BWP's Hungarian Signpost **FINISHED**

Any military equipment pressed into the service of the other side! Runs from 1st May to 31st May. Moderator: Jssel
User avatar
BWP
Got in under the wire
Posts: 778
Joined: April 28th, 2011, 2:23 am
Location: Melbourne, Australia
Contact:

BWP's Hungarian Signpost **FINISHED**

Post by BWP »

I have a couple of kits of T-34s (from UM and Dragon) that were modified and repainted in German colours, but that seemed a little too obvious -- could I do something a little more off-beat? Why yes, so it happens, I can.

The book Magyar Steel by Csaba Becze features a photograph of a T-34 captured by the Hungarians and (apparently) used as a signpost. The text indicates that the Hungarians didn't like to put captured vehicles back into the front line for fear of friendly fire. Seems like a waste of a perfectly good T-34 to me, but, hey, I wasn't there and it wasn't my life at stake. "The photo was taken probably in the Nadworna area (W Ukraine) in spring 1944."

Image

Image

This vehicle has been reproduced in the Bison Decals sheet 72028 "Hungarian Tanks in WW2, part 2". So with reference material and markings in hand, all I need to do is choose an appropriate kit.

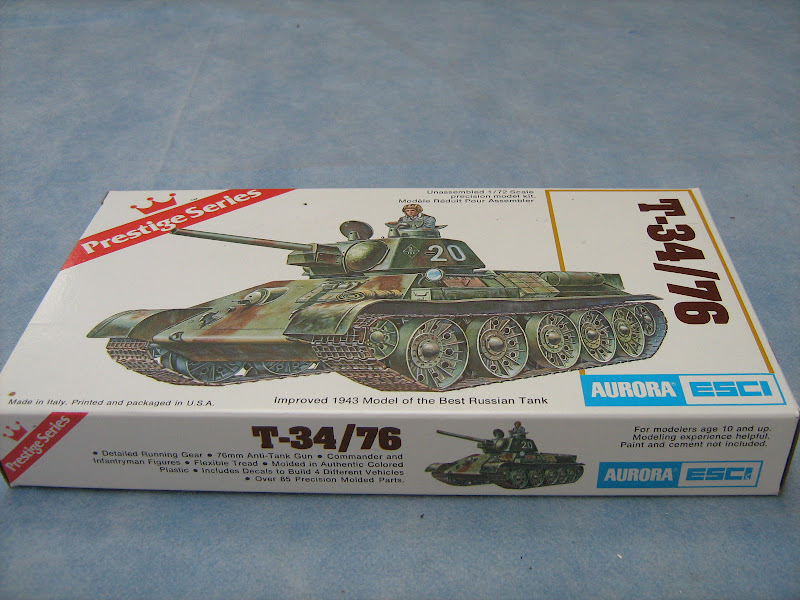
The photograph doesn't allow much to be determined about the precise model of T-34 involved, other than it looks like a T-34 Model 1943 (the turret has the cupola, and the suspension uses "full spider" rubber-rimmed wheels). It so happens that the remaining ESCI T-34 kit in my stash fits that description just fine. Checking against the plans in T-34 Mythical Weapon the kit seems to best represent a vehicle from 183 Factory.

The kit itself uses the identical hull pieces from the ESCI Model 1942 kit (which I have previously built); the difference is the new turret and road wheels. My kit is from the period when ESCI were being reboxed by Aurora in the US. As such it dates from before the link-and-length plastic tracks were added to the ESCI molds and thus features the original-style vinyl tracks. I have previously raided this kit for one of its figures and somewhere in the process it looks like one of the drive wheels has gone walkabout. This would normally be a tremendous nuisance but to be frank the tracks and spider wheels included in this kit are pretty terrible, so I will be replacing everything below the fenders anyway. The road wheels are being replaced by a resin set from Armory, while the idler wheels and tracks are stolen from the Dragon Model 1943 kit. (When I build that kit at some future date there are plenty of after-market options I can use at that time.) The Dragon tracks are their "DS" flexible styrene which are, IMO, very nice indeed -- they can be glued and painted just like regular styrene. The rest of the kit should be pretty much good to go as is, although I will be replacing the gun barrel with an aftermarket offering -- I don't have one on hand just at the moment, but I've ordered a bunch of them which ought to arrive soon.

The last detail will be the actual little "mace" signpost itself, which I guess I will be scratchbuilding from sprue pieces or similar.

The various components:

Image

Image

Image

Image

Image

So now I just need to wait for the 1st of May and I'm ready to go!

(It would be nice to feature the Hungarian guard figure as well but I'm not aware of any suitable Hungarian figures in 1/72 scale ... anyone have any ideas?)
Bruce Probst
Melbourne, Australia
"I want to decide who lives and who dies."
My Model Profile
User avatar
BWP
Got in under the wire
Posts: 778
Joined: April 28th, 2011, 2:23 am
Location: Melbourne, Australia
Contact:

Re: BWP's Hungarian Signpost

Post by BWP »

OK. No photos, but started some work today: I cleaned up the resin wheels (18 holes per wheel, times 20, to drill to clean up resin flash -- sigh. Not remotely difficult, just tedious), applied some Mr Liquid Putty to some minor sink holes and pin marks in the lower hull, and I need to wait for that to dry so I can clean it up -- once that's done the lower hull and suspension can be assembled. I removed some details from the upper hull not needed here (front and rear fenders removed completely, plus a toolbox on the port fender that needed to go also).

I have discovered something rather disturbing though about this kit: the plastic it's molded in is astonishingly brittle. I don't know if it's from age or just was normal for ESCI at that time, but the parts have a habit of cracking or breaking under very little pressure. (Although boxed by Aurora in America, the kit parts were still manufactured in Italy.) Fortunately the breaks are very clean so I can put them back together easily, but I'd rather not have to do it at all! I was going to remove both toolboxes molded onto the upper hull piece, but after near trauma removing the first one (which had to go, as it's not visible in the photo) I decided that the photo doesn't tell me anything about the one on the other side -- so it stays! The remaining fenders on the upper hull will need to be thinned (and I also need to add some plastic card to fill up the gaping holes the kit has under the upper hull -- the kit doesn't "seal in" the interior the way it's supposed to, and with some of the fenders missing this is even more obvious than usual) and I'm going to have to be very careful indeed or the fenders -- and maybe the entire upper hull -- will just shatter completely.

Also scrounged up some extra parts I will need: one of my Eastern Express T-34 kits has yielded the fuel tank holders (visible on the upper rear hull in the photo), and one of the Dragon T-34 kits had a horn going spare, so that will be added here too. I could probably have scratch-built all of these easily enough but since the parts were spare and to hand, why not use them? I will still need to scratch a saw to attach to the hull side, but that is about as simple a job to do as one could hope for. The Hungarians appear to have stripped everything else from the vehicle, which makes sense if they had no operational use for it.

There's some confusion about the paint job on the tank. Magyar Steel offers no opinion; Bison Decals thinks it's overall Russian green with some unknown lighter colour (a sandy brown of some sort) sprayed over in a camouflage pattern. The same photo appears in T-34/76 Camouflage & Markings and that book is convinced that, as it doesn't resemble any known Hungarian scheme, it's probably the standard German camouflage colours; they speculate that the Germans captured it, repainted it, and subsequently passed it on to the Hungarians. I don't know how likely that is as the Germans appeared to have used captured T-34s quite enthusiastically, but it does seem to me more likely than the scheme suggested by Bison -- so the paint job will be based on the standard German scheme of yellow with green and brown patterns (hopefully matching the photo when it's done).
Bruce Probst
Melbourne, Australia
"I want to decide who lives and who dies."
My Model Profile
User avatar
BWP
Got in under the wire
Posts: 778
Joined: April 28th, 2011, 2:23 am
Location: Melbourne, Australia
Contact:

Re: BWP's Hungarian Signpost

Post by BWP »

Well, got to do some more today. In fact I practically finished the kit in a single sitting.

The brittle plastic is driving me nuts. It almost got to the point where I didn't dare do anything -- any pressure at all on a part would cause it to crack or snap. The breaks are always very "clean" and thus easy to repair, but even so it's terrifying.

I don't know if it's a side effect of this plastic or just a poor sample but the lower hull had very poor fit. (The previous ESCI T-34 I built, which uses identical hull parts, caused me no problems at all that I can recall.) A lot of filling required at the seams.

Image

Image

The resin wheels from The Armory were not all perfectly shaped so the wheel alignment is a little off in places. I don't think that it will be noticable when it's painted and with the tracks in place.

All the details have been added to the upper hull, except for the plastic card I need to add to seal the bottom of the hull over the road wheels. The fuel tank holders (from an Eastern Express kit) are a little overscale and had a lot of flash on them which was tricky to clean up, but I think they look good. Some liquid putty has been applied to cover up marks where I had to cut off some detail. In the second photo you can see where part of the fender has chipped off ... I'll have to fill that in with some putty and scrap plastic (or something).

Image

Image

I still haven't received my new stock of aluminium gun barrels yet, hopefully they will turn up in the coming week. I was able to assemble the rest of the turret and add some bits and pieces of detailing. The turret is too tall by several mm but I couldn't think of any good way of flattening it without a lot of extra work (not to mention the risk of having the whole thing shatter). Problems with the plastic aside, the ESCI Model 1943 does not appear to be quite as good a kit (for its day) as the Model 1942. Interestingly Italeri have not (yet) reboxed the Model 1943 so it is more difficult to find than any boxing of the Model 1942 (if you want to go looking for it). If you want a decent 1/72 Model 1943 out of the box, well, you have lots of choices: Dragon, Trumpeter, UM are all good; even the Eastern Express kits seem pretty good (for short-run kits using poor plastic). (There are also lots of after-market approaches: for several years the Revell T-34/85 was the only T-34 kit available in 1/72 that wasn't the ESCI, and many folks produced resin conversion kits to use the Revell hull to make quite a number of different T-34 types.)

Image

Image

All going well, tomorrow I should be able to clean up the filler and get the painting started, with the primer coat if nothing else.
Bruce Probst
Melbourne, Australia
"I want to decide who lives and who dies."
My Model Profile
User avatar
jssel
Still crazy after all these years
Posts: 12005
Joined: April 5th, 2011, 3:42 pm

Re: BWP's Hungarian Signpost

Post by jssel »

Nice progress Bruce.
Besting 60 years of mediocre building of average kits in the stand off scale
User avatar
Dirkpitt289
NUMA's Auto Mechanic
Posts: 8724
Joined: May 2nd, 2011, 1:55 am
Location: New jersey USA
Contact:

Re: BWP's Hungarian Signpost

Post by Dirkpitt289 »

Moving along nicely
.... Dirk

Beware of the DOG's of WAR

My Youtube Channel
https://www.youtube.com/user/ModelingGu ... rid&view=0
User avatar
BWP
Got in under the wire
Posts: 778
Joined: April 28th, 2011, 2:23 am
Location: Melbourne, Australia
Contact:

Re: BWP's Hungarian Signpost

Post by BWP »

Brews wrote:I'm not a big fan of Mr Liquid putty.
Any particular reason? I think it's great for filling small gaps where regular putty would be overkill, plus you can use it to "paint" details such as weld seams.
Bruce Probst
Melbourne, Australia
"I want to decide who lives and who dies."
My Model Profile
User avatar
BWP
Got in under the wire
Posts: 778
Joined: April 28th, 2011, 2:23 am
Location: Melbourne, Australia
Contact:

Re: BWP's Hungarian Signpost

Post by BWP »

Brews wrote:IMHO,it takes too long to dry, and is too soft to scribe properly.
(Where's the "shrug" smiley? Oh well, you'll just have to picture me shrugging.) I leave all putty at least overnight to dry, and I rarely have any need for scribing ... of course you build a lot more aircraft than I do. :) I like Tamiya putty too, but IMO it doesn't dry to the point where it's safe to work it any faster than the Liquid Putty.

If I needed to fill a gap and have it be dry in a very short time so I can continue working with it right away, I'd use gel superglue and accelerator.
Bruce Probst
Melbourne, Australia
"I want to decide who lives and who dies."
My Model Profile
User avatar
BWP
Got in under the wire
Posts: 778
Joined: April 28th, 2011, 2:23 am
Location: Melbourne, Australia
Contact:

Re: BWP's Hungarian Signpost

Post by BWP »

Well, worked some more this morning, although most of my time was spent on the Panzer I (see my workbench thread). All I managed on this subject today was to clean up the filler, add the plastic card to the bottom of the upper hull and fill the spaces there, and I also assembled the gun mantlet (minus gun), which also needed a small amount of filler to hide join seams.

Image

I used 0.015" styrene which is way too thick for scale thickness but I want to some heavy sanding and I was worried that thinner stock wouldn't cope with the abuse I plan to give it (and wouldn't give much support to the brittle kit plastic).

There's not a great deal more I can do here until the replacement gun barrel arrives, although I suppose I could make a start on the painting of the lower hull. Maybe later today, but it's been cold and wet today and I don't look forward to spending more time in the garage.
Bruce Probst
Melbourne, Australia
"I want to decide who lives and who dies."
My Model Profile
User avatar
BWP
Got in under the wire
Posts: 778
Joined: April 28th, 2011, 2:23 am
Location: Melbourne, Australia
Contact:

Re: BWP's Hungarian Signpost

Post by BWP »

Brews wrote:Just had a look at your weather. 13C isn't cold, old son.
Look, I'm sure it seems positively balmy if you're accustomed to digging tunnels through the snow just to look out the window, and heaven knows winter has barely started and it's likely get much colder still before very much longer. Nevertheless, it's cold today. :ha:
Bruce Probst
Melbourne, Australia
"I want to decide who lives and who dies."
My Model Profile
User avatar
BWP
Got in under the wire
Posts: 778
Joined: April 28th, 2011, 2:23 am
Location: Melbourne, Australia
Contact:

Re: BWP's Hungarian Signpost

Post by BWP »

Not Monday to Friday during winter, unless I happen to have days off from work. Artificial light in the garage is not great at the best of the times, although if that was the only issue I could cope. The real problems are that (a) by the time I get home from work I'm tired and (b) it's too cold in the garage to spend much time there when it's dark.

Maybe I could set up a little work table or something inside, but with the sanding and the cutting and the scraping I'm concerned that all I'd end up doing is making a mess on the carpet. I'm open to suggestions.

There has been an update of sorts, though, in that the replacement 1/72 barrels I was waiting for turned up the other day, so first order of business on Saturday will be fitting one to the T-34 turret. Then it will be priming and painting!
Bruce Probst
Melbourne, Australia
"I want to decide who lives and who dies."
My Model Profile
User avatar
BWP
Got in under the wire
Posts: 778
Joined: April 28th, 2011, 2:23 am
Location: Melbourne, Australia
Contact:

Re: BWP's Hungarian Signpost

Post by BWP »

Here's the turret with the new shiny barrel:

Image

Image

Well. Didn't get as much done this weekend as I'd hoped too. I thought I'd be making a start on the painting, but after I applied the primer coat, several gaps that I had not noticed previously made themselves known, so these were filled and left to set. So that's where it sits at this time. Once the putty has set and been sanded back, painting proper can begin, first with an overall coat of Dunkelgelb.

The plastic on this kit has just been annoying me more and more. It's detracted quite substantially from what should have been a simple and fun build. I do hope I don't see its like again.
Bruce Probst
Melbourne, Australia
"I want to decide who lives and who dies."
My Model Profile
User avatar
Dirkpitt289
NUMA's Auto Mechanic
Posts: 8724
Joined: May 2nd, 2011, 1:55 am
Location: New jersey USA
Contact:

Re: BWP's Hungarian Signpost

Post by Dirkpitt289 »

It's too bad its giving you such a fit but it still looks good from where I sit.
.... Dirk

Beware of the DOG's of WAR

My Youtube Channel
https://www.youtube.com/user/ModelingGu ... rid&view=0
User avatar
BWP
Got in under the wire
Posts: 778
Joined: April 28th, 2011, 2:23 am
Location: Melbourne, Australia
Contact:

Re: BWP's Hungarian Signpost

Post by BWP »

Thanks Dirk, I'll probably feel a lot happier about it once I get some paint on it. :)
Bruce Probst
Melbourne, Australia
"I want to decide who lives and who dies."
My Model Profile
User avatar
Dirkpitt289
NUMA's Auto Mechanic
Posts: 8724
Joined: May 2nd, 2011, 1:55 am
Location: New jersey USA
Contact:

Re: BWP's Hungarian Signpost

Post by Dirkpitt289 »

That always makes me happy
.... Dirk

Beware of the DOG's of WAR

My Youtube Channel
https://www.youtube.com/user/ModelingGu ... rid&view=0
User avatar
BWP
Got in under the wire
Posts: 778
Joined: April 28th, 2011, 2:23 am
Location: Melbourne, Australia
Contact:

Re: BWP's Hungarian Signpost

Post by BWP »

Well, at last I have some paint put down. First up, of course, is the overall coat of Dunkelgelb, in this case from LifeColor. Ordinarily with an overall coat like this I would have used the airbrush, but that would require that one of my two airbrushes actually be working. (Don't ask. Just ... don't ask. :evil: ) These photos are after the second of two thin coats.

Image

Image

Image

And some paint for the tracks too: first a coat of Gunze Aqueous Steel, then a thin coat of Gunze Aqueous Rust.

Image

Nothing spectacular yet but at last it begins to come together. More tomorrow.
Bruce Probst
Melbourne, Australia
"I want to decide who lives and who dies."
My Model Profile
Locked

Return to “The Captured Equipment GB”