Testors 1/48 Cessna O-2A

Military or civil, triplanes, biplanes or monoplanes, props, jets or helicopters...models in here.
Post Reply
Sunray
Active Participant
Posts: 611
Joined: March 18th, 2014, 4:01 pm
Location: Penshaw, North East, England
Contact:

Testors 1/48 Cessna O-2A

Post by Sunray »

This will be my first go at a Testor's kit. On my first look inside the box I thought there isn't a great deal of plastic and the detail in the cockpit looks as though its had a day but I have a few idea's. The kit itself is raised and recessed panel lines with raised rivets which look a bit too big to me. The clear parts will pass but the main windscreen has a few gap issues with the rest of the fuselage so I think I will have to make my own but we will see how we get on.

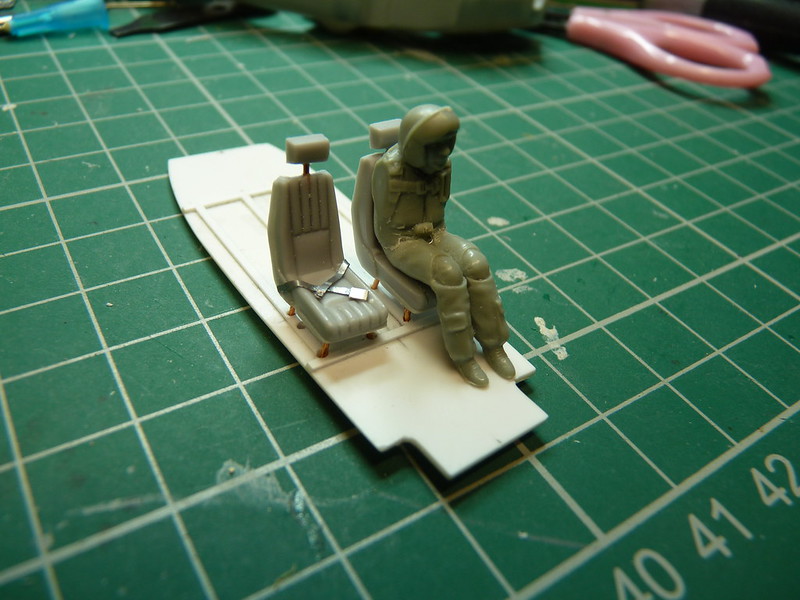
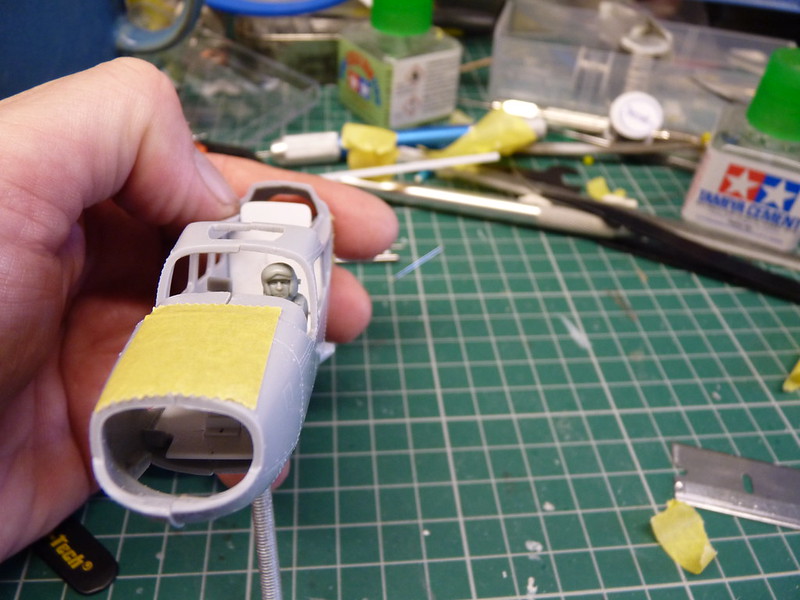
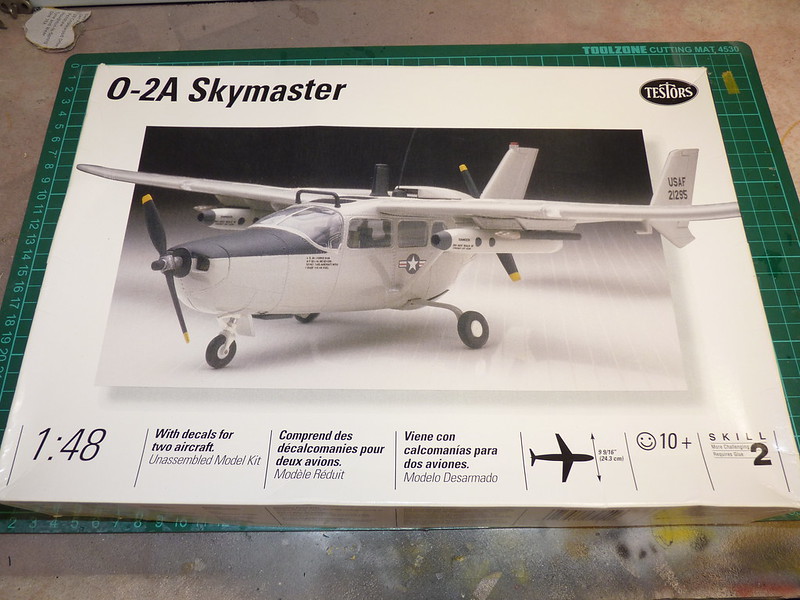
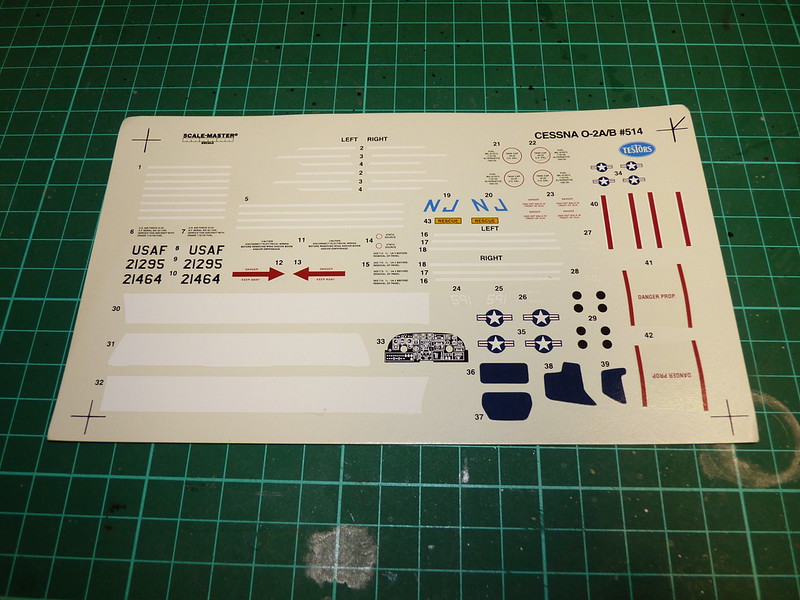
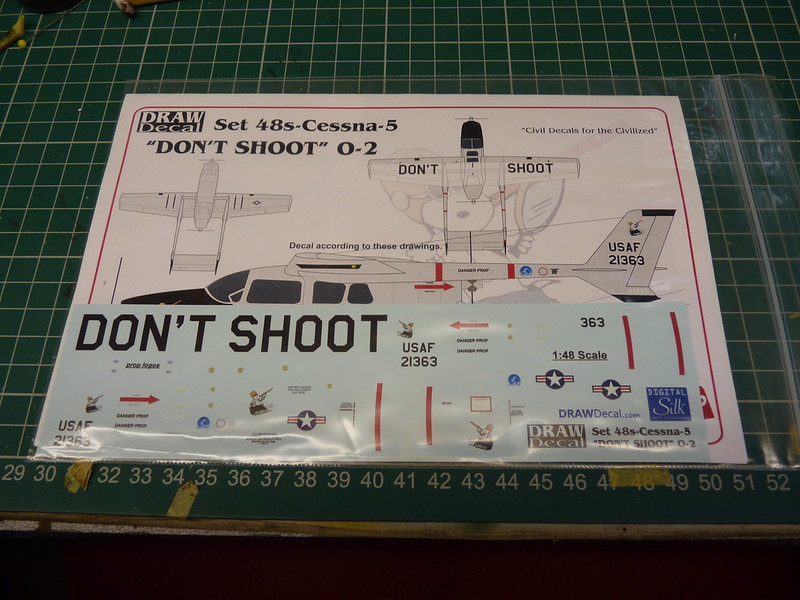
I first made a O-2A when I was a child in short trousers, colour TV had just come in the shops, Gordon Banks was in goal for England and the first Rocky film was years away. It was the 1/72 Airfix kit and I remember I had fun making it. I choose to go for after-market decals just because the kit ones looked a little flat so I ordered these from Decal Draw in USA which only took about a week to get here. Like most of my builds lately this one will be an in-flight display with the pilot coming from my spares box when I find him as there is no pilot in the kit.

Image

Image

Image

Image

Image

Image

Image

Image

Image

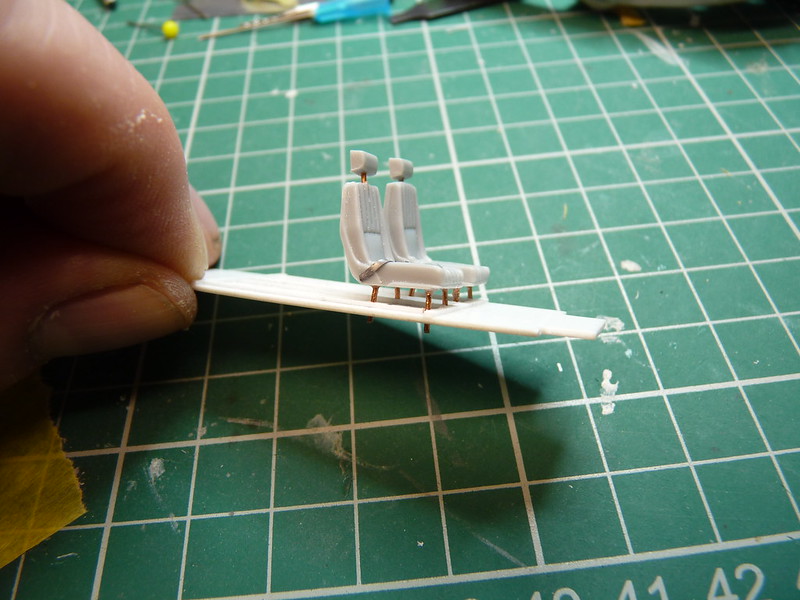
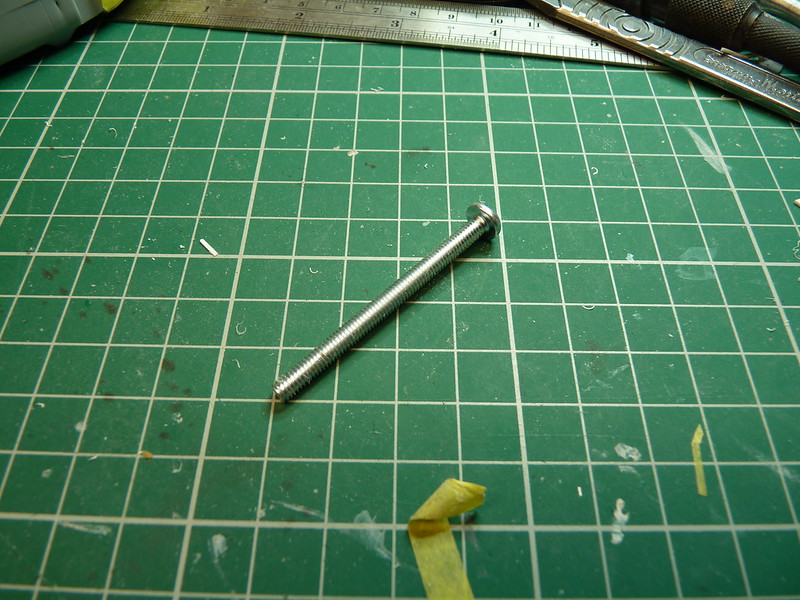
So here we go. As I am making this an in-flight display my normal rule of thumb is if its a jet I use acrylic rod "The Flory way" and if its prop I use a stainless steel machine bolt with brass tube, this being the latter. The diameter of the bolt is normally determined by the size of the model as is the diameter of the brass tube.

Image

Image

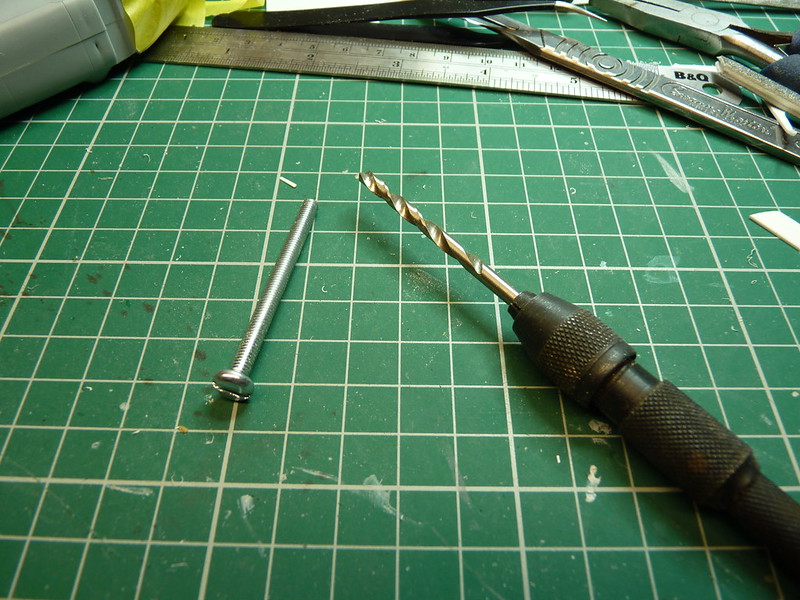
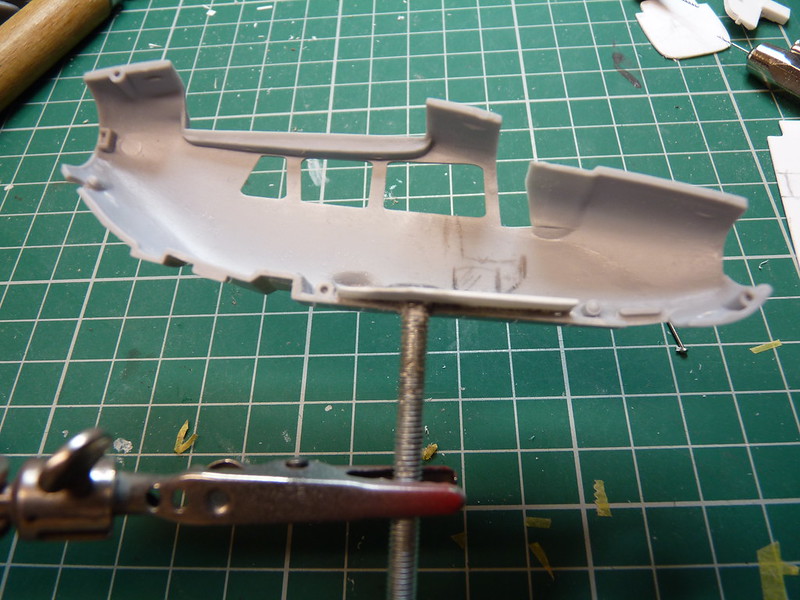
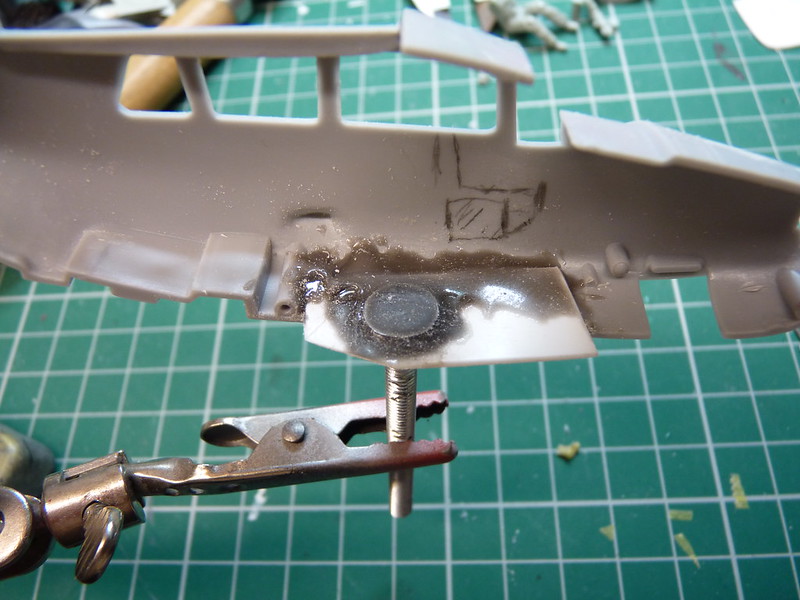
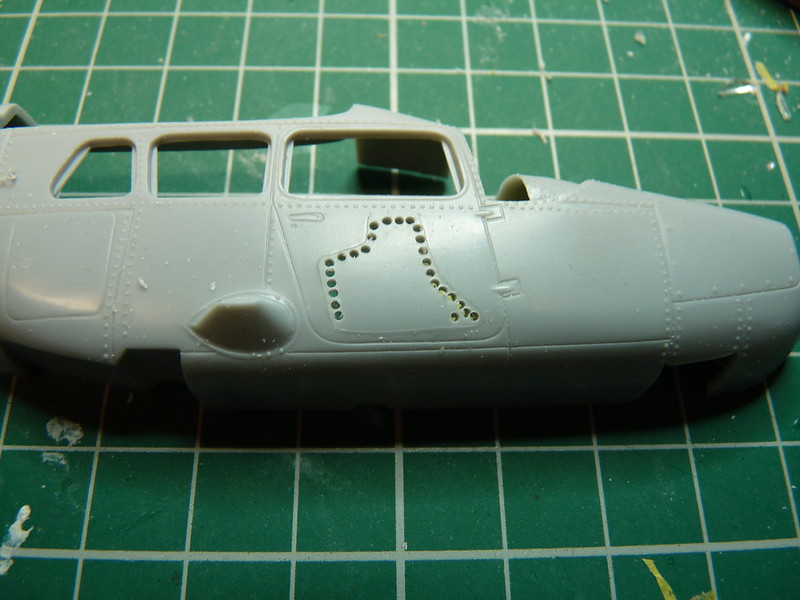
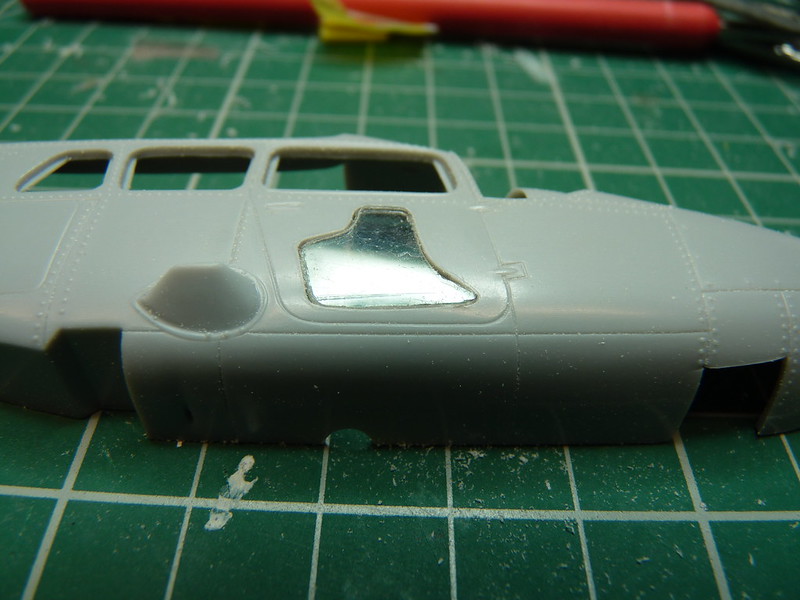
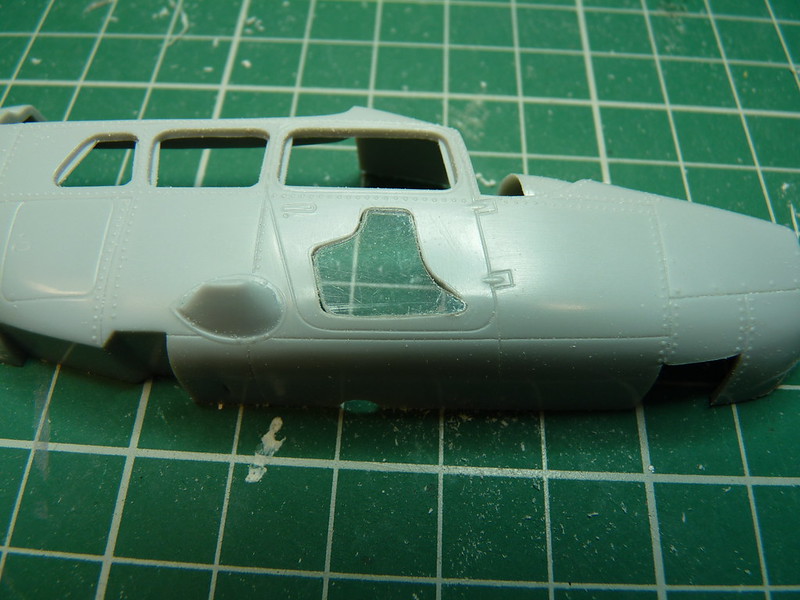
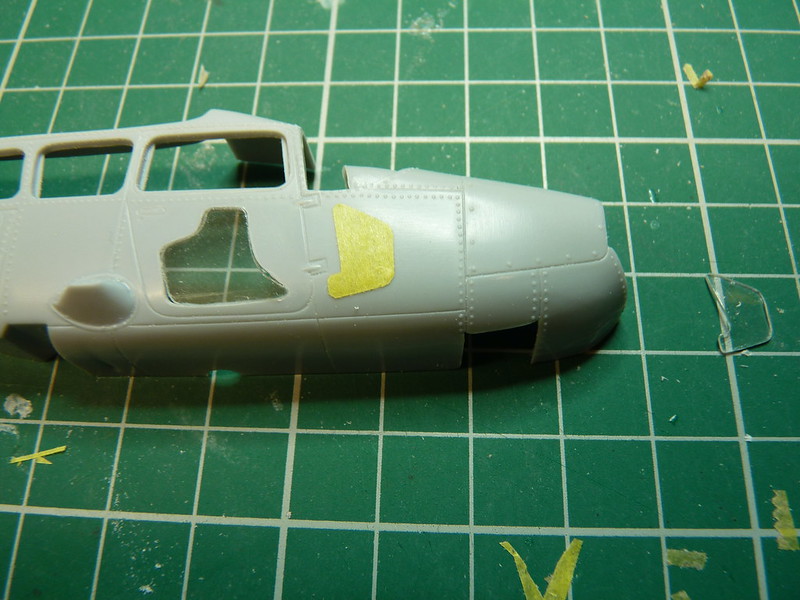
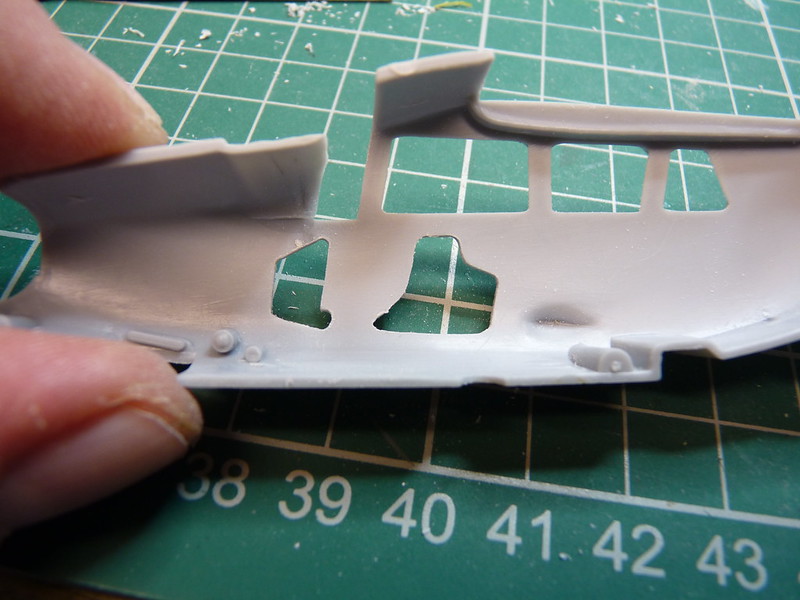
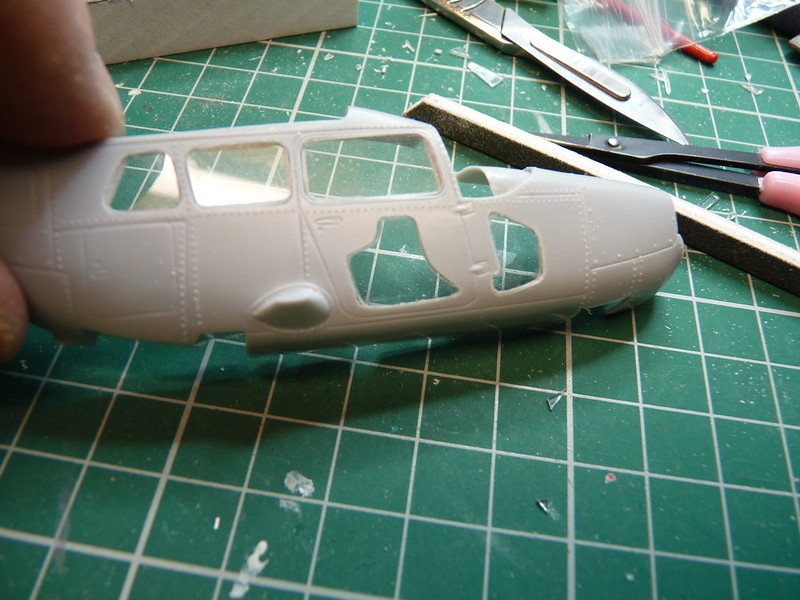
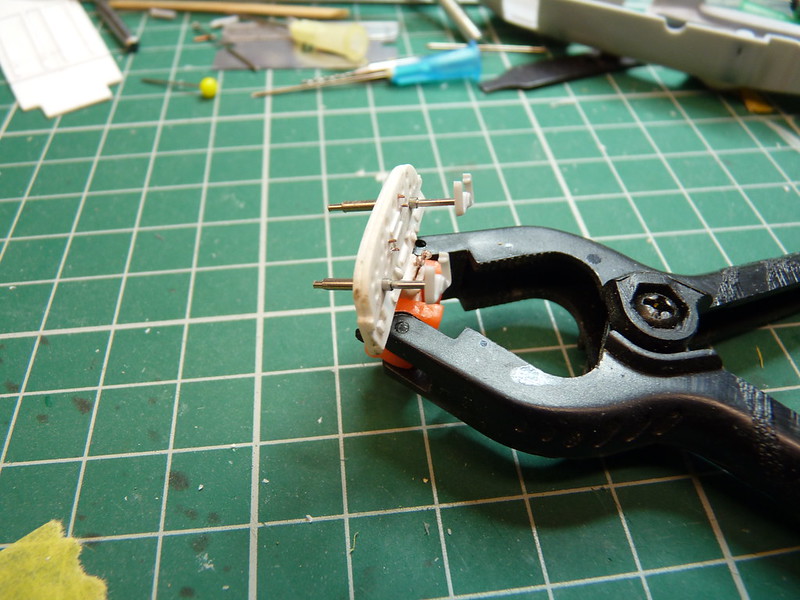
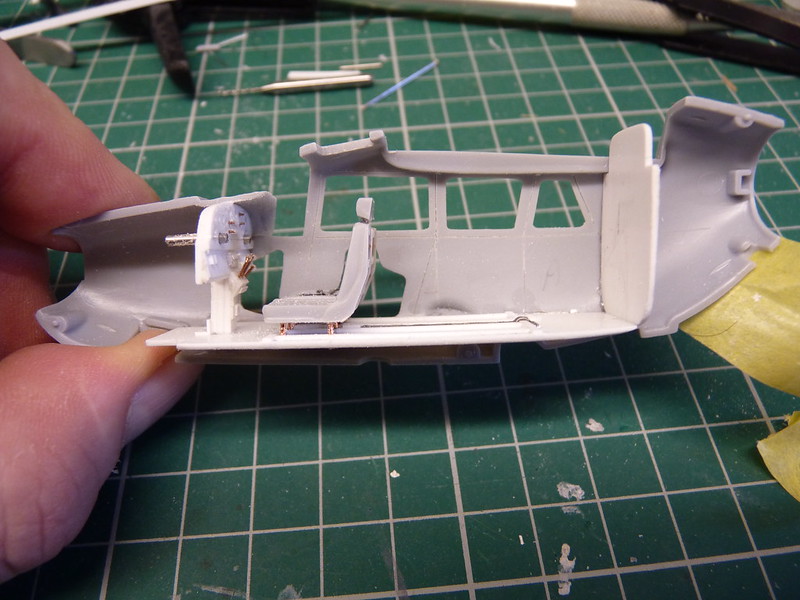
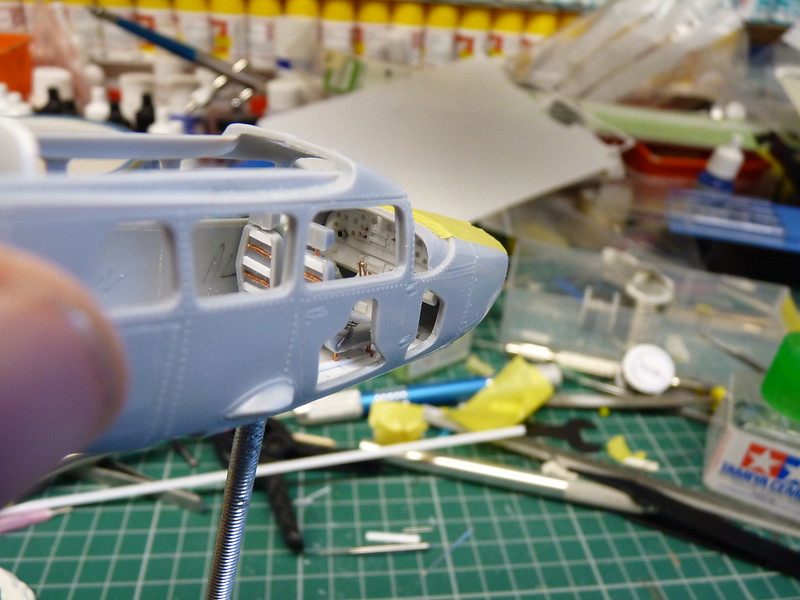
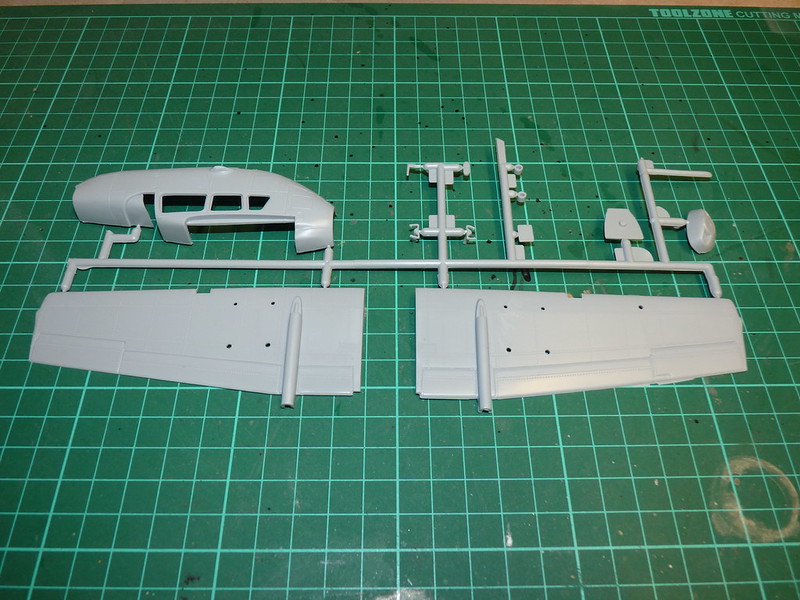
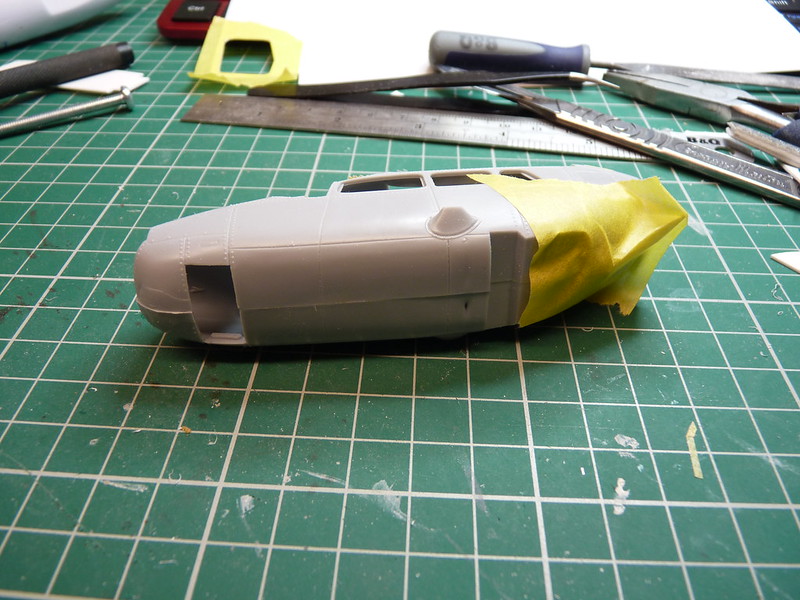
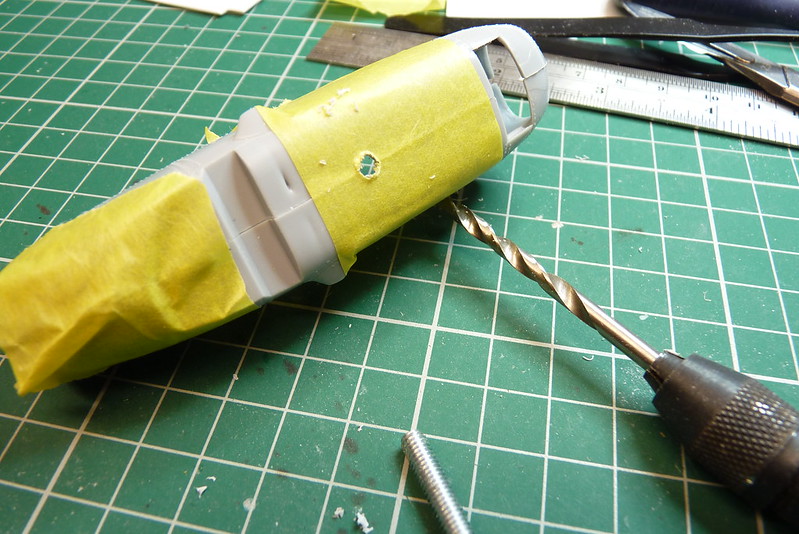
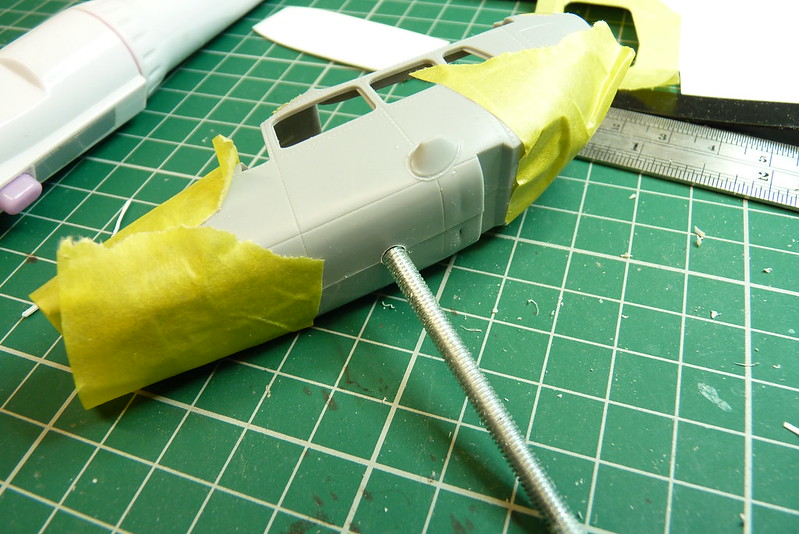
With the size of bolt decided on I drill the a hole in the fuselage and this is where it gets interesting. Because I what to add detail in the cockpit I don't have a lot of room to play with. Also normally if I can I glue the fuselage halves together before drilling the hole and attaching the bolt. But with this kit I don't have that luxury because the cockpit floor, rear bulkhead and instrument panel have to be added before I glue the fuselage halves together. To get round this I tape the fuselage together and I also put tape where the hole is going to make the job easier.

Image

Image

Image

Image

Image

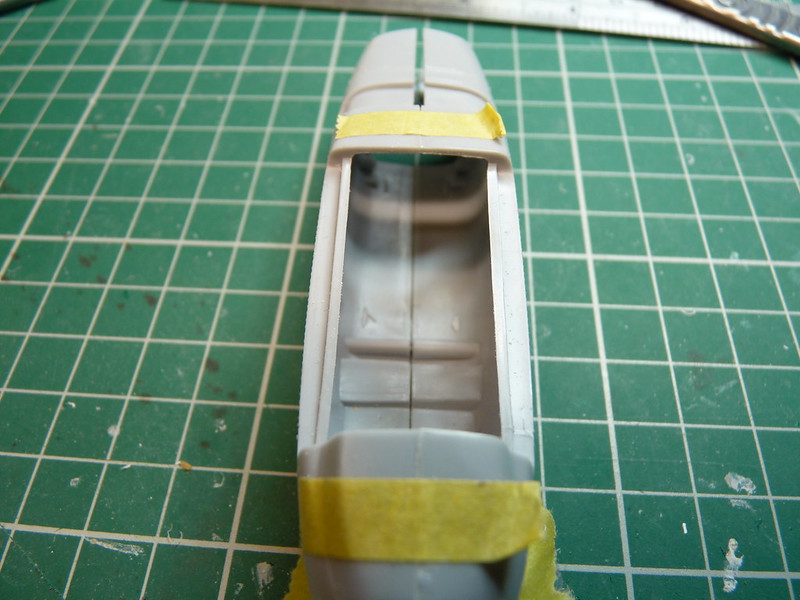
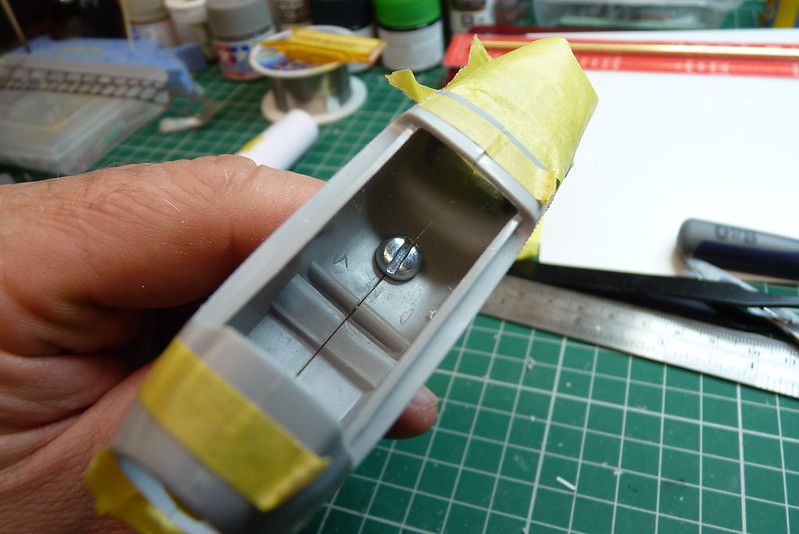
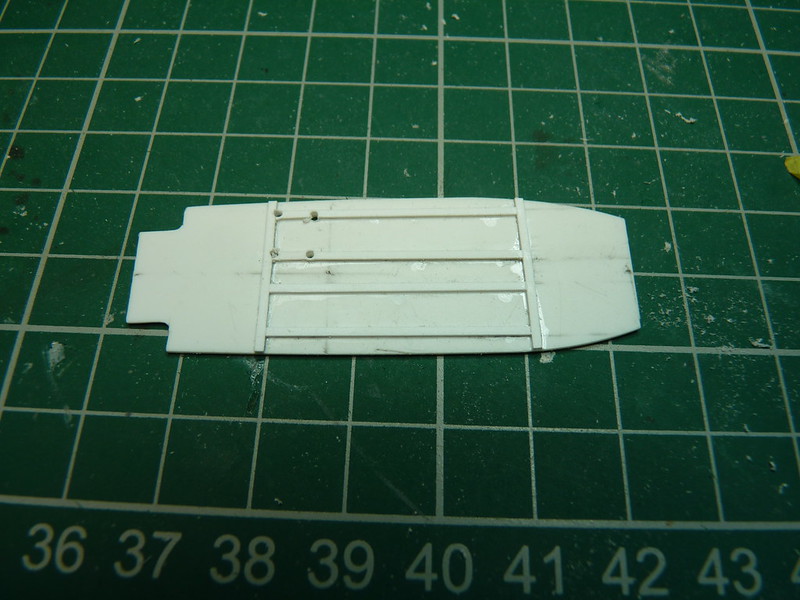
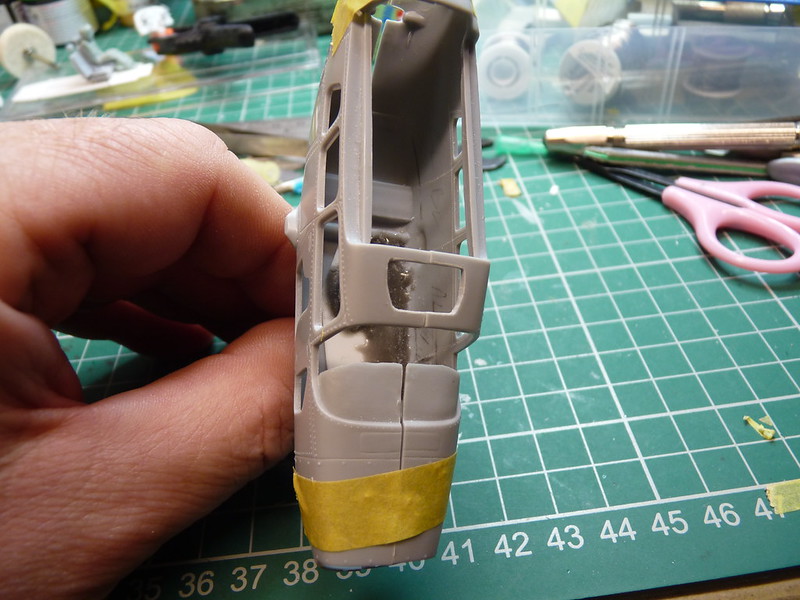
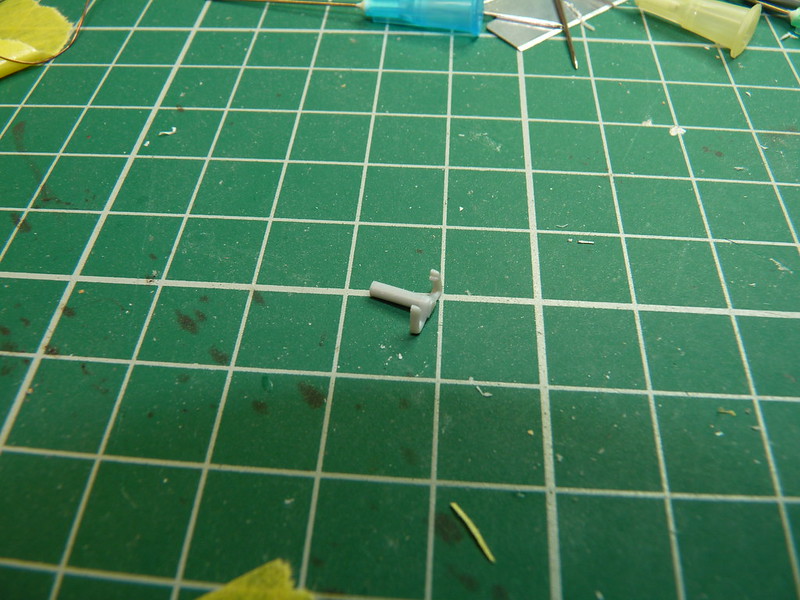
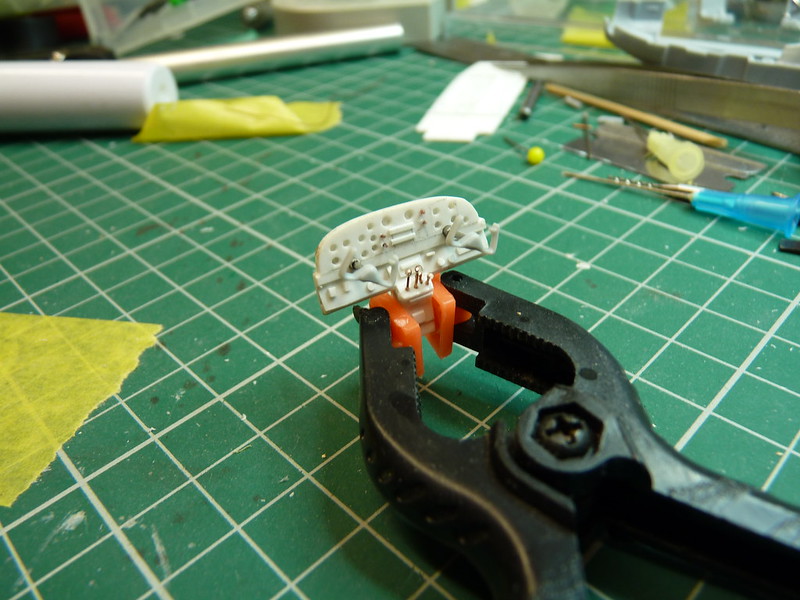
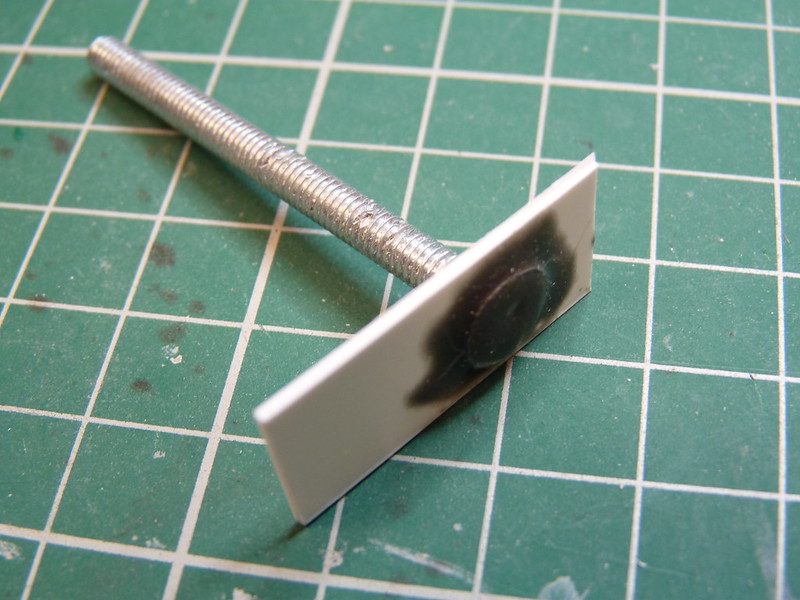
As you can see from the photo the head of the bolt is a bit proud so that sorted by putting it in vice and simply filing it down. You could use a Dremel but I find it easier and faster to use a hand file. I first used CA glue to attach the bolt to the plastic of the fuselage half but it didn't take for some reason. I have used it before but for some reason the joint gave way. On the upside I would rather it go now than later on. So I used an epoxy, one of those with two tubes that you have to mix and glues plastic's. To increase the surface area of the joint I also used a strip of plastic with a hole drilled in.

Image

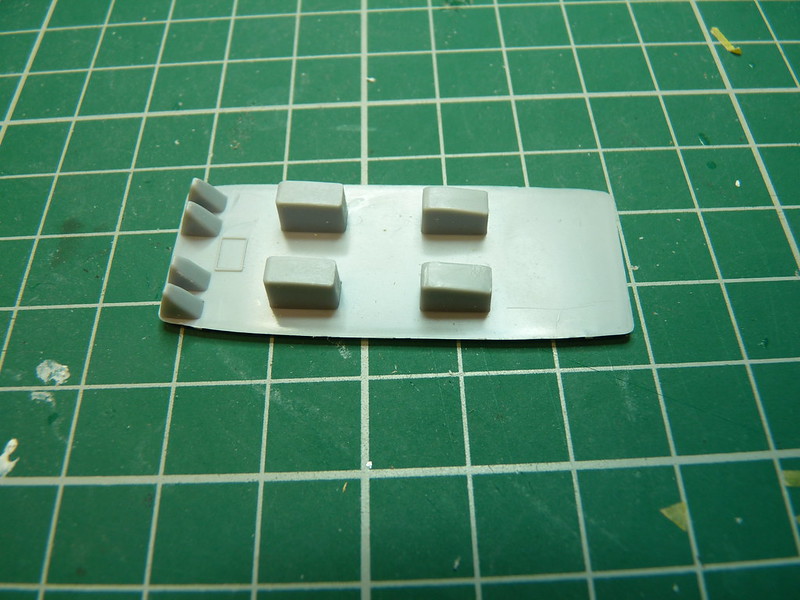
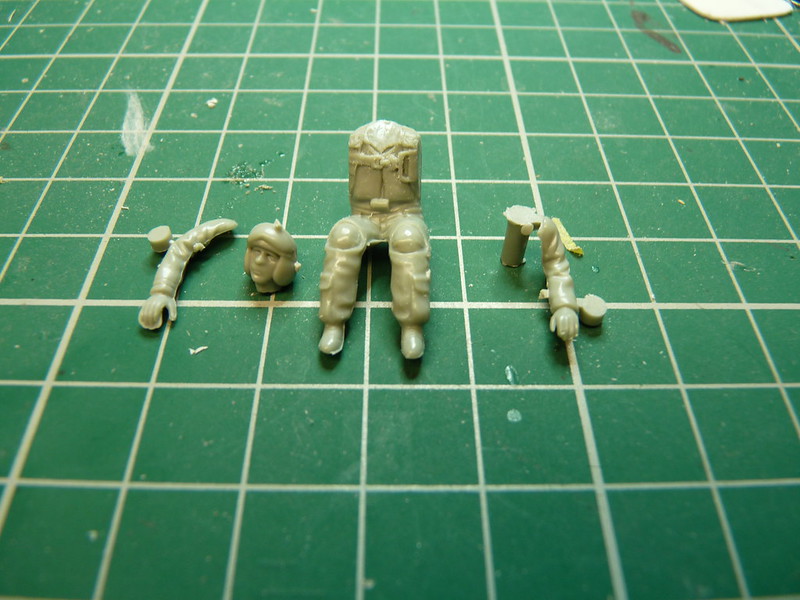
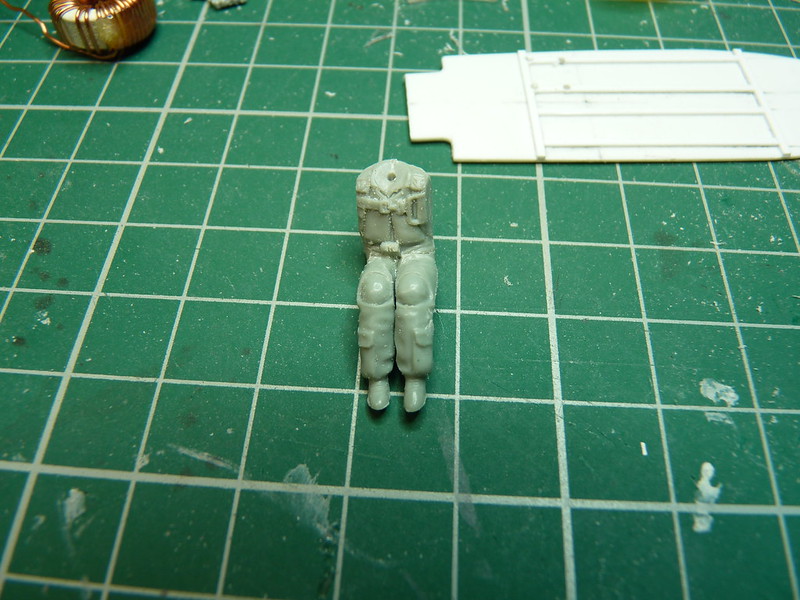
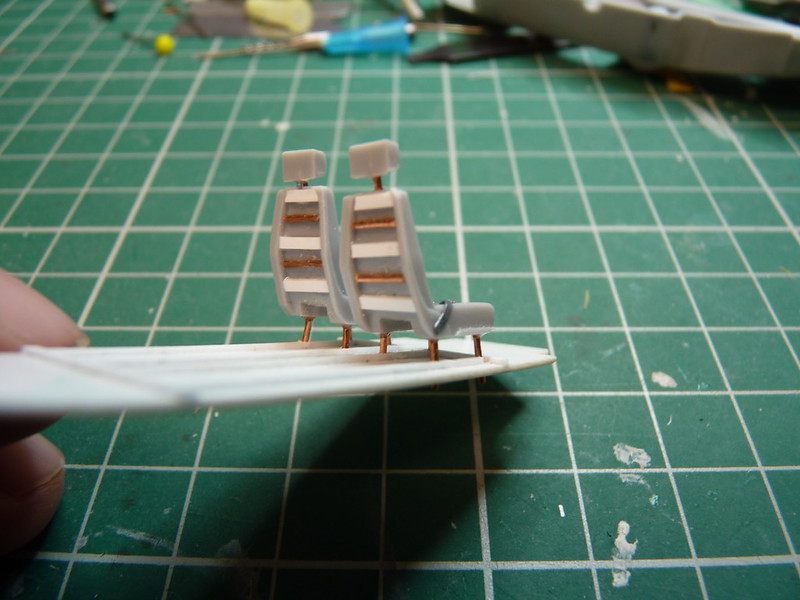
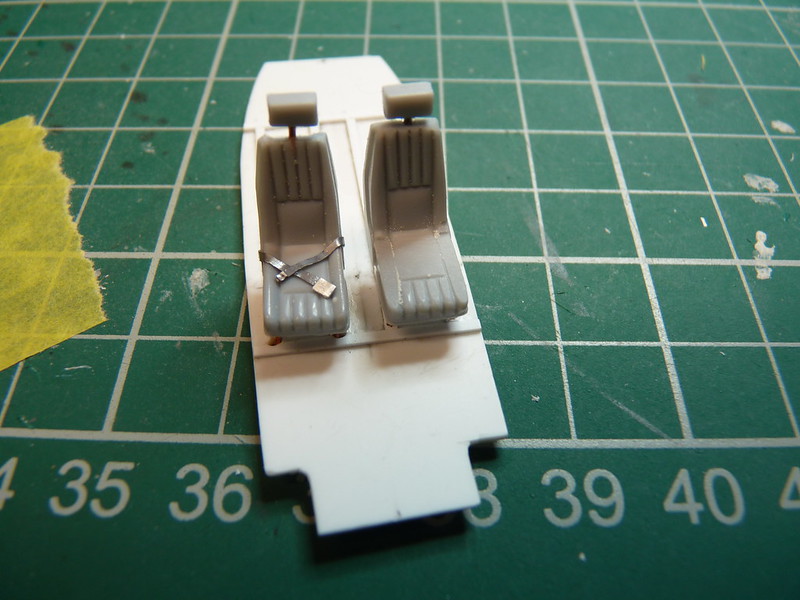
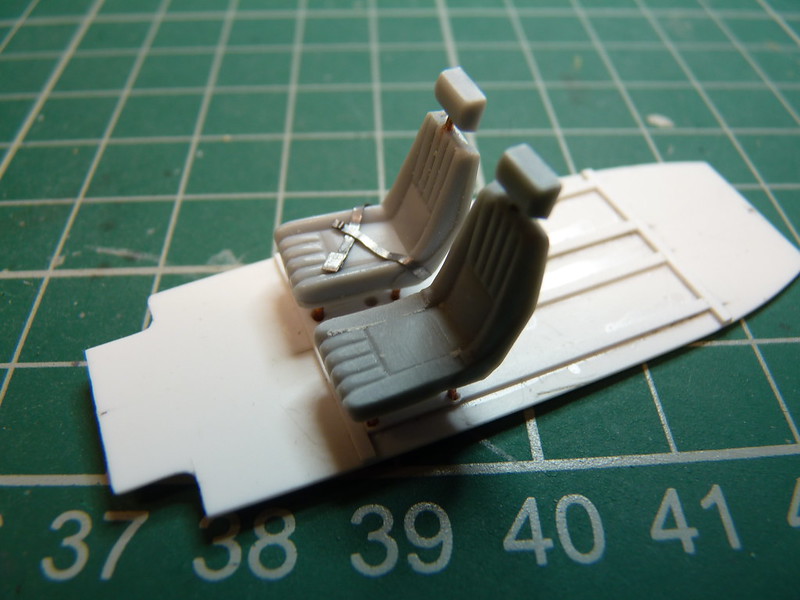
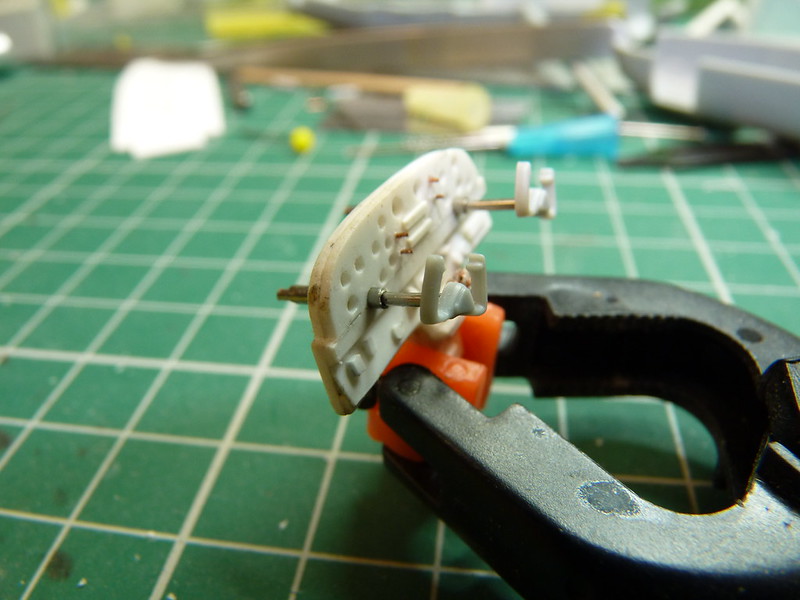
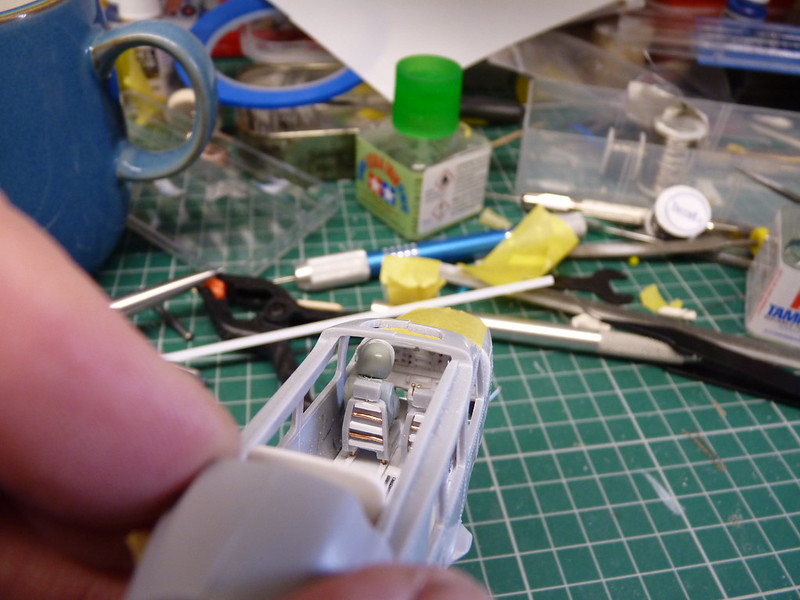
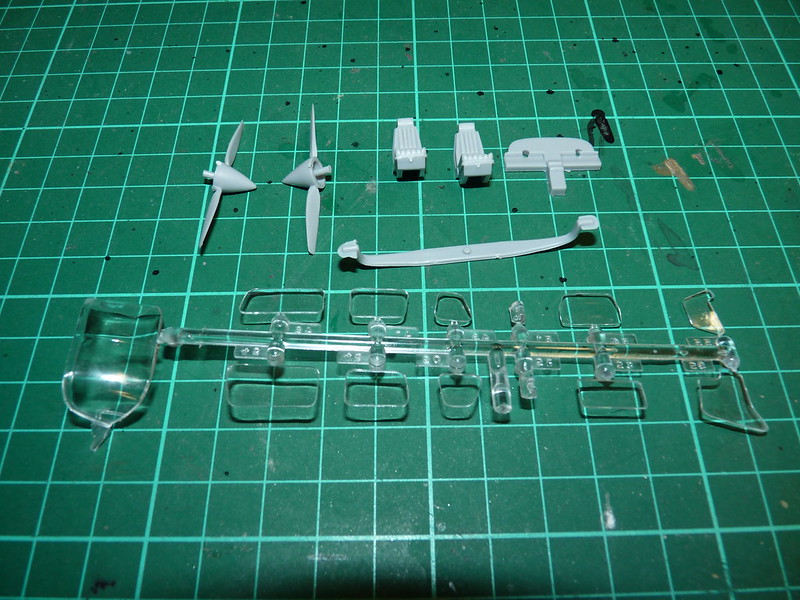
It says it can be used after a curing time of about 2 hours but I left it over night. While I am waiting for that there are a few extra jobs I can get on with. When I was looking at the seats I thought a quick way to add detail was to cut off the head rest and with the help of a pin reattach with CA glue the head rest.

Image

Image

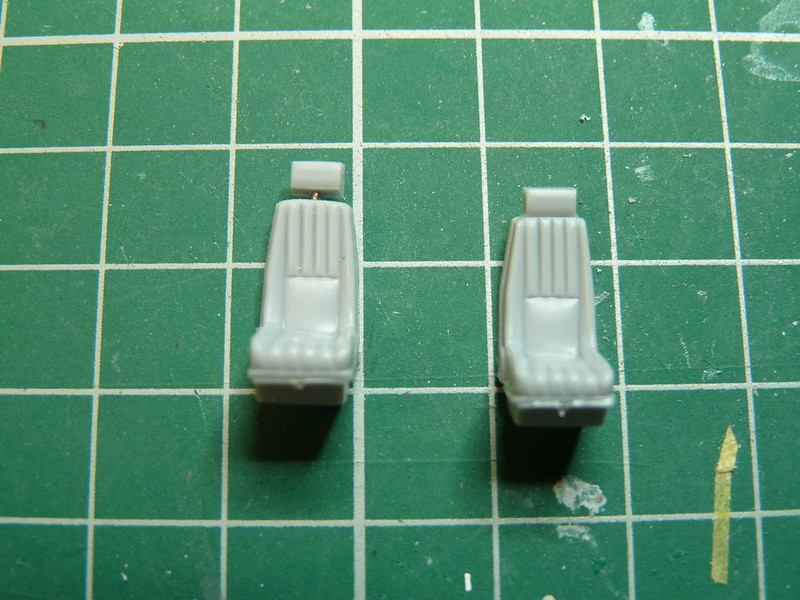
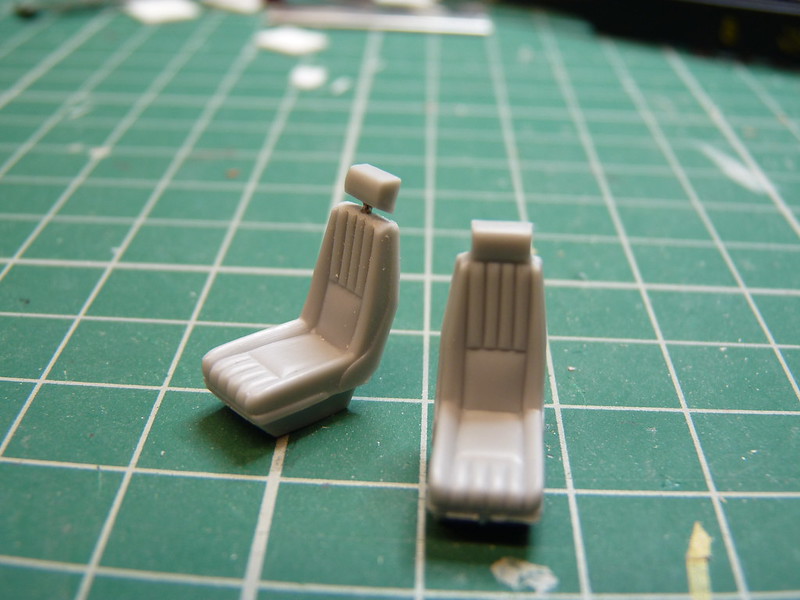
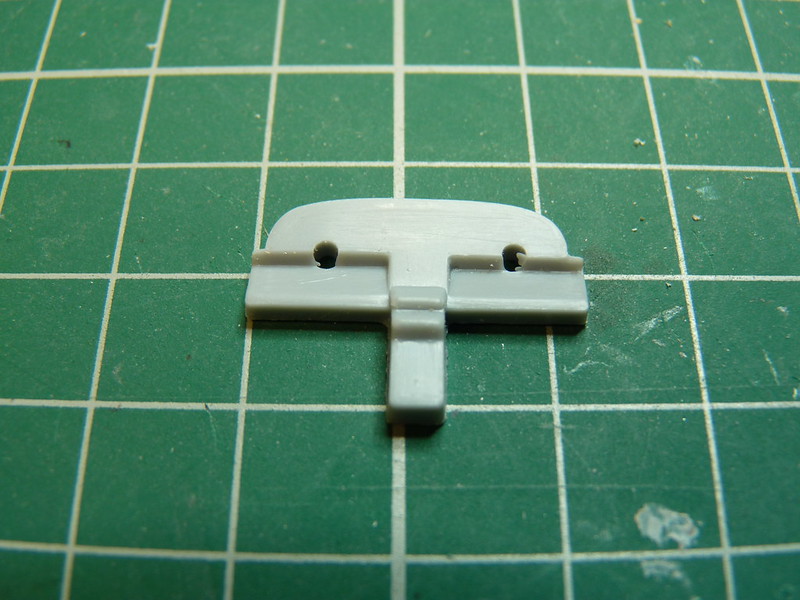
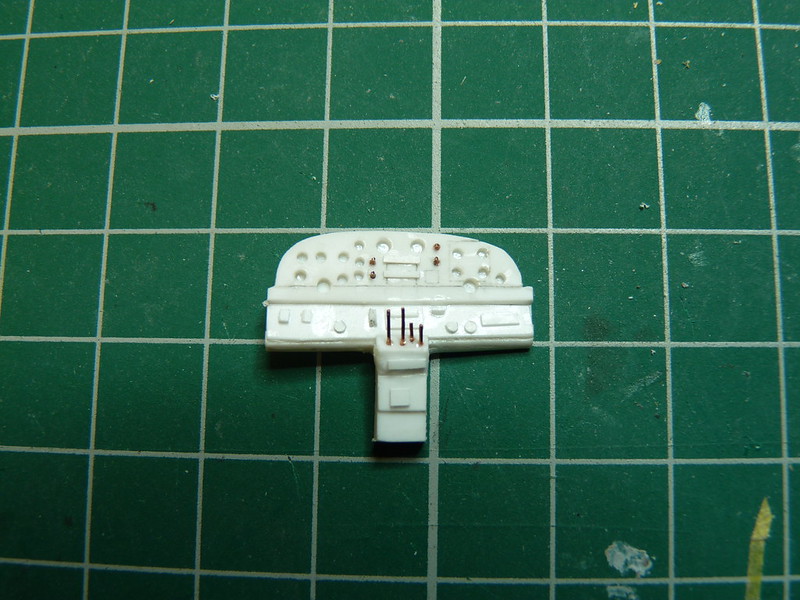
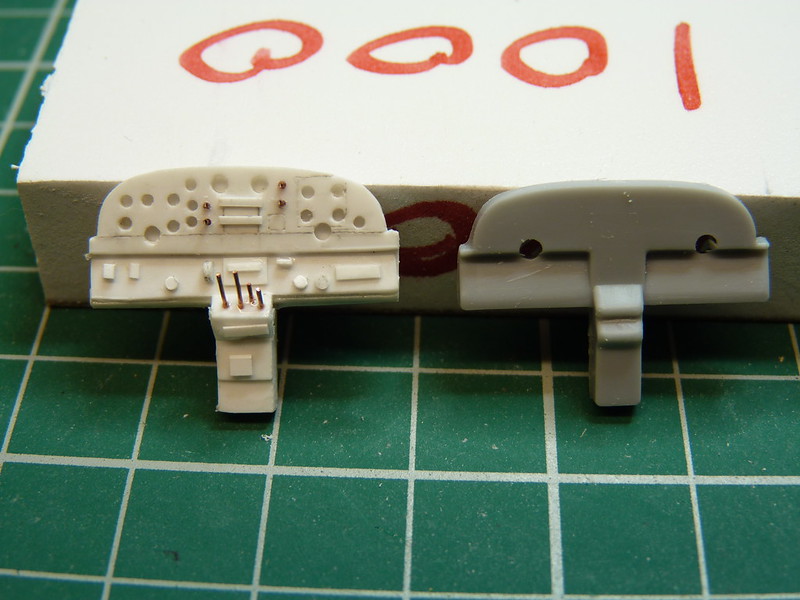
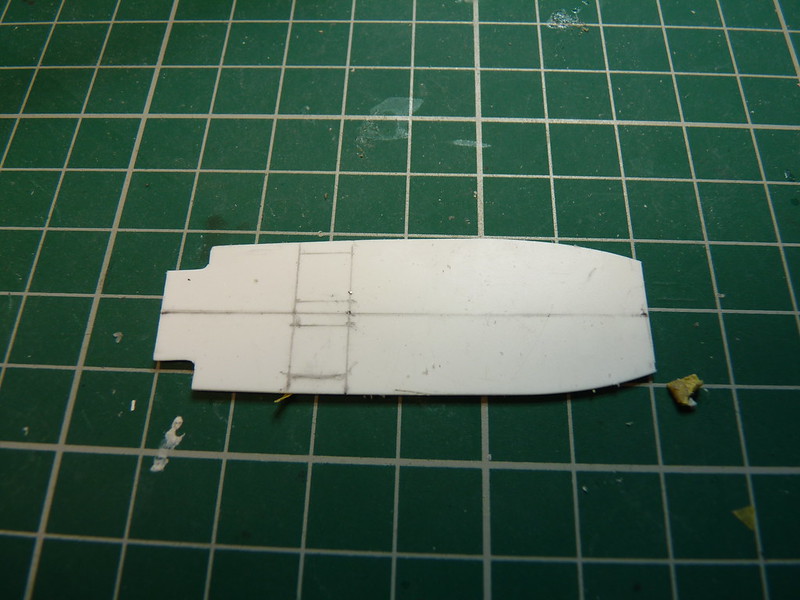
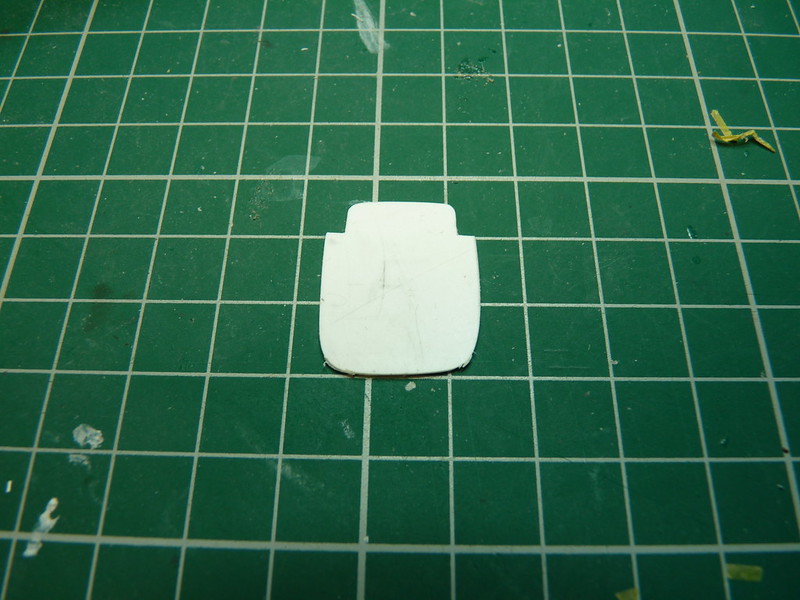
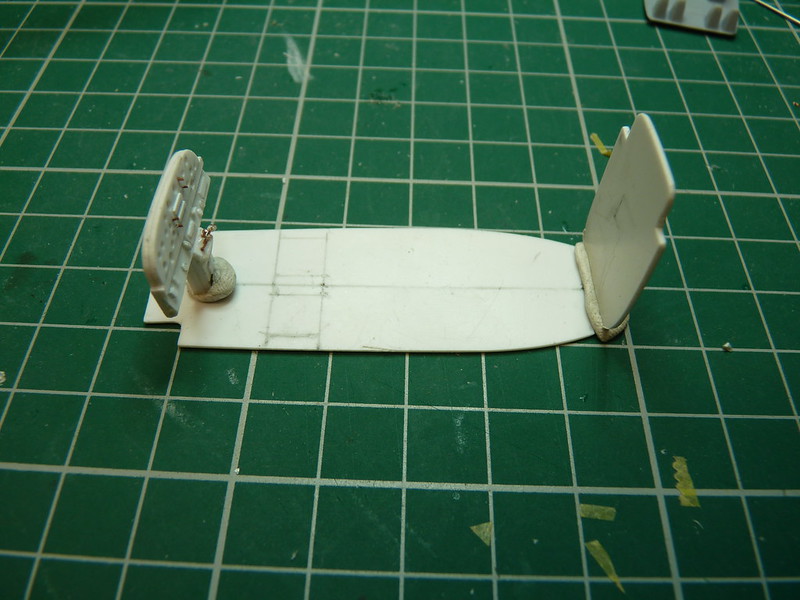
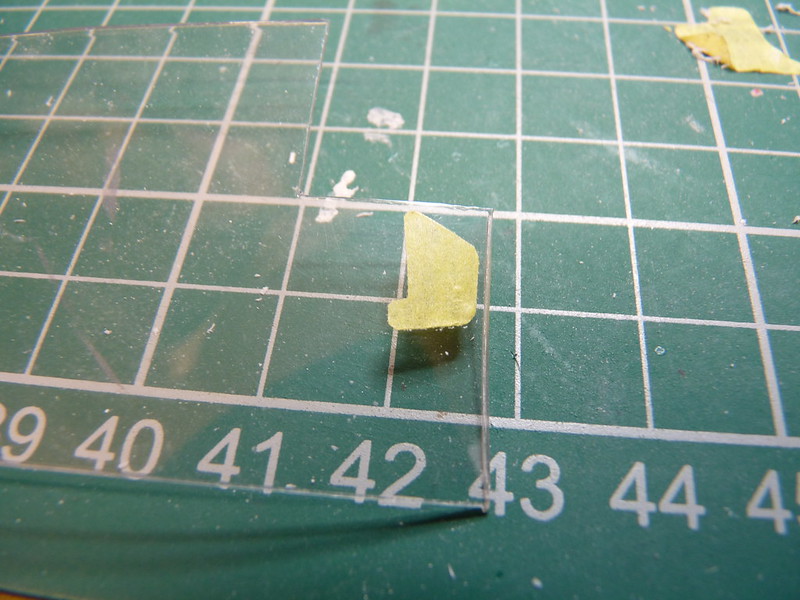
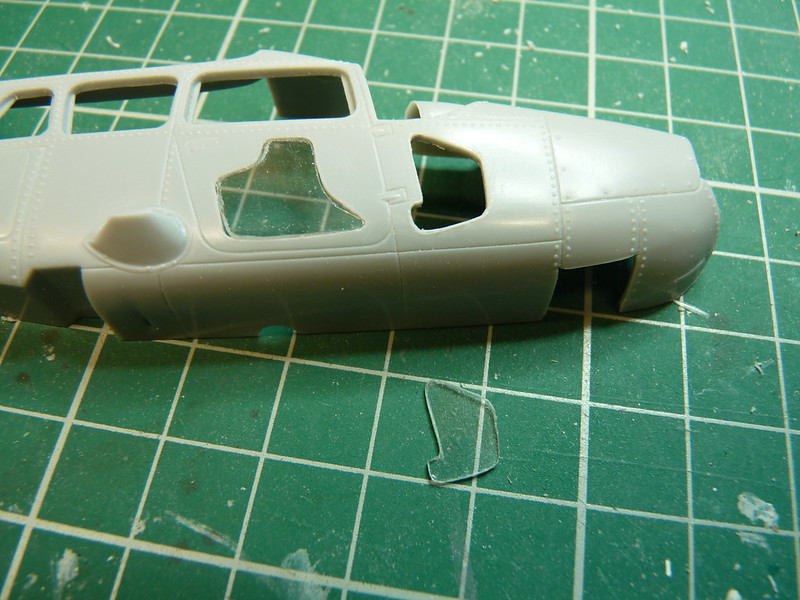
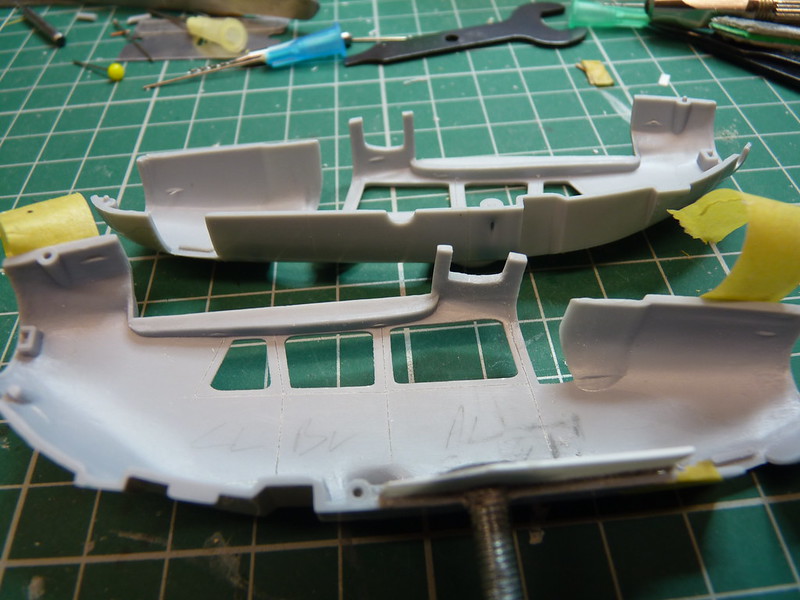
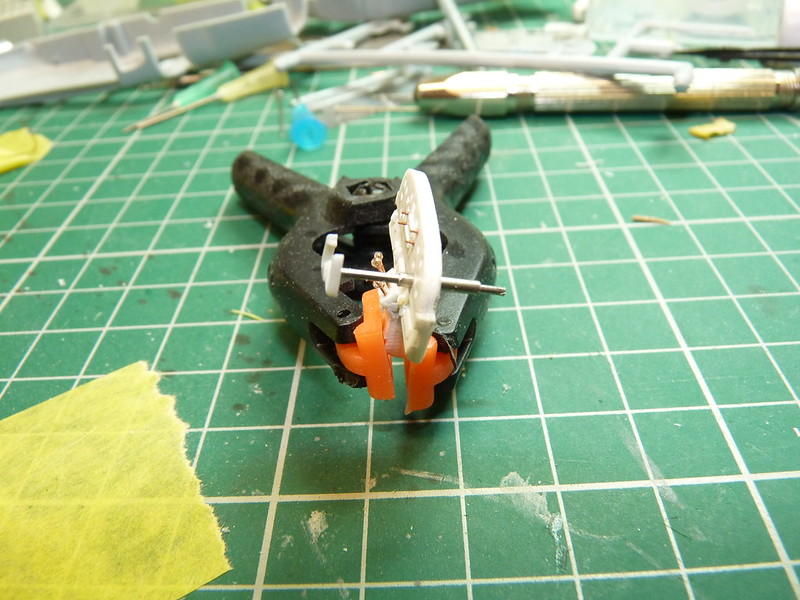
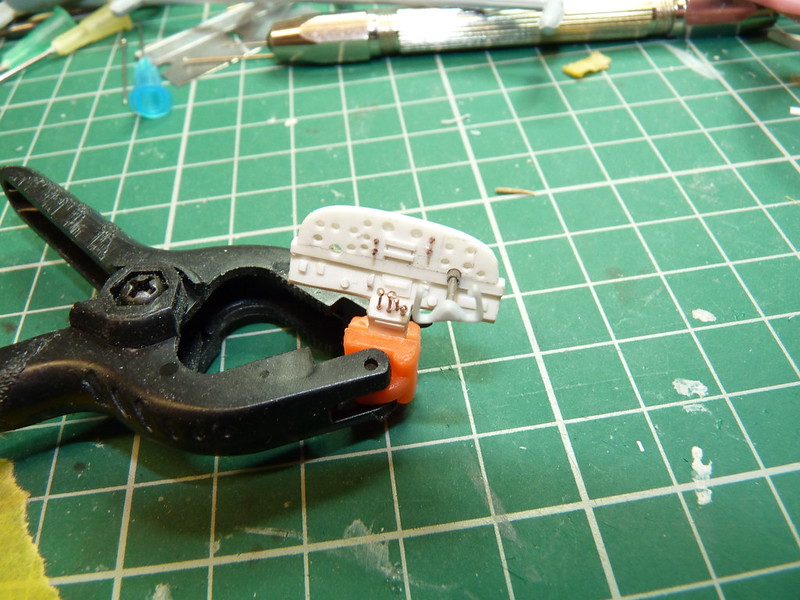
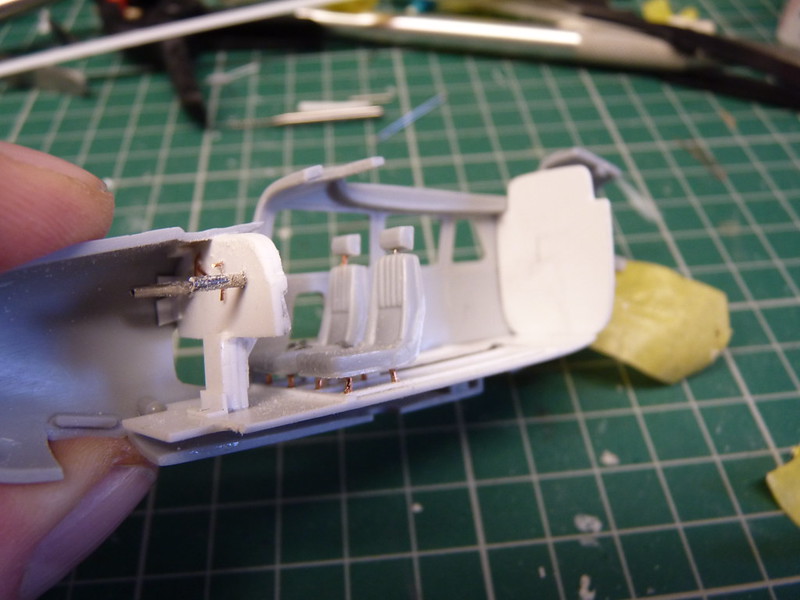
I will be adding more detail to the seats later. I am only using two of the four seats as I will be adding other things in the cockpit like radio equipment. The kit instrument panel is completely lacking in detail as the kit uses a decal for instruments so I thought I would use the kit panel as a template and make my own from plasticard and copper wire stripped from an old electric lead.

Image

Image

Image
Cheers
Ian


Please click on the web link below to have a look at all my photo's.

https://www.flickr.com/photos/ecirpnai/albums
Sunray
Active Participant
Posts: 611
Joined: March 18th, 2014, 4:01 pm
Location: Penshaw, North East, England
Contact:

Re: Testors 1/48 Cessna O-2A

Post by Sunray »

The good news is that the epoxy has cured and the bolt is firmly attached to the fuselage.

Image

Image

The pencil mark on the side of the cabin is just a quick reference for me for the rough location of the front seats. I ensured that the epoxy went where I wanted it to go so when it cured it wasn't on the fuselage seam, etc to prevent problems later on. As you can see from the photo below the kit cabin floor is a bit bare and for what I want its a bit too thick and too short, so out came the plasticard again.

Image

I used a contour gauge to get the shape of the floor and then a little sanding was required to get it right. I could of used the kit floor as a template but its a bit short. You can get a contour gauge off Amazon or ebay for a few pounds and they are easy to use. The pencil marks again are for the seat locations and centre mark.

Image

Image

As the kit doesn't come with a rear cabin bulkhead I made this one again using a contour gauge to get the shape.

Image

Here is a quick check to see how it looks.

Image

I haven't seen any photo's of the cabin floor but I thought I would add some ribs made for plastic strips to add a bit of interest. The four holes are there because I was going to put legs on the seats until I realised I didn't need them so they will be filled in later.

Image

Now for a little glazing. The kit hasn't got the bottom door windows cut out so you have to do it yourself. You get the glazed parts so I used these as a template to cut out the window and to make a replacement window from clear acrylic sheet.. I am replacing the windows with acrylic because its clearer and I am going to make a new windscreen using a vacuformer because the kit one is such a poor fit. First I cut the kit window off the sprue and tidied it up and then I put a piece of frog tape over it and cut around it with a razor blade to produce a template of the window.

Image

Then I stuck the tape template to the side door and I just scribed around the template. Then I removed the template and drilled holes inside the scribed line ensuring there was a small gap between the holes and the scribed line.

Image

Then with a modelling knife I carefully cut out the window and sanded to the scribed line.

Image

When I was happy with the opening I placed the window opening over the a piece of clear acrylic sheet and scribed the shape on to the sheet. Then I carefully cut out the shape and sanded to fit.

Image

Image

While I was doing this I managed to find the pilot I wanted to use. I thought I had seen it in my spares box but no and then for some reason while I was doing the window I remembered where it was. It was the pilot figure from Academy 1/48 F-86 kit, jackpot I thought.

Image

I wanted to use this pilot because he is wearing a flight helmet without an oxygen mask. Because I wasn't sure he would fit in the cabin thats why I wanted a thinner floor and if he seat too low I could adjust the seat height by adjusting the seat legs, but when I tried the pilot I found I didn't need the seat legs after all. The only problem I had was that the pilots legs were too far apart to fit under the instrument panel. To get around this I cut the pilot in half at the waist and then I cut the legs apart between the groin. I then sanded the legs to how I wanted them and reattached them back to the body.

Image
Cheers
Ian


Please click on the web link below to have a look at all my photo's.

https://www.flickr.com/photos/ecirpnai/albums
Sunray
Active Participant
Posts: 611
Joined: March 18th, 2014, 4:01 pm
Location: Penshaw, North East, England
Contact:

Re: Testors 1/48 Cessna O-2A

Post by Sunray »

Just carrying on with the windows, my next job was to cut out another window. I used the kit window again as the template and I attached a piece of frog tape and I cut around it with a razor. When that was done I peeled off the tape and stuck the tape template on the fuselage where I wanted the new window to be. It was then just a case of carefully scribing around the tape template, removing the template and drilling the holes.

Image

Image

As before I cut out the unwanted plastic with a shape knife and filed and sanded to the scribed line.

Image

Image

Image

I then used the tape template again to cut a piece of clear acrylic and I just sanded to get the right shape.

Image

Image

Image

For the rest of the windows I used the kit parts as templates for the acrylic windows.

Image

Image

The next photo is the fuselage with the kit windows and the photo's after are with the acrylic windows just to give you an idea of the difference between them. On the kit windows you can see the distortion of the white lines of the cutting mat but on the acrylic windows there is no distortion at all.

Image

Image

Image

I have nearly finished all the windows except for the one of the two in the cabin roof. The one I have done in the roof was not as straight forward as the others as the fuselage isn't stuck together yet. So I taped the fuselage together and used a tape template of the kit windows as a reference to mark the location where to cut. I just drilled as the other windows and filed down to get the right shape.

Image

Image

Next I decided to do so work on the seats. As I didn't have any reference photo's some artistic licence kicked in. Also because you will be able to see the bottom of the seats I added some legs made from copper wire and glued in place with CA glue, to make it look more interesting.

Image

Image

The seat belts are made from rolled lead wire and the buckle was made from a strip of aluminium cut from a coke can and just bent over itself. I again used CA glue to attach them.

Image

Image

Image

The seats and pilot are just test fitted at the minute as I have to do a few more things. One of them was the control yoke. The kit one wasn't that inspiring and gave me no way of adjusting the reach to the pilot, so a few changes were required.

Image

To start with I cut off the stem leaving me just the handle. Then I drilled a hole in the back for the new stem ensuring that the drill didn't go straight through. For the new stem I used a syringe needle cut to size and glued in place. The housing in the instrument panel for the new stem was again a syringe needle but this one was a larger one cut to size and glued in place. But first I test fitted to see if it would work.

Image

Image

I was happy with this so I glued the housing in place leaving the stem, which will be done later when the pilot is in place.

Image

Image

Image

Image

After dry fitting the seats and floor one or two times to check and get them in the right position. The seats were attached with CA glue ensuring that they were at the right height. I used one of the spare rear seats as a reference. I cut off any excess copper off the seat legs as it is a bit tight for space beneath the cabin floor and I attached the floor.

To ensure the floor sat right in the fuselage, I placed the floor in the fuselage halves the I used tapes to hold the fuselage together. When I was happy I ran extra thin glue along one side of the floor and used small weights placed on the floor to hold in place while the glue went off. I did the same for the rear bulkhead and instrument panel except on these I added pieces of right angled plasticard to add support.

Image

Image

Image

Image

Image

Image

Looking at the photo's I think a bit of tidying is in order.
Cheers
Ian


Please click on the web link below to have a look at all my photo's.

https://www.flickr.com/photos/ecirpnai/albums
User avatar
Arcwelder
Modelling Gent and Scholar
Posts: 1228
Joined: July 17th, 2015, 1:56 am
Location: Cork City, Ireland

Re: Testors 1/48 Cessna O-2A

Post by Arcwelder »

That looks excellent. The extra work on the detailing is clearly paying off!
Is this your sanderling?.

2016: A:40 B:12
User avatar
MarkyM607
Modelling Gent and Scholar
Posts: 9153
Joined: January 5th, 2013, 1:16 pm
Location: Cambs

Re: Testors 1/48 Cessna O-2A

Post by MarkyM607 »

Great work so far!.
Hoping to return to modelling sometime this year!! :lol:
Owner of Marky's Model Emporium since 2013!.
User avatar
PTB11
Modelling Gent and Scholar
Posts: 2463
Joined: April 30th, 2015, 12:50 pm
Location: Belfast

Re: Testors 1/48 Cessna O-2A

Post by PTB11 »

fantastic work.
On The Bench
Takom 1/35 M247 Sgt. York.
User avatar
Eric Mc
Modelling Gent and Scholar
Posts: 4811
Joined: May 3rd, 2011, 8:27 am
Location: Farnborough, Hants

Re: Testors 1/48 Cessna O-2A

Post by Eric Mc »

I have the Airfix 1/72 one to do. This build might come in very handy for me later.
User avatar
PaulBradley
Staring out the window
Posts: 21211
Joined: April 6th, 2011, 3:08 pm
Location: Flagstaff, AZ

Re: Testors 1/48 Cessna O-2A

Post by PaulBradley »

Nice start, Ian!
Paul

За демократію і незалежний Україну

"For Democracy and a Free Ukraine"
User avatar
Clashcityrocker
Modelling Gent and Scholar
Posts: 10817
Joined: May 1st, 2011, 12:31 am
Location: Adelaide. South Australia

Re: Testors 1/48 Cessna O-2A

Post by Clashcityrocker »

Great start. It's looking fantastic.

Nigel
User avatar
Stuart
Raider of the Lost Ark Royal
Posts: 19447
Joined: February 25th, 2013, 4:55 pm
Location: North Wales
Contact:

Re: Testors 1/48 Cessna O-2A

Post by Stuart »

I've spent many an hour inside the cockpit of a Cessna (generally with my head jammed under the instrument panel) - that's looking pretty darn good!

Great work!
Stuart Templeton I may not be good but I'm slow...

My Blog: https://stuartsscalemodels.blogspot.com/
User avatar
mjatx
Modelling Gent and Scholar
Posts: 1396
Joined: April 10th, 2014, 10:13 pm
Location: Austin, Texas, USA

Re: Testors 1/48 Cessna O-2A

Post by mjatx »

Really awesome modeling. Looking forward to the rest of the build.
AdrianMF
starter kit
Posts: 8
Joined: December 3rd, 2011, 2:53 am

Re: Testors 1/48 Cessna O-2A

Post by AdrianMF »

What a great project! You are a very organised builder (I could learn from that!) and the model is looking miles better than it did in the box already.

Regards,
Adrian
SteveC
The Bug Has Well And Truly Bitten
Posts: 377
Joined: October 28th, 2012, 1:40 pm

Re: Testors 1/48 Cessna O-2A

Post by SteveC »

That's looking really good. I especially like the way you put in the door transparencies.

Regards,

Steve
User avatar
jssel
Still crazy after all these years
Posts: 12003
Joined: April 5th, 2011, 3:42 pm

Re: Testors 1/48 Cessna O-2A

Post by jssel »

Love your glass work. Really nice results.
Besting 60 years of mediocre building of average kits in the stand off scale
User avatar
Gregers
Forum founder
Posts: 8187
Joined: April 10th, 2011, 6:13 pm

Re: Testors 1/48 Cessna O-2A

Post by Gregers »

Nice work. The good old skymonster is a neat aircraft. I must dig out my old Airfix one sometime.

All the best.

Greg
Two things are infinite: the universe and human stupidity; and I'm not sure about the the universe.
The difference between stupidity and genius is that genius has its limits.
Albert Einstein
Post Reply

Return to “Aviation Modelling”