John Fokker - E-III -- * * FINISHED * *

Dreidekker zweidecker eindecker go.
Runs April 16th to May 13th.
GBL Gregers
User avatar
JohnRatzenberger
Why is he so confused ?
Posts: 15727
Joined: April 5th, 2011, 3:42 pm
Location: Living on a sandbar - Nags Head, NC.

John Fokker - E-III -- * * FINISHED * *

Post by JohnRatzenberger »

I have to admit it took about 3 days for me to make the connection between Greg's "Time to meet the Fokkers" and the cute thread names you guys used ... Fortunately I figured it out before I broke the string ...

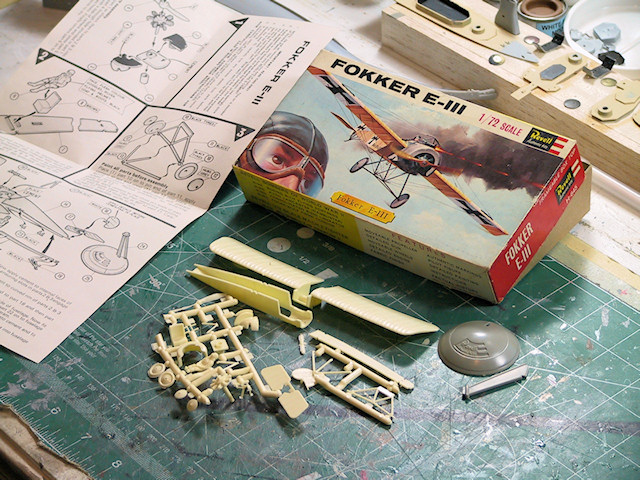
Anyway, I only have a half dozen German kits -- and this is the only Fokker among them. Fortunately it is the Revell(GB) boxing, so I get CBK credit with this GB. Unfortunately the decals are as expected and I'll have to do something with trim film and whatever I can find for tiny serials.

Image

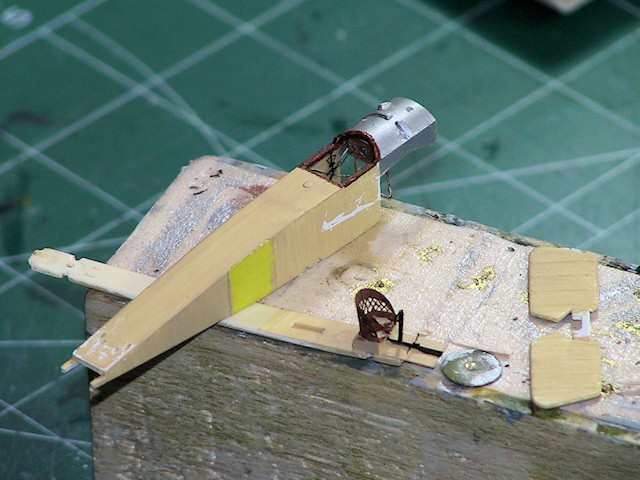
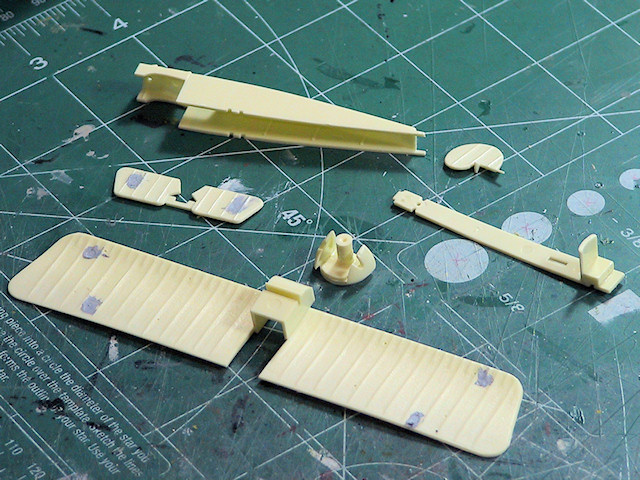
Kit is pretty rough, lots of flash, a half-dozen or so pin marks, which I'm working on now.

Image

Since I have to roll my own markings, I think I'll take some time to leave through my references to see if I have anyhting interesting -- I doubt that I do, and IIRC the real machines weren't that colorful that early in the war either.
John Ratzenberger :???:
It's my model and I'll do what I want with it.
User avatar
jssel
Still crazy after all these years
Posts: 11997
Joined: April 5th, 2011, 3:42 pm

Re: John Fokker - E-III

Post by jssel »

Here is a little something that may help you John.

Image

Image

Image
Besting 60 years of mediocre building of average kits in the stand off scale
User avatar
JohnRatzenberger
Why is he so confused ?
Posts: 15727
Joined: April 5th, 2011, 3:42 pm
Location: Living on a sandbar - Nags Head, NC.

Re: John Fokker - E-III

Post by JohnRatzenberger »

Thanks, Jeff, you've given me a standard to not attempt -- ltttle pulleys & things will not appear, even as glue blobs.

However, is the squiggly pattern on the cowl the result of the metal working to form it or some sort of "paint job" ?
John Ratzenberger :???:
It's my model and I'll do what I want with it.
User avatar
AndrewR
In the basement lab
Posts: 24072
Joined: April 5th, 2011, 4:13 pm
Location: Ottawa, Ontario, The Great White North
Contact:

Re: John Fokker - E-III

Post by AndrewR »

The swirls are called Damascus patterns, after the steel made in Damascus which was used to make extremely strong swords. As I understand it, they are produced by the conditions used to make the steel and the impurities in the iron ore used.

I'm not sure how I'm going to paint them with ye olde hirsute stycke yet :)

Jeff's middle picture is the only surviving original in the Science Museum, London. More at:

http://www.sciencemuseum.org.uk/objects ... 8-210.aspx;
Up in the Great White North
User avatar
JohnRatzenberger
Why is he so confused ?
Posts: 15727
Joined: April 5th, 2011, 3:42 pm
Location: Living on a sandbar - Nags Head, NC.

Re: John Fokker - E-III

Post by JohnRatzenberger »

Thanks for that information, Andrew.

I have read of one method but it requires airbrush.
- paint cowl gloss black
- paint gloss white squiggles
- spray thin aluminum coats over

I had intended this be a brush job also, so I'm not sure what I'll actually do, but I'll think on it ...
John Ratzenberger :???:
It's my model and I'll do what I want with it.
User avatar
JohnRatzenberger
Why is he so confused ?
Posts: 15727
Joined: April 5th, 2011, 3:42 pm
Location: Living on a sandbar - Nags Head, NC.

Re: John Fokker - E-III

Post by JohnRatzenberger »

My days have been a bit fragmented, so no pix, but I will try to get some up Sunday.

Meanwhile, I just couldn't leave well enough alone, so I downloaded the Eduard Profi-Pack instructions for some ideas. Then it was off to the stash, where I have almost nothing German, but I did find a Tom's generic WW1 German Interior set, some Eduard seatbelts, some Part seats, and for some reason, a Part Gotha G.III detail set.

I chopped up the Gotha set to get formers and rigging for the fuselage interior and then faked an instrument panel. I now have a woven looking seat, control column, rudder pedals, a throttle, etc .... nothing fancy, may not be totally accurate, but better than what I started with.

I have sorted what the rigging should look like. I may try the cowl by putting metalcote or silver down, then using MM Steel for squiggles; I'll have to play with it -- no rush.
John Ratzenberger :???:
It's my model and I'll do what I want with it.
User avatar
AndrewR
In the basement lab
Posts: 24072
Joined: April 5th, 2011, 4:13 pm
Location: Ottawa, Ontario, The Great White North
Contact:

Re: John Fokker - E-III

Post by AndrewR »

I looked at the Eduard instructions too, and decided to go for the opposite approach - put the pilot in and thereby not worry about cockpit detailing :)

The plastic on my pressing is incredibly soft, I was able to sand out the shallow ejector pin marks without filler.

Cheers

Andrew
Up in the Great White North
User avatar
JohnRatzenberger
Why is he so confused ?
Posts: 15727
Joined: April 5th, 2011, 3:42 pm
Location: Living on a sandbar - Nags Head, NC.

Re: John Fokker - E-III

Post by JohnRatzenberger »

My ej-pins weren't particularily shallow, so I put in a bit of filler and tried not to mess up the "fabric" too much ...
John Ratzenberger :???:
It's my model and I'll do what I want with it.
ShaunW
NOT the sheep
Posts: 26180
Joined: November 26th, 2011, 6:11 pm
Location: Pontefract West Yorkshire

Re: John Fokker - E-III

Post by ShaunW »

Best of luck with that cowling finish John it will not be easy in this scale, I bet the kit's cowling is pretty small.
Doing - Tamiya 1/35th Universal Carrier.

Work is the curse of the modelling classes!
IPMS#12300
User avatar
JohnRatzenberger
Why is he so confused ?
Posts: 15727
Joined: April 5th, 2011, 3:42 pm
Location: Living on a sandbar - Nags Head, NC.

Re: John Fokker - E-III

Post by JohnRatzenberger »

Well, let's see what we have so far.

I faked a cockpit interior with some stray photo-etch -- wicker seat, seatbelts, stick, rudder-bar, throttle, and instrument panel.

Image

Image

Image

I have a coat of "fabric" on, white blocks for the insignia, and some "metal". Holes drilled for rigging. I can start assembly. The decals are yellowed out, but I may be able to carefully cut out the crosses and just apply them over my white patches.

We're off for a long weekend, seeing friends, so there won't be anything new until 1 May or later.
John Ratzenberger :???:
It's my model and I'll do what I want with it.
User avatar
jssel
Still crazy after all these years
Posts: 11997
Joined: April 5th, 2011, 3:42 pm

Re: John Fokker - E-III

Post by jssel »

I would try painting the cowl aluminum and than with a 10/0 hairy stick paint the squiggles with Testors steel 1180.

Just a thought.
Besting 60 years of mediocre building of average kits in the stand off scale
User avatar
JohnRatzenberger
Why is he so confused ?
Posts: 15727
Joined: April 5th, 2011, 3:42 pm
Location: Living on a sandbar - Nags Head, NC.

Re: John Fokker - E-III

Post by JohnRatzenberger »

jssel wrote:I would try painting the cowl aluminum and than with a 10/0 hairy stick paint the squiggles with Testors steel 1180.

Just a thought.
Yeah, that's what I thought originally but then went and put on Hu 11, I think I had the tin open for something else and got lost.
Anyway, I think I'll go back over it with Testors Aluminum and then do squiggles in Testors Steel, as you suggest.
John Ratzenberger :???:
It's my model and I'll do what I want with it.
ShaunW
NOT the sheep
Posts: 26180
Joined: November 26th, 2011, 6:11 pm
Location: Pontefract West Yorkshire

Re: John Fokker - E-III

Post by ShaunW »

There's some great looking photoetch details there John, looks like 1/48th in the pics!
Doing - Tamiya 1/35th Universal Carrier.

Work is the curse of the modelling classes!
IPMS#12300
User avatar
AndrewR
In the basement lab
Posts: 24072
Joined: April 5th, 2011, 4:13 pm
Location: Ottawa, Ontario, The Great White North
Contact:

Re: John Fokker - E-III

Post by AndrewR »

That looks good John. The cockpit needs something in if, if you don't use a pilot.

Cheers

Andrew
Up in the Great White North
MerlinJones

Re: John Fokker - E-III

Post by MerlinJones »

I've been thinking about that milling effect and wonder if it could be replicated by actual 'milling'?

I've been twizzling the blunt end of a paintbrush against some painted Humbrol metalcote and have been getting promising results. That said, it is tedious adding each and every little swirl.

Regards,
Bruce
Locked

Return to “Meet the Fokkers Group build.”