Airfix 1/76 Opel Blitz Troop Carriers
-
ShaunW
- NOT the sheep
- Posts: 26188
- Joined: November 26th, 2011, 6:11 pm
- Location: Pontefract West Yorkshire
Re: Airfix 1/76 Opel Blitz Troop Carriers
Excellent paint jobs Neil. The photos are deceiving, making the models look so much larger than in reality, having built one of these I know how small the model is and that is a great piece of airbrushing!
Doing - Tamiya 1/35th Universal Carrier.
Work is the curse of the modelling classes!
IPMS#12300
Work is the curse of the modelling classes!
IPMS#12300
-
Titan

- Modelling Gent and Scholar
- Posts: 1835
- Joined: November 13th, 2011, 10:38 pm
- Location: The windswept Isle of Cornwall
Re: Airfix 1/76 Opel Blitz Troop Carriers
Lovely job on these Neil, great paint work.
Regards
Mark
Regards
Mark
Regards
Mark
_________________________________________
My models are never perfect, but I kinda like them.
Mark
_________________________________________
My models are never perfect, but I kinda like them.

Re: Airfix 1/76 Opel Blitz Troop Carriers
Excellent work there Neil. I certainly will be reading through this again when I build my Airfix Blitz.
All the best.
Greg
All the best.
Greg
Two things are infinite: the universe and human stupidity; and I'm not sure about the the universe.
The difference between stupidity and genius is that genius has its limits.
Albert Einstein
The difference between stupidity and genius is that genius has its limits.
Albert Einstein
-
ntrocket88

- Active Participant
- Posts: 827
- Joined: July 2nd, 2012, 11:49 pm
- Location: New Jersey, USA
Re: Airfix 1/76 Opel Blitz Troop Carriers
Many thanks for the very kind comments, once again.
It seems like I have been working hard to achieve very little! I made my first attempt with custom inkjet decal sheets to create the number plates. That led to having to research standard German number plate sizes and number series vs. dates issued etc. etc. As far as I can tell, most, if not all, Opel Blitz had a separate, painted, front number plate. Even late-war versions seemed to still have a separate plate rather than just painting it on the bumper. The front plate mounted slightly up on the bumper, not level with it. Early war versions used the six-sided rear number plate, but this was replaced by the simpler rectangle later.
I used Archer's AFT wet decals for the 1st SS Panzer Divisional symbols front and back. No problem there. However, I had to use their dry transfers for the Motorized Infantry Tactical symbols. I have decided I really dislike dry transfers... My success rate of getting them to a) come off the backing, b) stick to the model with all pieces attached and still aligned and c) have them aligned straight on the model is usually no better than 50%. On the front bumper, that dropped to 10%... Not enough space to hold the decal still. I tried transferring them to transparent decal paper and this did work, but even then I lost some getting them to stick to the decal paper.
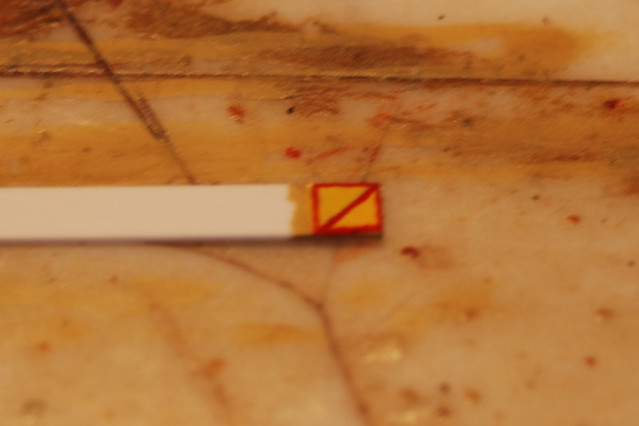
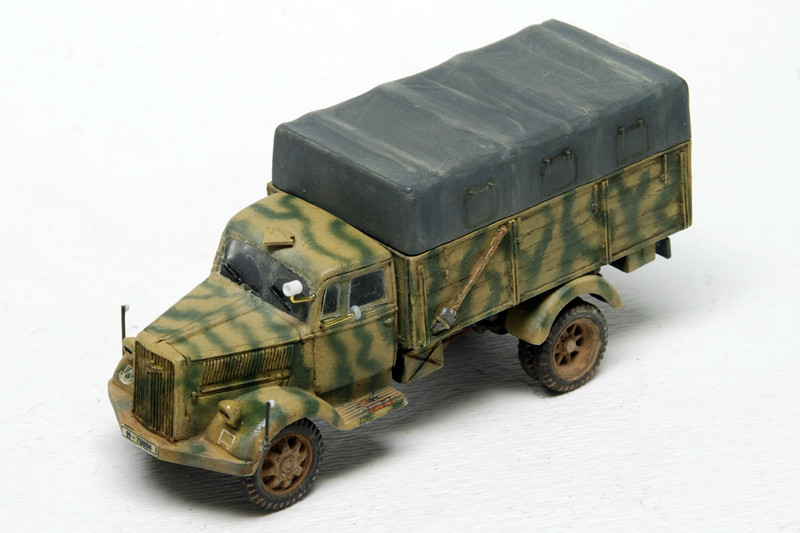
My other delay came from foolishly trying to find out more about the triangle thingy on the cab roof of Opel Blitz built before 1943ish. It turns out it is an illuminated sign signifying that the Blitz was towing something (like a PaK40, perhaps). It was slightly bigger than the one Airfix moulded in and stood taller by mounting on a hinge. Basically, it was supposed to be folded down if nothing was being towed, and then stuck out beyond the windscreen a bit. For example, if the Blitz was in use as a motorized infantry troop carrier... So out came the Exacto knife. The color of the sign seems to have been bright yellow, but the border round it is more debatable. I have seen white, dunkelgelb and black used on post-war versions and by modelers, however I went for red.
It seems like I have been working hard to achieve very little! I made my first attempt with custom inkjet decal sheets to create the number plates. That led to having to research standard German number plate sizes and number series vs. dates issued etc. etc. As far as I can tell, most, if not all, Opel Blitz had a separate, painted, front number plate. Even late-war versions seemed to still have a separate plate rather than just painting it on the bumper. The front plate mounted slightly up on the bumper, not level with it. Early war versions used the six-sided rear number plate, but this was replaced by the simpler rectangle later.
I used Archer's AFT wet decals for the 1st SS Panzer Divisional symbols front and back. No problem there. However, I had to use their dry transfers for the Motorized Infantry Tactical symbols. I have decided I really dislike dry transfers... My success rate of getting them to a) come off the backing, b) stick to the model with all pieces attached and still aligned and c) have them aligned straight on the model is usually no better than 50%. On the front bumper, that dropped to 10%... Not enough space to hold the decal still. I tried transferring them to transparent decal paper and this did work, but even then I lost some getting them to stick to the decal paper.
My other delay came from foolishly trying to find out more about the triangle thingy on the cab roof of Opel Blitz built before 1943ish. It turns out it is an illuminated sign signifying that the Blitz was towing something (like a PaK40, perhaps). It was slightly bigger than the one Airfix moulded in and stood taller by mounting on a hinge. Basically, it was supposed to be folded down if nothing was being towed, and then stuck out beyond the windscreen a bit. For example, if the Blitz was in use as a motorized infantry troop carrier... So out came the Exacto knife. The color of the sign seems to have been bright yellow, but the border round it is more debatable. I have seen white, dunkelgelb and black used on post-war versions and by modelers, however I went for red.
Neil
'With every model I learn a little more...and then the next one takes longer!'
'With every model I learn a little more...and then the next one takes longer!'
-
Clashcityrocker

- Modelling Gent and Scholar
- Posts: 10823
- Joined: May 1st, 2011, 12:31 am
- Location: Adelaide. South Australia
Re: Airfix 1/76 Opel Blitz Troop Carriers
A wonderful set of trucks you have there Neil. Great work all round on them.
Nigel
Nigel
-
iggie

- Modelling Gent and Scholar
- Posts: 23438
- Joined: July 31st, 2013, 11:04 am
- Location: North Somercotes, Lincolnshire
- Contact:
Re: Airfix 1/76 Opel Blitz Troop Carriers
Awesome work at that scale......actually I think it would be awesome at 1/35th!!!
Best wishes
Jim
If you can walk away from a landing, it's a good landing. If you use the airplane the next day, it's an outstanding landing
"Never put off till tomorrow, what you can do the day after tomorrow"
Jim
If you can walk away from a landing, it's a good landing. If you use the airplane the next day, it's an outstanding landing
"Never put off till tomorrow, what you can do the day after tomorrow"
-
gnomemeansgnome

- Modelling Gent and Scholar
- Posts: 5269
- Joined: July 16th, 2013, 4:03 pm
- Location: No Fun City
Re: Airfix 1/76 Opel Blitz Troop Carriers
Great looking build. They look terrific so far.
Ego no habeo consilium.
ICBM = Insatiable Collector and Builder of Models
ICBM = Insatiable Collector and Builder of Models
-
Purplethistle

- Delusional Miniature Killer
- Posts: 4680
- Joined: July 10th, 2014, 1:03 am
- Location: Glasgow
Re: Airfix 1/76 Opel Blitz Troop Carriers
Don't know how I missed the early part of this, just seen the driver and it's superb. Nice work!
"Spits, SLUFS and Rock 'n' Roll"

Re: Airfix 1/76 Opel Blitz Troop Carriers
They look fantastic.
On The Bench
Takom 1/35 M247 Sgt. York.
Takom 1/35 M247 Sgt. York.
-
ShaunW
- NOT the sheep
- Posts: 26188
- Joined: November 26th, 2011, 6:11 pm
- Location: Pontefract West Yorkshire
Re: Airfix 1/76 Opel Blitz Troop Carriers
These are simply excellent Neil and I always look forward to the next installment of this project. The info re the triangle device on the cab roof is very interesting - I've often wondered what it was for but never got around to researching it for myself. Dry transfers I have never tried as they sound difficult to use - however, they do have the advantage of not requiring a gloss finish and there being no silvering.
Doing - Tamiya 1/35th Universal Carrier.
Work is the curse of the modelling classes!
IPMS#12300
Work is the curse of the modelling classes!
IPMS#12300
-
ntrocket88
- Active Participant
- Posts: 827
- Joined: July 2nd, 2012, 11:49 pm
- Location: New Jersey, USA
Re: Airfix 1/76 Opel Blitz Troop Carriers
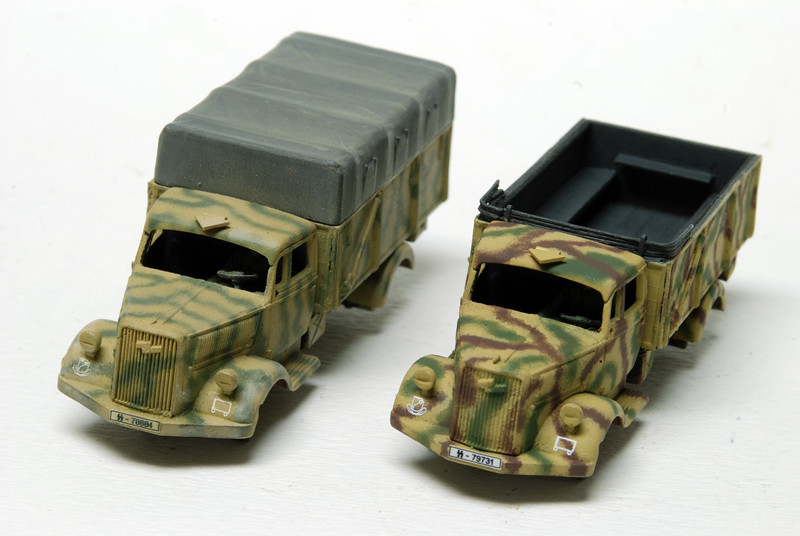
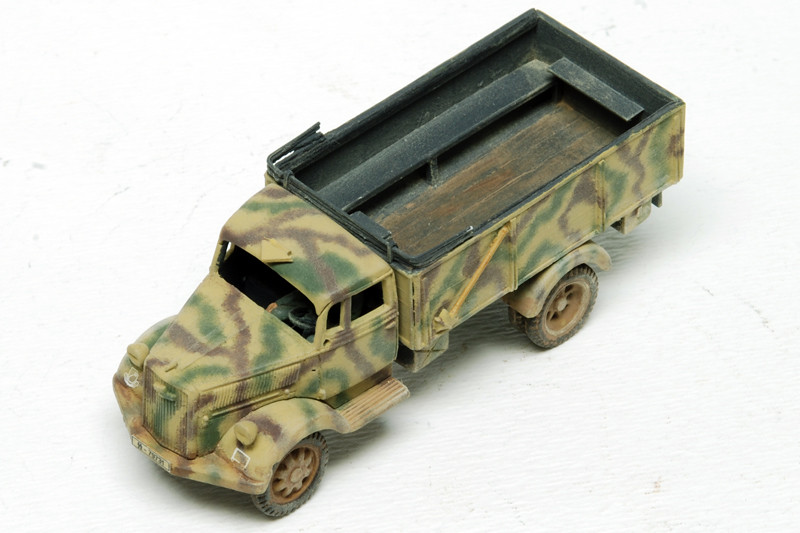
Anyway, some progress. The front wheels Airfix supplied are a reasonable match to real ones used on 4x4 Blitz, but I had to fill-in the back, as you wouldn't have seen through them past the brake housings. The rear wheel hubs seem completely inaccurate, being spoked instead of concave/solid with rounded-triangular holes similar to the front wheels. However, they represent more work to correct than I felt like tackling this time. Perhaps I will try to find some 1/72 aftermarket ones for future attempts. Getting all four wheels to touch the ground is a real challenge on this kit, particularly as the front axle always breaks either getting it off the sprue or during handling. My solution was to fit the rear wheels and one of the front ones. I cut the mounting indent into a slot on the remaining front wheel and glued it on while the Blitz rested on a flat surface, allowing it to find it's own level.
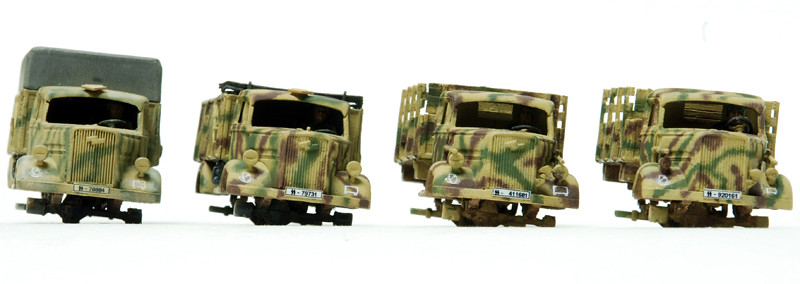
The first Series 2 Blitz is nearly finished. The first round of weathering was applied, followed by a coat of matt varnish and then a pin-wash. I have glazed the front windscreen, but still need to do the side windows.
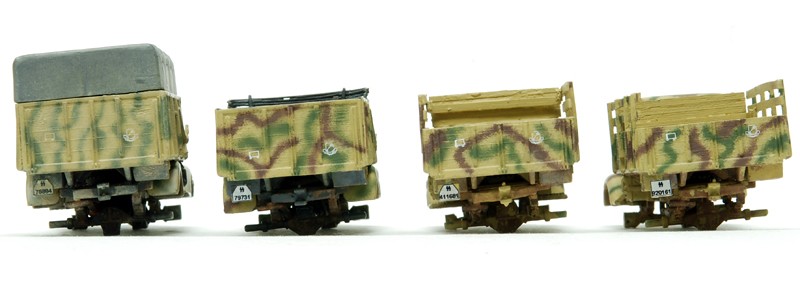
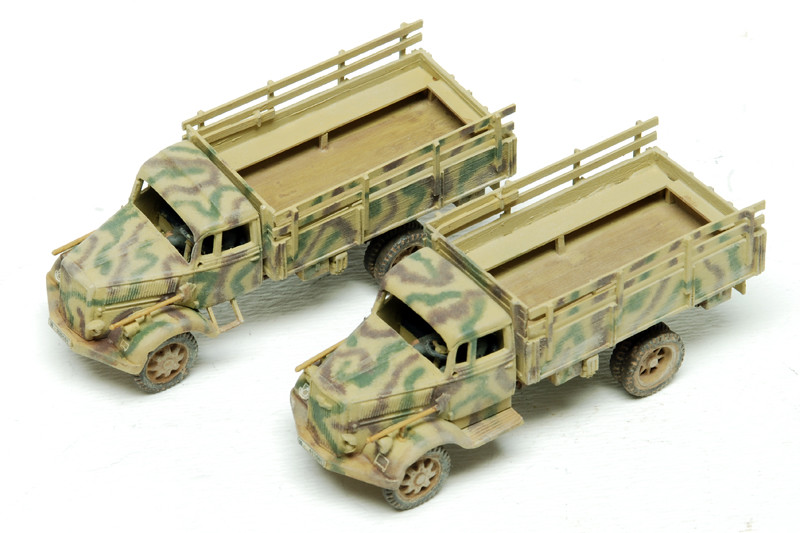
The others have had the wheels attached, weathering and matt varnish, but still need the pin wash:

The first Series 2 Blitz is nearly finished. The first round of weathering was applied, followed by a coat of matt varnish and then a pin-wash. I have glazed the front windscreen, but still need to do the side windows.
The others have had the wheels attached, weathering and matt varnish, but still need the pin wash:
Neil
'With every model I learn a little more...and then the next one takes longer!'
'With every model I learn a little more...and then the next one takes longer!'
Re: Airfix 1/76 Opel Blitz Troop Carriers
I must say, these look very nice. Well done. I like the wood deck in the middle vehicle pic. Awesome.
-
iggie
- Modelling Gent and Scholar
- Posts: 23438
- Joined: July 31st, 2013, 11:04 am
- Location: North Somercotes, Lincolnshire
- Contact:
Re: Airfix 1/76 Opel Blitz Troop Carriers
Superb work!
Best wishes
Jim
If you can walk away from a landing, it's a good landing. If you use the airplane the next day, it's an outstanding landing
"Never put off till tomorrow, what you can do the day after tomorrow"
Jim
If you can walk away from a landing, it's a good landing. If you use the airplane the next day, it's an outstanding landing
"Never put off till tomorrow, what you can do the day after tomorrow"
-
ShaunW
- NOT the sheep
- Posts: 26188
- Joined: November 26th, 2011, 6:11 pm
- Location: Pontefract West Yorkshire
Re: Airfix 1/76 Opel Blitz Troop Carriers
Excellent work Neil. This thread is an excellent resource for anyone who is contemplating building one of these kits.
Doing - Tamiya 1/35th Universal Carrier.
Work is the curse of the modelling classes!
IPMS#12300
Work is the curse of the modelling classes!
IPMS#12300
-
ntrocket88
- Active Participant
- Posts: 827
- Joined: July 2nd, 2012, 11:49 pm
- Location: New Jersey, USA
Re: Airfix 1/76 Opel Blitz Troop Carriers
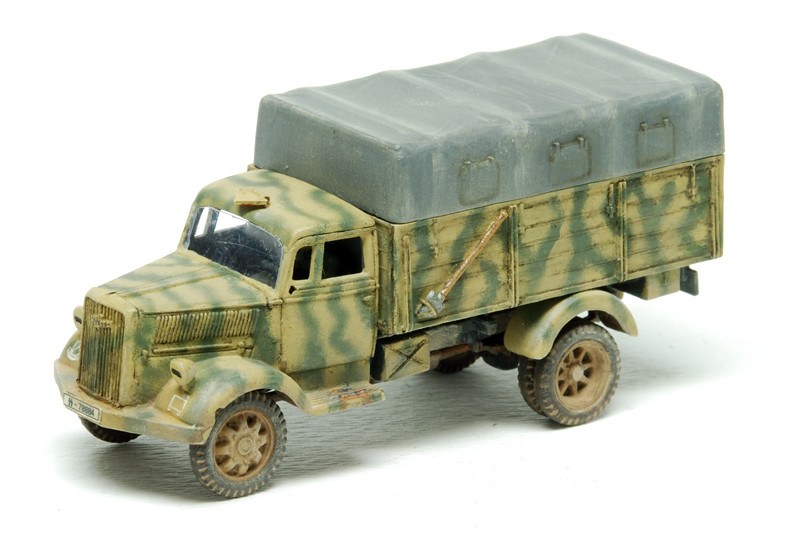
The final fiddly bits have now been added to the closed Series 2 Blitz.
I decided not to use the Airfix parts for the wing-mirror and edge markers, not so much because they are a little too thick, but more because I wasn't sure they would survive long enough even to be photographed! I made the wing mirror from brass rod, but used brush bristles for the edge markers, hoping they will be flexible enough to bend rather than break. One thing missing from the Airfix kit is the small searchlight mounted next to the windscreen on the drivers side, so I added that from brass and plastic rod.
Just need to paint the additions, and I am calling this one done! Unless someone sees something I missed...
Neil
'With every model I learn a little more...and then the next one takes longer!'
'With every model I learn a little more...and then the next one takes longer!'