1/32 Airfix World War One B Type Bus "Old Bill"
-
iggie

- Modelling Gent and Scholar
- Posts: 23424
- Joined: July 31st, 2013, 11:04 am
- Location: North Somercotes, Lincolnshire
- Contact:
Re: 1/32 Airfix World War One B Type Bus "Old Bill"
Glorious work Ian, as always and an absolute inspiration to get the best out of not just this kit but many others too
Best wishes
Jim
If you can walk away from a landing, it's a good landing. If you use the airplane the next day, it's an outstanding landing
"Never put off till tomorrow, what you can do the day after tomorrow"
Jim
If you can walk away from a landing, it's a good landing. If you use the airplane the next day, it's an outstanding landing
"Never put off till tomorrow, what you can do the day after tomorrow"
-
ShaunW
- NOT the sheep
- Posts: 26180
- Joined: November 26th, 2011, 6:11 pm
- Location: Pontefract West Yorkshire
Re: 1/32 Airfix World War One B Type Bus "Old Bill"
Great stuff Ian, that is the sort of additional detail work that I enjoy doing the most and is one of the reasons why I tend to favour older kits - they generally offer a blank canvas and are (usually) cheap and cheerful enough not to cause too much of an upset if it all goes wrong. You have really lifted the underside detail and I think that has been time very well spent.
Doing - Tamiya 1/35th Universal Carrier.
Work is the curse of the modelling classes!
IPMS#12300
Work is the curse of the modelling classes!
IPMS#12300
-
splash

- Senior Service Rotorhead
- Posts: 13828
- Joined: May 1st, 2011, 11:02 am
- Location: Somerset England
Re: 1/32 Airfix World War One B Type Bus "Old Bill"
Because of this brilliant thread, I have just won a B type bus on eBay for just over £10 inc p&p.
I quit fancy the thought of a mobile WW1 pidgin loft.
Regards Splash
I quit fancy the thought of a mobile WW1 pidgin loft.
Regards Splash
My work bench is starting to look like Portsmouth Naval Dockyard.
-
JohnRatzenberger

- Why is he so confused ?
- Posts: 15728
- Joined: April 5th, 2011, 3:42 pm
- Location: Living on a sandbar - Nags Head, NC.
Re: 1/32 Airfix World War One B Type Bus "Old Bill"
Really good work going on here, Ian. I do like the wood effect.
BTW, a friend did a pigeon bus - I think she scratch-built it in 1/35. If I can find the pix I took, I'll post them for inspiration.
BTW, a friend did a pigeon bus - I think she scratch-built it in 1/35. If I can find the pix I took, I'll post them for inspiration.
John Ratzenberger 
It's my model and I'll do what I want with it.
It's my model and I'll do what I want with it.
Re: 1/32 Airfix World War One B Type Bus "Old Bill"
I'm looking forward to end result. My dad built one of these for me circa 1968 and its good the old bus is back after nearly 50 years
-
Sunray
- Active Participant
- Posts: 611
- Joined: March 18th, 2014, 4:01 pm
- Location: Penshaw, North East, England
- Contact:
Re: 1/32 Airfix World War One B Type Bus "Old Bill"
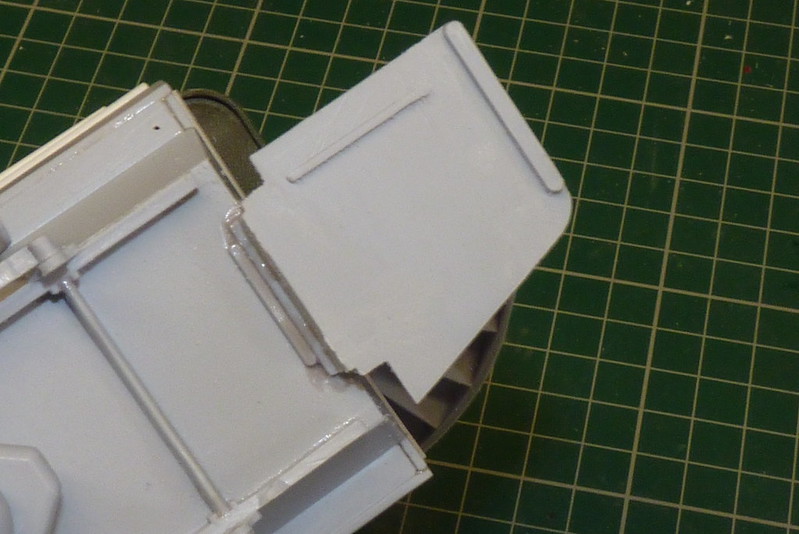
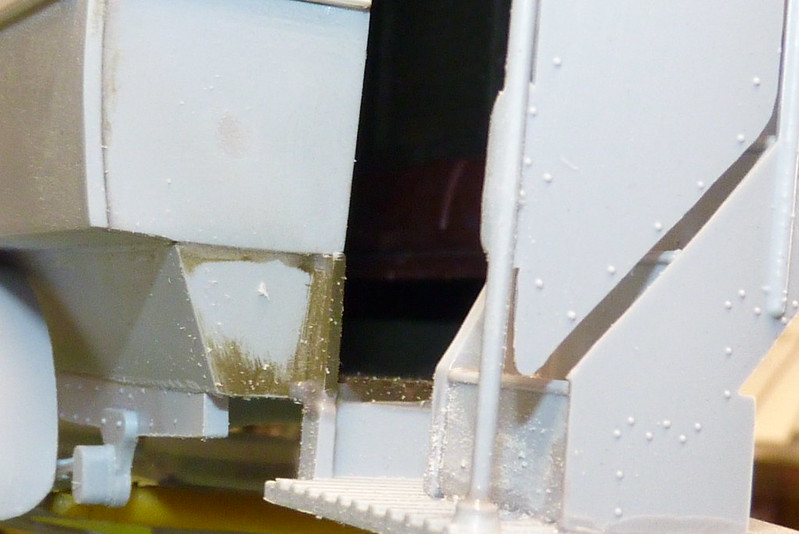
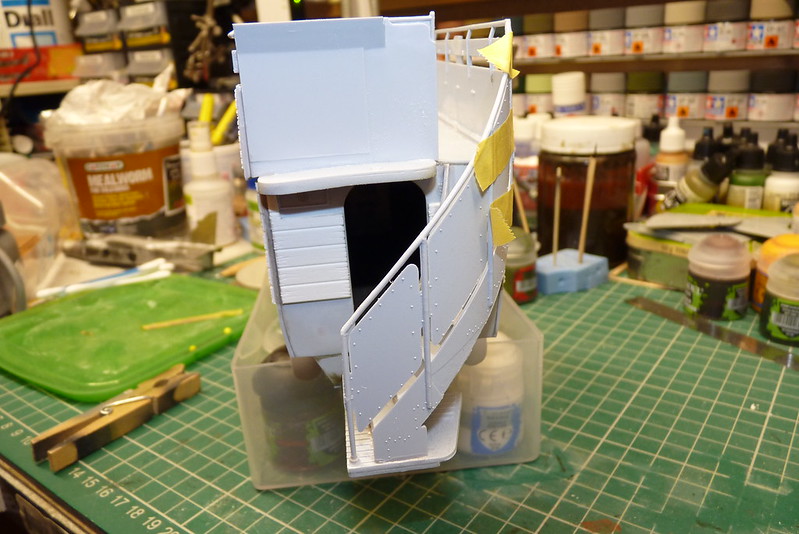
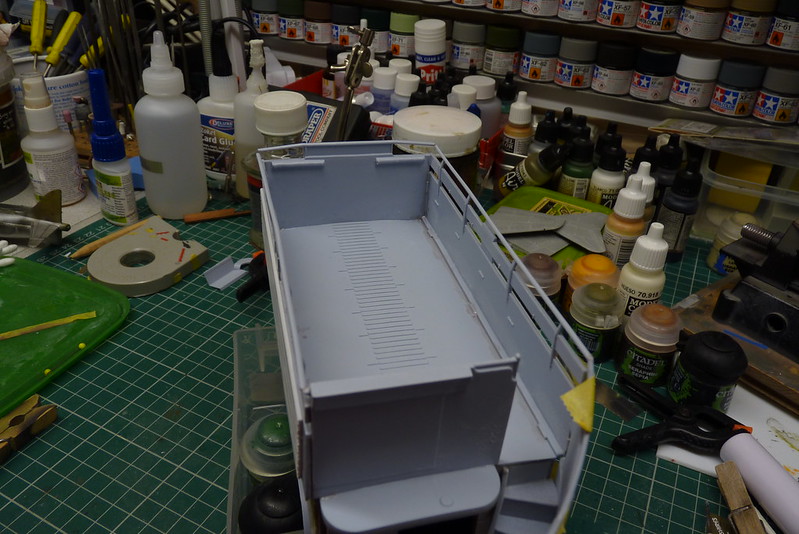
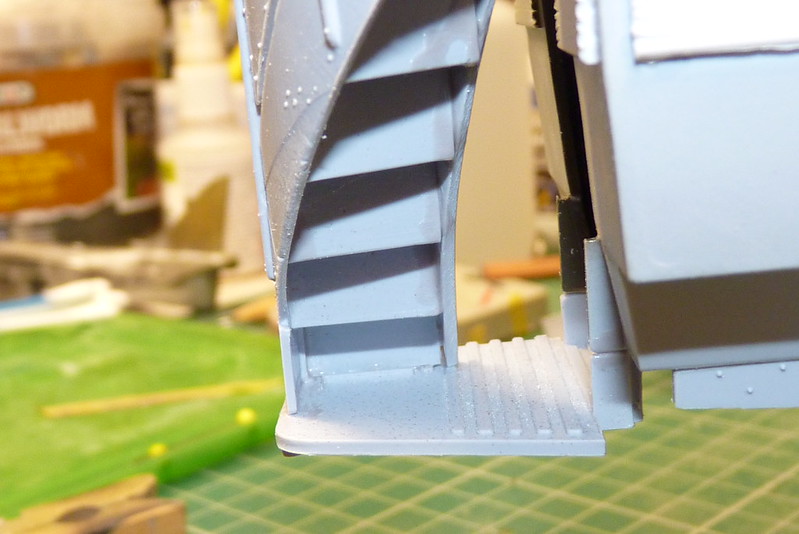
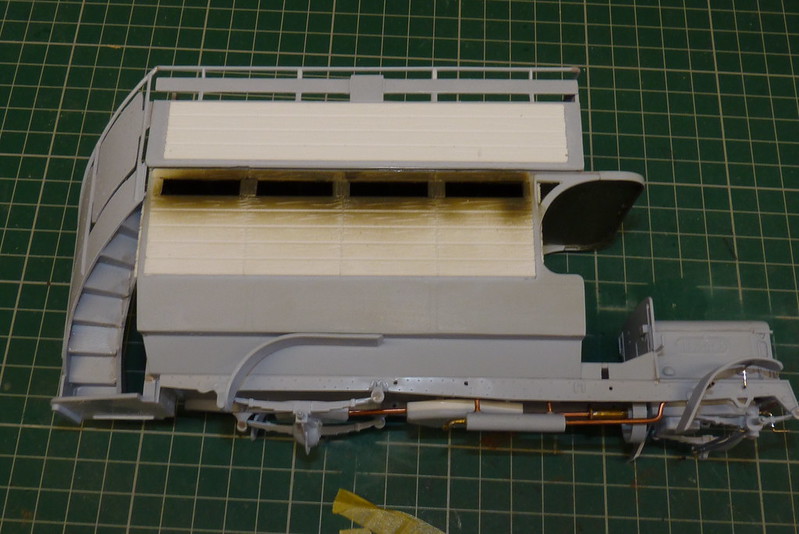
Thanks lads. I have done a bit more work on the bus by adding the upper deck, wooden side boards and stairs. After I cleaned up the top deck parts I made the wooden side boards the same way as the window covers from plasticard. Then it was just a case of holding the deck sides with tape and gluing in place. Once the glue on upper deck was completely cured I started on the stairs. Once again the parts required cleaning up a bit due to the age of the kit and once I was happy I first tried test fitting which was a pain due to the shape of the stairs, I glued the small platform supporting the stairs to the rear of the bus ensuring it was as level as I could get it. I then glued the stair treads to the rear outside stair side. Once dry this enabled me to fit the stairs to the rear of the bus and platform. The reason I haven't attached the small inside stair wall was because it requires fitting and sanding to the back wall of the bus where I have attached a window cover and I thought I would get the main stairs attached first. With the main stairs on the bus I glued the remaining small inside stair wall in place and I left it overnight to cure.
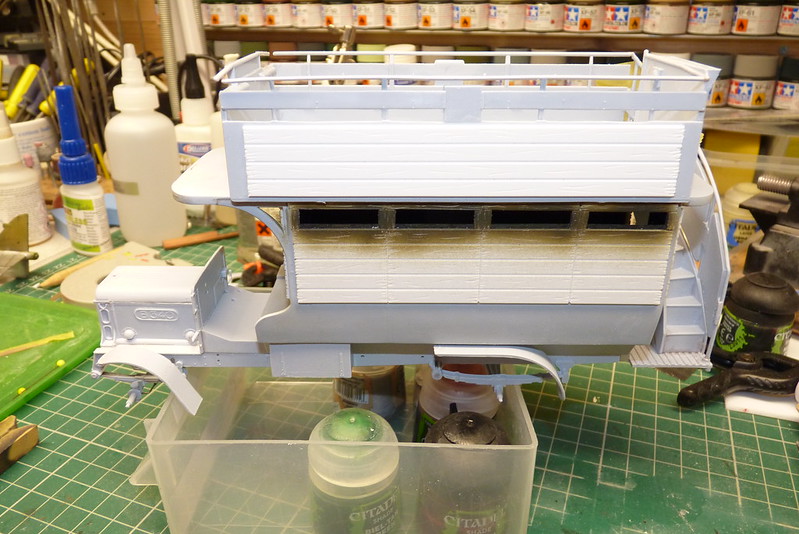
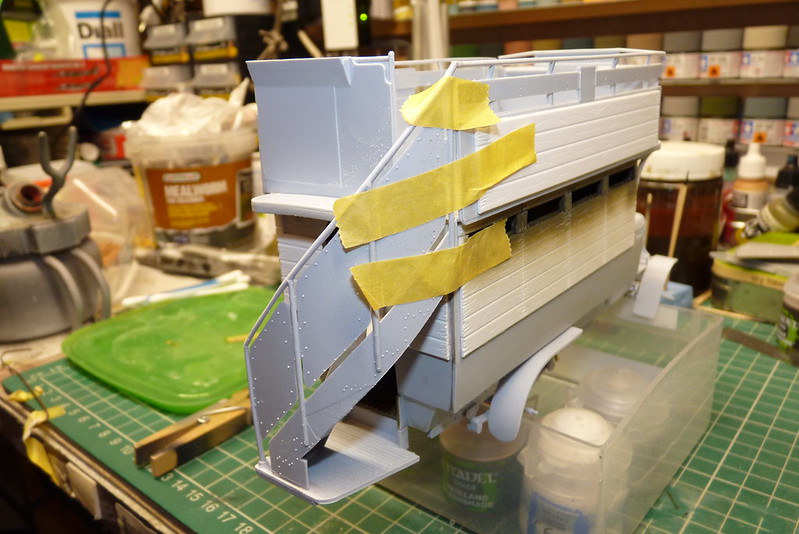

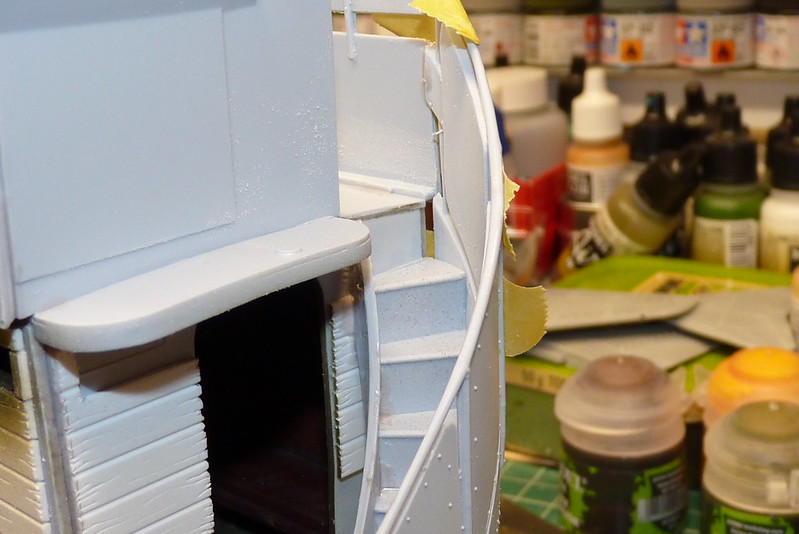
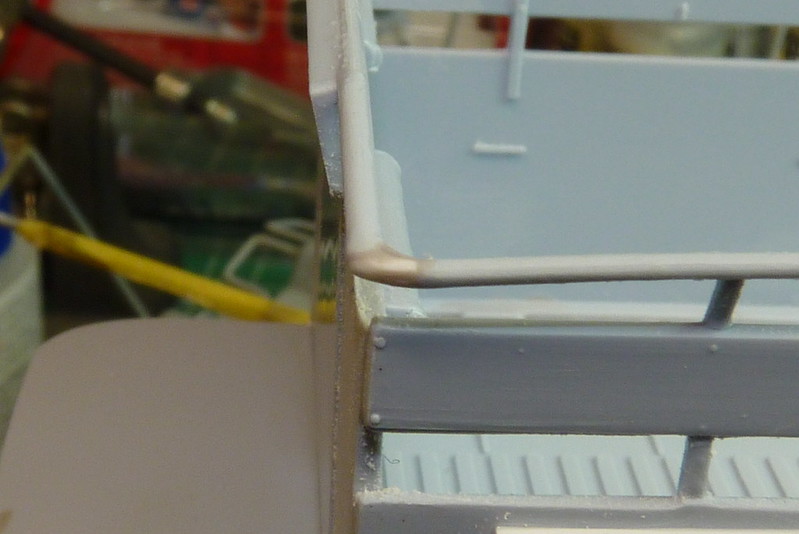
The railings on the top deck weren't long enough so to get around this I cut a small scrap piece of plastic and used home made Tamiya filler to bridge the gap. Once the filler has gone rock hard it was sanded.
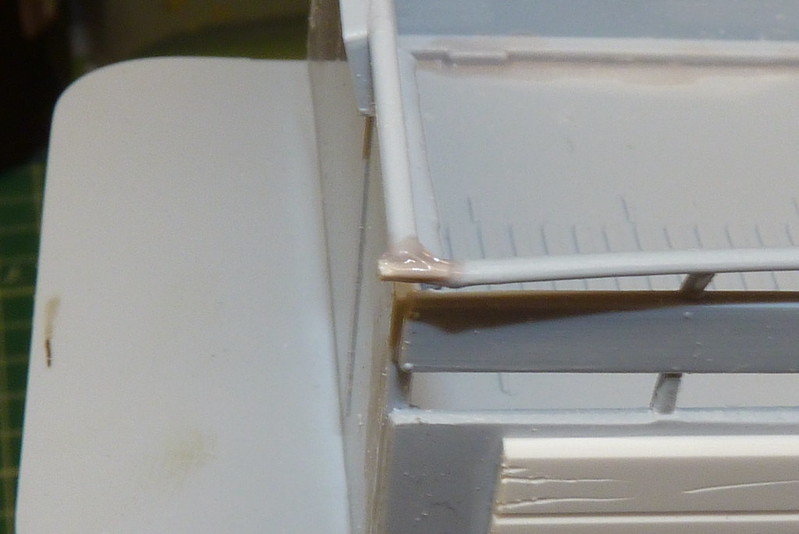
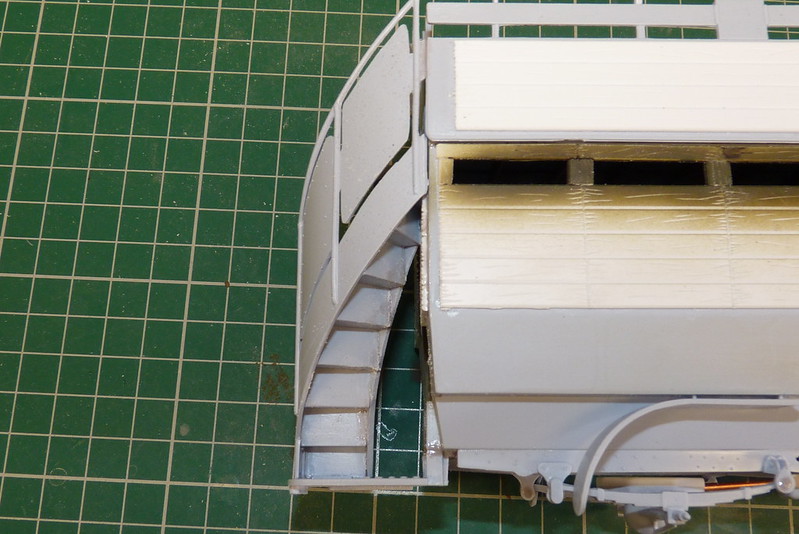
The railings on the top deck weren't long enough so to get around this I cut a small scrap piece of plastic and used home made Tamiya filler to bridge the gap. Once the filler has gone rock hard it was sanded.
Cheers
Ian
Please click on the web link below to have a look at all my photo's.
https://www.flickr.com/photos/ecirpnai/albums
Ian
Please click on the web link below to have a look at all my photo's.
https://www.flickr.com/photos/ecirpnai/albums
-
Sunray
- Active Participant
- Posts: 611
- Joined: March 18th, 2014, 4:01 pm
- Location: Penshaw, North East, England
- Contact:
Re: 1/32 Airfix World War One B Type Bus "Old Bill"
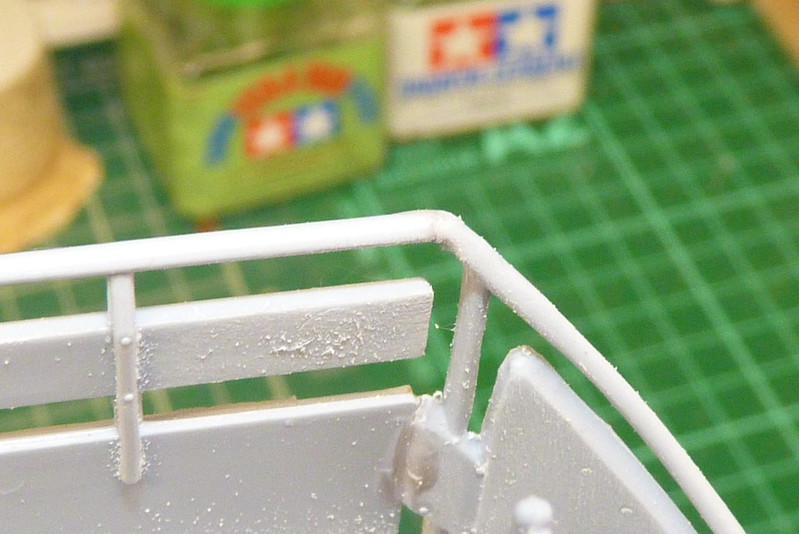
The home made filler cured on the ends of the handrails on the top deck and I sanded them down and here is the result.

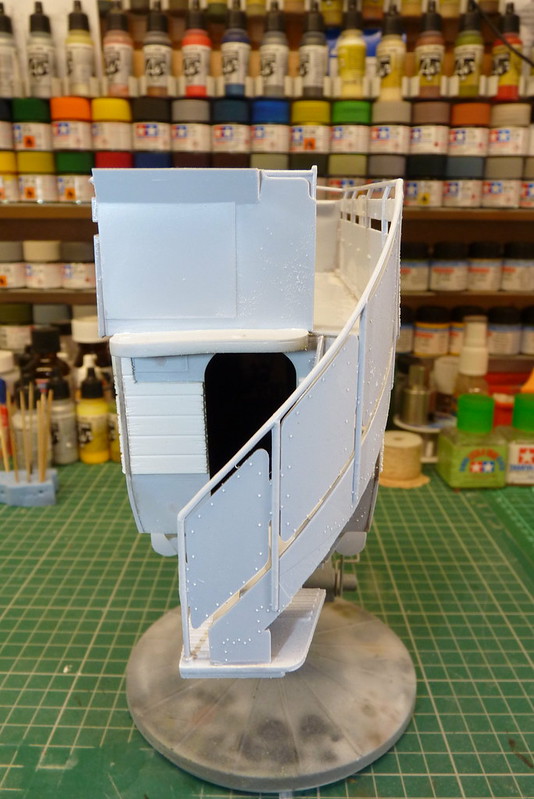
Continuing with handrails I had a look at the rear platform rail and I wasn't impressed with the kit one.
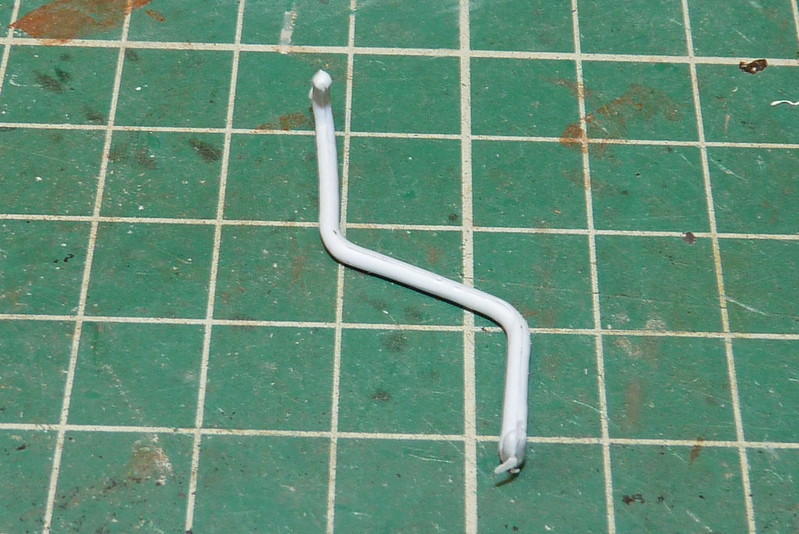
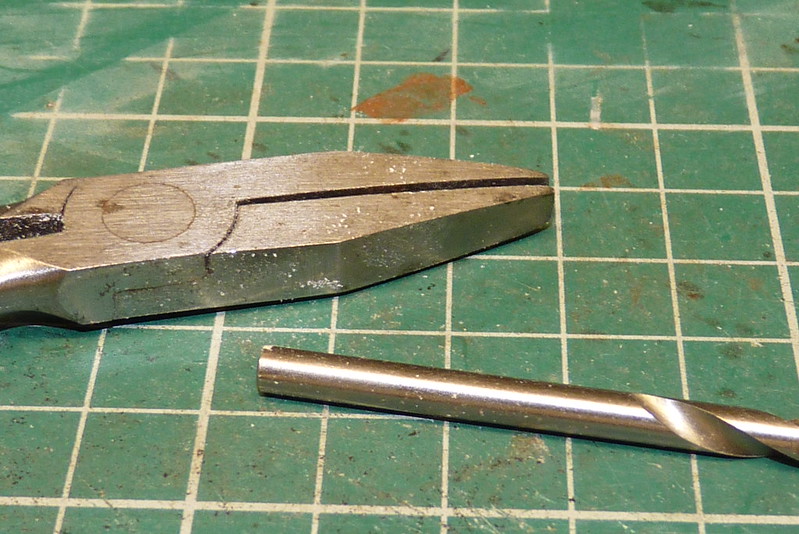
So I thought it time to get out the copper wire again. I used the kit part as a guide and I made my own using smooth flat nose pliers as before to straighten the wire and put some of the bends in. For the curl at the bottom end of the rail I used the shaft of a 4mm drill bit as a guide to bend the wire around.
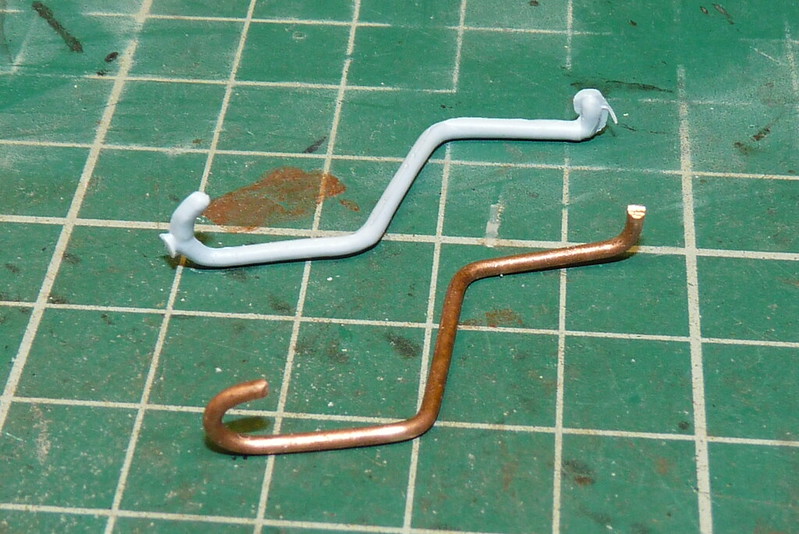
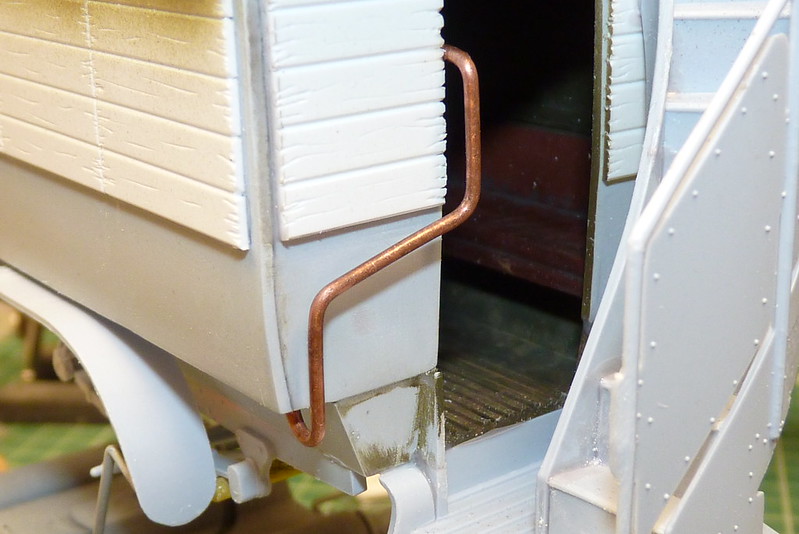
I must be getting good at bending wire as the fit was spot on and it was just a case of attaching the rail to the bus using CA glue.
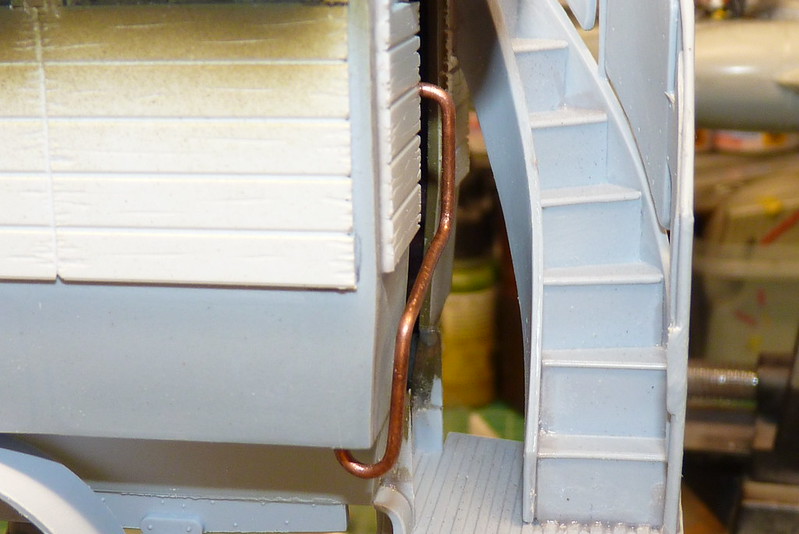
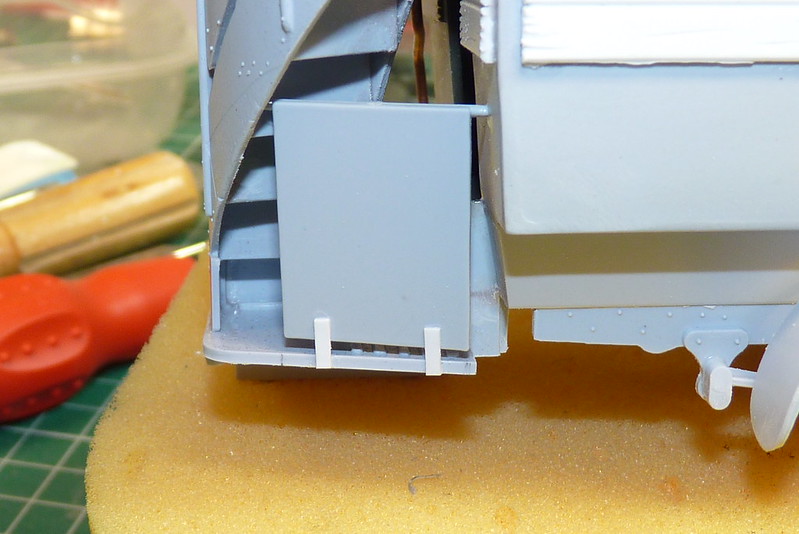
Next I glued the rear platform barrier. The instructions don't give a good view of this so I used some reference photo's from the web to give me a better idea of how it is attached.
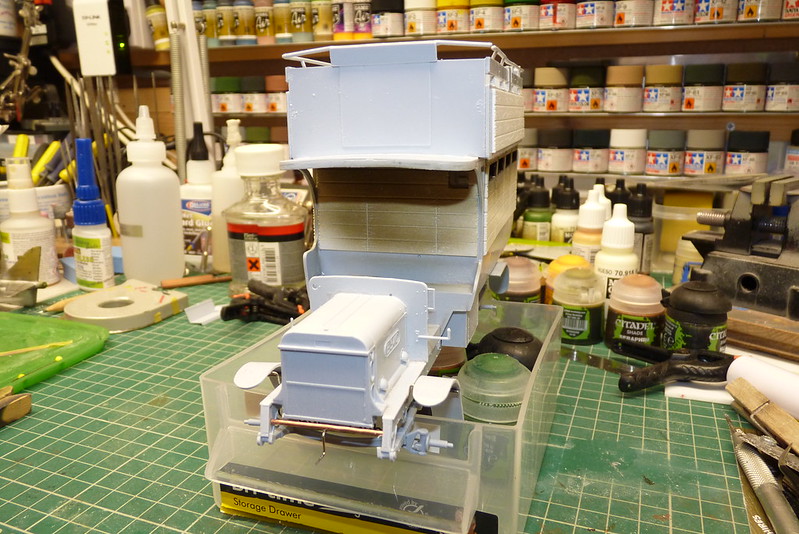
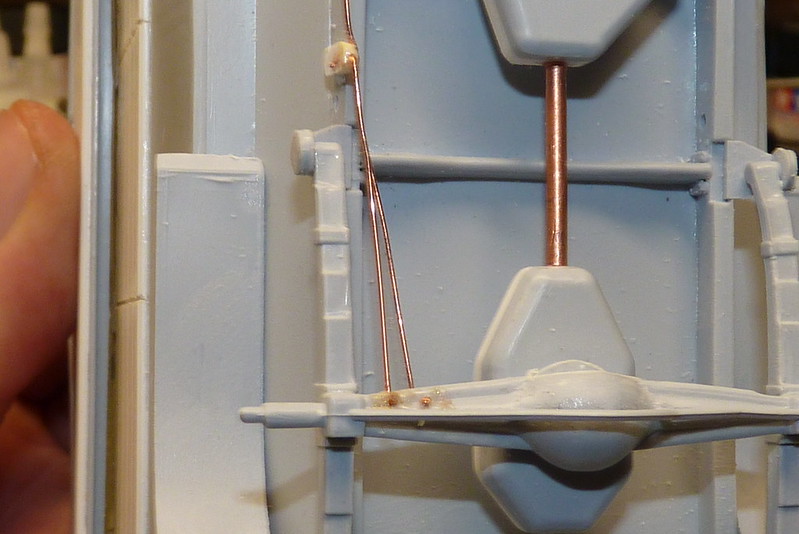
I didn't want to use the steering column from the kit so used a syringe needle and a pin as they would be stronger.
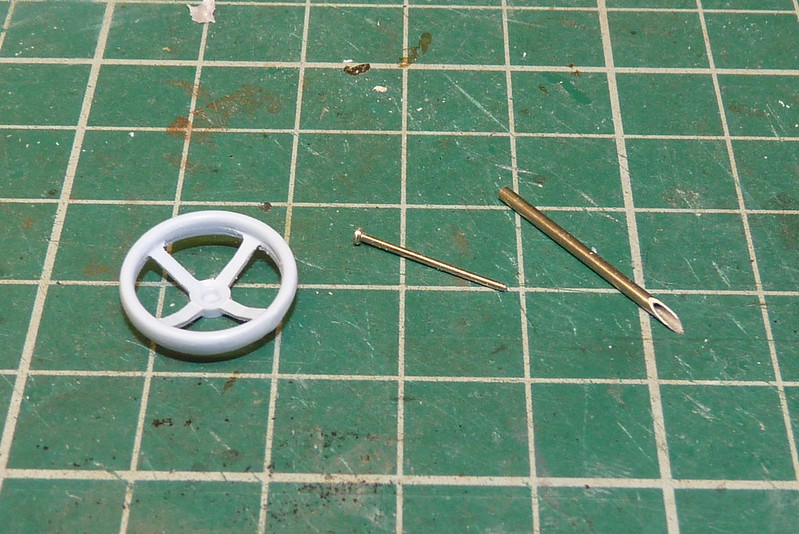
To attach the wheel I drilled a hole in the centre of the steering wheel to take the pin.
Then using CA glue I attached the pin to the steering wheel.
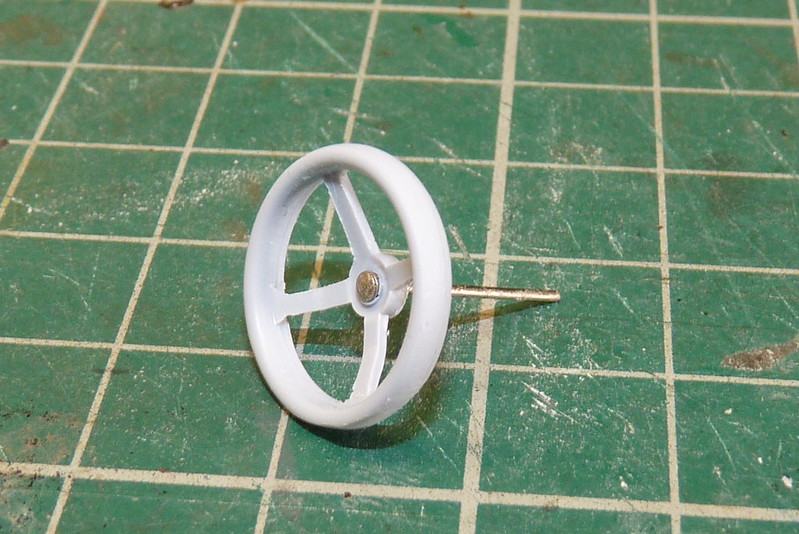
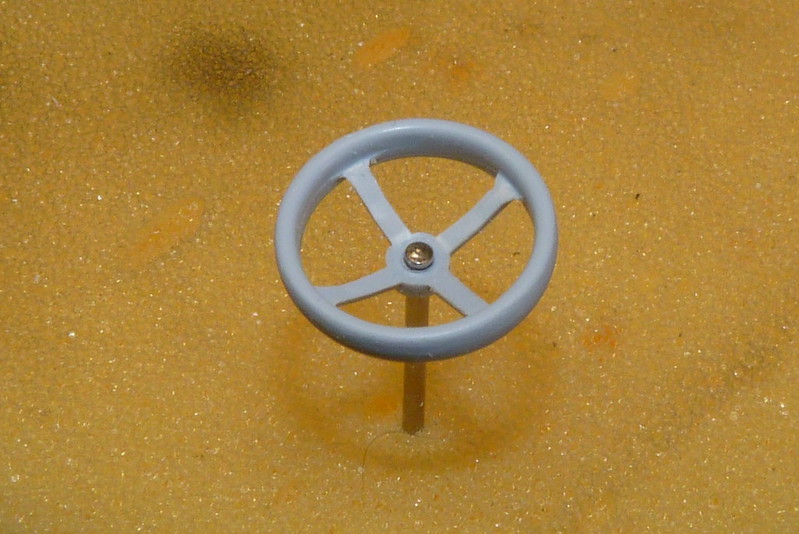
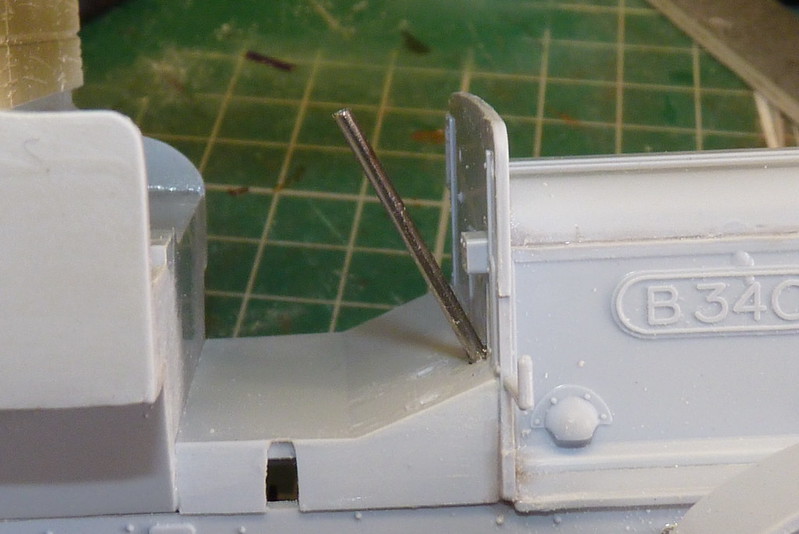
The syringe needle is going to act as the new and stronger steering column and it was just attached to the bus via the hole for the kit column using CA glue. Again I used reference shots to get the length and angle right. Well sort of.
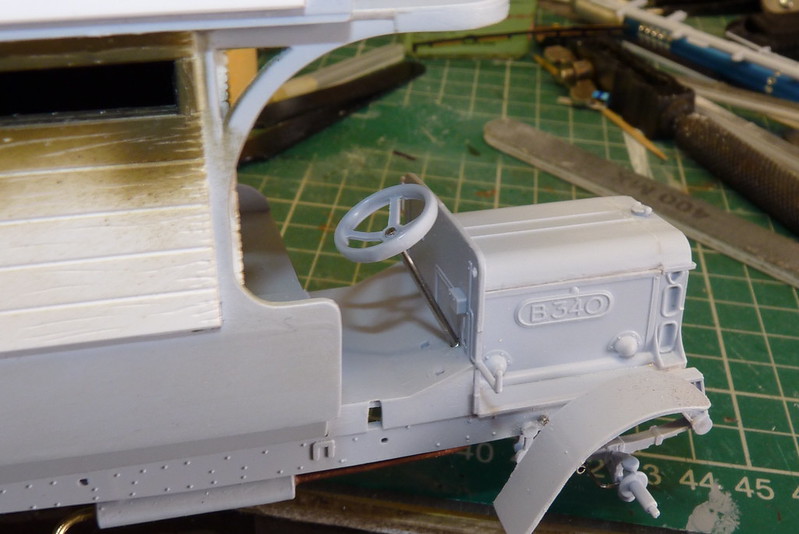
Now the steering wheel with attached pin just drops into the syringe needle.
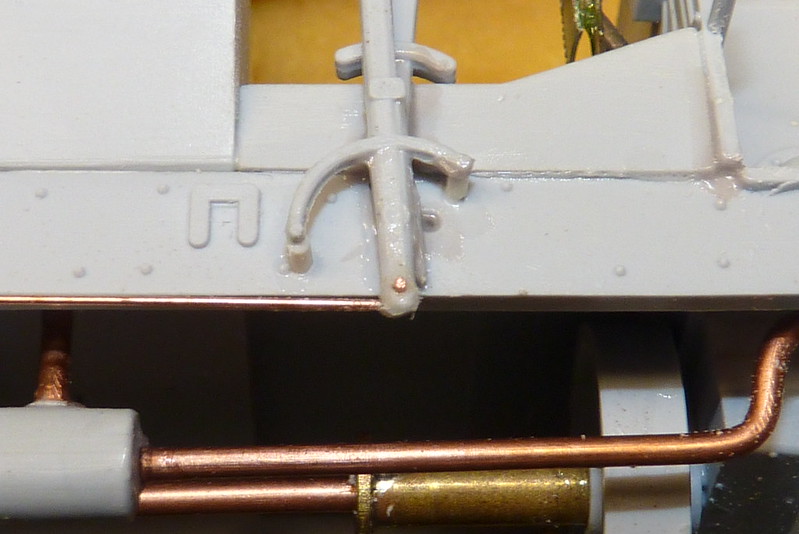
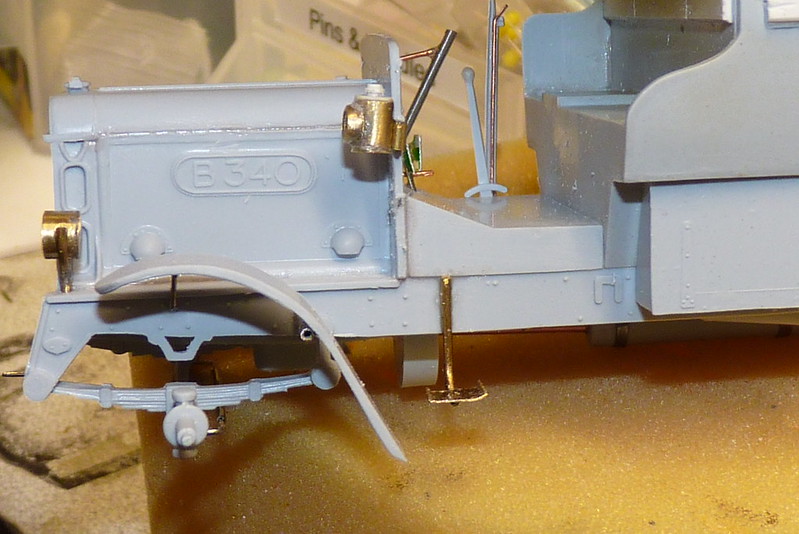
As with the steering column I wanted the make the foot pedals out of stronger stuff so for the pedal shaft I used a pin and for the pedal foot plate I used metal cut from a mackerel tin. The third pedal is made from copper wire as is the steering column support.
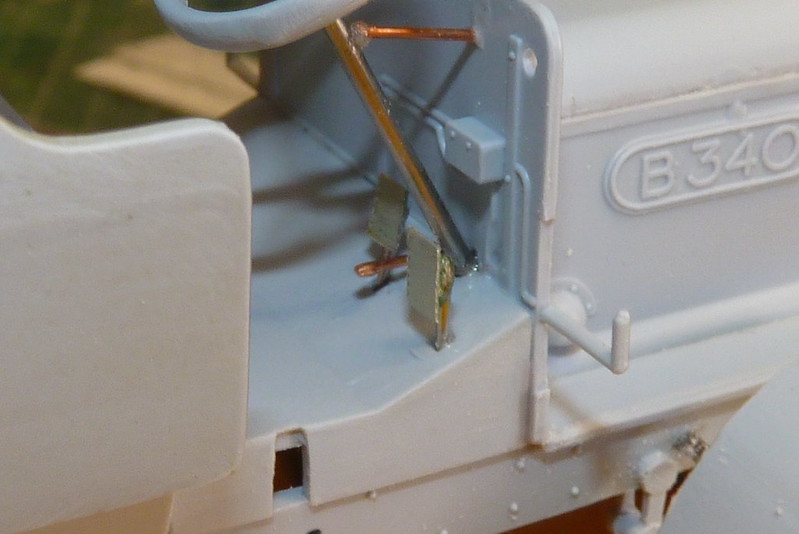
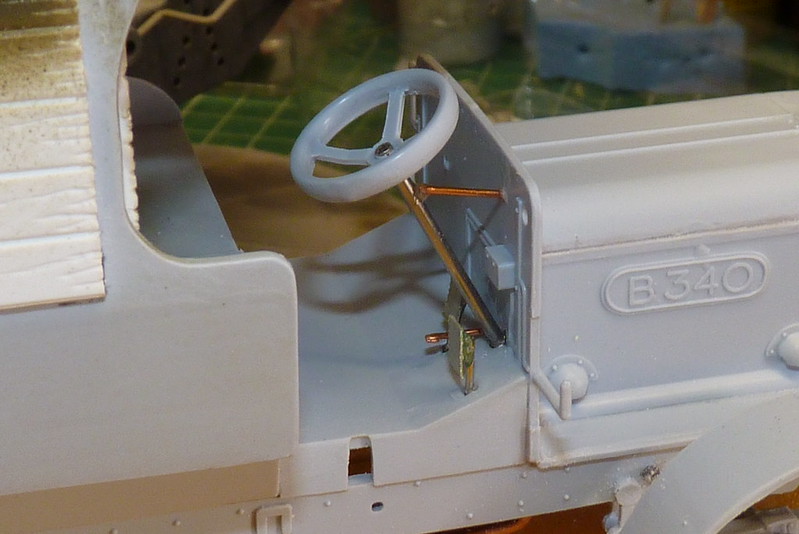
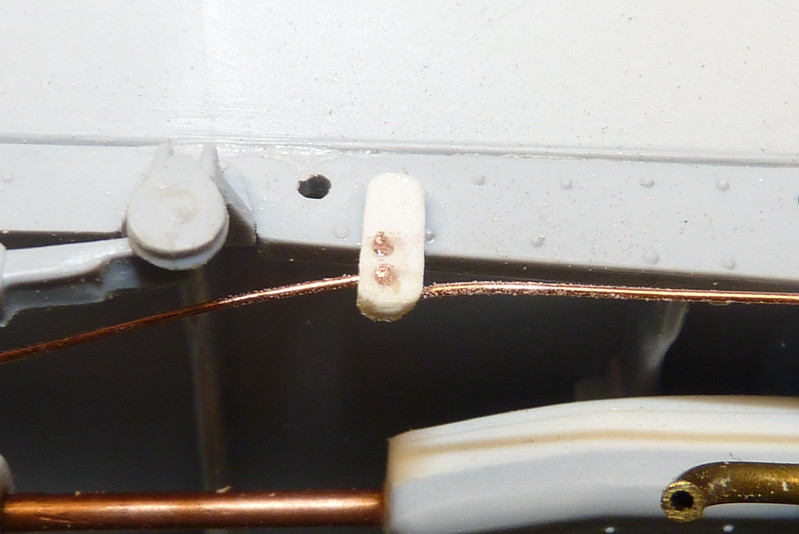
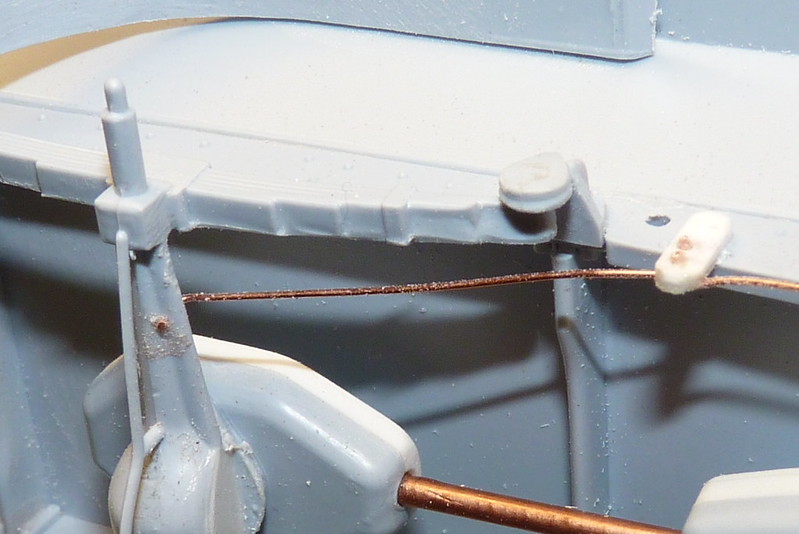
With the pedals done I moved on to the handbrake and gear lever. The larger of the two levers had the locking lever handle missing, so to get around this I glued copper wire the full length of the lever to give more strength and to add a locking lever handle. I have tried to get the levers in the right position for the bus to be stationary but to do this one of the ratchets is in the wrong position but I can live with that. I also added the connecting rods from the levers along the body to the rear wheel hub made from copper wire.
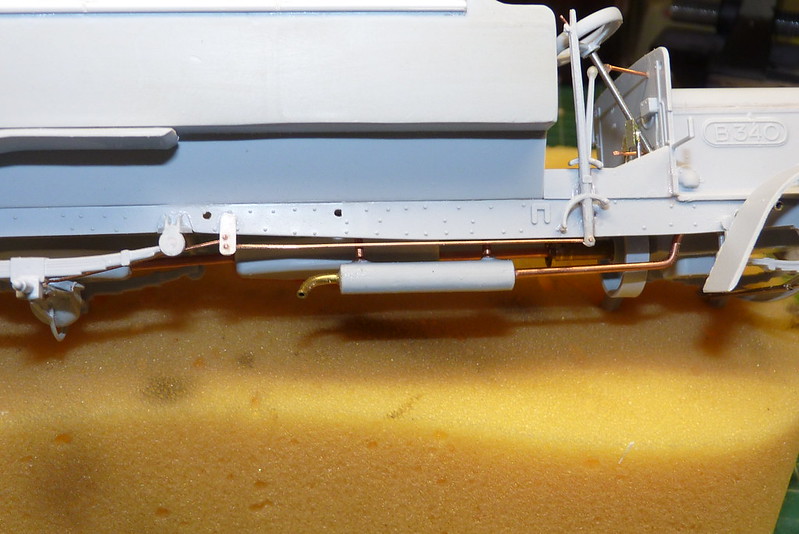
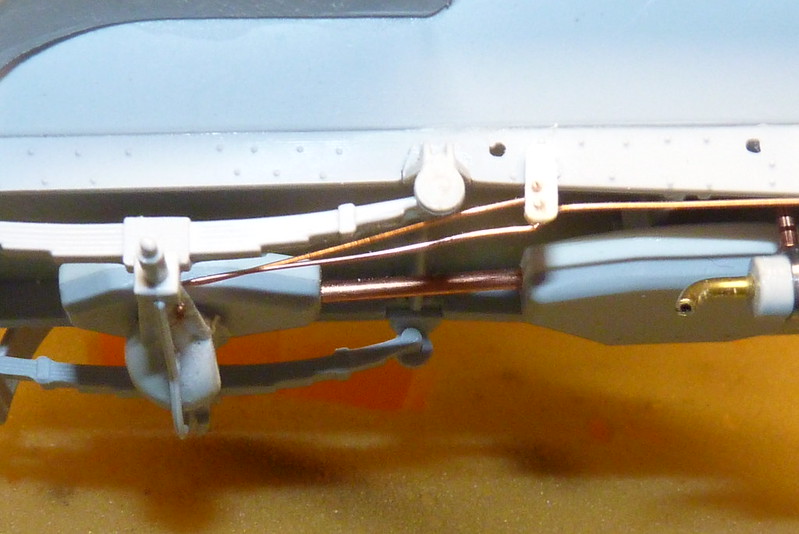
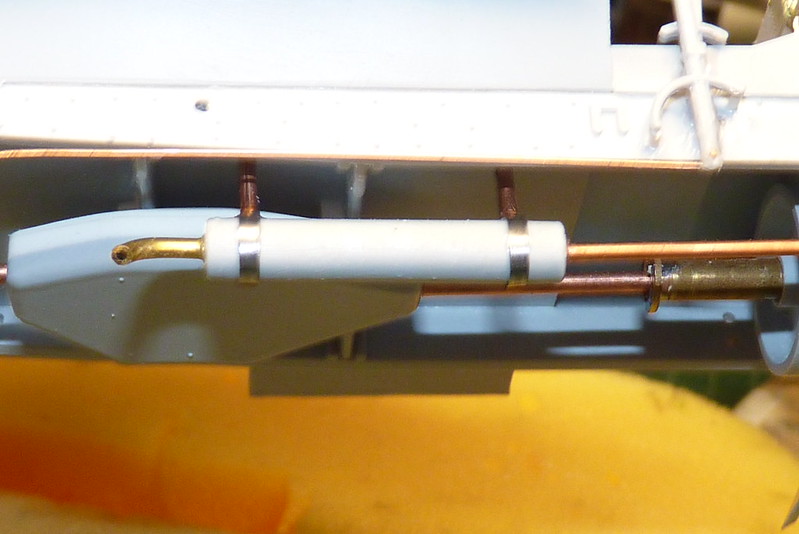
I also added the support bands for the silencer made from lead fishing weights.
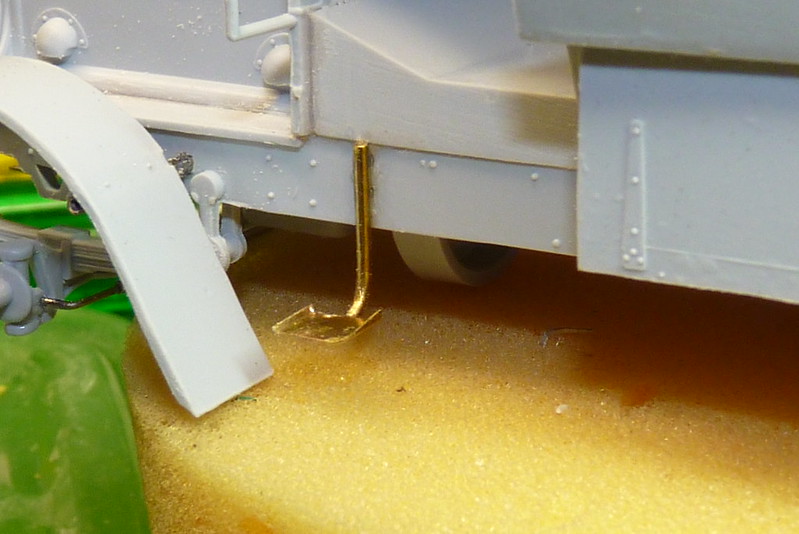
My next little job was to add the step for the driver. That kit part I think could do with a bit of improvement.
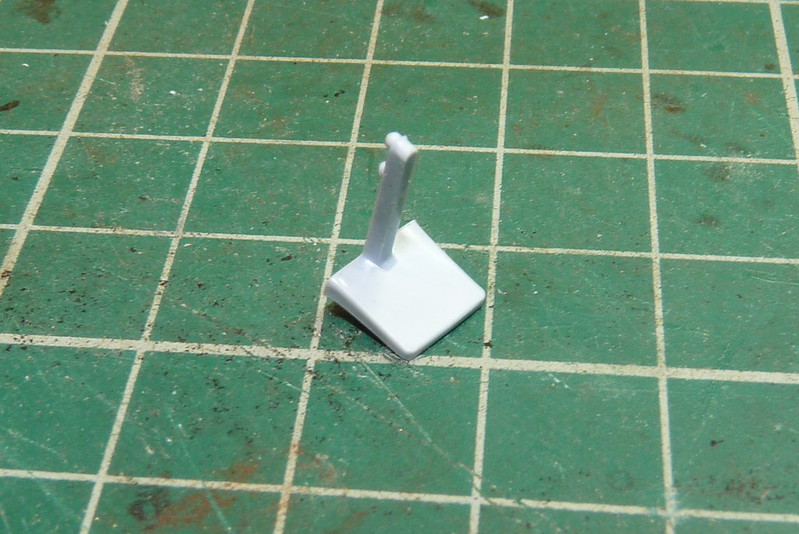
For this I used brass from a photo etch sprue for the foot plate and brass rod for the support. I bent the brass rod and cut the sprue to size and joined them using my soldering iron.
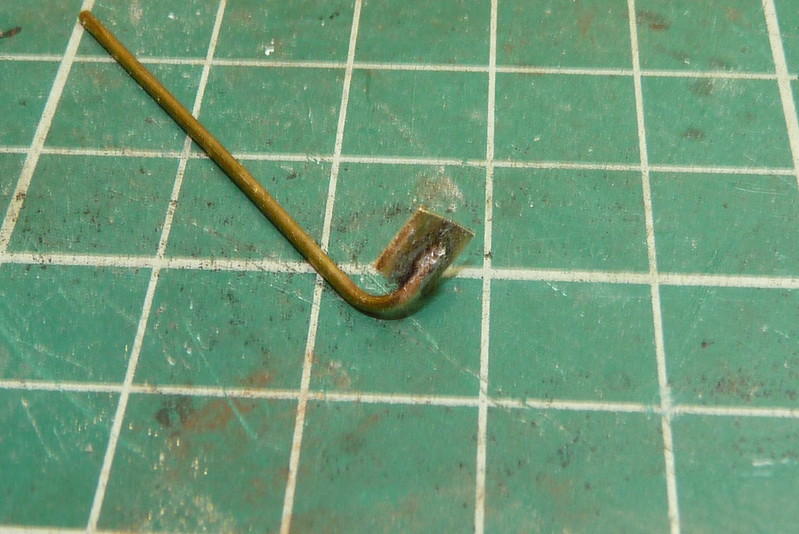
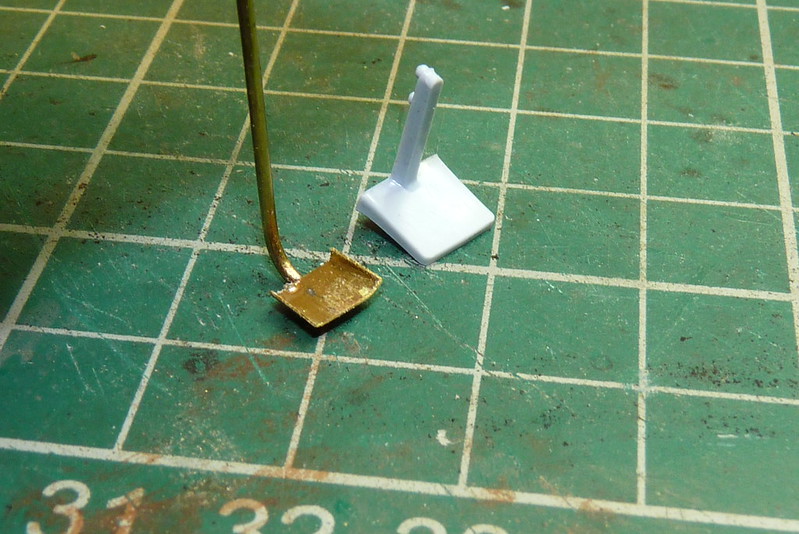
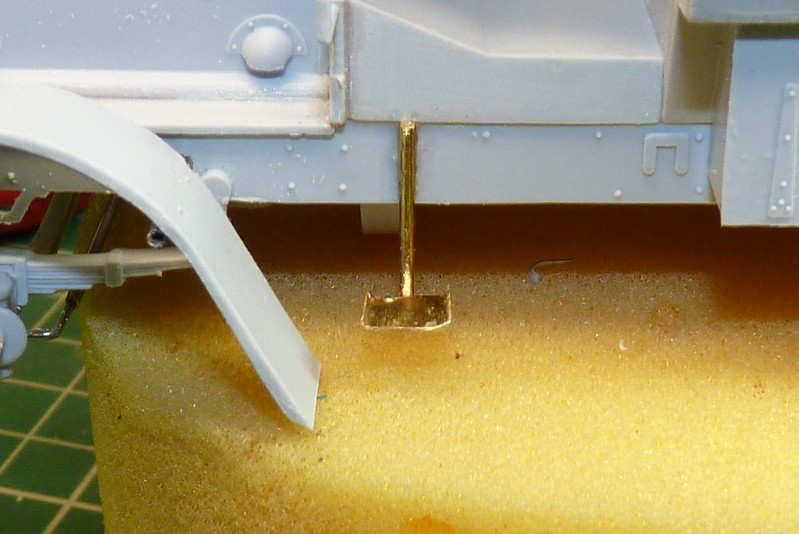
I cut the rod to size and glued it to the bus.
Continuing with handrails I had a look at the rear platform rail and I wasn't impressed with the kit one.
So I thought it time to get out the copper wire again. I used the kit part as a guide and I made my own using smooth flat nose pliers as before to straighten the wire and put some of the bends in. For the curl at the bottom end of the rail I used the shaft of a 4mm drill bit as a guide to bend the wire around.
I must be getting good at bending wire as the fit was spot on and it was just a case of attaching the rail to the bus using CA glue.
Next I glued the rear platform barrier. The instructions don't give a good view of this so I used some reference photo's from the web to give me a better idea of how it is attached.
I didn't want to use the steering column from the kit so used a syringe needle and a pin as they would be stronger.
To attach the wheel I drilled a hole in the centre of the steering wheel to take the pin.
Then using CA glue I attached the pin to the steering wheel.
The syringe needle is going to act as the new and stronger steering column and it was just attached to the bus via the hole for the kit column using CA glue. Again I used reference shots to get the length and angle right. Well sort of.
Now the steering wheel with attached pin just drops into the syringe needle.
As with the steering column I wanted the make the foot pedals out of stronger stuff so for the pedal shaft I used a pin and for the pedal foot plate I used metal cut from a mackerel tin. The third pedal is made from copper wire as is the steering column support.
With the pedals done I moved on to the handbrake and gear lever. The larger of the two levers had the locking lever handle missing, so to get around this I glued copper wire the full length of the lever to give more strength and to add a locking lever handle. I have tried to get the levers in the right position for the bus to be stationary but to do this one of the ratchets is in the wrong position but I can live with that. I also added the connecting rods from the levers along the body to the rear wheel hub made from copper wire.
I also added the support bands for the silencer made from lead fishing weights.
My next little job was to add the step for the driver. That kit part I think could do with a bit of improvement.
For this I used brass from a photo etch sprue for the foot plate and brass rod for the support. I bent the brass rod and cut the sprue to size and joined them using my soldering iron.
I cut the rod to size and glued it to the bus.
Cheers
Ian
Please click on the web link below to have a look at all my photo's.
https://www.flickr.com/photos/ecirpnai/albums
Ian
Please click on the web link below to have a look at all my photo's.
https://www.flickr.com/photos/ecirpnai/albums
-
general rocket

- Modelling Gent and Scholar
- Posts: 2790
- Joined: May 1st, 2011, 4:42 pm
- Location: Telford
Re: 1/32 Airfix World War One B Type Bus "Old Bill"
Some serious work going on here.
I wish, that I knew what was doing!
-
gnomemeansgnome

- Modelling Gent and Scholar
- Posts: 5269
- Joined: July 16th, 2013, 4:03 pm
- Location: No Fun City
Re: 1/32 Airfix World War One B Type Bus "Old Bill"
Very serious work. This looks amazing.
Ego no habeo consilium.
ICBM = Insatiable Collector and Builder of Models
ICBM = Insatiable Collector and Builder of Models
-
iggie
- Modelling Gent and Scholar
- Posts: 23424
- Joined: July 31st, 2013, 11:04 am
- Location: North Somercotes, Lincolnshire
- Contact:
Re: 1/32 Airfix World War One B Type Bus "Old Bill"
Well, that's another kit I won't be bothering with now.... 
Seriously though Ian, the detail going into this is going to make it a masterpiece I suspect!
Seriously though Ian, the detail going into this is going to make it a masterpiece I suspect!
Best wishes
Jim
If you can walk away from a landing, it's a good landing. If you use the airplane the next day, it's an outstanding landing
"Never put off till tomorrow, what you can do the day after tomorrow"
Jim
If you can walk away from a landing, it's a good landing. If you use the airplane the next day, it's an outstanding landing
"Never put off till tomorrow, what you can do the day after tomorrow"
-
ShaunW
- NOT the sheep
- Posts: 26180
- Joined: November 26th, 2011, 6:11 pm
- Location: Pontefract West Yorkshire
Re: 1/32 Airfix World War One B Type Bus "Old Bill"
Top class stuff Ian, the detail that you have added has seriously lifted this to the next level. As you always do!
Doing - Tamiya 1/35th Universal Carrier.
Work is the curse of the modelling classes!
IPMS#12300
Work is the curse of the modelling classes!
IPMS#12300
-
Molesworth

- Getting well comfy!
- Posts: 51
- Joined: May 1st, 2011, 6:32 am
- Location: North Shropshire
Re: 1/32 Airfix World War One B Type Bus "Old Bill"
Very nice, I must get around to finishing mine. I don't know how I could have attempted it without cyanoacrylate. Even so the whole is very fragile and I ended up sticking the front mudguards back together half a dozen times before I found a suitable base.
I never finish anythi......
-
Clashcityrocker

- Modelling Gent and Scholar
- Posts: 10808
- Joined: May 1st, 2011, 12:31 am
- Location: Adelaide. South Australia
Re: 1/32 Airfix World War One B Type Bus "Old Bill"
This is looking very special. Love the paint rack too
Nigel
Nigel
-
Sunray
- Active Participant
- Posts: 611
- Joined: March 18th, 2014, 4:01 pm
- Location: Penshaw, North East, England
- Contact:
Re: 1/32 Airfix World War One B Type Bus "Old Bill"
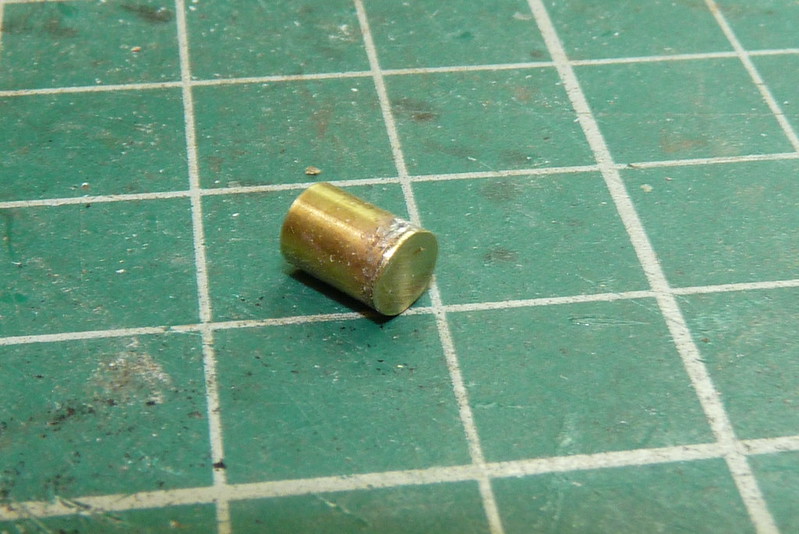
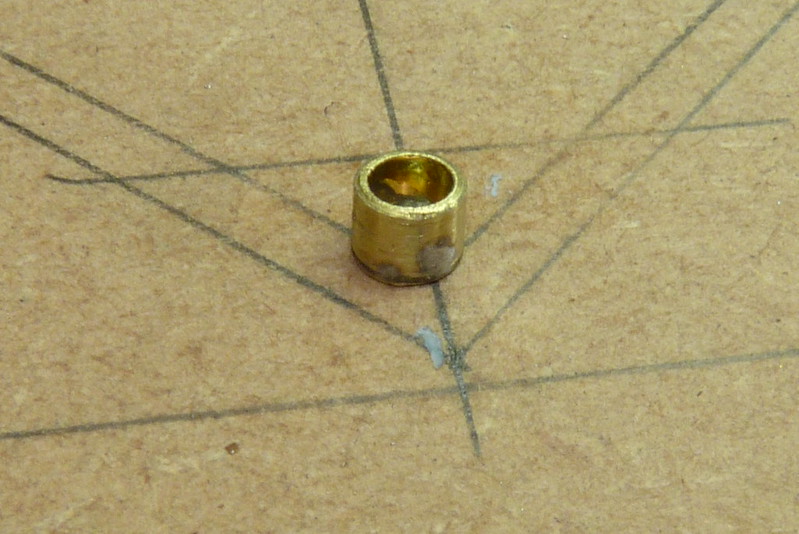
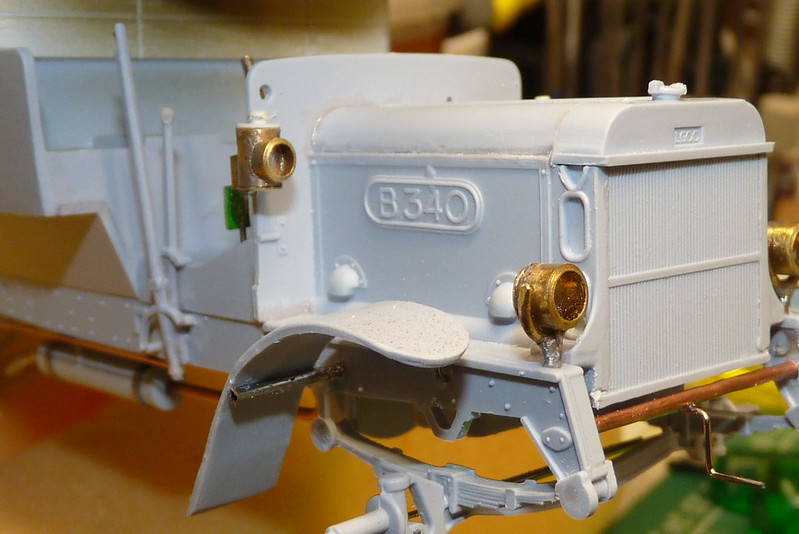
Thanks chaps. I looked at the lights provided in the kit and I wasn't impressed so I decided to have ago and make my own. The kit lights are carriage lamps fitted to the bulkhead behind the engine so I had a look at what bits I had knocking around and I decided to use brass tubing as its stronger than plastic and it roughly the right size I was after. Using my pipe cutter I cut off a small piece of tubing.
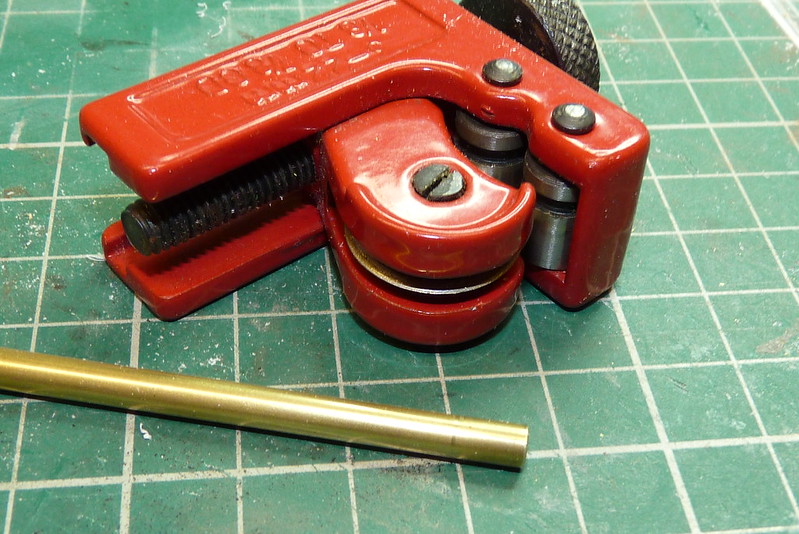
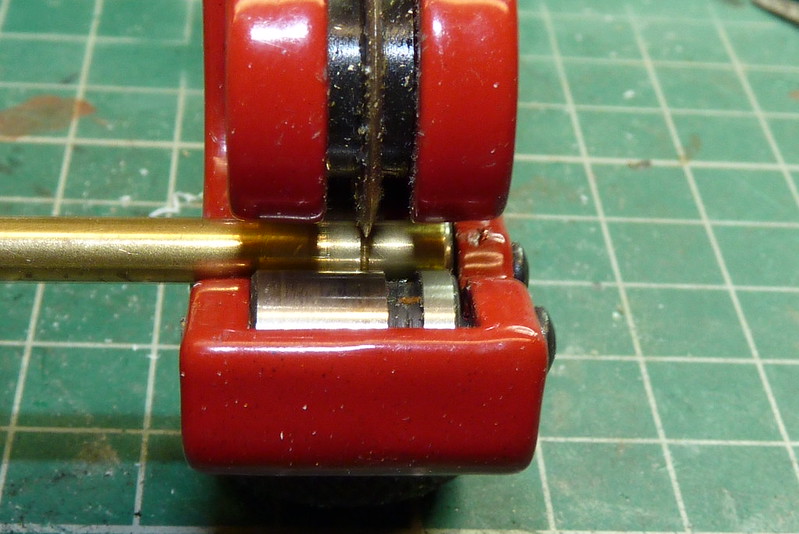
The pipe cutter is easy to use all you is decide where you want to cut on the tubing and tighten up the grub screw until it just bites. Then you hold onto the cutter in one hand and turn the tube with the other. If you can't turn the tubing then the grub screw is too tight so just loosen until the tube can be turned. After a few turns you will find it gets easier to turn then you tighten up the grub screw and carry on turning the tubing until again it gets easier. After a few minutes of doing this the cutter will give a clean even cut.

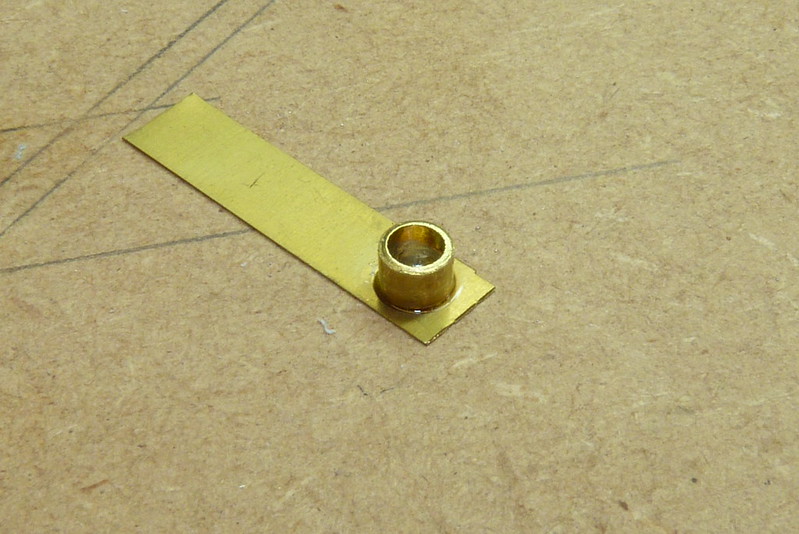
This piece is going to be the main body of the lamp. As the lamp is going to be suspended I used a piece of scrap brass from and old photo etch sprue as the base.

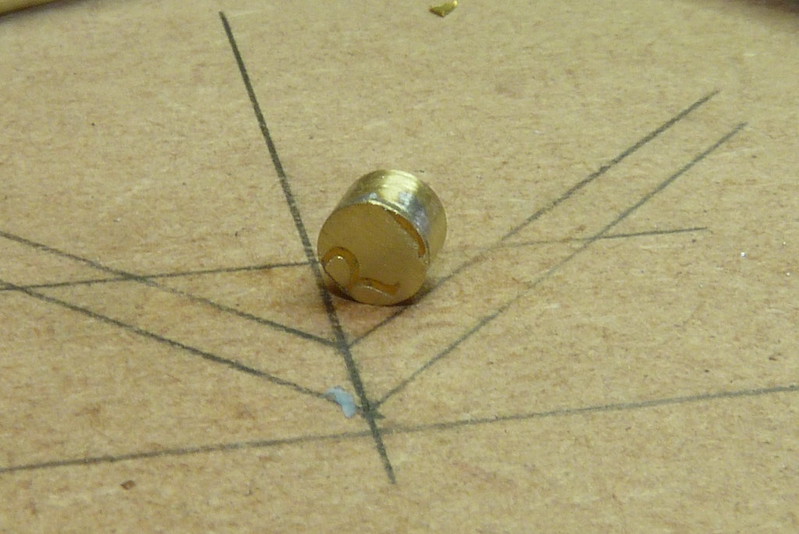
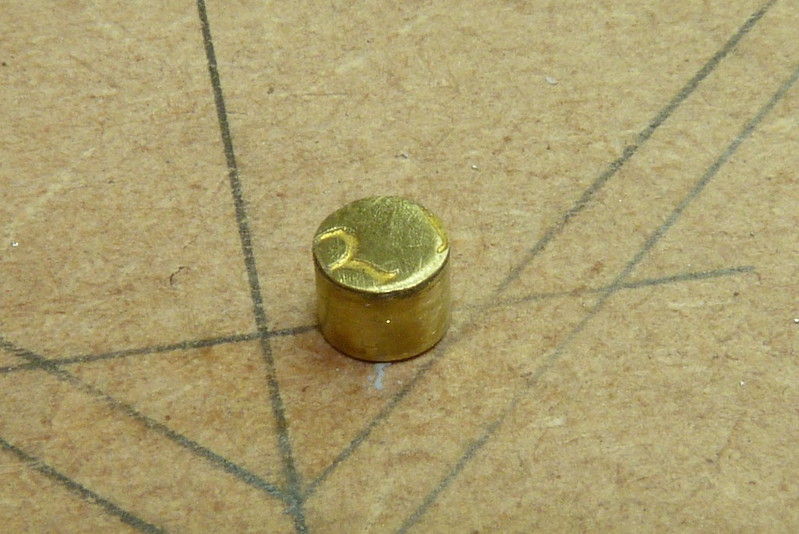
To attach the base I decided to use solder but you could use CA glue.
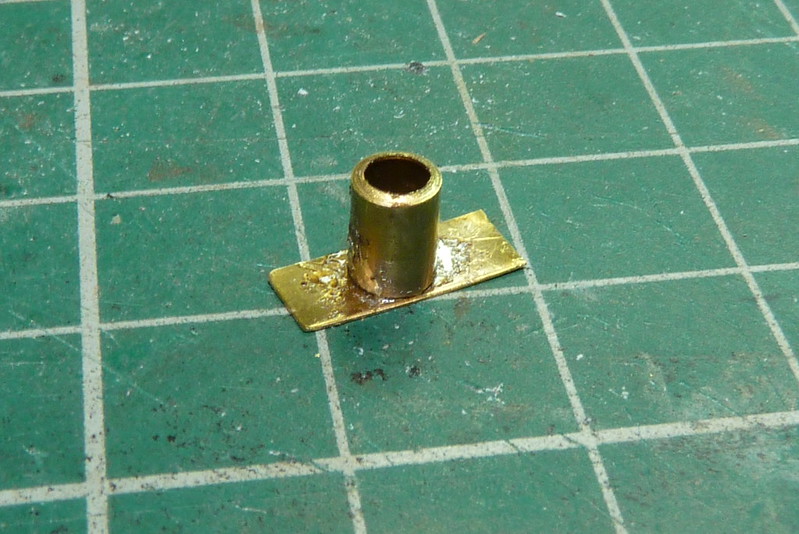
I could have cut a brass disc out the diameter of the tube but the small size would have been a nightmare to solder so I soldered the tube to the base and then cut around the tube to remove excess brass. It was just a case of filing and sanding to tidy it up.
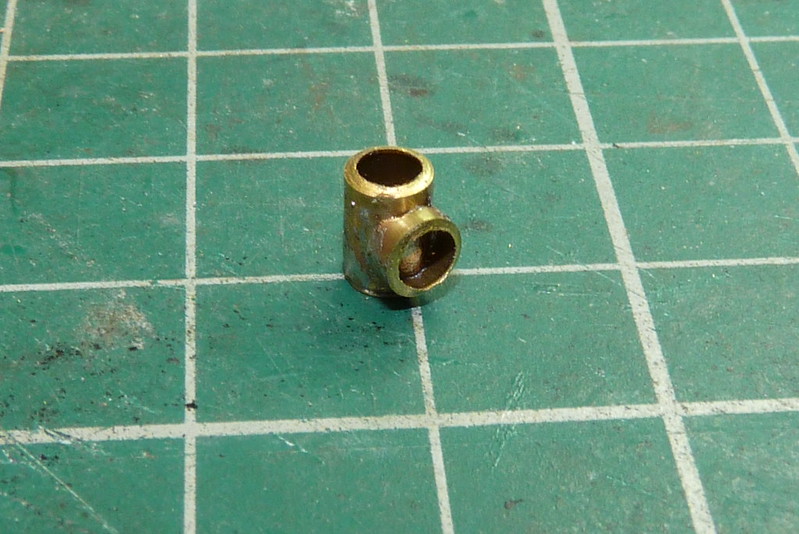
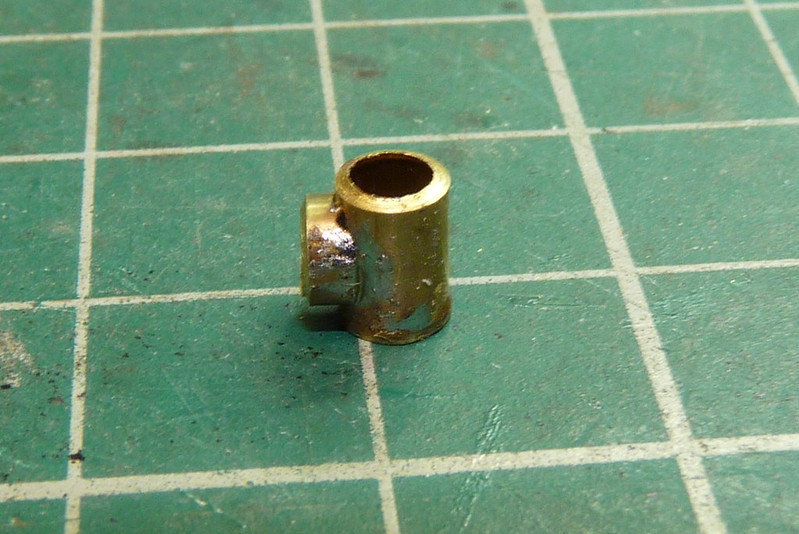
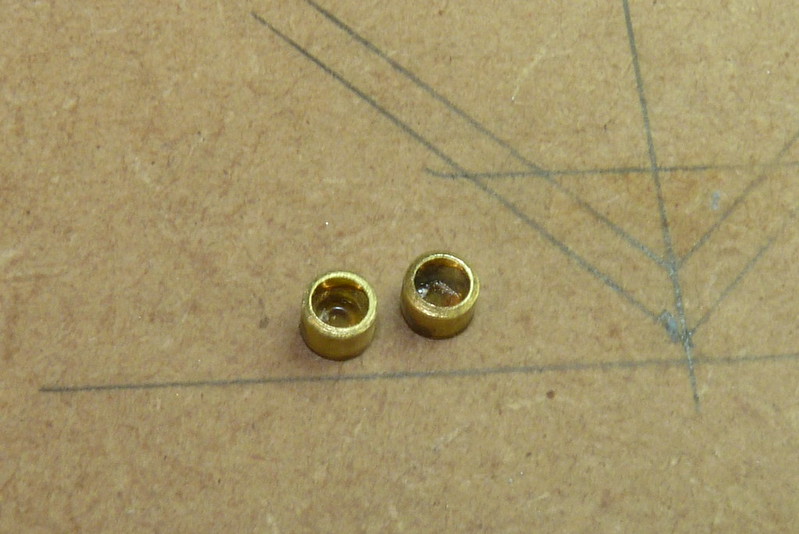
For the lens holder I used the same size brass tube. Using a small half round file I filed a round "dent" in the end of the tube big enough to go half way round the lamp body.

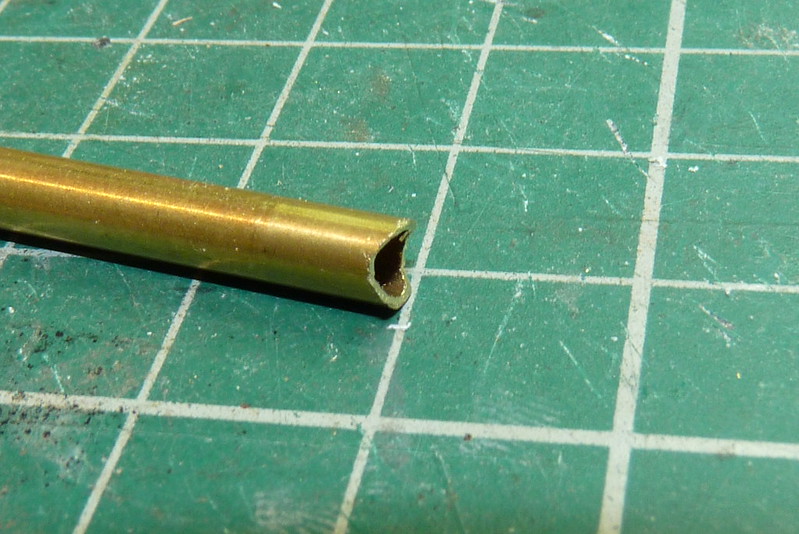
Then using the pipe cutter I cut this off the tubing.
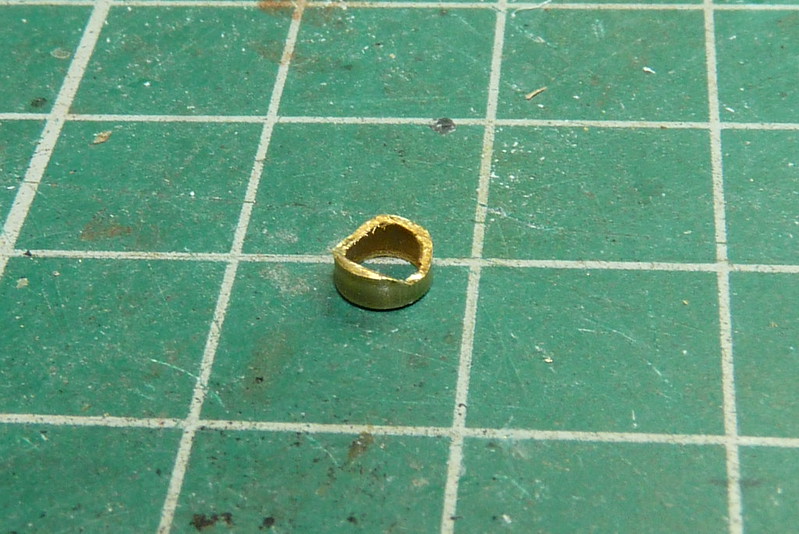
Now using a pair of sprung tweezers to hold them in position I soldered these together.
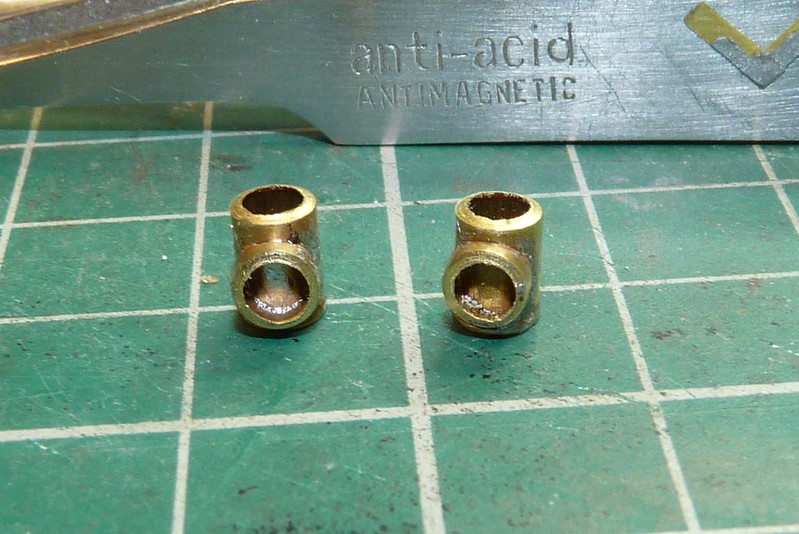
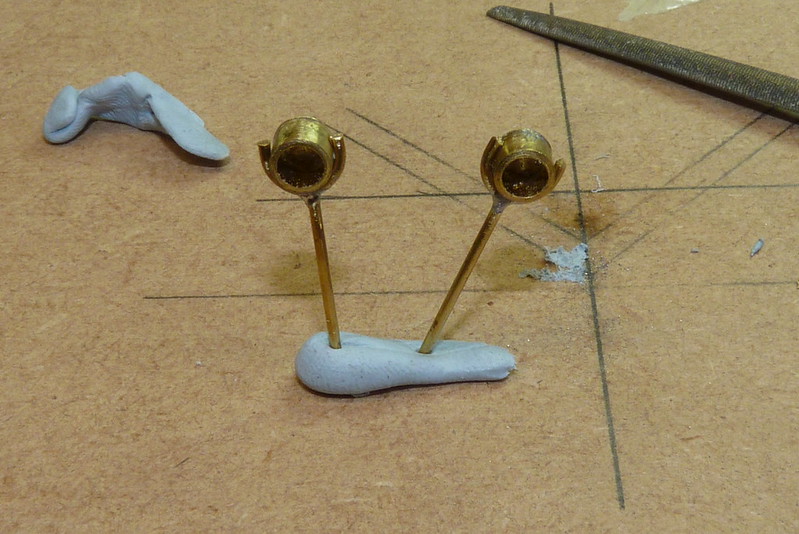
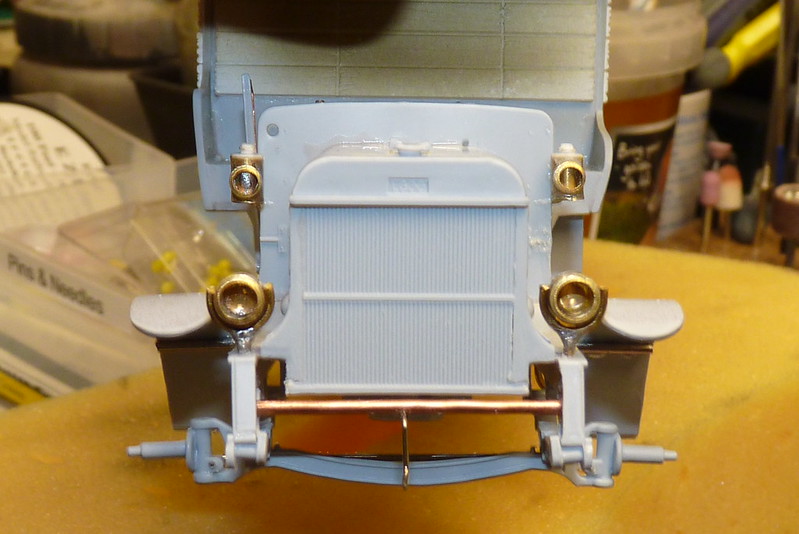
While I was thinking how I was going to do the tops of the lamps and how I was going to attach them to the bus I thought I would have to look at a few photo's. After looking at old photo's of buses in the First World War I decided to add one thing the kit doesn't provide and that is headlights. The carriage lamps can wait. I had to also workout how I was going to make them but this is what I came up with. I looked at what brass tubing I had and I picked the one with the biggest internal diameter then using my trusty pipe cutter, I cut a small of tubing 1/8" in length. I then soldered it to a piece of brass sprue as I did for the carriage lamps.
I cut off the excess brass as before.
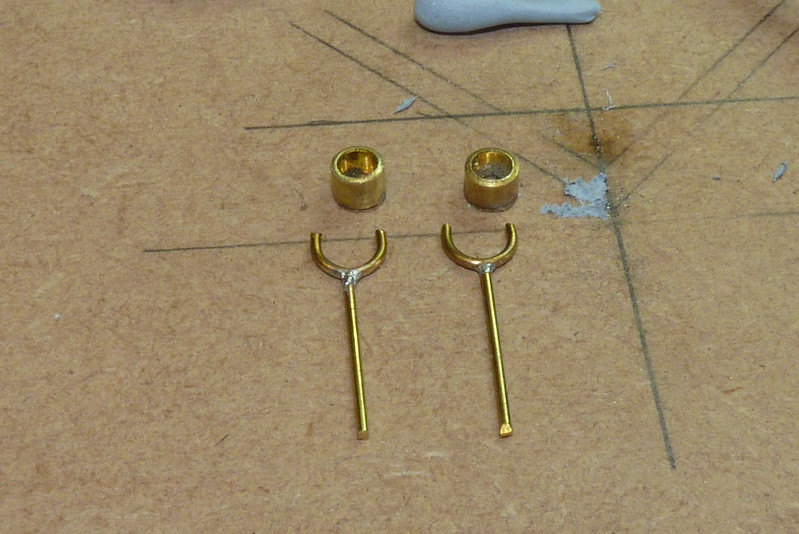
Now I had to make the headlight mounts. I used small brass rod which I first bent around tubing the same diameter as the lights.
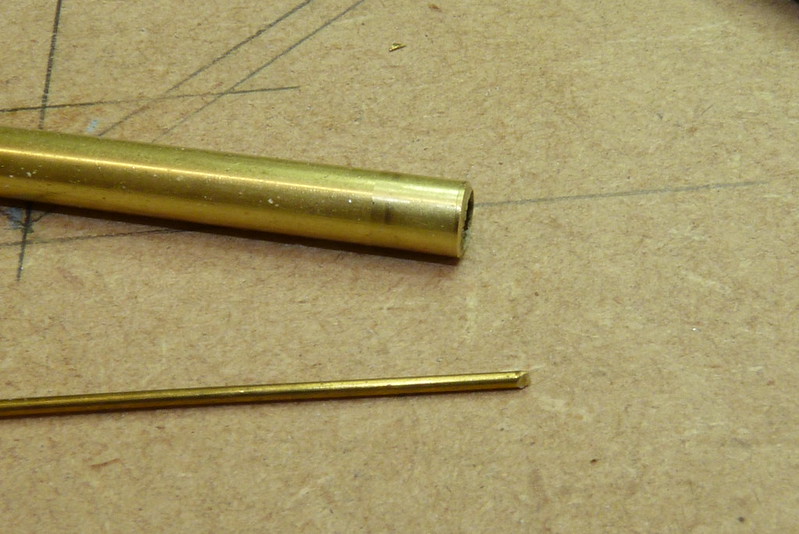

Then I cut the rod to size.
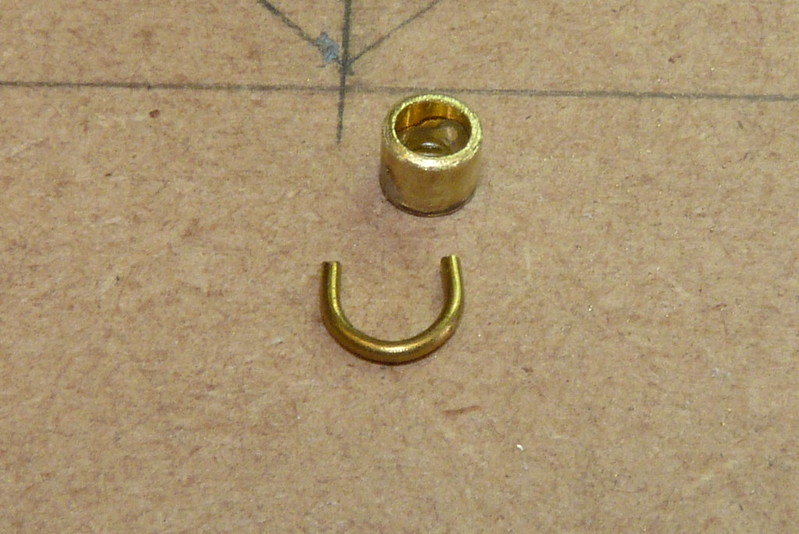
Using pliers I gave the jaws of the "U" a nip so they were a touch tighter touching the light.
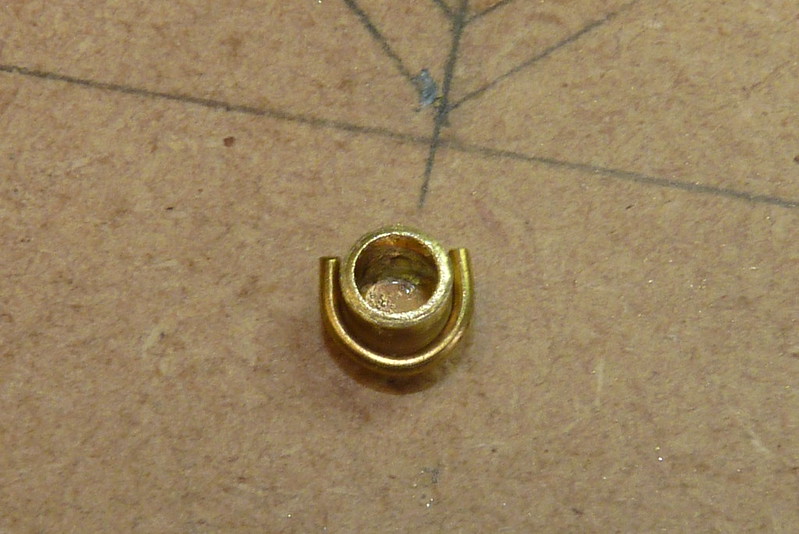
Now using another piece of the brass rod and a scrap piece of MDF with right angles marked I arranged the "U" and rod and temporarily suck them down with Blu-tak. Then I joined them using solder again.
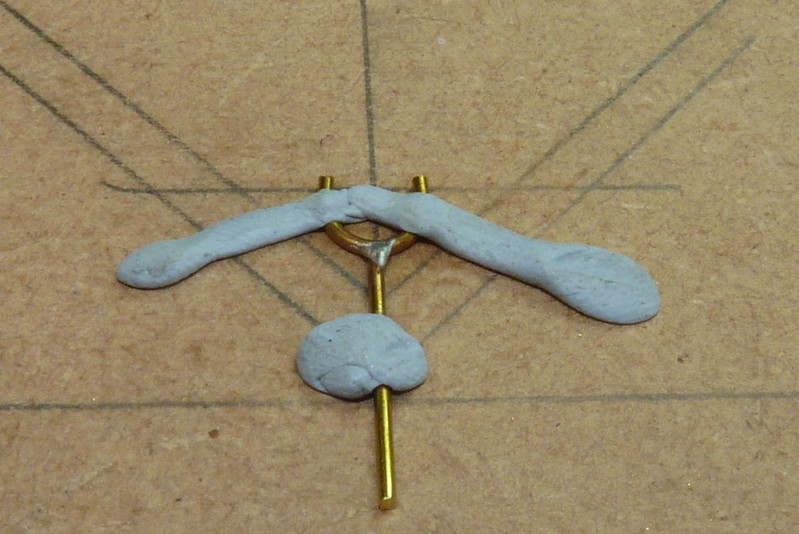
The first one was easy to make but the second was a pain as the solder kept snapping as I didn't get it all the way around but I got there in the end.
Now it was just a case of shortening the brass rod and drilling the holes in the bus. Then I glued in place using CA glue.
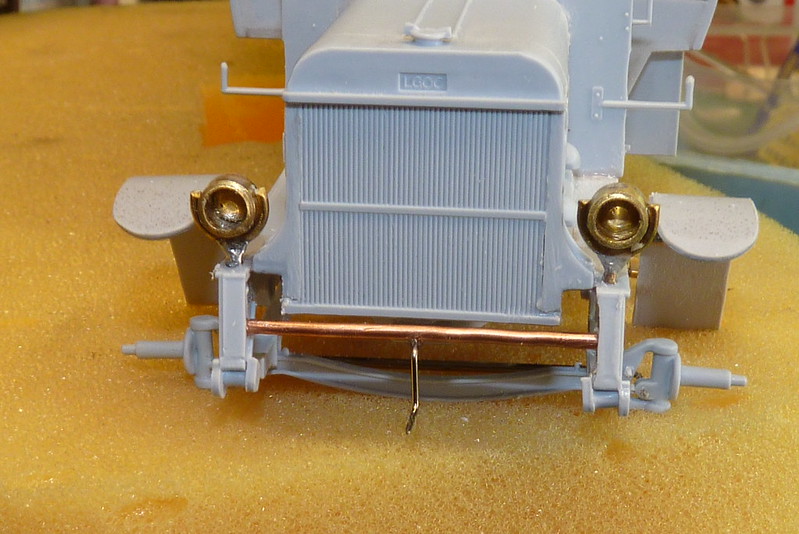
They aren't exactly accurate but I think they do the job and it passed an hour or two. All I have to do is paint the interior silver and make the lenses.
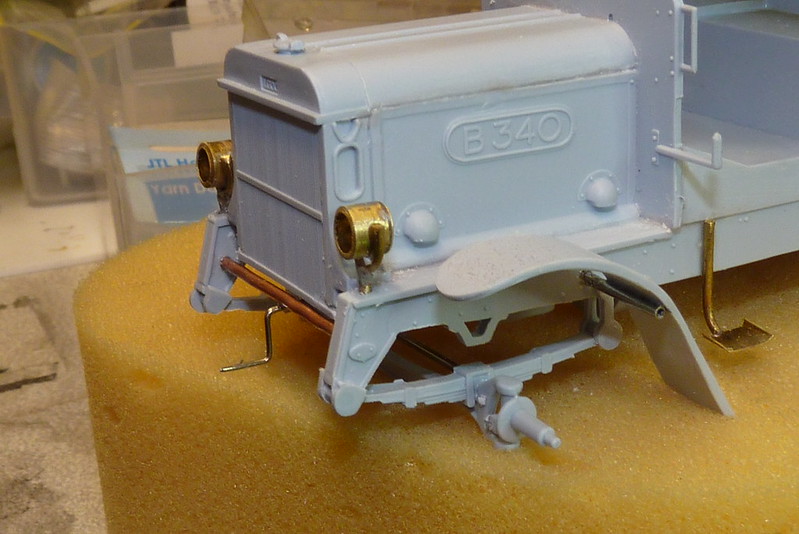
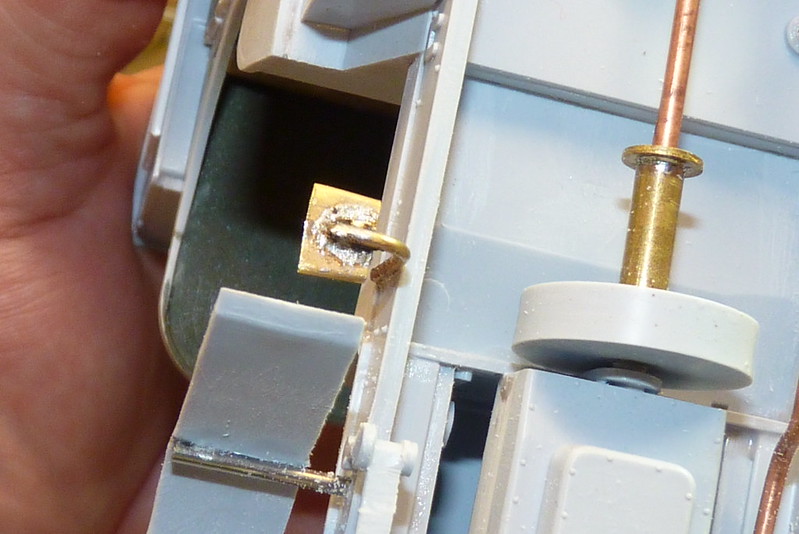
or the carriage lamps I used plasticard for the tops. I also added a small piece of small diameter brass tubing to the back of the lamp. I cut off the kit mounts and made new ones from bent pins and I drilled small holes in the side of the bulkhead or dashboard and I glued the pins with CA glue. To attach the lamps I just hung them via the newly added tubing on the back of the lamp on the pins and then I glue them to make them secure. I am going to do the lenses the same as the headlights.

The pipe cutter is easy to use all you is decide where you want to cut on the tubing and tighten up the grub screw until it just bites. Then you hold onto the cutter in one hand and turn the tube with the other. If you can't turn the tubing then the grub screw is too tight so just loosen until the tube can be turned. After a few turns you will find it gets easier to turn then you tighten up the grub screw and carry on turning the tubing until again it gets easier. After a few minutes of doing this the cutter will give a clean even cut.
This piece is going to be the main body of the lamp. As the lamp is going to be suspended I used a piece of scrap brass from and old photo etch sprue as the base.
To attach the base I decided to use solder but you could use CA glue.
I could have cut a brass disc out the diameter of the tube but the small size would have been a nightmare to solder so I soldered the tube to the base and then cut around the tube to remove excess brass. It was just a case of filing and sanding to tidy it up.
For the lens holder I used the same size brass tube. Using a small half round file I filed a round "dent" in the end of the tube big enough to go half way round the lamp body.
Then using the pipe cutter I cut this off the tubing.
Now using a pair of sprung tweezers to hold them in position I soldered these together.
While I was thinking how I was going to do the tops of the lamps and how I was going to attach them to the bus I thought I would have to look at a few photo's. After looking at old photo's of buses in the First World War I decided to add one thing the kit doesn't provide and that is headlights. The carriage lamps can wait. I had to also workout how I was going to make them but this is what I came up with. I looked at what brass tubing I had and I picked the one with the biggest internal diameter then using my trusty pipe cutter, I cut a small of tubing 1/8" in length. I then soldered it to a piece of brass sprue as I did for the carriage lamps.
I cut off the excess brass as before.
Now I had to make the headlight mounts. I used small brass rod which I first bent around tubing the same diameter as the lights.
Then I cut the rod to size.
Using pliers I gave the jaws of the "U" a nip so they were a touch tighter touching the light.
Now using another piece of the brass rod and a scrap piece of MDF with right angles marked I arranged the "U" and rod and temporarily suck them down with Blu-tak. Then I joined them using solder again.
The first one was easy to make but the second was a pain as the solder kept snapping as I didn't get it all the way around but I got there in the end.
Now it was just a case of shortening the brass rod and drilling the holes in the bus. Then I glued in place using CA glue.
They aren't exactly accurate but I think they do the job and it passed an hour or two. All I have to do is paint the interior silver and make the lenses.
or the carriage lamps I used plasticard for the tops. I also added a small piece of small diameter brass tubing to the back of the lamp. I cut off the kit mounts and made new ones from bent pins and I drilled small holes in the side of the bulkhead or dashboard and I glued the pins with CA glue. To attach the lamps I just hung them via the newly added tubing on the back of the lamp on the pins and then I glue them to make them secure. I am going to do the lenses the same as the headlights.
Cheers
Ian
Please click on the web link below to have a look at all my photo's.
https://www.flickr.com/photos/ecirpnai/albums
Ian
Please click on the web link below to have a look at all my photo's.
https://www.flickr.com/photos/ecirpnai/albums
-
Clashcityrocker
- Modelling Gent and Scholar
- Posts: 10808
- Joined: May 1st, 2011, 12:31 am
- Location: Adelaide. South Australia
Re: 1/32 Airfix World War One B Type Bus "Old Bill"
Some more excellent work Ian. It's going to look very nice under paint. 
Nigel
Nigel