For delicate scribing, I like a fine saw, such as one might use with resin, lightly run back and forth to be a decent method. On those curved "door" surface you can just let it ride along on the curves. Sometimes a thin CA bead in the new seam helps keep bits from breaking out.
BTW, great job shaping that replacement panel.
Rob's flagship
-
JohnRatzenberger

- Why is he so confused ?
- Posts: 15734
- Joined: April 5th, 2011, 3:42 pm
- Location: Living on a sandbar - Nags Head, NC.
Re: Rob's flagship
John Ratzenberger 
It's my model and I'll do what I want with it.
It's my model and I'll do what I want with it.
-
rob_van_riel
- Modelling Gent and Scholar
- Posts: 3325
- Joined: November 4th, 2012, 11:28 am
- Location: The Netherlands
- Contact:
Re: Rob's flagship
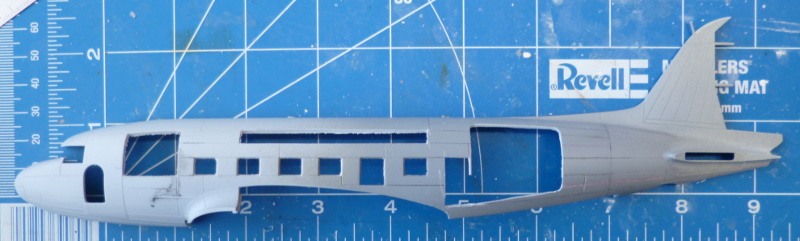
Real life got in the way for a bit, but I got the panel lines copied from the right side of the fuselage to the newly blanked off left side. Some lines also had to be covered over; not only were they not needed in this situation, but they were quite disorienting during copying,
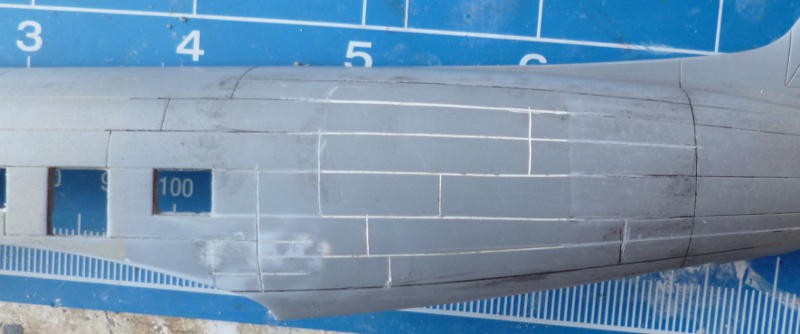
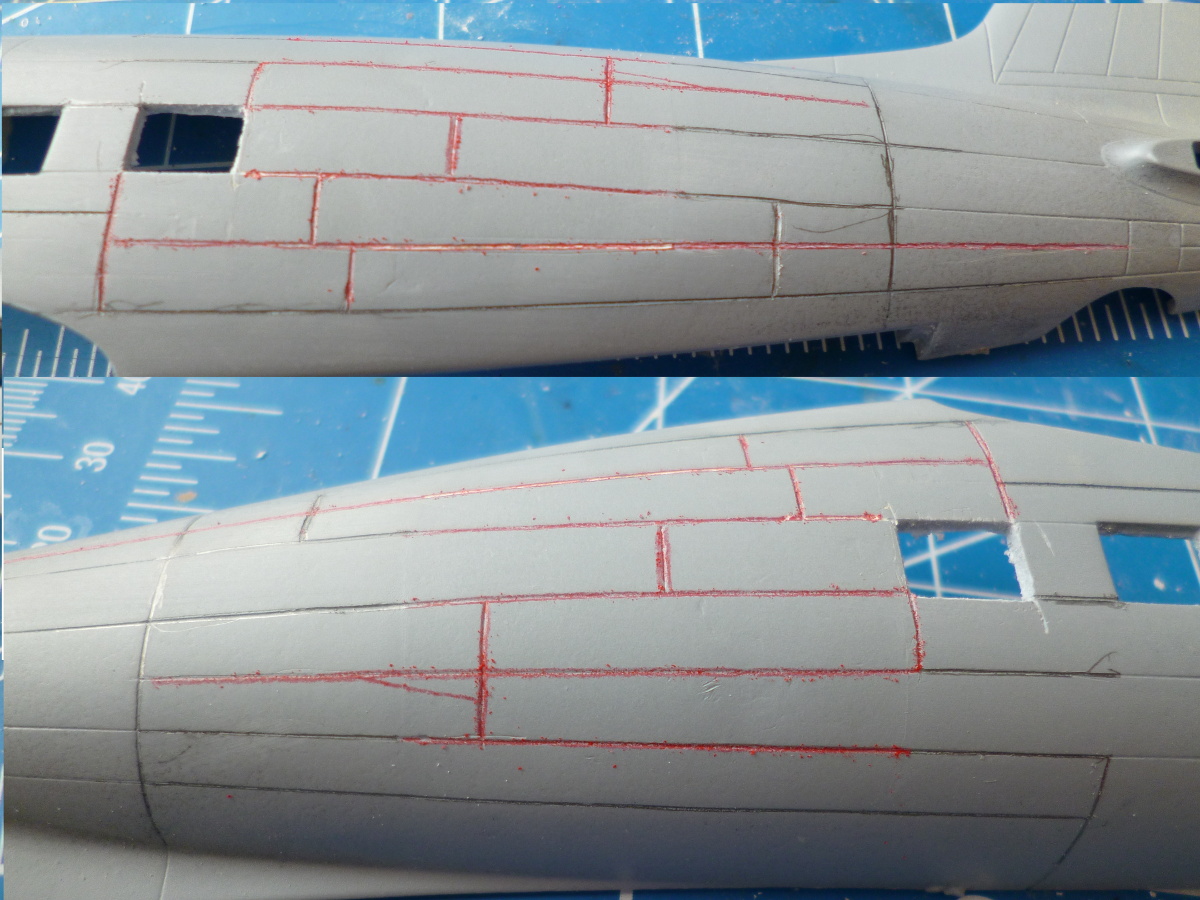
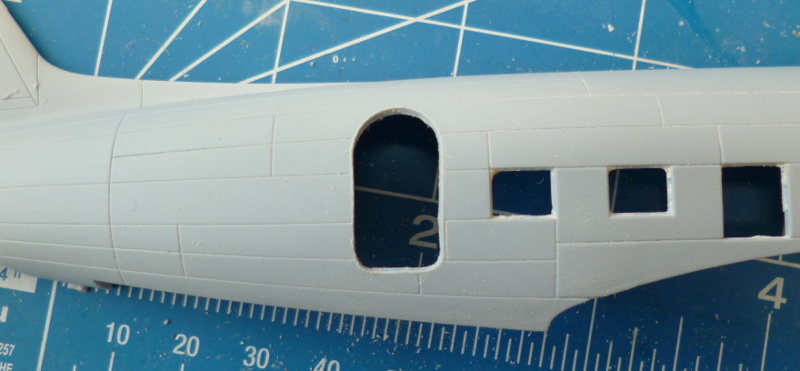
That done, it was time to cut out the extra window, or rather, the hole for this window. That way I could neatly line it up to panel lines, rather than try to keep some distance from them. I'll be making window frames anyway, so the hole is the same size as the kit holes. Just for kicks, I marked the original panel lines black, and the new ones red for the photo.
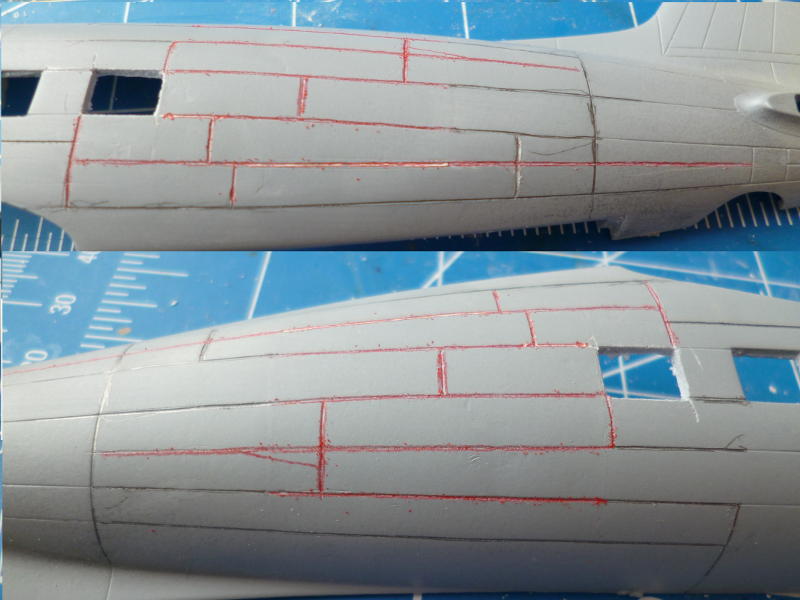
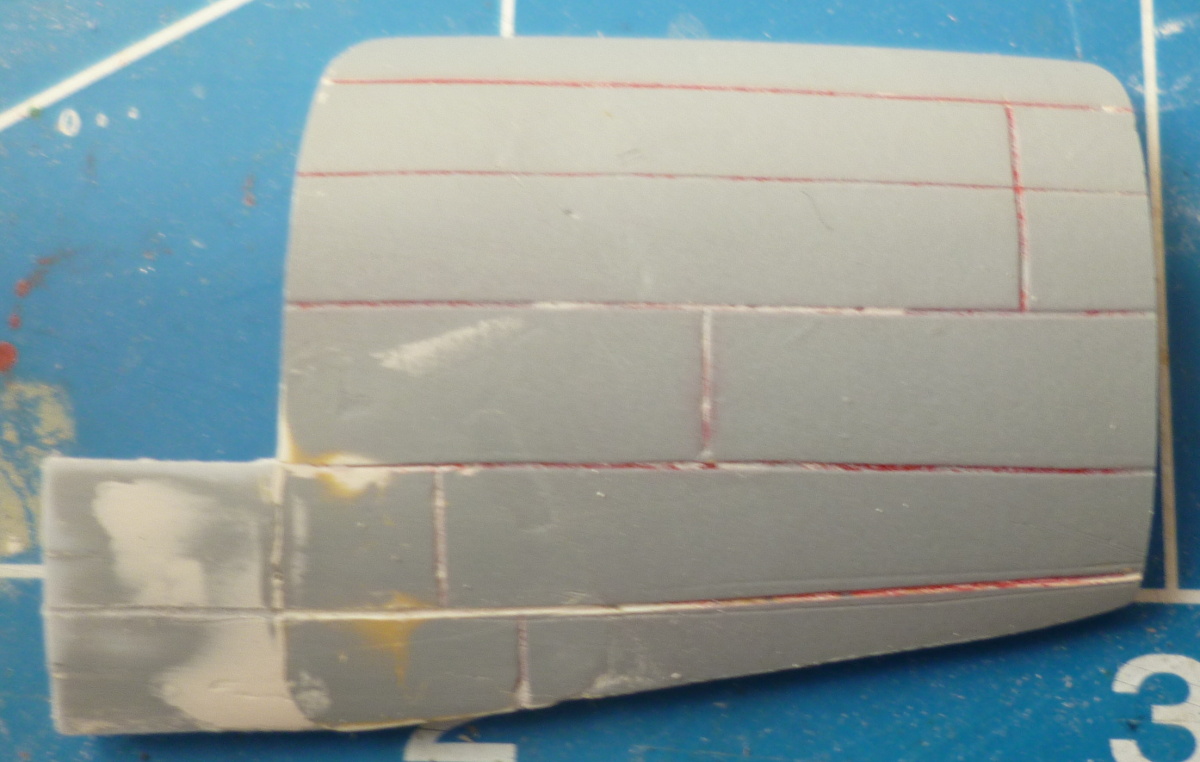
Didn't come out too bad, I think. Pity I then had to rip the whole lot out again. The plan has been all along to use the parts made here as masters, and that means separating them from the large model just when they're at their best. I added the section below the new rear window to the door insert, in hopes that this will help lining up the cuts for similar windows of future conversions.

The door insert, along with a bunch of windowframes, is now sitting at the bottom of a slowly curing pool of rubber. I suspect it will be tomorrow before I can pour on the second half of the mould, which means the first casts should be available on Wednesday. Fingers crossed...

That done, it was time to cut out the extra window, or rather, the hole for this window. That way I could neatly line it up to panel lines, rather than try to keep some distance from them. I'll be making window frames anyway, so the hole is the same size as the kit holes. Just for kicks, I marked the original panel lines black, and the new ones red for the photo.
Didn't come out too bad, I think. Pity I then had to rip the whole lot out again. The plan has been all along to use the parts made here as masters, and that means separating them from the large model just when they're at their best. I added the section below the new rear window to the door insert, in hopes that this will help lining up the cuts for similar windows of future conversions.
The door insert, along with a bunch of windowframes, is now sitting at the bottom of a slowly curing pool of rubber. I suspect it will be tomorrow before I can pour on the second half of the mould, which means the first casts should be available on Wednesday. Fingers crossed...
-
rob_van_riel
- Modelling Gent and Scholar
- Posts: 3325
- Joined: November 4th, 2012, 11:28 am
- Location: The Netherlands
- Contact:
Re: Rob's flagship
The first casts are done and de-moulded. Looks good, I think. I'll leave the inserts to cure overnight, then get down to the job of actually installing the final panel and the windows into the left fuselage half.
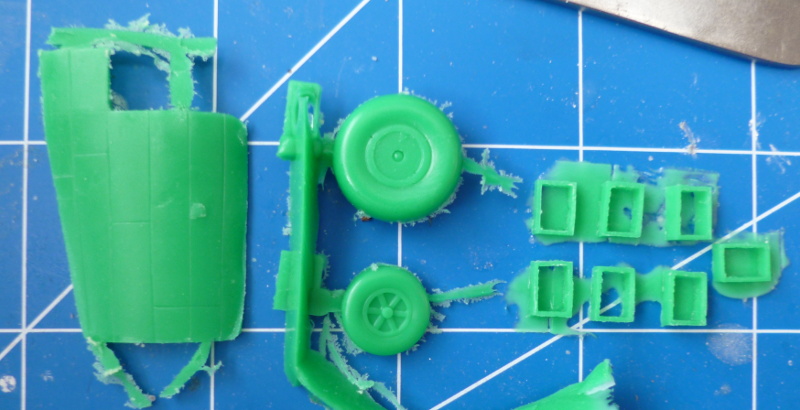
The wheels have nothing to do with this project; they're for a Rareplanes Constellation I'll be building some other time.
The wheels have nothing to do with this project; they're for a Rareplanes Constellation I'll be building some other time.
-
rob_van_riel
- Modelling Gent and Scholar
- Posts: 3325
- Joined: November 4th, 2012, 11:28 am
- Location: The Netherlands
- Contact:
Re: Rob's flagship
Now look what you made me do...airjim wrote:Oh, yes, try for a DST instead!
DST it is..
The right side will start suffering similar indignities soon
DSTs are funny old critters. Aside from the extra row of top windows, they had 6 windows on the left side (losing the front most window from the usual 7), but 8 on the right side (gaining one in front of the first). The top window that would sit over the front window on the left is there, despite the fact that the window is not, providing some extra light in the luxury front compartment. Later on, the DSTs became rather less exclusive liners with 8 rows of seats, gaining the full eight windows on the left side. This means I'll be making a panel with the extra windows up front, and then blanking out the front two main windows.
Anyone confused yet? I am...
-
gnomemeansgnome

- Modelling Gent and Scholar
- Posts: 5269
- Joined: July 16th, 2013, 4:03 pm
- Location: No Fun City
Re: Rob's flagship
Douglas SCT (Swiss cheese transport). Very cool conversion work.
Ego no habeo consilium.
ICBM = Insatiable Collector and Builder of Models
ICBM = Insatiable Collector and Builder of Models
-
splash

- Senior Service Rotorhead
- Posts: 13828
- Joined: May 1st, 2011, 11:02 am
- Location: Somerset England
Re: Rob's flagship
You should publish this thread in paperback form, its brilliant, I just wish I had your skills and patients.
My work bench is starting to look like Portsmouth Naval Dockyard.
-
rob_van_riel
- Modelling Gent and Scholar
- Posts: 3325
- Joined: November 4th, 2012, 11:28 am
- Location: The Netherlands
- Contact:
Re: Rob's flagship
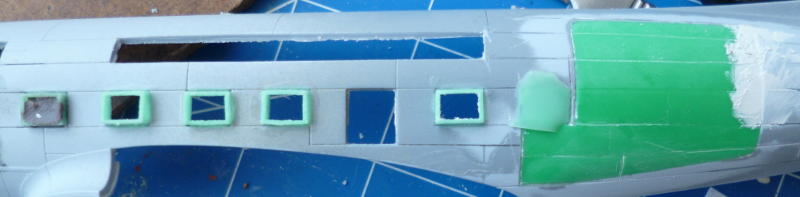
Restoration of the left fuselage half has begun. The cast rear door section has been mounted and lightly sanded. This was enough for all but the rear edge, which needed just a dab of filler. I've also inserted the window frames on this side. They're visibly raised above the surface, but that is by design. There's no way I can get them thin and accurate enough to fit perfectly, so I didn't even try. As long as length and width are OK, sandpaper will deal with the rest. The front window was then plugged with five minute epoxy (I could have saved myself the effort of fitting a window frame first, but in my enthousiasm I forgot to skip the first window..). Making a virtue out of necessity, I glued a frame without the backing sheet sanded off into the new window hole; this does not have the rims for the frames the original holes have, and I figured the backing sheet would be just the thing to keep the frame in place until the CA is cured. A bit more in situ sanding will obviously be needed, but that's a small price to pay for not having to hold the parts together with big clumsy fingers while the CA sets, running the risk of developing the wrong kind of attachment to the project..
On future conversions, I'll have the option of using kit supplied windows instead of these frames, since I'll obviously end up with quite a number of spares from this model.
On future conversions, I'll have the option of using kit supplied windows instead of these frames, since I'll obviously end up with quite a number of spares from this model.
-
rob_van_riel
- Modelling Gent and Scholar
- Posts: 3325
- Joined: November 4th, 2012, 11:28 am
- Location: The Netherlands
- Contact:
Re: Rob's flagship
A selection of the more extensive projects documented on this forum could certainly be turned into a nice little publication, should anyone want to make the effort. Your own conversion of Belfast would be just as much of a candidate as this one, as would the car conversions/scratchbuilds going on here, or the figure conversions, just to name a few from just this GB.splash wrote:You should publish this thread in paperback form, its brilliant, I just wish I had your skills and patients.
-
rob_van_riel
- Modelling Gent and Scholar
- Posts: 3325
- Joined: November 4th, 2012, 11:28 am
- Location: The Netherlands
- Contact:
Re: Rob's flagship
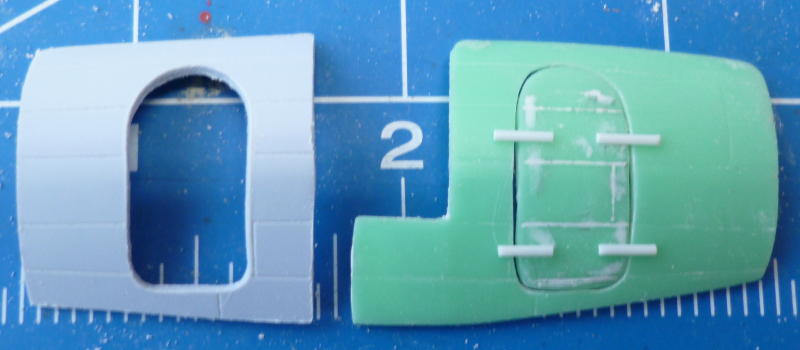
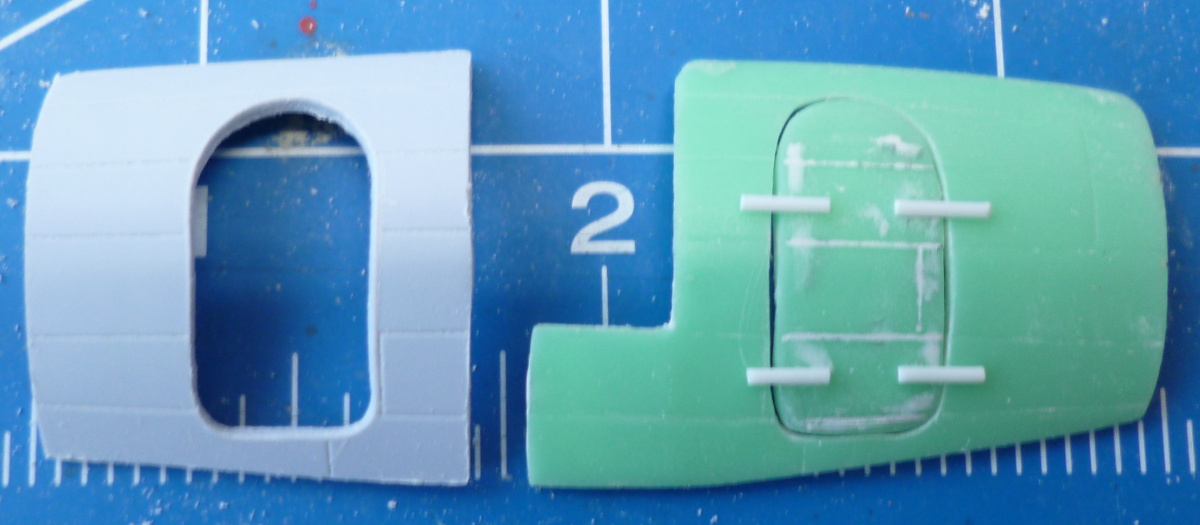
I need DC-3 doors for both sides of the fuselage (not just for this build). The doors are a complex shape, with only a few straight lines, so freestyling those was out of the question. The Esci kit has just such a door in the civilian inserts they supply with the corresponding boxings, but unfortunately, it is not a separate part. That means scratching out the door from the kit part (this is why I opted to use the Esci part; the Italeri has a much thicker wall...). Half an hour or so with a pin in an appropriately named pinvise gave a separated door, and a frame with a door shaped hole in it. I then used the frame as a guide to scratch out the outline of the door on one of the castings for the left side fuselage plug, and then proceeded to scratch all the way through that horribly thick piece of resin. This gave me the master for the left-doored DC-3s, as well as the actual door.
With the position of the door now easily determined relative to the panel lines, I stuck the Esci door to the right fuselage half of the Airfix, and got down to some further scratching.
Time to start messing with rubber again, for the doored inserts.
With the position of the door now easily determined relative to the panel lines, I stuck the Esci door to the right fuselage half of the Airfix, and got down to some further scratching.
Time to start messing with rubber again, for the doored inserts.
-
JohnRatzenberger
- Why is he so confused ?
- Posts: 15734
- Joined: April 5th, 2011, 3:42 pm
- Location: Living on a sandbar - Nags Head, NC.
Re: Rob's flagship
I've been watching your thread but it wasn't until now that I realized I didn't know what a DST was - my bad.
That is some surgery there - fascinating !
That is some surgery there - fascinating !
John Ratzenberger
It's my model and I'll do what I want with it.
It's my model and I'll do what I want with it.
-
rob_van_riel
- Modelling Gent and Scholar
- Posts: 3325
- Joined: November 4th, 2012, 11:28 am
- Location: The Netherlands
- Contact:
Re: Rob's flagship
Always happy to contribute to the 'learn something new every day' rulejRatz wrote:I've been watching your thread but it wasn't until now that I realized I didn't know what a DST was - my bad.
Fortunately, the end is is sight; two more holes to cut into the right fuselage, then complete the set of moulds, and re-build the fuselage with the result. 'Routine' surgery, if there's any such thing. The scratchbuilding for the interior is now ramping up, but I have nothing worth showing just yet.That is some surgery there - fascinating !
Heading full throttle towards DNF territory of course, but I'm having way too much fun to change course
-
rob_van_riel
- Modelling Gent and Scholar
- Posts: 3325
- Joined: November 4th, 2012, 11:28 am
- Location: The Netherlands
- Contact:
Re: Rob's flagship
Moulds for the final exterior parts are now curing. Some will get their second halves tomorrow (two part moulds all the way), which means I should be able put the final fixes into the fuselage halves on Thursday.
I found I'd made the little skylights too wide. Part of the problem could be fixed on the replacement parts, four small patches will be required on the fuselage parts themselves (trivial compared to the rest of the surgery).
I've smoothed over the floor, since passenger planes don't have cargo tracks on the inside. A new forward bulkhead, to be located just in front of the eighth row of seats has been made of some very shaky extensions to the kit part that forms the rear of the radio rack. If I can complete this without breaking it in the process, that's the next part to be introduced to rubber and resin. The main door is also almost complete. No point waiting before setting up the current batch of moulds; I'm out of Lego anyway
Then there's chairs, bunk beds, cabinets and lots of other stuff I'll never finish on time to work on

-
rob_van_riel
- Modelling Gent and Scholar
- Posts: 3325
- Joined: November 4th, 2012, 11:28 am
- Location: The Netherlands
- Contact:
Re: Rob's flagship
I took a radical step today: I actually put in place two kit parts, without even altering them. I must be losing it..
The moulds for the remaining fuselage inserts are curing, just the emergency exits and the door left to go (masters are waiting for use), and I'll have all the parts for the exterior.
The interior is going to be interesting, since I'm gunning for something like this: https://group4aucb.files.wordpress.com/ ... tail60.jpg
-
rob_van_riel
- Modelling Gent and Scholar
- Posts: 3325
- Joined: November 4th, 2012, 11:28 am
- Location: The Netherlands
- Contact:
Re: Rob's flagship
I've been racking my brain all evening, but I can't seem to find any way of getting those bulkheads right without fitting them in place (no two are the same..), which is not what I want, but I may have to do just that. That would mean grabbing another Dakota from the stash, and building it to the point where I have the floor attached to the right fuselage half, which will have to be stripped of all ribbing. To keep things (relatively) simple, that means starting the build of a civilian with seven rows of seats, with the door on the left side. Fortunately, that means most early civilian Dakotas, so there's plenty to choose from. Still, this was not a sidestep I'd planned for 