Rob's Meteor salvage *Finished*

The one you have all been waiting for - Vac(u)-formed kits. Any subject, any kit, so long as the basis of the kit is vac-form (no, you can't enter an injection airplane with a vac-canopy). Started kits are eligible, within reason - this is a learning GB to introduce members the variety of kits, what can be accomplished with them, and to overcome any reluctance to add them to your modeling repertoire.
This is an extended GB, running 4 April to 31 May, and your hosts are Lancfan, SJPONeill, and Splash.
rob_van_riel
Modelling Gent and Scholar
Posts: 3325
Joined: November 4th, 2012, 11:28 am
Location: The Netherlands
Contact:

Re: Rob's Meteor salvage

Post by rob_van_riel »

rob_van_riel wrote:The resulting horrid mixture seems to be drying up as a very dirty windscreen. Even if I manage to salvage the canopy, it will set me back days, which I don't have.
The mess was as bad as expected. Cleanup, fortunately, seems to be less of a hassle than feared; leaving the canopy sitting in a cup of 96% alchol completely wipes it back to bare plastic. The F8 part is now drying, and will get a new coat of Humbrol Clear later today, and the frame will be glued in place this evening. Effective loss of a day, which I can probably schedule around.
Getting ambitious about cleaning, I've now dunked the Mk4 canopy in the same cup of alcohol; I was willing to put up with the less then perfect result of the Future to avoid the risks inherent in cleaning and starting over, but with the cleaning process tested on the F8 I'm no longer willing to put up with any nonsense there.
rob_van_riel
Modelling Gent and Scholar
Posts: 3325
Joined: November 4th, 2012, 11:28 am
Location: The Netherlands
Contact:

Re: Rob's Meteor salvage

Post by rob_van_riel »

Both fuselages have been joined to their wing, and the seam blobbed over with filler. Tomorrow, the dust will fly as I clean off the excess filler and sand the lower fuselage join into shape.
User avatar
splash
Senior Service Rotorhead
Posts: 13828
Joined: May 1st, 2011, 11:02 am
Location: Somerset England

Re: Rob's Meteor salvage

Post by splash »

Bad luck with the canopy I hope it all goes well.

Regards Splash
My work bench is starting to look like Portsmouth Naval Dockyard.
rob_van_riel
Modelling Gent and Scholar
Posts: 3325
Joined: November 4th, 2012, 11:28 am
Location: The Netherlands
Contact:

Re: Rob's Meteor salvage

Post by rob_van_riel »

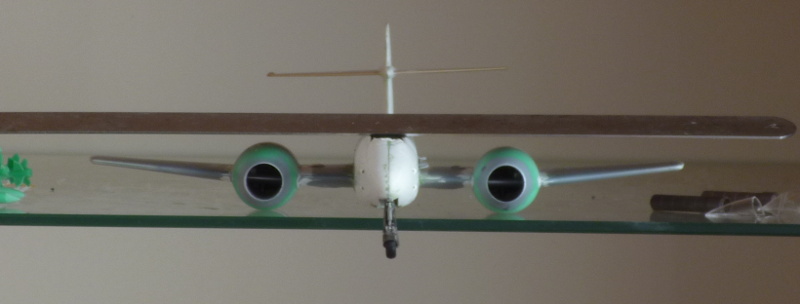
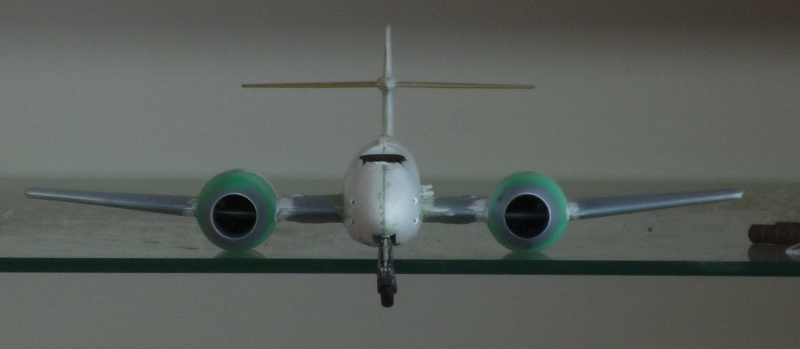
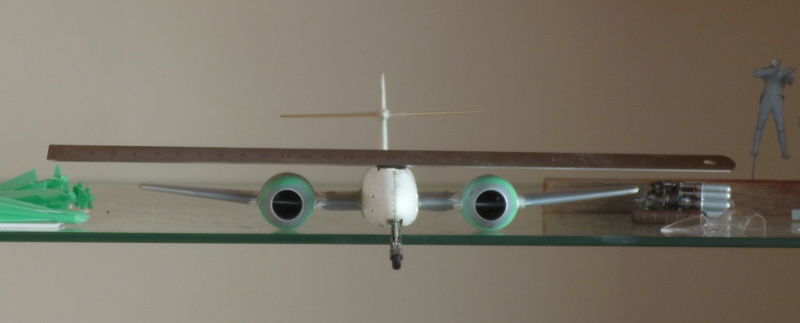
Alerted to the issue by Splash's build, I decided to check the alingment of the wings and fuselages. The Mk4 was ok, the F8 was skewed in every way possible. Not only was the wing-fuselage join messed up, the whole fuselage has torqued, as seen in the top picture. Annoyingly, the torque is counter clockwise seen from the front, while the join is skewed clockwise. That means the skewed tail will be even more pronounced when I straigthen out the join.
Image
I've cut loose the port side of the wing-fuselage join, and pushed in some plastic wedges I made from Evergreen strips. These corrected the fuselage to wing alignment sufficiently.
Image
I'm still trying to figure out how to get the torque out of the fuselage; with that huge tail it stands out like a sore thumb. Fortunately, I have time to think while the wedges recover from the glue I hit them with.

Clearly, the F8 is not the luckiest plane out there :cry:
rob_van_riel
Modelling Gent and Scholar
Posts: 3325
Joined: November 4th, 2012, 11:28 am
Location: The Netherlands
Contact:

Re: Rob's Meteor salvage

Post by rob_van_riel »

Bananas? What bananas? :-D
More wedgery on the tail, before and after pics speak for themselves I think..
Image
Image
User avatar
Kitaholic
Modelling Gent and Scholar
Posts: 3765
Joined: November 10th, 2014, 7:53 pm
Location: 5 mins from SMW

Re: Rob's Meteor salvage

Post by Kitaholic »

Well thought out and great recovery on that
Regards

Gord

Desperately trying to find his MOJO, don't know where I left it
User avatar
fredk
Modelling Gent and Scholar
Posts: 6196
Joined: May 1st, 2012, 6:25 am
Location: Donaghadee, N'rn Ir'n

Re: Rob's Meteor salvage

Post by fredk »

Lots of very different techniques being expertly used on these Meteors.
Al speling misteaks aer all mi own werk..
Its not just how good your painting is, its how good the touch-ups are too.
rob_van_riel
Modelling Gent and Scholar
Posts: 3325
Joined: November 4th, 2012, 11:28 am
Location: The Netherlands
Contact:

Re: Rob's Meteor salvage

Post by rob_van_riel »

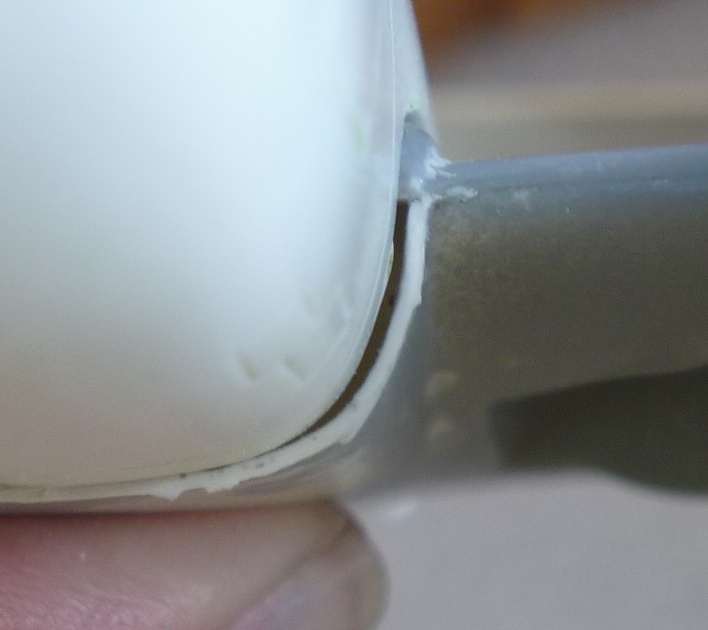
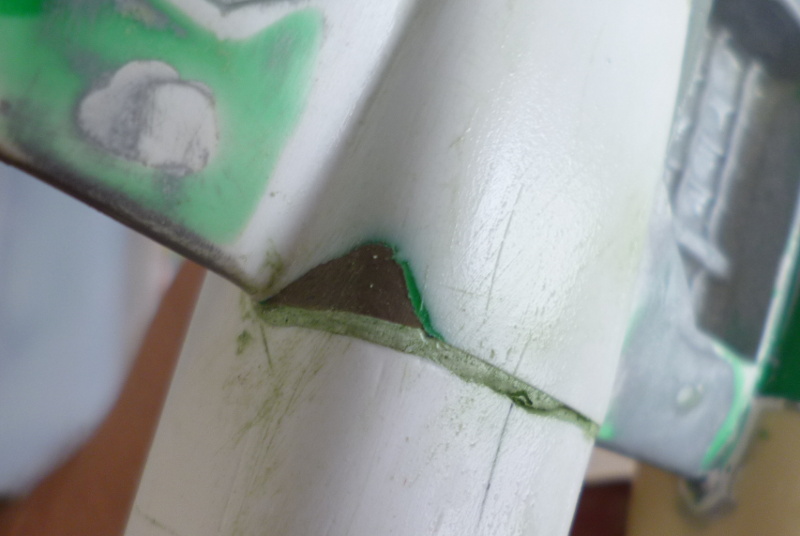
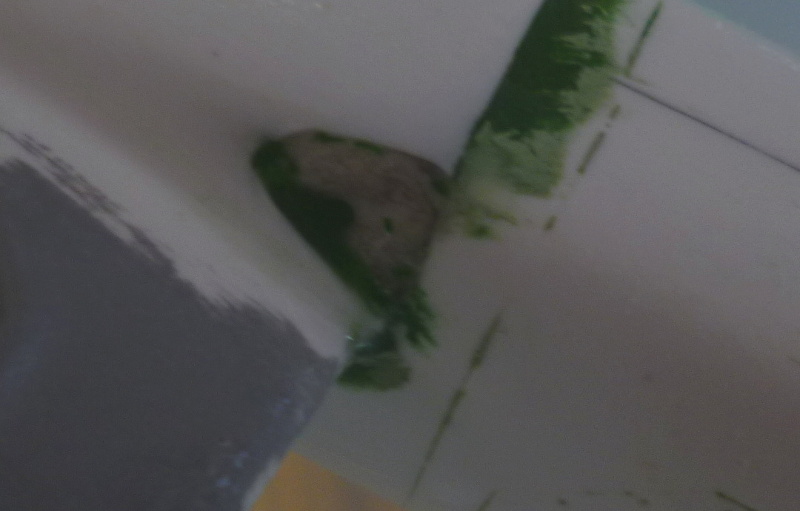
While the F8 recovers from a flood of chemicals, I've been working on the Mk4 wing join. This was much cleaner than the one on the F8 (I'm going to clain superior plastic chopping skills compared to the original owner :-D ), but still had the nasty shape problem at the front of the wingroot. Before, and after (more likely halfway through) pics below.
Image

Image

The dark grey area is the epoxy putty plug I put into the inside of the wing assembly. As predicted, I ended up sanding and filing right through the original plastic. The thin green stripe between the putty and the plastic is spillover from the engine nacelle repair; the resin was just a bit more mobile than I'd like, and put a thin coat over most of the inside on the wing, and with the sanding going through the plastic, it's peeping around the corner.
The entire area has become such a mess of colours and structures that it's becoming hard to see whats going on. To improve matters, I'll shoot a coat of primer over it all as soon as the model has dried from it's bath, just to get a good look of where things stand.
rob_van_riel
Modelling Gent and Scholar
Posts: 3325
Joined: November 4th, 2012, 11:28 am
Location: The Netherlands
Contact:

Re: Rob's Meteor salvage

Post by rob_van_riel »

fredk wrote:Lots of very different techniques being expertly used on these Meteors.
Thanks, although I shudder to think what a real expert would think of all this. The only thing I dare claim expertise at is muddling along and sort of improvising along the way (which, fortunately, often works nicely :-D )
Muttzley
The Bug Has Well And Truly Bitten
Posts: 224
Joined: April 13th, 2015, 4:57 pm

Re: Rob's Meteor salvage

Post by Muttzley »

Given the choice of hurtling towards the ground in an uncontrollable, disintegrating hulk of metal, or being propelled upwards by an explosive charge under my derrière through the canopy and hopefully avoiding the tail fin I know what one I'd...
scratch that, they both sound like a lot less then fun.
rob_van_riel
Modelling Gent and Scholar
Posts: 3325
Joined: November 4th, 2012, 11:28 am
Location: The Netherlands
Contact:

Re: Rob's Meteor salvage

Post by rob_van_riel »

Muttzley wrote:Given the choice of hurtling towards the ground in an uncontrollable, disintegrating hulk of metal, or being propelled upwards by an explosive charge under my derrière through the canopy and hopefully avoiding the tail fin I know what one I'd...
scratch that, they both sound like a lot less then fun.
"Ejections are like old age - no fun and not for sissies, but clearly preferable to the alternative"
rob_van_riel
Modelling Gent and Scholar
Posts: 3325
Joined: November 4th, 2012, 11:28 am
Location: The Netherlands
Contact:

Re: Rob's Meteor salvage

Post by rob_van_riel »

I swear this thing hates me.

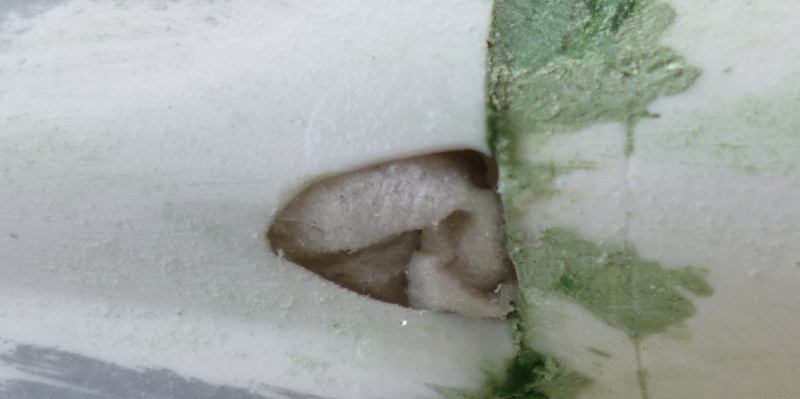
I'd been wondering what that big thing was that was bouncing around inside the F8. Now I know. It's the expoxy plug that was supposed to sit behind the overly wide wingroot. It's not doing it's job, I'm sorry to say, which I discovered when I sanded right through the plastic and found a gap, rather than a plug behind it. Let me assure you some very uncharitable thoughts occurred around this time :evil:

Still, the show must go on, and that requires a wingroot. I cut away the parts most likely to vanish in further sanding, and stuffed a wad of tissuepaper through the hole, holding on to part of it with a pair of tweezers. I then rather unceremoniously dribbled CA all over it. Hopefully, this will stick the paper to the edges, and at the same time harden the soaked paper to the point where I can sand any bits sticking out smooth, and use it as a base to throw more filler at.

Image
rob_van_riel
Modelling Gent and Scholar
Posts: 3325
Joined: November 4th, 2012, 11:28 am
Location: The Netherlands
Contact:

Re: Rob's Meteor salvage

Post by rob_van_riel »

Ha! Gotcha. The trick with the CA-drenched paper worked. Sanded off, stuffed with filler, sanded smooth. In the picture it can still be seen, but I'll bet you'll never know it's there after a shot of primer. Certainly feels smooth :grin:

Image
User avatar
lancfan
Avro's Rivet Rhapsodizer
Posts: 8764
Joined: May 2nd, 2011, 3:55 pm
Location: Nelson, Lancashire

Re: Rob's Meteor salvage

Post by lancfan »

Brilliant work Rob.

David.
David.

If you forget the past, you may lose the future.
rob_van_riel
Modelling Gent and Scholar
Posts: 3325
Joined: November 4th, 2012, 11:28 am
Location: The Netherlands
Contact:

Re: Rob's Meteor salvage

Post by rob_van_riel »

I think I managed to lick the F8 canopy into shape, next question is how well it will fit the fuselage. If any amount of fitting is required, it's going to be nervous work, since the bond between the canopy and the Clearfix used to mount the framing is shaky at best.
Makes me wonder, what does everyone else use to glue vacform canopies. Solvent based glues and CA seem like very bad ideas, Clearfix is only so-so in this case. What else is there?

Both vacforms have been through the first primer and inspection cycle. To my immense relief, this didn't show any nasty surprises. I'm feeling rather smug about the fact that the wings are now almost impossible to tell apart, except by the colours still shining through here and there, and the fact that I just happen to know which wing is sitting under which fuselage.
Locked

Return to “Vac-form Kits”