Slightest bit of force while dryfitting, and PING!, off went the frame again. I'm through with this, I'm not spending another whole day sticking it back into position only for it to take off a third (and probably many after) time when I look at it too hard, the frame is going in the bin. There's enough detail on the canopy to paint the $%$@# thing on, and that will have to do.rob_van_riel wrote:I think I managed to lick the F8 canopy into shape, next question is how well it will fit the fuselage. If any amount of fitting is required, it's going to be nervous work, since the bond between the canopy and the Clearfix used to mount the framing is shaky at best.
Rob's Meteor salvage *Finished*
-
rob_van_riel
- Modelling Gent and Scholar
- Posts: 3325
- Joined: November 4th, 2012, 11:28 am
- Location: The Netherlands
- Contact:
Re: Rob's Meteor salvage
-
rob_van_riel
- Modelling Gent and Scholar
- Posts: 3325
- Joined: November 4th, 2012, 11:28 am
- Location: The Netherlands
- Contact:
Re: Rob's Meteor salvage
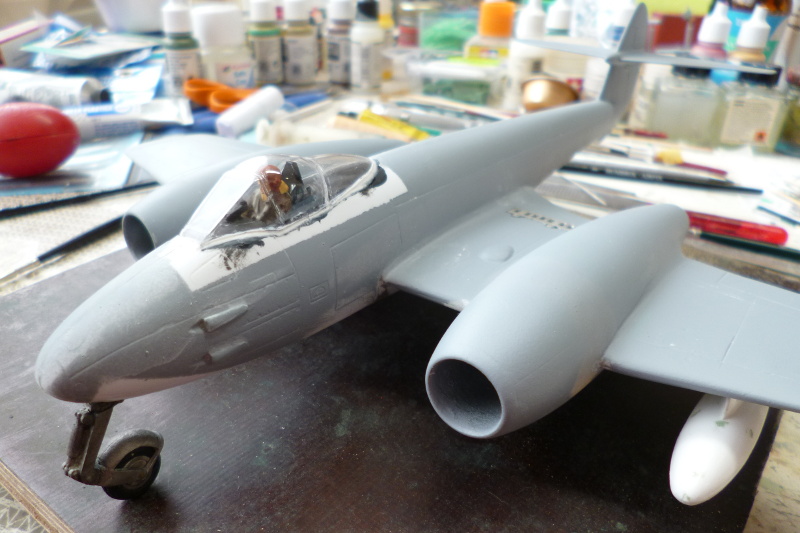
I'm going to call the F8 ready for the paintshop.
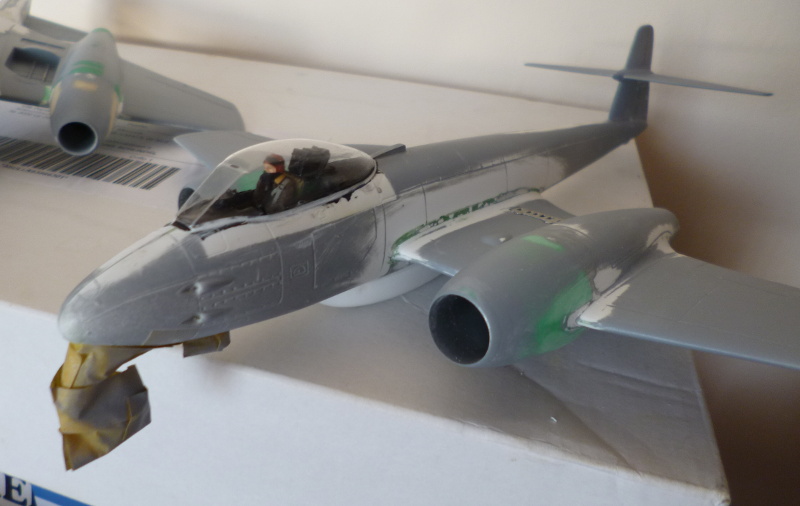
I used the canopy insert at the back to attach the whole thing to the fuselage, then closed any gaps with Clearfix. Once set, the clearfix was painted black (to avoid visible while rims on the inside), and once that was dry, I squirted a big fat blobby line of Vallejo filler along the edge. This was then wiped smooth with a wet finger (followed by more wiping to clean it off the canopy; with this material, you can get clean away with that). This filler doesn't sand all that well, but nothing beats it for a quick, smooth line in dangerous places, like around transparencies.
The Mk4, seen in the background, has some work to go before it reaches this stage, but since it will be overall High Speed Silver, it will need much less time in the paintshop than the camo F8, so I'm not worried.
-
rob_van_riel
- Modelling Gent and Scholar
- Posts: 3325
- Joined: November 4th, 2012, 11:28 am
- Location: The Netherlands
- Contact:
Re: Rob's Meteor salvage
The Mk4 is coming along nicely too. One, maybe two more filling/sanding iterations, and I ought to have the wing-fuselage join cleaned up and smoothed out. The fit may have been better on this kit than on the F8, but the F8 has the large slipper tank under the fuselage hiding most of the issues.rob_van_riel wrote:The Mk4, seen in the background, has some work to go before it reaches this stage, but since it will be overall High Speed Silver, it will need much less time in the paintshop than the camo F8, so I'm not worried.
-
rob_van_riel
- Modelling Gent and Scholar
- Posts: 3325
- Joined: November 4th, 2012, 11:28 am
- Location: The Netherlands
- Contact:
Re: Rob's Meteor salvage
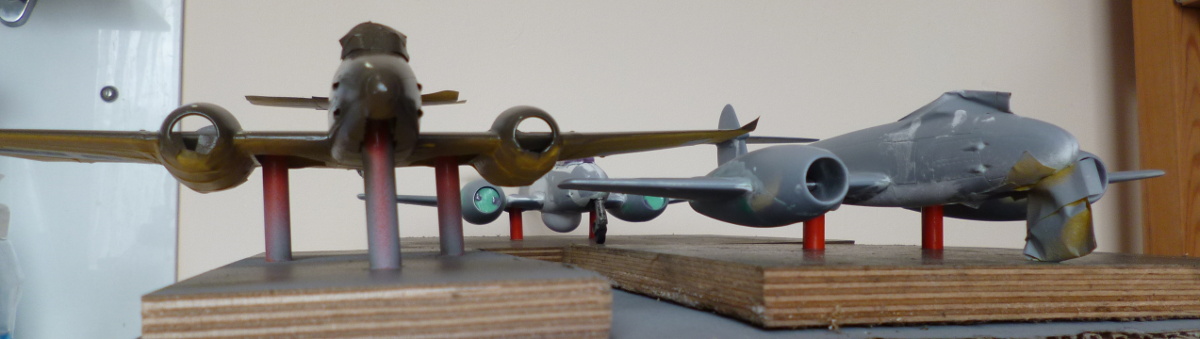
Just another little trick I've found helpful: caddies for use during airbrushing. If possible, I prefer to have the undercarriage installed when I start airbrushing, so it can do it's job of keeping the airframe off the ground, but there are any number of reasons why this may not be a sensible option. In those cases, I grab some old planks and dowels (or in this case, a written off arrow), and build the reverse, a floor with posts sticking up into the wheelwells. This also helps with spotting tailsitters before finishing...
Here's the complete project of Meteors sitting on their caddies. The Aeroclubs of necessity have the front gears installed, so the caddy is roughly the same height as the main gears, while the Tamiya has empty wells all round, and is placed higher off the deck for convenience.

Here's the complete project of Meteors sitting on their caddies. The Aeroclubs of necessity have the front gears installed, so the caddy is roughly the same height as the main gears, while the Tamiya has empty wells all round, and is placed higher off the deck for convenience.
-
DavidWomby

- Modelling Gent and Scholar
- Posts: 11767
- Joined: May 1st, 2011, 8:09 pm
- Location: Florida, USA
Re: Rob's Meteor salvage
Well done with the canopy - must have been frustrating but the end result looks just fine.
David
David
-
rob_van_riel
- Modelling Gent and Scholar
- Posts: 3325
- Joined: November 4th, 2012, 11:28 am
- Location: The Netherlands
- Contact:
Re: Rob's Meteor salvage
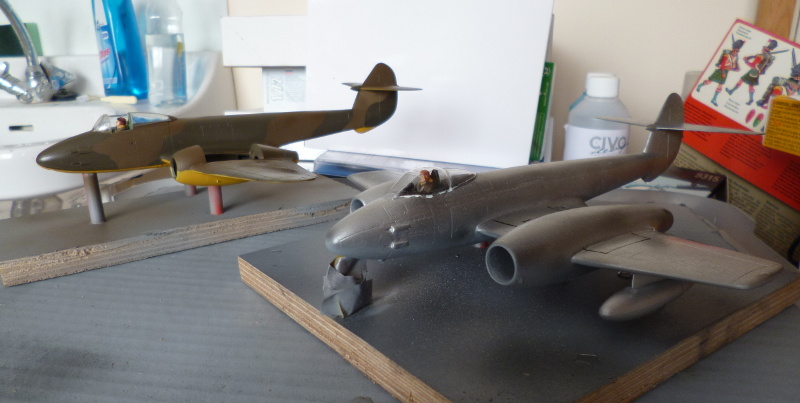
The Mk4 is also ready to go to the paintshop. We're getting there...
The F8 has been primed, and the first two colours (yellow for the tail, and black for the walkways) are on. I hope to do the remaining three at a rate of one per day from here on; any faster is risky, as masking will be involved and paints need time to cure. Without the GB deadline I would probably wait several days between two colours, but it will probably be fine.
The F8 has been primed, and the first two colours (yellow for the tail, and black for the walkways) are on. I hope to do the remaining three at a rate of one per day from here on; any faster is risky, as masking will be involved and paints need time to cure. Without the GB deadline I would probably wait several days between two colours, but it will probably be fine.

-
rob_van_riel
- Modelling Gent and Scholar
- Posts: 3325
- Joined: November 4th, 2012, 11:28 am
- Location: The Netherlands
- Contact:
Re: Rob's Meteor salvage
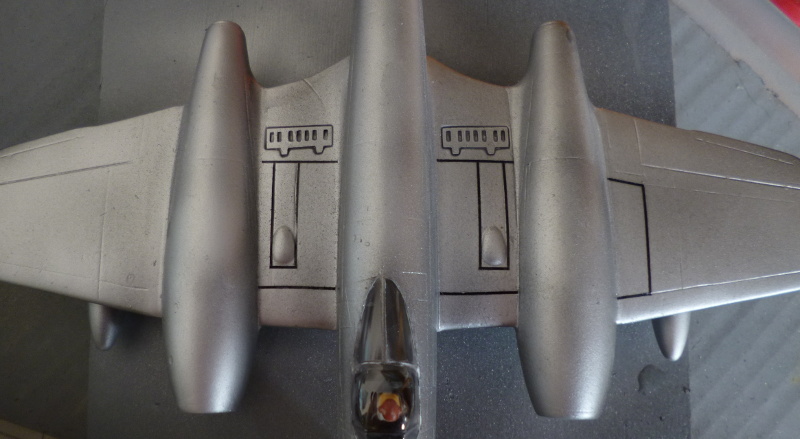
High Speed Silver just went onto the bottom of the F8. It also went damn near all over my workbench; when I cranked open the tin, the lid made a credible attempt at exploding off with a respectable bang  . Needless to say I jumped and tipped the tin.
Fortunately, this is again fairly thick paint, and I managed to salvage most of the spill and send it out the airbrush. Agression aside, it's good paint to work with. Good thing too, since I got it into my masochistic mind to do the Mk4 with the repaired wings in overall silver, which is asking for trouble of course.
Never a dull moment with XtraColour
I did a headcount of workable castings of the undercarriage doors, and I should be all set on that front. Cleanup and patchwork this afternoon. That leaves just the rockets to produce.
-
rob_van_riel
- Modelling Gent and Scholar
- Posts: 3325
- Joined: November 4th, 2012, 11:28 am
- Location: The Netherlands
- Contact:
Re: Rob's Meteor salvage
The Mk4 had a few spots that just wouldn't become smooth, so the doors had to wait. I finally got the Mk4 primed and painted black on the top (just the center section of the wings would have been enough, but I had too much paint..). The F8 has has a coat of varnish shot over the silver, in hopes of improving decal adhesion later on.rob_van_riel wrote:I did a headcount of workable castings of the undercarriage doors, and I should be all set on that front. Cleanup and patchwork this afternoon.
-
rob_van_riel
- Modelling Gent and Scholar
- Posts: 3325
- Joined: November 4th, 2012, 11:28 am
- Location: The Netherlands
- Contact:
Re: Rob's Meteor salvage
The two early marks are back from the paintshop. In general, I'm happy with them. In general..
The silver on the top surfaces somehow picked up somthing nasty from the surrounding air, and turned all rough in some spots. This wasn't the surface of the model; there may have been some issues there, but nothing like this. It was actually rough to the touch. So, with great trepidation, I went after it with some sandpaper. Well, sandpaper.. 2000 grit feels smooth to my fingers, nothing sandy about it. I managed to clean most of the roughness off, with no damage to the undelying paint.
Sadly, I managed to miss a few bits around the nose. Due to the grey primer this didn't show up until too late. I'll have to find some way to fix this. I'm thinking a bit of drybrushing might do it.
Also, spot the SNAFU here..
This, by the way, is the plane with the repaired wings. I'm definately declaring victory on that point
-
lancfan

- Avro's Rivet Rhapsodizer
- Posts: 8764
- Joined: May 2nd, 2011, 3:55 pm
- Location: Nelson, Lancashire
Re: Rob's Meteor salvage
 Superb work Rob, your build is a brilliant tutorial in casting and mixed media modelling.
David.
David.
If you forget the past, you may lose the future.
If you forget the past, you may lose the future.
-
rob_van_riel
- Modelling Gent and Scholar
- Posts: 3325
- Joined: November 4th, 2012, 11:28 am
- Location: The Netherlands
- Contact:
Re: Rob's Meteor salvage
Time for what should hopefully be my last trick for this project: the undercarriage doors.
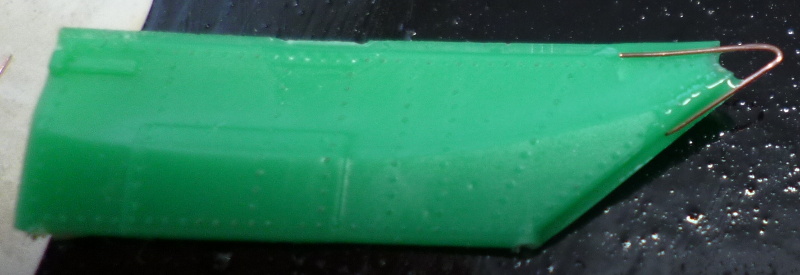
The rather unsuccessful mould I made to duplicate the doors from the Tamiya kit routinely leaves out part of the edges of the doors, with corners being among it's favourites. Trying to get a blob of normal filler to stick to a corner, and then not break off or crumble while being filed into shape, has so far been beyond me, so I needed an alternative approach. The idea is this: first, reconstruct the outline with some copper wire. Then, if the gap is large enough, put on a drop of Clearfix, as though creating a small window. Once this is set, apply normal filler over the thin but rigid edge/sheet to build up the thickness needed, and file into shape. Theoretically, the support from the wire and optionally Clearfix should give the filler enough to hang on to.
I used a small cut off from an electical cable (essentially a bundle of this parallel wires) to supply the copper, and if needed bent it into the correct shape to cover the corner. The wire was then stuck to the resin with a drop of thin CA.
We'll see if at works shortly.
-
Nikon Boy

- Series 3 and Beyond
- Posts: 37
- Joined: September 18th, 2012, 1:21 pm
- Location: Bendigo Victoria Australia
Re: Rob's Meteor salvage
I love Meteors
And i am really enjoying your thread
Great work
Cheers

And i am really enjoying your thread
Great work
Cheers
Norm
Bendigo
Victoria
Australia
Bendigo
Victoria
Australia
-
despondman

- Active Participant
- Posts: 773
- Joined: July 15th, 2013, 6:49 pm
- Location: Lincolnshire
Re: Rob's Meteor salvage
Fantastic work and a great thread - I have really enjoyed reading through it.
Thanks for going to all the trouble of recording what you have done.
Thanks for going to all the trouble of recording what you have done.
-
rob_van_riel
- Modelling Gent and Scholar
- Posts: 3325
- Joined: November 4th, 2012, 11:28 am
- Location: The Netherlands
- Contact:
Re: Rob's Meteor salvage
Drybrushing worked nicely along the nose, but I also had to use this up to some extent to blend in the touch-up around the canopy, and there it created a visible collar around the cockpit, with clearly isn't supposed to be there. I saw no other option that to re-mask the canopy, and run a fine airbrush with more silver over the affected area. While I was at it, I also patched some other minor issues I would normally have left alone, but since I was masking and spraying any way, I thought I might as well.rob_van_riel wrote:Sadly, I managed to miss a few bits around the nose. Due to the grey primer this didn't show up until too late. I'll have to find some way to fix this. I'm thinking a bit of drybrushing might do it.
The F8 has also had it's paint job completed, save touch up.

I'd masked the cockpit with maskol, hoping to need less force to pull it of the canopy than tape, since I'm not completely happy with the bond I'm getting between vacform canopies and plastic. This was a mistake; not only did I need at least as much force as using tape, but the maskol dragged out from between the canopy and the paint, rather than taking the paint with it, giving an ugly jagged edge that will need work. The walkways will also need damage control, since the masking tape tore some of the paint off with it. Oh well...