Page 10 of 11
Re: Rob's Meteor salvage
Posted: May 28th, 2015, 2:30 pm
by rob_van_riel
I now have six pairs of resin rockets. I'll use originals for the final two, keeping two for use as masters just in case, That means that, four days before the deadline, I've finally reached the end of parts production. Good thing too; it's been fun, but the next project is a yet to be determined shake-and-bake kit

Re: Rob's Meteor salvage
Posted: May 28th, 2015, 3:25 pm
by rob_van_riel
More SNAFUs

The undercarriage legs start out identical, and the builder is required to file off the socket for the actuator on one side only (different sides on each leg of course). Now problem. Thing is, I've got two half documented kits. I
thought I started out with four identical legs, cheerfully chopped off the appropriate sockets, and installed the (two different sets of) wheels in the legs. Still cheerful, I glued the set with the Mk4 wheels in the bays. Fit seemed beautifully tight, but just in case, I checked wheel alignment.
One leg clearly was several mm taller than the other

A quick, if belated, inspection showed the legs were not identical, so I yanked out the taller legs before the CA was fully set. Taking stock, I found that I'd chopped off the left sockets on both the Mk4 legs, and the right sockets from the F8 legs (or the other way around, no idea which is which). Filed off bits don't grow back, so there was no way to swap things around. The only solution was to shorten the longer legs. Not exactly trivial, but I found a place where I could cut through a moulded in actuator, and then bend the leg so the ends of the actuator line up again, effective shortening the actuator and the leg. Good thing these are metal legs; it takes some more effort to saw through them, but at least they can be bent without breaking.
Re: Rob's Meteor salvage
Posted: May 28th, 2015, 6:08 pm
by rob_van_riel
I just stuck the decals on the Mk4. Getting sort 'o cheerful about this one

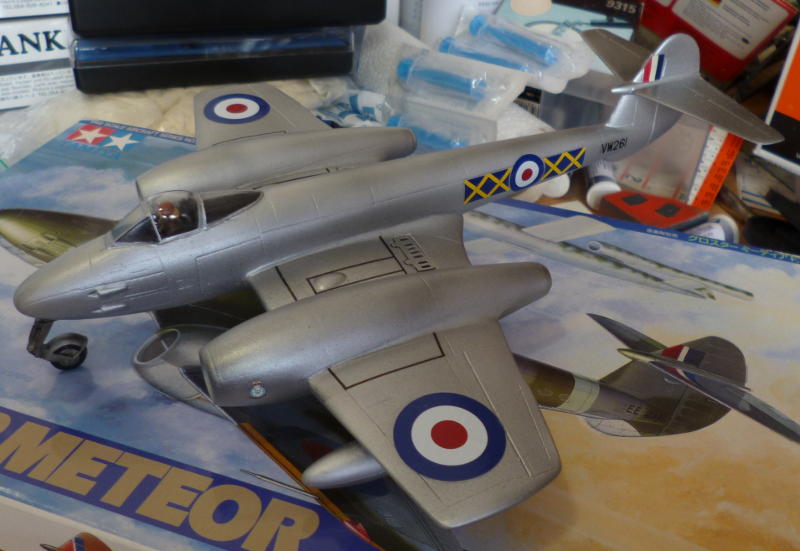
After I've hammered the decals flat with solvents, all that remains are the wheel doors, antenna, and pitot. Barring disasters this will finish on time

Re: Rob's Meteor salvage
Posted: May 29th, 2015, 5:13 am
by Clashcityrocker
I always enjoy getting the decals on. Covers up my below par paintwork
Nice looking Meteors.
Nigel
Re: Rob's Meteor salvage
Posted: May 29th, 2015, 10:50 am
by rob_van_riel
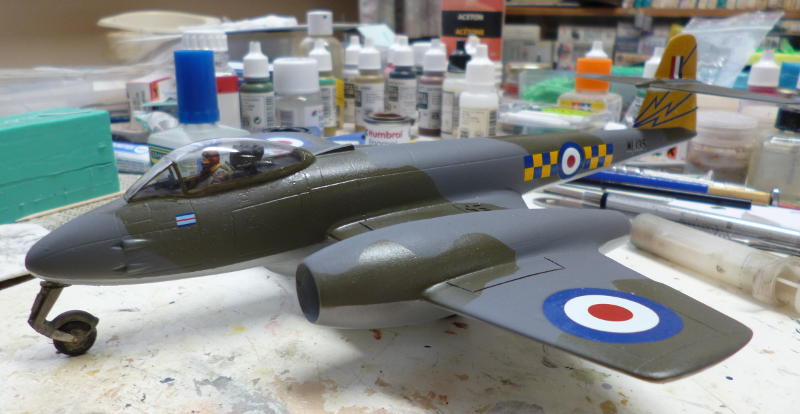
I couldn't resist a little embellishment for the Mk4...
The instructions from the decal sheet show narrow red bands along the engine intake, but no decals for that of course. Free hand painting didn't seem like all that bright an idea (better to leave them off than to put them on badly). But I wanted those rings, if only for a little extra colour..
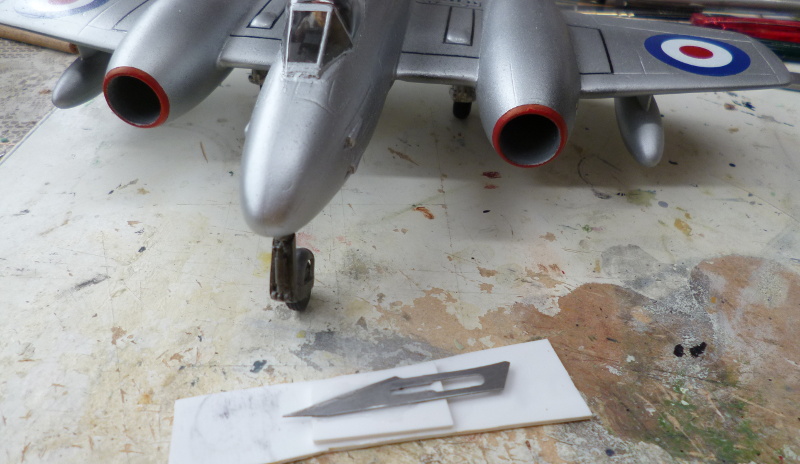
Free hand was out, so was airbrushing (couldn't properly mask that either). I needed some sort of line to work with. So I made up the little toy in the foreground: an old scalpel blade, mounted just above a strip of plastic. I then pressed the left end of the plastic strip against the front of the intake, and rotated almost full circle (fuselage was in the way); some scuff marks can be seen on the plastic. This gave me just enough of scratched line to paint the rims by hand.
Re: Rob's Meteor salvage
Posted: May 29th, 2015, 11:56 am
by Nikon Boy
Well done Rob !
Re: Rob's Meteor salvage
Posted: May 29th, 2015, 4:14 pm
by splash
That's a clever trick with red bands, I will file that technique away for use in the future.
Re: Rob's Meteor salvage
Posted: May 29th, 2015, 4:34 pm
by DavidWomby
That Mk4 looks lovely. Great solution to the red intake lips!
David
Re: Rob's Meteor salvage
Posted: May 29th, 2015, 7:14 pm
by rob_van_riel
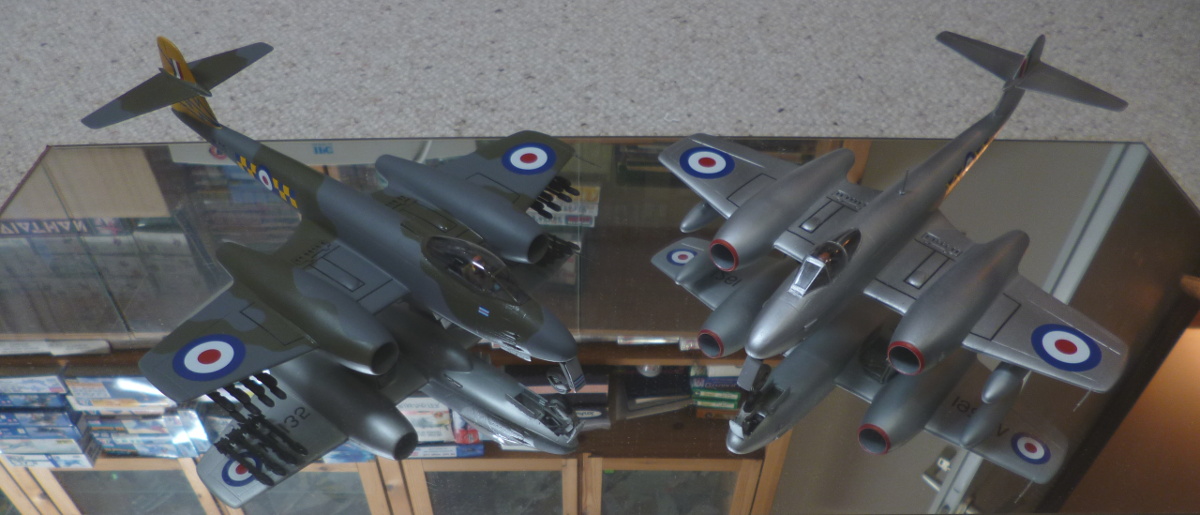
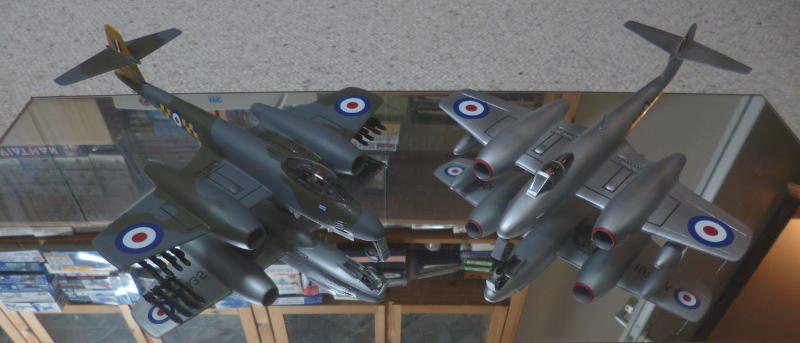
Here, have another 'almost there' picture
Re: Rob's Meteor salvage
Posted: May 30th, 2015, 9:56 pm
by splash
I can't decide what I prefer, high speed silver or camouflage, they both look good on a Meteor but you have made them look brillient.
Re: Rob's Meteor salvage
Posted: May 30th, 2015, 10:41 pm
by rob_van_riel
splash wrote:I can't decide what I prefer, high speed silver or camouflage, they both look good on a Meteor but
I couldn't decide either, but hey, I had two canvasses
(well, three actually, and there's also the green/earth over yellow prototype; guess what #3 looks like
)
Re: Rob's Meteor salvage
Posted: May 31st, 2015, 11:28 am
by rob_van_riel
I finally found the time to assemble and fix the rockets for the F8. The glue is now setting on the lot of them. Next will be painting and installation, installation of undercarriage doors, and a big "phew, I made it".
Fiddling with the rockets finally introduced me to the experience of glueing your fingers together with CA. Did I earn a button
?
Re: Rob's Meteor salvage
Posted: May 31st, 2015, 8:53 pm
by rob_van_riel
It's done
The pitot tubes were made out of solid core network cable; just strip off the insulation at the tip, and leave it on along the body. Instant pitot tubes
If anyone is interested in leftover bits and/or decals, check here:
http://uamf.org.uk/viewtopic.php?f=91&t=11901;
Re: Rob's Meteor salvage *Finished*
Posted: May 31st, 2015, 9:03 pm
by DavidWomby
They're a very impressive and good-looking pair.
David
Re: Rob's Meteor salvage *Finished*
Posted: May 31st, 2015, 9:08 pm
by vacant
First rate results on both kits. You have certainly gone to a lot of effort to get them looking do good. Why bother to choose between colour schemes when one can do both, as you have done? I assume this is a 1/48 scale kit as I can't see any references to an Aeroclub Meteor in 1/72 - perhaps you mentioned it somewhere. I bet it looks even more impressive 'live'.