A Pair Of Pioneers
-
ShaunW
- NOT the sheep
- Posts: 26188
- Joined: November 26th, 2011, 6:11 pm
- Location: Pontefract West Yorkshire
Re: A Pair Of Pioneers
Nicely done Bruce. I gain a lot of my enjoyment from this hobby by adding bits to kits using scrap plastic etc and I really enjoy seeing other members doing likewise.
Doing - Tamiya 1/35th Universal Carrier.
Work is the curse of the modelling classes!
IPMS#12300
Work is the curse of the modelling classes!
IPMS#12300

Re: A Pair Of Pioneers
This is putting me off trying to build my Ark Models issue of this kit BUT, I am admiring your efforts!!.
Liquid Gravity seems a bit of money (it did at the time I bought it), but it is great stuff and has come to my rescue more than once!.
Liquid Gravity seems a bit of money (it did at the time I bought it), but it is great stuff and has come to my rescue more than once!.
Hoping to return to modelling sometime this year!! 
Owner of Marky's Model Emporium since 2013!.
Owner of Marky's Model Emporium since 2013!.
-
BWP

- Got in under the wire
- Posts: 778
- Joined: April 28th, 2011, 2:23 am
- Location: Melbourne, Australia
- Contact:
Re: A Pair Of Pioneers
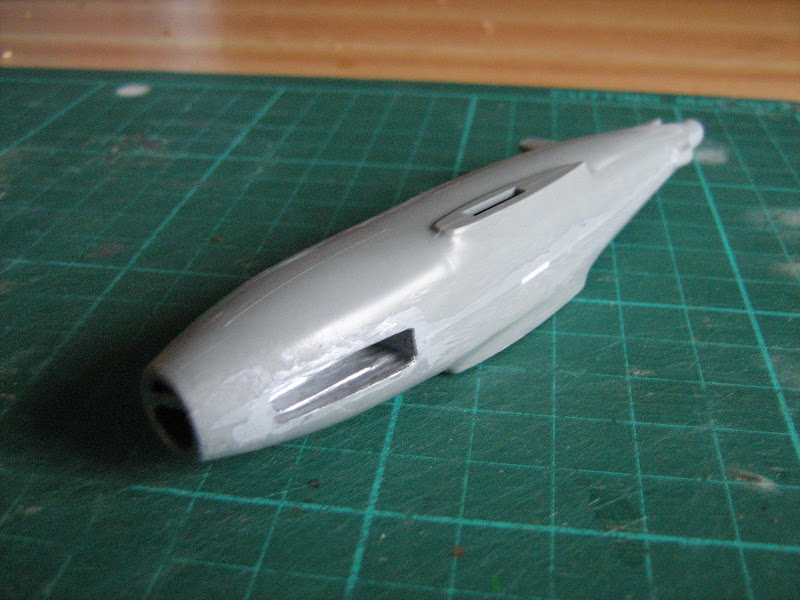
Last night work started on the FROG kit. It has a very smart idea with a cockpit insert that doubles as the intake vane. Unfortunately the idea was poorly executed, as the representation of the intake vane is simply terrible. The shape of the cockpit is also poor. Still, it's more then you get from the HPM kit.
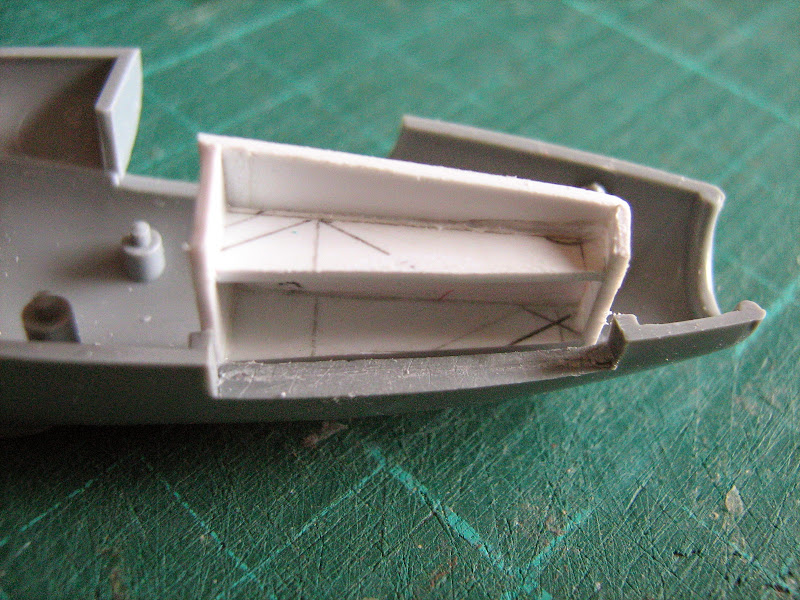
I started by cutting out the floor of the nose wheel bay and blocking the hole for the stand (not provided!).

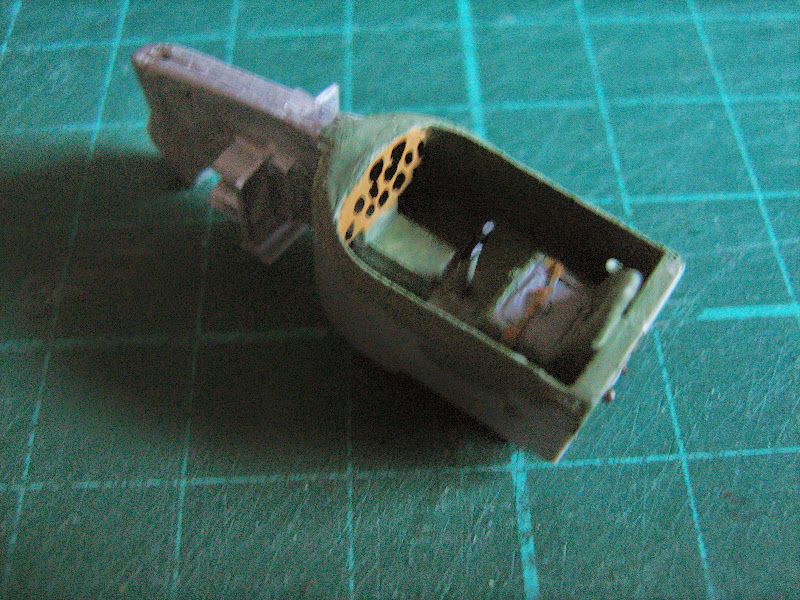
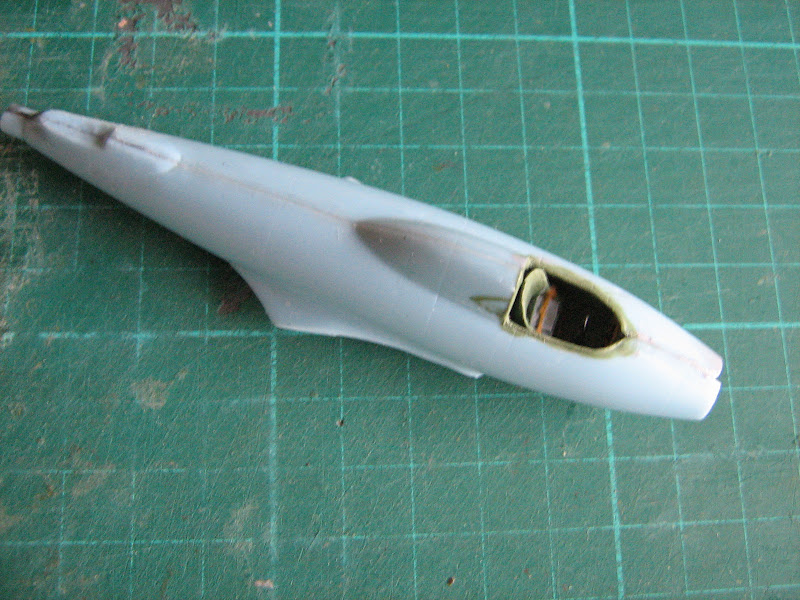
The cockpit went together very quickly; aside from the huge pin marks on the sides of the cockpit parts, everything went together with a very neat and tidy fit. (There was also some flash to clean up but nothing excessive.) I elevated the seat, which is unfortunately a bit small, and I carved out the outlines of a cushion, and added the IP and other bits.


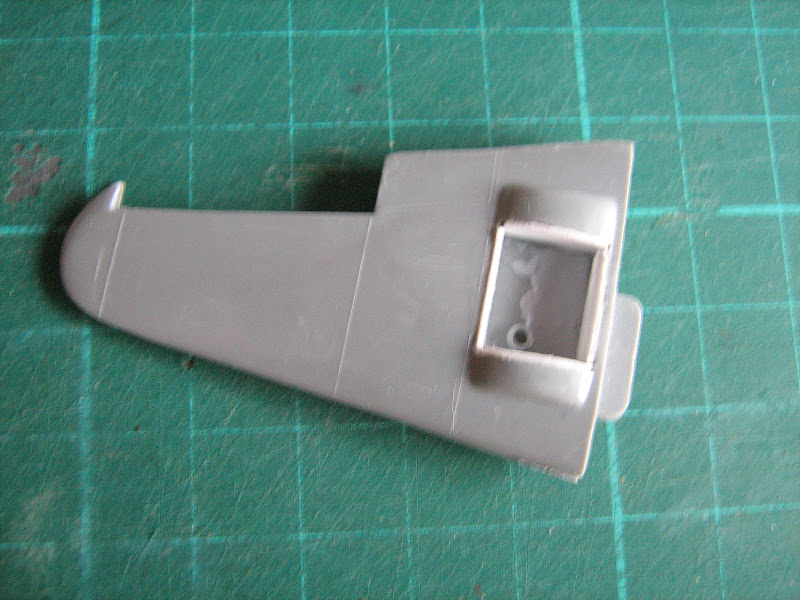
The most time-consuming part of the operation followed, which was constructing the nose wheel bay. It involved a lot of guesstimating, shaping, sanding, test fitting etc. None of it was difficult. It also occurred to me that the exhaust pipe on both kits is rather shallow (on the real plane it was very long indeed) so I added some scrap tubing at the rear to extend the view, so to speak. Of course now I'm wondering how I'm actually going to paint inside that tiny tube! (I've done the same work on the HPM kit but have not included a photo.) Modelling tip: those tubes came from Chupa Chups, they're really rather excellent for plastic modelling purposes (as well as being tasty).
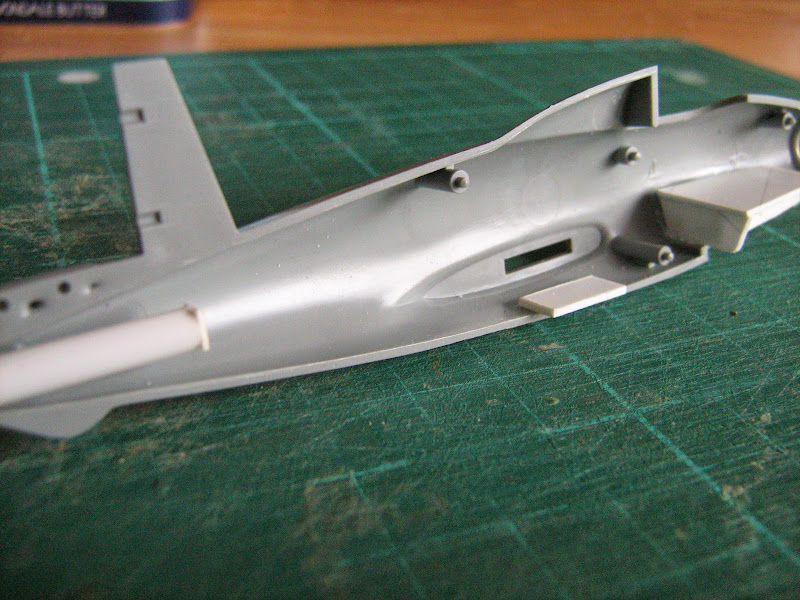
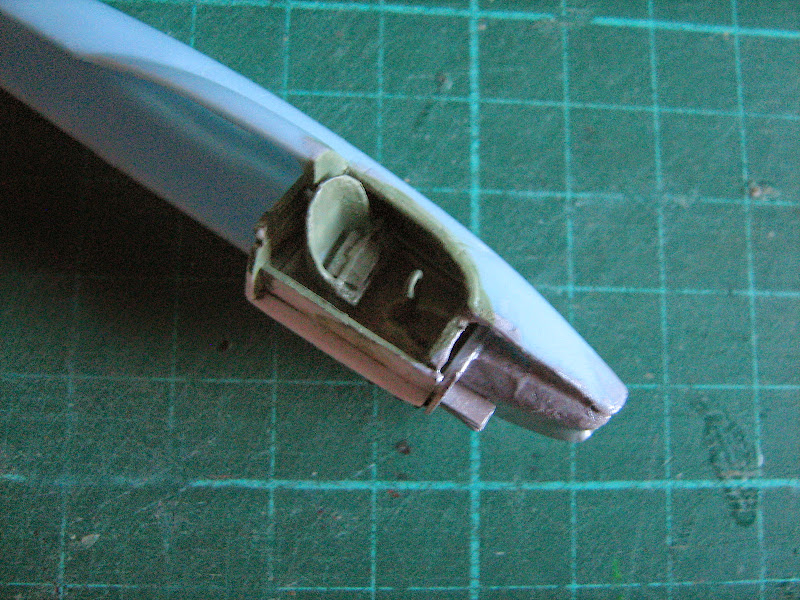
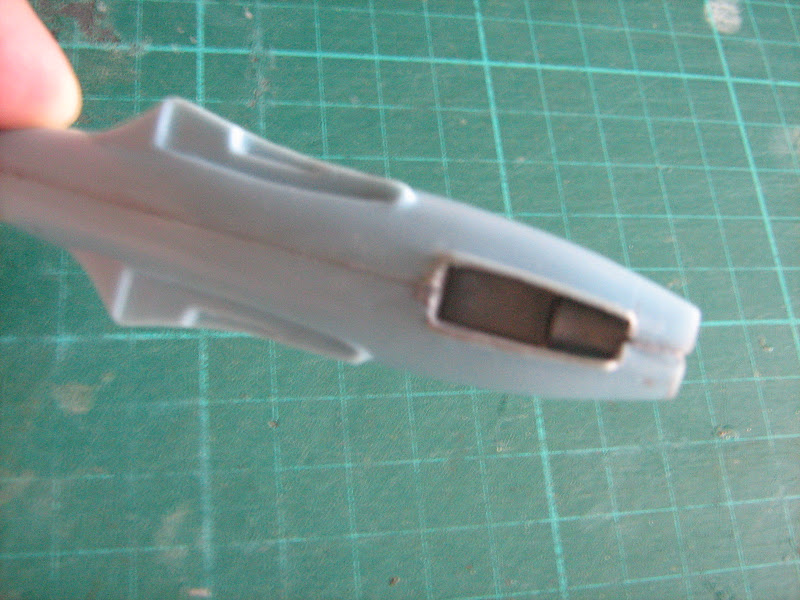
Then I went back to cleaning up the cockpit insert. I added some plastic to the front of the intake vane and attempted to shape it into something resembling the real thing. It's not great, but I think it will do.

Now I just have to add some plastic to the sides to block off the view inside from the intake as well as adding the horizontal vanes. This should be pretty straight-forward to do. A little bit of putty will also be required to fill in the gaps in various spots and to improve the shape of the intake vane as well.
I started by cutting out the floor of the nose wheel bay and blocking the hole for the stand (not provided!).
The cockpit went together very quickly; aside from the huge pin marks on the sides of the cockpit parts, everything went together with a very neat and tidy fit. (There was also some flash to clean up but nothing excessive.) I elevated the seat, which is unfortunately a bit small, and I carved out the outlines of a cushion, and added the IP and other bits.
The most time-consuming part of the operation followed, which was constructing the nose wheel bay. It involved a lot of guesstimating, shaping, sanding, test fitting etc. None of it was difficult. It also occurred to me that the exhaust pipe on both kits is rather shallow (on the real plane it was very long indeed) so I added some scrap tubing at the rear to extend the view, so to speak. Of course now I'm wondering how I'm actually going to paint inside that tiny tube! (I've done the same work on the HPM kit but have not included a photo.) Modelling tip: those tubes came from Chupa Chups, they're really rather excellent for plastic modelling purposes (as well as being tasty).
Then I went back to cleaning up the cockpit insert. I added some plastic to the front of the intake vane and attempted to shape it into something resembling the real thing. It's not great, but I think it will do.
Now I just have to add some plastic to the sides to block off the view inside from the intake as well as adding the horizontal vanes. This should be pretty straight-forward to do. A little bit of putty will also be required to fill in the gaps in various spots and to improve the shape of the intake vane as well.
-
ShaunW
- NOT the sheep
- Posts: 26188
- Joined: November 26th, 2011, 6:11 pm
- Location: Pontefract West Yorkshire
Re: A Pair Of Pioneers
Excellent start to the Frog kit Bruce. Regarding the length of the exhaust tube, it might be the case that if you halved the length of it your inside painting job would be easier - so long as it's plenty dark enough in the tube, i.e. matt black, I don't think a viewer would be able to judge how long it is.
Doing - Tamiya 1/35th Universal Carrier.
Work is the curse of the modelling classes!
IPMS#12300
Work is the curse of the modelling classes!
IPMS#12300
-
BWP
- Got in under the wire
- Posts: 778
- Joined: April 28th, 2011, 2:23 am
- Location: Melbourne, Australia
- Contact:
Re: A Pair Of Pioneers
You're probably right, but even at the length I have it I felt it was still too short. In any case I'm not sure that even at a shorter length it wouldn't really make a difference to paint -- either I can fit a brush inside, or I can't! (Note to self for future: cut the tube in half and paint the interior before assembling!)
-
BWP
- Got in under the wire
- Posts: 778
- Joined: April 28th, 2011, 2:23 am
- Location: Melbourne, Australia
- Contact:
Re: A Pair Of Pioneers
Time for an update.
With the interior construction largely complete it was time to splash some paint around.
HPM:
First coats:

Second (and more) coats:

FROG:
First coats:


Second (and more) coats:

For both kits just a little bit of clean-up work on those paint jobs and I can seal up the fuselages.
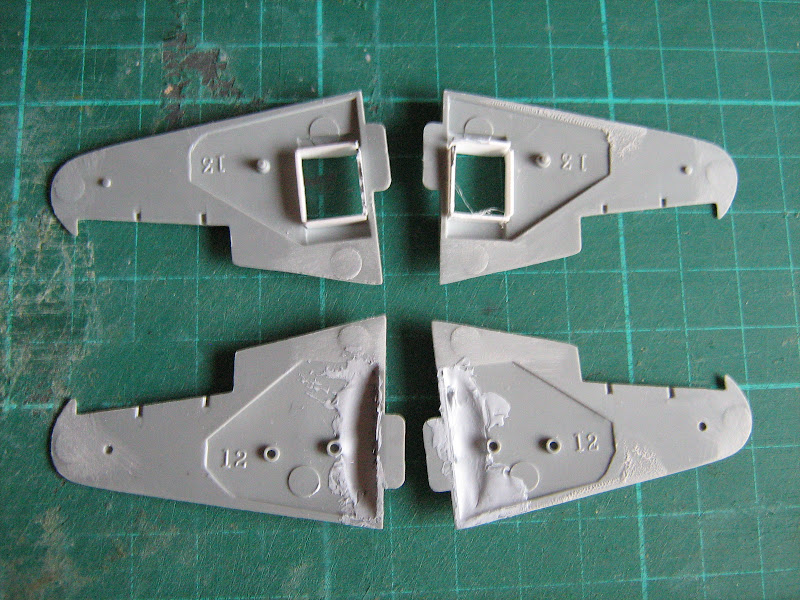
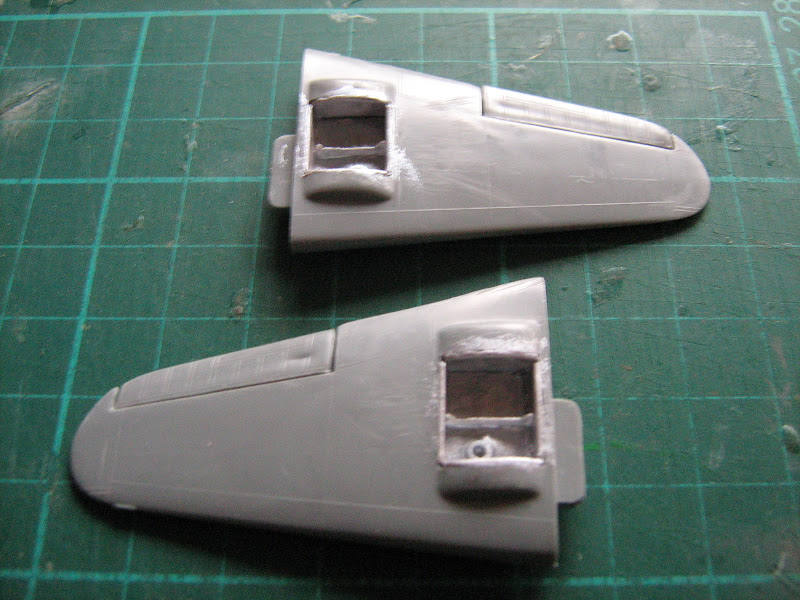
While waiting for the paint to dry I started work on the wings of the HPM kit. Once again this kit has proven to be somewhat disappointing; not only is there no interior wheel well detail of any sort, there isn't anything other than a bit of vague text to even tell you where the legs should be fitted! Furthermore, if you want to go ahead and create your own wheel well detail, you have to cut away a lot of plastic where the wings are butted against the fuselage (and the wings are quite small, so there isn't a lot of plastic to begin with!). This as you may imagine all took some time, in addition to the general cleanup of flash etc. I also cleaned up the main wheel parts as well, which were almost lost in flash.
You can see where I've placed some small bits of 40-thou plastic to act as locators/supports for the landing legs. The plan right at the moment is to drill a hole in each of those bits of plastic to insert the legs into, but it depends on how much of the legs need to peek out from below the wing -- the parts seem rather short. They might work out just fine once the wings are assembled, but the way this kit has been going, I'm not going to bet on it.
As I mentioned up-thread, Kershaw has an excellent photo of the post-crash W4046/G which displays all of the wheel well interior so mocking up the details is not very difficult.
I haven't started on the FROG wings yet but I think the overall process is going to be pretty similar. The undercarriage parts themselves are very disappointing: they resemble the real aircraft parts in much the same way that I resemble Tom Cruise (i.e., sort of the same, but rather different in the details). My original plan of replacing them with Airfix Gloster Meteor parts won't work, as the Meteor wheels were substantially larger in size. Since nothing else in my stash even comes close in terms of size and shape, I'll just have to use the FROG parts, but I will try and dress them up as much as I can to better represent the real thing.
With the interior construction largely complete it was time to splash some paint around.
HPM:
First coats:
Second (and more) coats:
FROG:
First coats:
Second (and more) coats:
For both kits just a little bit of clean-up work on those paint jobs and I can seal up the fuselages.
While waiting for the paint to dry I started work on the wings of the HPM kit. Once again this kit has proven to be somewhat disappointing; not only is there no interior wheel well detail of any sort, there isn't anything other than a bit of vague text to even tell you where the legs should be fitted! Furthermore, if you want to go ahead and create your own wheel well detail, you have to cut away a lot of plastic where the wings are butted against the fuselage (and the wings are quite small, so there isn't a lot of plastic to begin with!). This as you may imagine all took some time, in addition to the general cleanup of flash etc. I also cleaned up the main wheel parts as well, which were almost lost in flash.
You can see where I've placed some small bits of 40-thou plastic to act as locators/supports for the landing legs. The plan right at the moment is to drill a hole in each of those bits of plastic to insert the legs into, but it depends on how much of the legs need to peek out from below the wing -- the parts seem rather short. They might work out just fine once the wings are assembled, but the way this kit has been going, I'm not going to bet on it.
As I mentioned up-thread, Kershaw has an excellent photo of the post-crash W4046/G which displays all of the wheel well interior so mocking up the details is not very difficult.
I haven't started on the FROG wings yet but I think the overall process is going to be pretty similar. The undercarriage parts themselves are very disappointing: they resemble the real aircraft parts in much the same way that I resemble Tom Cruise (i.e., sort of the same, but rather different in the details). My original plan of replacing them with Airfix Gloster Meteor parts won't work, as the Meteor wheels were substantially larger in size. Since nothing else in my stash even comes close in terms of size and shape, I'll just have to use the FROG parts, but I will try and dress them up as much as I can to better represent the real thing.

Re: A Pair Of Pioneers
Good progress, Bruce, and an entertaining read.
Martin R
"the 'R' stands for 'Representative'."
"the 'R' stands for 'Representative'."
-
BWP
- Got in under the wire
- Posts: 778
- Joined: April 28th, 2011, 2:23 am
- Location: Melbourne, Australia
- Contact:
Re: A Pair Of Pioneers
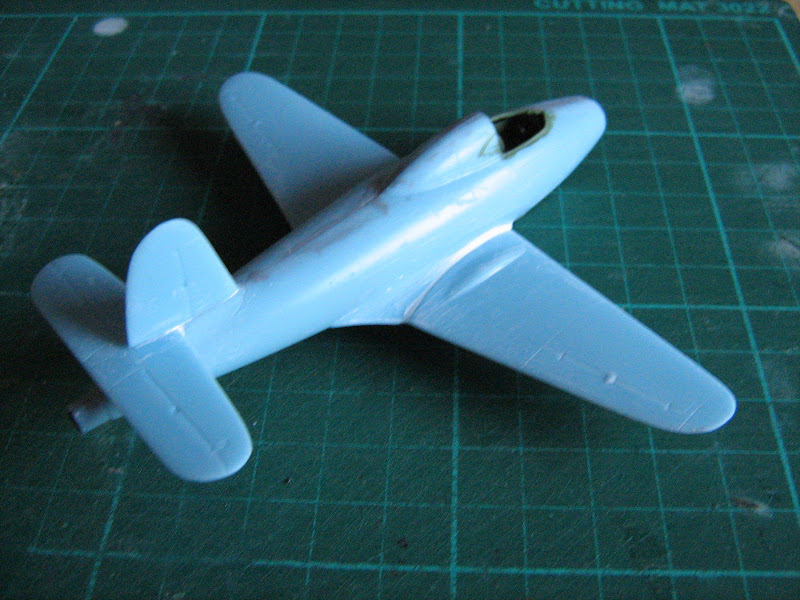
Some actual assembly now. Let me apologise in advance for some more terrible photos, the light isn't great and apparently the auto-focus on my little camera is struggling. 
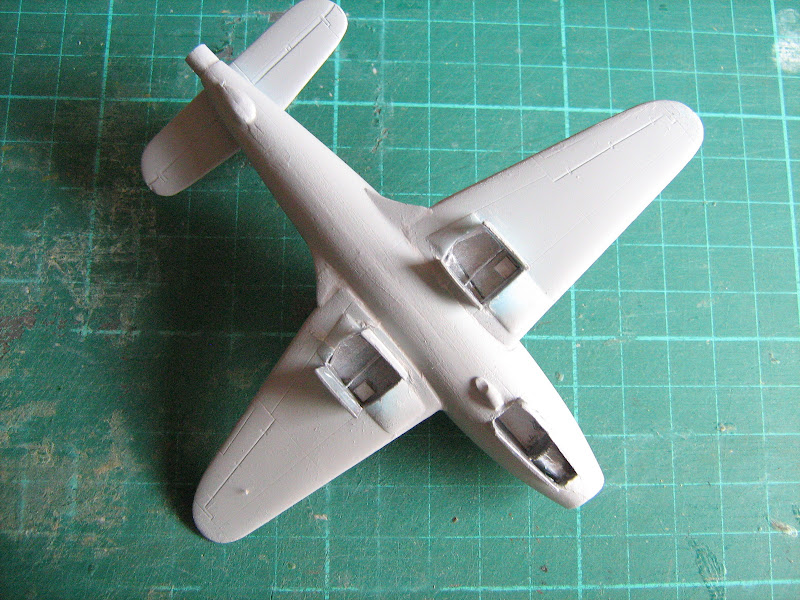
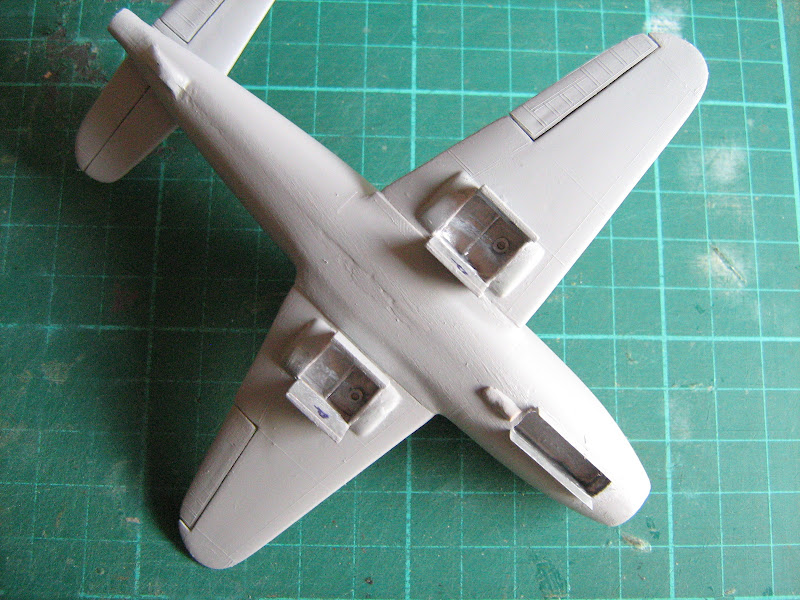
HPM: The wheel wells are as detailed as I plan to make them, so I glued the wing halves and added the doors for good measure.


Looking at photos of the real aircraft, the wheels only barely extend past the bottom of the doors so the height of the undercarriage on the little plastic base is pretty nearly right. I might have to add a 20-thou extension or something like that, but nothing more. For once, something is going right (he says cautiously)! (Incidentally, the trapezoidal shape of the wheel wells on the HPM kit appears to be spurious; the wells were more rectangular in shape as on the FROG kit. Odd sort of mistake to make, I would have thought.)
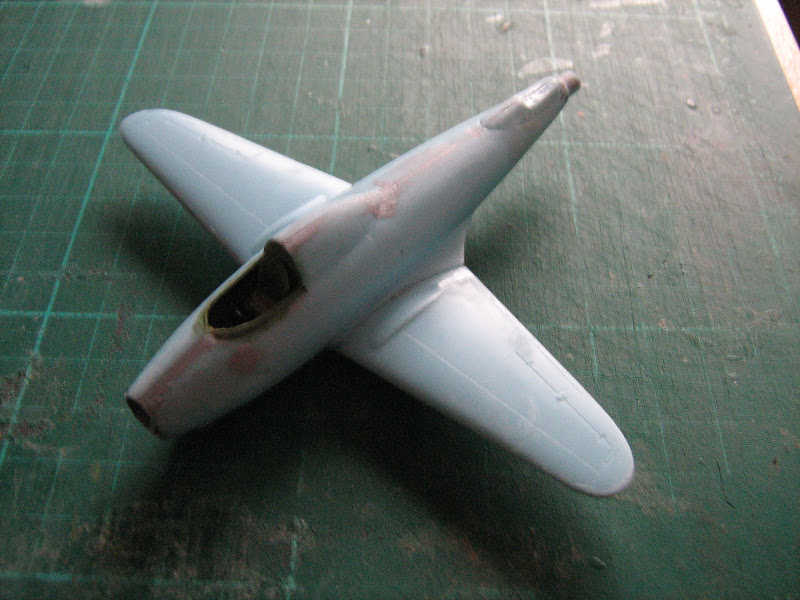
There being no reason not to assemble the fuselage, I've done that too. There won't be much in the way of filling required except around the nose to make sure the intake splitter is faired in nicely.

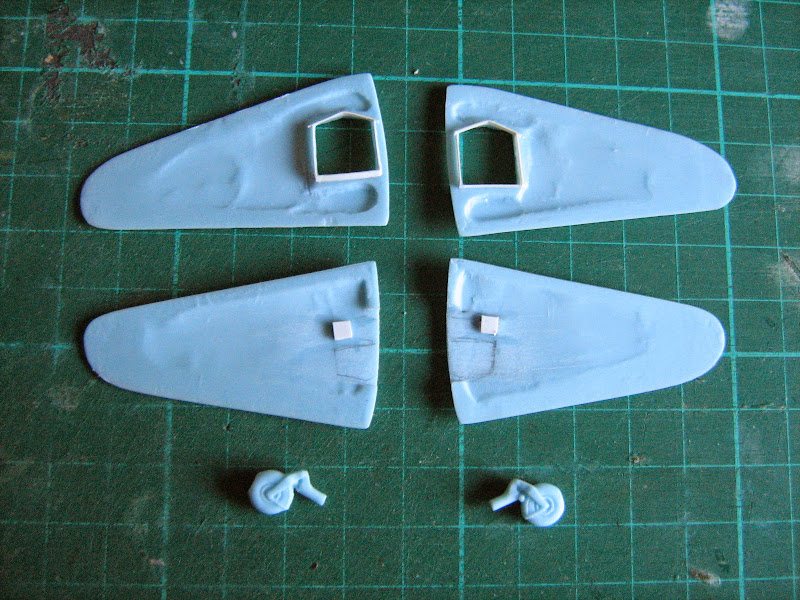
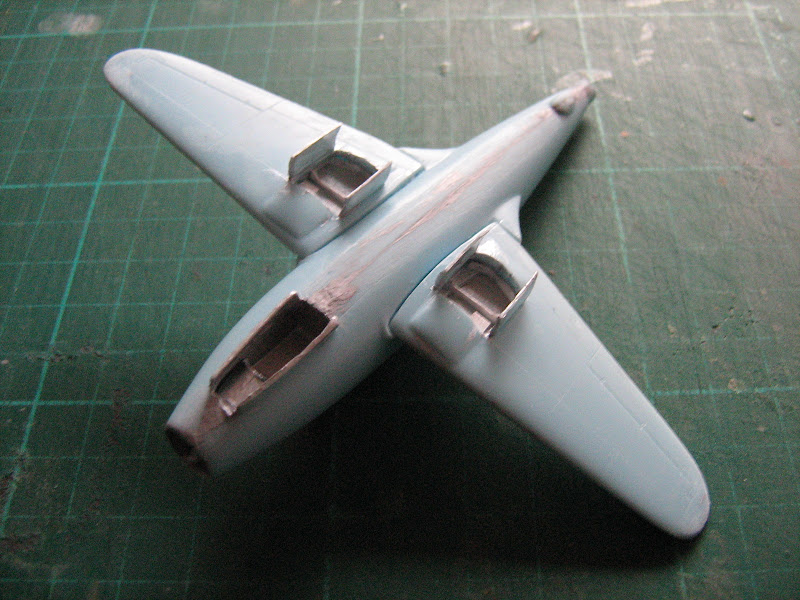
FROG: Filling in the wheel well detail is a lot easier because unlike the HPM kit the wheel wells are entirely located on the wing pieces. The wing halves have some nasty pin marks that need to be sanded flat, otherwise they won't join, but that's no big deal. The only real issue is the hollow space where the "bump" on the upper wing surface is located. I have dumped in some Tamiya filler to fill that space, a little more will be required. Other than that it all goes swimmingly.
Wing halves assembled for this photo (but not yet glued).
And like the HPM the fuselage is assembled. Again, not a lot of filler is going to be needed, it's a pretty neat fit. Obviously there a couple of small sink holes that will need to be dealt with.


HPM: The wheel wells are as detailed as I plan to make them, so I glued the wing halves and added the doors for good measure.
Looking at photos of the real aircraft, the wheels only barely extend past the bottom of the doors so the height of the undercarriage on the little plastic base is pretty nearly right. I might have to add a 20-thou extension or something like that, but nothing more. For once, something is going right (he says cautiously)! (Incidentally, the trapezoidal shape of the wheel wells on the HPM kit appears to be spurious; the wells were more rectangular in shape as on the FROG kit. Odd sort of mistake to make, I would have thought.)
There being no reason not to assemble the fuselage, I've done that too. There won't be much in the way of filling required except around the nose to make sure the intake splitter is faired in nicely.
FROG: Filling in the wheel well detail is a lot easier because unlike the HPM kit the wheel wells are entirely located on the wing pieces. The wing halves have some nasty pin marks that need to be sanded flat, otherwise they won't join, but that's no big deal. The only real issue is the hollow space where the "bump" on the upper wing surface is located. I have dumped in some Tamiya filler to fill that space, a little more will be required. Other than that it all goes swimmingly.
Wing halves assembled for this photo (but not yet glued).
And like the HPM the fuselage is assembled. Again, not a lot of filler is going to be needed, it's a pretty neat fit. Obviously there a couple of small sink holes that will need to be dealt with.
-
Clashcityrocker

- Modelling Gent and Scholar
- Posts: 10823
- Joined: May 1st, 2011, 12:31 am
- Location: Adelaide. South Australia
Re: A Pair Of Pioneers
Both progressing nicely.
Nigel
Nigel
-
BWP
- Got in under the wire
- Posts: 778
- Joined: April 28th, 2011, 2:23 am
- Location: Melbourne, Australia
- Contact:
Re: A Pair Of Pioneers
Still more progress.
HPM: The wings have been attached to the fuselage. At first they wouldn't fit at all, as the additions I'd made to the wheel wells were obstructing the join. A little bit of judicious trimming solved that problem. Unfortunately, although the wings now fit, they don't fit well. The joints will need a lot of filling, and right about now I'm regretting the decision to glue the doors on before this step -- it would have been a great deal wiser to wait until later.
Still, this will prove an excellent opportunity to test out the "Perfect Plastic Putty" that I bought recently, to see if it matches its claims of easy application and clean-up.
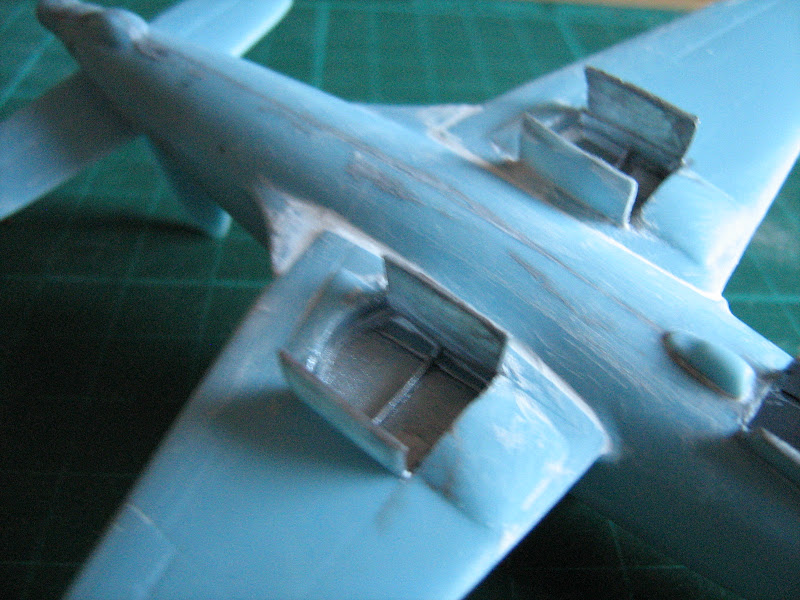
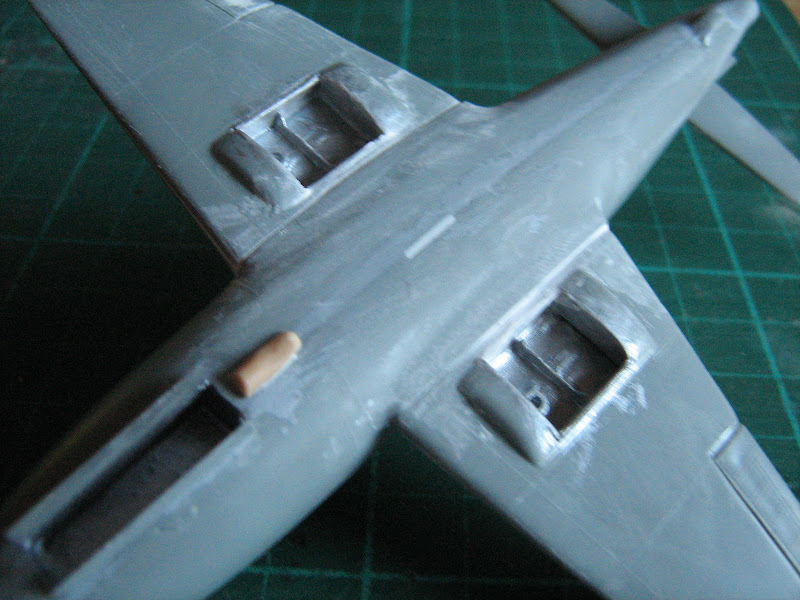
FROG: Not quite ready to attach the wings (and I suspect much filler will be required here also), but general clean-up of the fuselage is done and the wings assembly is finished. In this case I'll wait until later before adding the wheel well doors! The FROG doors "helpfully" have little "P" and "S" symbols moulded onto the doors so you know which is which. I sanded those off and marked the doors instead.
You can see yet more sinkholes to fill in the FROG parts. An initial coat of silver has been applied to the wells and inner doors of both kits. The wheel well details on both kits are somewhat crude but as none of this will be easily visible once the kits are mounted onto their bases I'm not going to worry about it.
HPM: The wings have been attached to the fuselage. At first they wouldn't fit at all, as the additions I'd made to the wheel wells were obstructing the join. A little bit of judicious trimming solved that problem. Unfortunately, although the wings now fit, they don't fit well. The joints will need a lot of filling, and right about now I'm regretting the decision to glue the doors on before this step -- it would have been a great deal wiser to wait until later.
Still, this will prove an excellent opportunity to test out the "Perfect Plastic Putty" that I bought recently, to see if it matches its claims of easy application and clean-up.
FROG: Not quite ready to attach the wings (and I suspect much filler will be required here also), but general clean-up of the fuselage is done and the wings assembly is finished. In this case I'll wait until later before adding the wheel well doors! The FROG doors "helpfully" have little "P" and "S" symbols moulded onto the doors so you know which is which. I sanded those off and marked the doors instead.
You can see yet more sinkholes to fill in the FROG parts. An initial coat of silver has been applied to the wells and inner doors of both kits. The wheel well details on both kits are somewhat crude but as none of this will be easily visible once the kits are mounted onto their bases I'm not going to worry about it.
-
ShaunW
- NOT the sheep
- Posts: 26188
- Joined: November 26th, 2011, 6:11 pm
- Location: Pontefract West Yorkshire
Re: A Pair Of Pioneers
You are doing great work with this pair Bruce and thanks for taking the time to detail your endeavours so thoroughly.
Doing - Tamiya 1/35th Universal Carrier.
Work is the curse of the modelling classes!
IPMS#12300
Work is the curse of the modelling classes!
IPMS#12300
-
BWP
- Got in under the wire
- Posts: 778
- Joined: April 28th, 2011, 2:23 am
- Location: Melbourne, Australia
- Contact:
Re: A Pair Of Pioneers
Thanks for the encouragement guys, frankly these are turning out to be a little more tedious than I had expected them to be. Or maybe I just bore easily these days.
Any way. Getting closer.
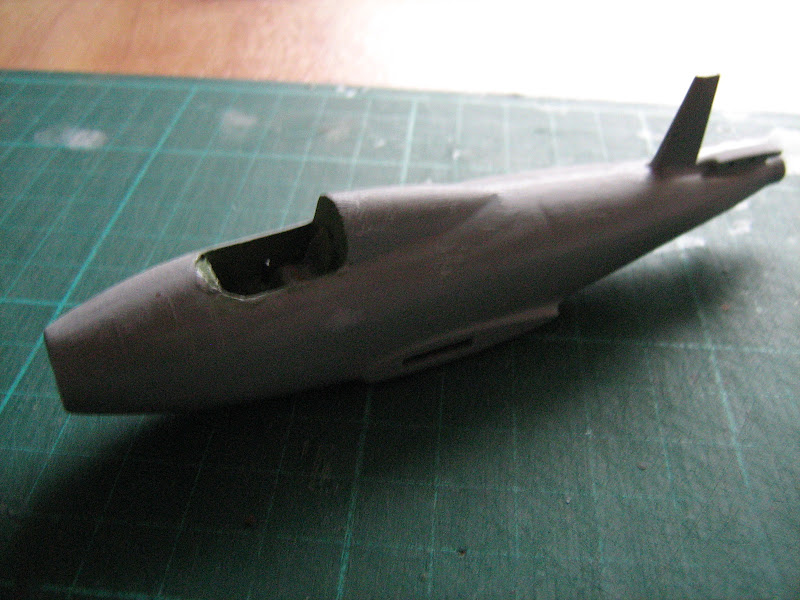
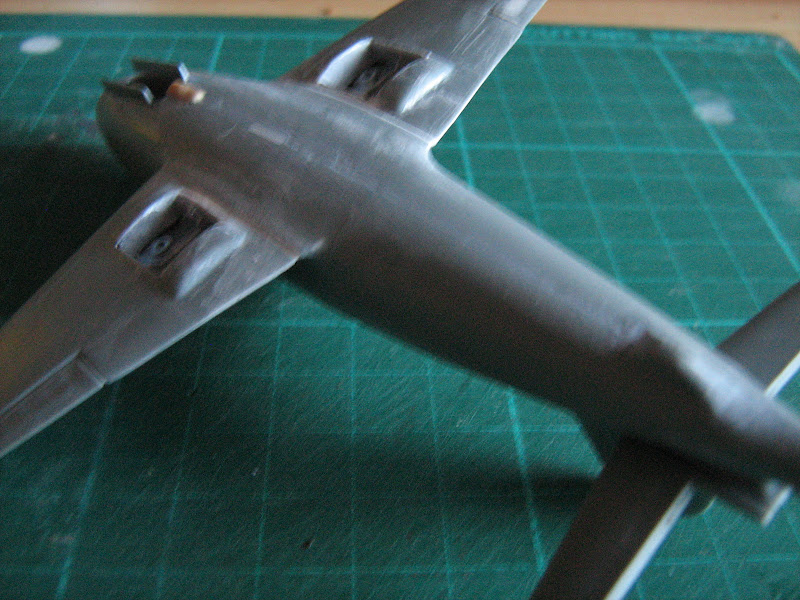
HPM: The Perfect Plastic Putty does work very nicely, the only problem with it cleaning up so easily (I use a moistened cotton bud) that I worry I'm cleaning putty out of the gap that I'm trying to fill. Oh well, it's looking OK so far, but I'm going to have to apply a coat of primer to better judge if I have indeed filled the trenches. Meanwhile I have also applied the tail planes and fin, which on this kit are just flat lumps that attach where you think they will fit best -- there are no guiding pegs or anything similar. Fortunately I had plenty of useful photographs to make the determination, there's precious little help in the instructions. This, of course, leads to more significant gaps in hard-to-reach places that need to be filled in this area. I had to use a pin to apply the putty, a toothpick was too thick! I also added the under-fuselage intake piece that once again the kit instructions provide no help for (other than to tell you that it needs to be added) and unfortunately the available photographs are not quite as helpful -- it doesn't show up at all in many of them. "Best guess" time I'm afraid. Even this tiny little piece needs some filler!
Gah, my photos are getting worse. Sorry, it was extra gloomy this morning.

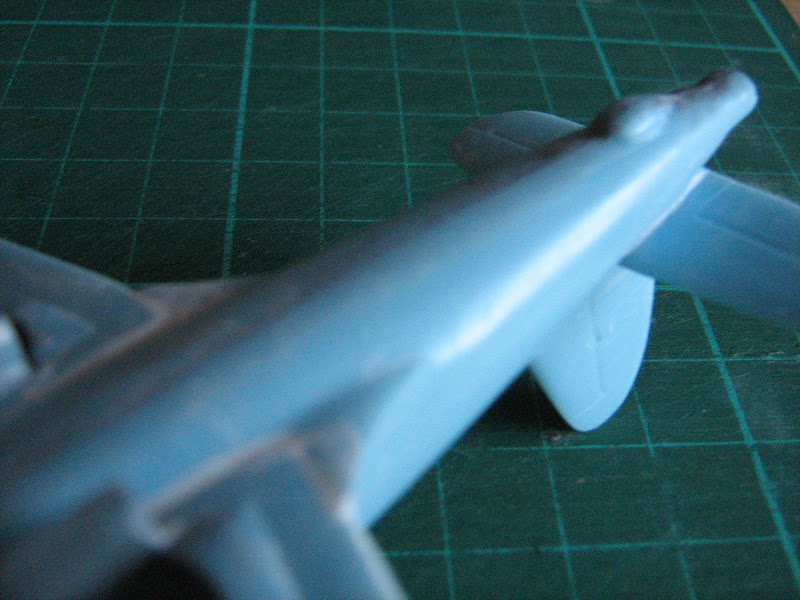
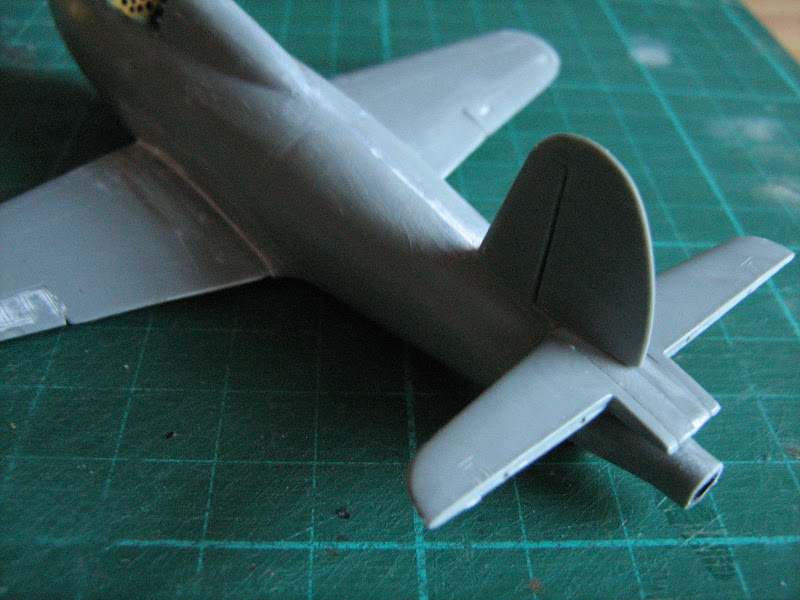
FROG: Similarly the wings have now been attached (some filler required, but not as bad as I thought it would be) and the tailplanes/fin too. The tailplanes are each split into two halves, presumably to avoid sinkholes forming, but instead each half has some rather severe raised pin marks that need to be removed to allow a good join. A tiny amount of filler is also required around the edges. The fin and rudder parts are almost as thick as the tailplanes though but are only single parts -- not quite sure of the logic involved in that choice. Remarkably they don't suffer from sinkholes at all! Anyway the fit of all these tail bits is actually pretty decent, although there's not a lot of strength in the join of the tailplane to the fuselage, a little carelessness will easily break them off I think. The FROG kit does not offer the underside intake part at all so I have carved one from a piece of sprue.
I'm getting remarkably close to applying the primer coat to each kit to get the paint job underway, I think!
Any way. Getting closer.
HPM: The Perfect Plastic Putty does work very nicely, the only problem with it cleaning up so easily (I use a moistened cotton bud) that I worry I'm cleaning putty out of the gap that I'm trying to fill.
Gah, my photos are getting worse. Sorry, it was extra gloomy this morning.
FROG: Similarly the wings have now been attached (some filler required, but not as bad as I thought it would be) and the tailplanes/fin too. The tailplanes are each split into two halves, presumably to avoid sinkholes forming, but instead each half has some rather severe raised pin marks that need to be removed to allow a good join. A tiny amount of filler is also required around the edges. The fin and rudder parts are almost as thick as the tailplanes though but are only single parts -- not quite sure of the logic involved in that choice. Remarkably they don't suffer from sinkholes at all! Anyway the fit of all these tail bits is actually pretty decent, although there's not a lot of strength in the join of the tailplane to the fuselage, a little carelessness will easily break them off I think. The FROG kit does not offer the underside intake part at all so I have carved one from a piece of sprue.
I'm getting remarkably close to applying the primer coat to each kit to get the paint job underway, I think!
-
DavidWomby

- Modelling Gent and Scholar
- Posts: 11765
- Joined: May 1st, 2011, 8:09 pm
- Location: Florida, USA
Re: A Pair Of Pioneers
This is great to follow, Bruce.
I have tried Perfect Plastic Putty too and I like it but it is easy to wipe too hard and remove a bit too much sometimes. Where there's space, I find a wet finger works best for smoothing it into shape while it is still not set.
David
I have tried Perfect Plastic Putty too and I like it but it is easy to wipe too hard and remove a bit too much sometimes. Where there's space, I find a wet finger works best for smoothing it into shape while it is still not set.
David
-
BWP
- Got in under the wire
- Posts: 778
- Joined: April 28th, 2011, 2:23 am
- Location: Melbourne, Australia
- Contact:
Re: A Pair Of Pioneers
I have applied a primer coat to both kits now to see how well I've filled the gaps.
HPM:
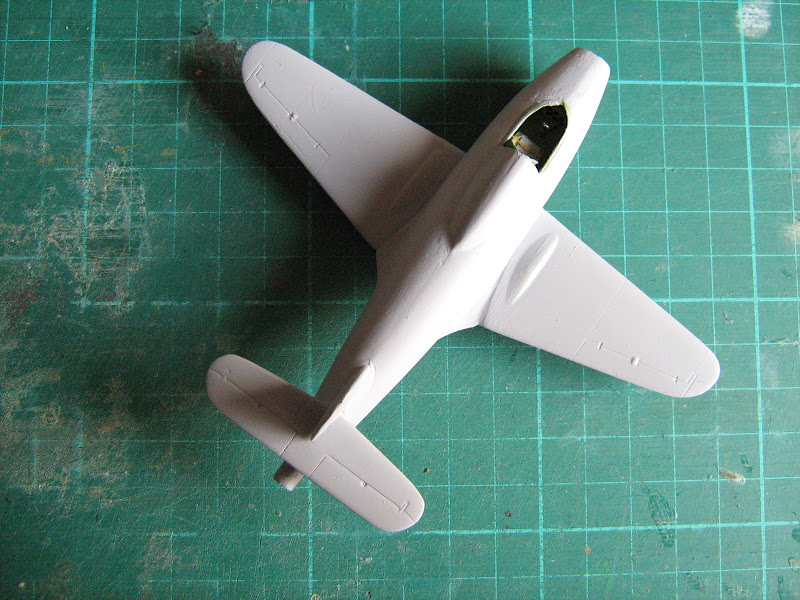
FROG:
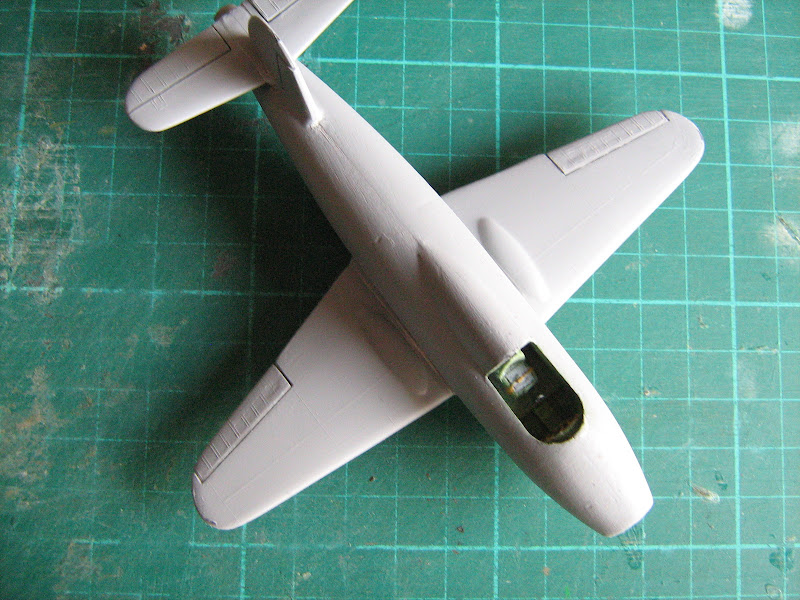
Both fall into the "OK, a little bit more filling needed here and there" category, I think. I can cope.
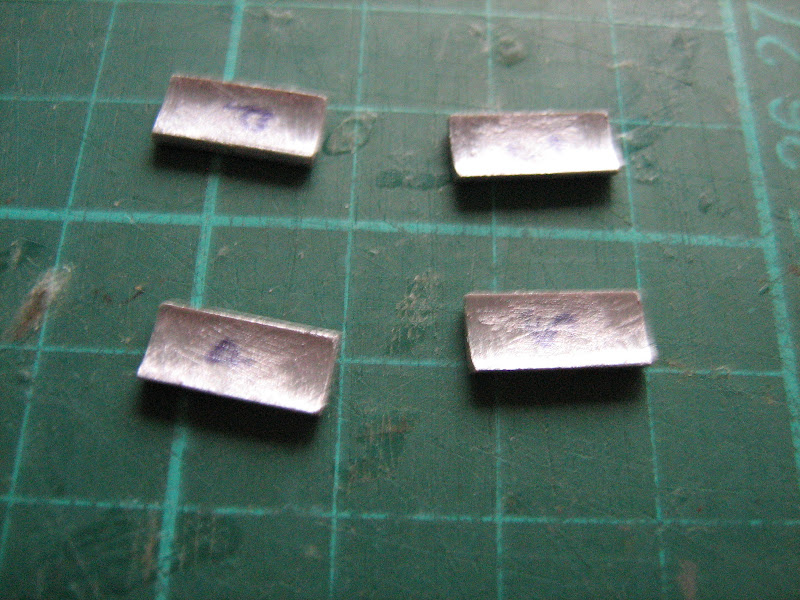
While the primer coats were drying I thought I'd work on the FROG undercarriage. Here's a comparison of the parts from the two kits:
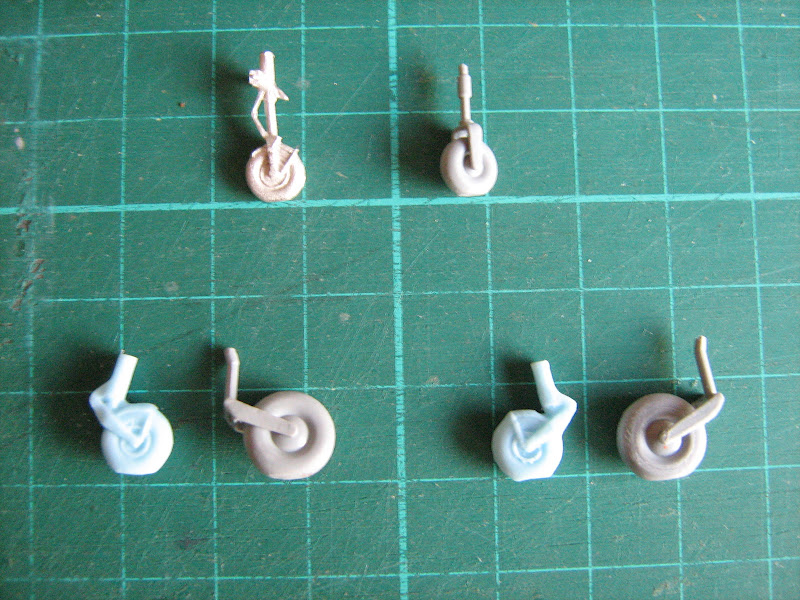
You have trouble telling them apart, right?? The HPM tires come pre-flattened, I had to manually flatten the FROG ones. The wheels on the FROG kit are actually intended to rotate, and do so without the traditional "apply a hot knife blade to the pin to form a hub" common to many FROG kits -- instead, the wheels just clip in. Remarkable. Of course, I don't want the wheels to rotate so, you know ... glue.
After a little bit of jiggery-pokery with bits of plastic card and stretched sprue, this is the end result:
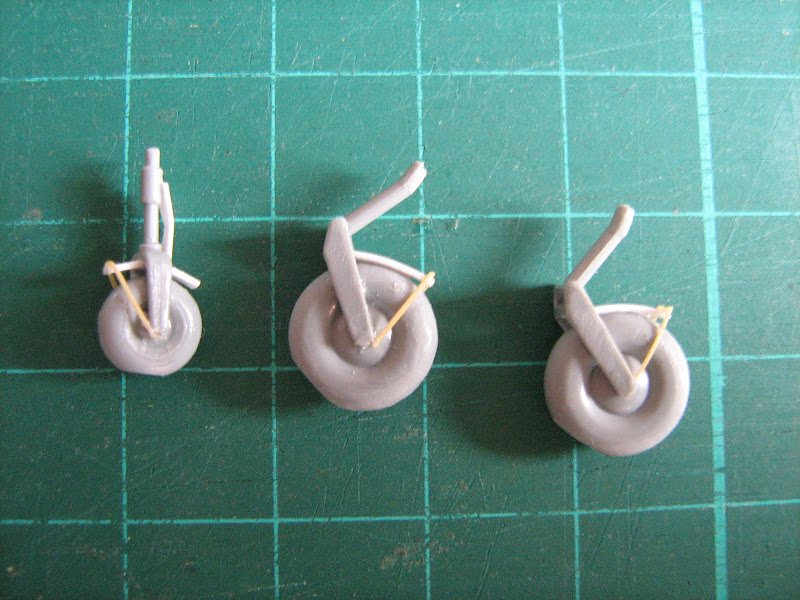
I'm actually quite pleased with that. I hope they don't fall apart when I paint them!
HPM:
FROG:
Both fall into the "OK, a little bit more filling needed here and there" category, I think. I can cope.
While the primer coats were drying I thought I'd work on the FROG undercarriage. Here's a comparison of the parts from the two kits:
You have trouble telling them apart, right??
After a little bit of jiggery-pokery with bits of plastic card and stretched sprue, this is the end result:
I'm actually quite pleased with that. I hope they don't fall apart when I paint them!
-
Clashcityrocker
- Modelling Gent and Scholar
- Posts: 10823
- Joined: May 1st, 2011, 12:31 am
- Location: Adelaide. South Australia
Re: A Pair Of Pioneers
Nice improvements Bruce.
Nigel
Nigel