Westland Whirlwind, Airfix, 1/72
Posted: September 15th, 2015, 2:55 pm
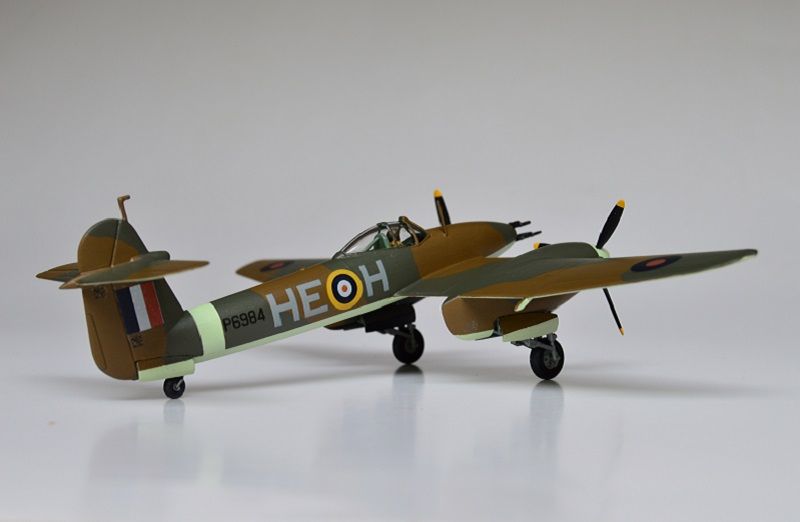
Westland Whirlwind (No.263 Sqn, RAF Exeter, December 1940)
Hi everyone,
Right from the start I decided that I would try to build this kit with spinning props. I usually fix them in place at the end of the build to help with painting and to ensure that they are sitting correctly but I thought it would be fun to have a go. No motors – I just wanted to be able to spin the props (and zoom the model around the room!).
The props and spinners were therefore pre-painted and attached whilst making sure that they were kept free to turn and not clogged up with glue. They are a loose fit but when pushed up against the engine look fine.
The undercarriage legs looked like they would be a fiddly job so I also painted them up in advance and attached them to the upper wing part before joining the two halves. You have to separate the undercarriage bay doors which is no problem but somehow I managed to paint the wrong colours on each part not once but twice. Then I painted the wrong shade of brown over the whole model and had to start again (Must actually look at the numbers on the tins next time).
Despite my mistakes painting was eventually completed but was actually made quite difficult by my use of paper discs to mask the props. Still, the build overall was very enjoyable and best of all…
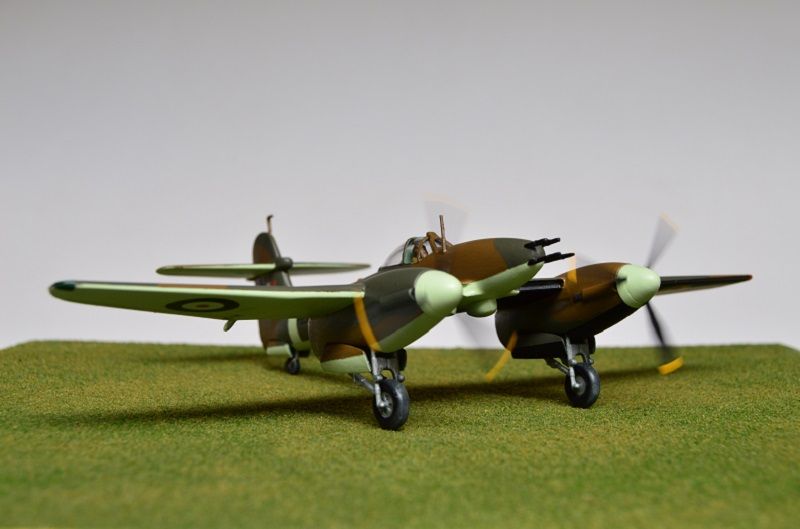
…Spinning props!!!
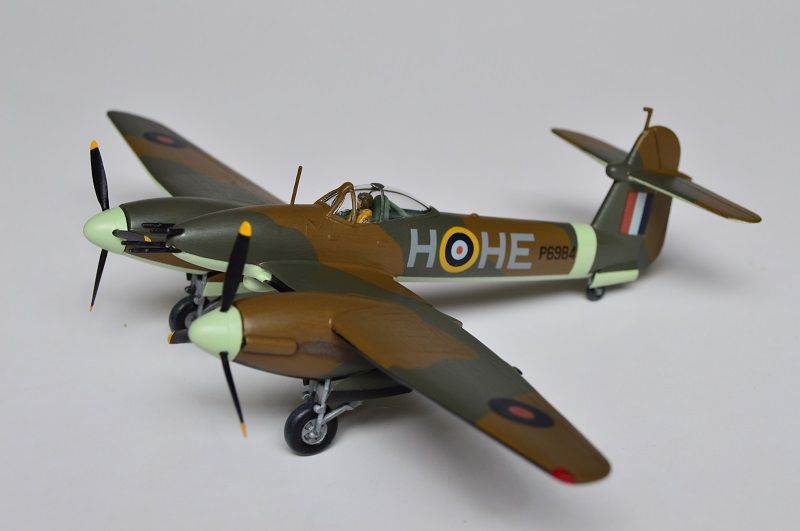
As usual the model was brush painted using Humbrol enamels and varnishes.
Thanks for looking
Stu
Hi everyone,
Right from the start I decided that I would try to build this kit with spinning props. I usually fix them in place at the end of the build to help with painting and to ensure that they are sitting correctly but I thought it would be fun to have a go. No motors – I just wanted to be able to spin the props (and zoom the model around the room!).
The props and spinners were therefore pre-painted and attached whilst making sure that they were kept free to turn and not clogged up with glue. They are a loose fit but when pushed up against the engine look fine.
The undercarriage legs looked like they would be a fiddly job so I also painted them up in advance and attached them to the upper wing part before joining the two halves. You have to separate the undercarriage bay doors which is no problem but somehow I managed to paint the wrong colours on each part not once but twice. Then I painted the wrong shade of brown over the whole model and had to start again (Must actually look at the numbers on the tins next time).
Despite my mistakes painting was eventually completed but was actually made quite difficult by my use of paper discs to mask the props. Still, the build overall was very enjoyable and best of all…

…Spinning props!!!


As usual the model was brush painted using Humbrol enamels and varnishes.
Thanks for looking
Stu