Paul's Attempts

Re: Paul's Attempts
Looks great in those colours
-
Clashcityrocker

- Modelling Gent and Scholar
- Posts: 10832
- Joined: May 1st, 2011, 12:31 am
- Location: Adelaide. South Australia
Re: Paul's Attempts
You've achieved an excellent finish. Top work.
Nigel
Nigel

Re: Paul's Attempts
Very sweet build.
Besting 60 years of mediocre building of average kits in the stand off scale
-
giulio_gobbi

- Modelling Gent and Scholar
- Posts: 1971
- Joined: May 4th, 2011, 8:37 pm
- Location: Naples, Italy
- Contact:
Re: Paul's Attempts
A great result on this!
Very Nice.
Very Nice.
Sometimes the talent consists exactly in that: try five dozen times when others stop at three dozen...! (F.Labelle)
I think that modeling is a subtle mix of zen philosophy and absolute crazyness - but in my case I would not dare to specify the respective percentage of each......
I think that modeling is a subtle mix of zen philosophy and absolute crazyness - but in my case I would not dare to specify the respective percentage of each......
-
shangos70
- Modelling Gent and Scholar
- Posts: 4426
- Joined: May 1st, 2011, 11:14 am
- Location: Doncaster, Socialist Republic of South Yorkshire.
Re: Paul's Attempts
A little thing of beauty. Well done.

Re: Paul's Attempts
Thank you guys. Sharing and looking at all this stuff is good motivation. 
Paul
This is it. The moment we should have trained for.
This is it. The moment we should have trained for.
-
Canuck2016

- Active Participant
- Posts: 535
- Joined: March 6th, 2016, 4:03 pm
Re: Paul's Attempts
Absolutely outstanding work, Paul! The finish on your models always amazes me, and the bases for the Beaver and Gladiator look great. Terrific detailing on the cockpit and landing lights of the Zlin too. I'm in awe! 

Re: Paul's Attempts
I really like the Zlin, the kit, looks to be very good, but your work is amazing!

Re: Paul's Attempts
Evening.
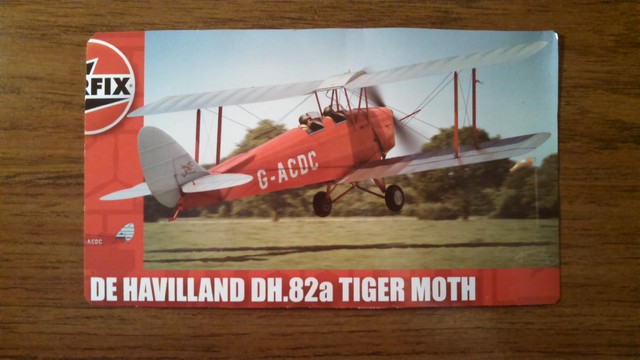
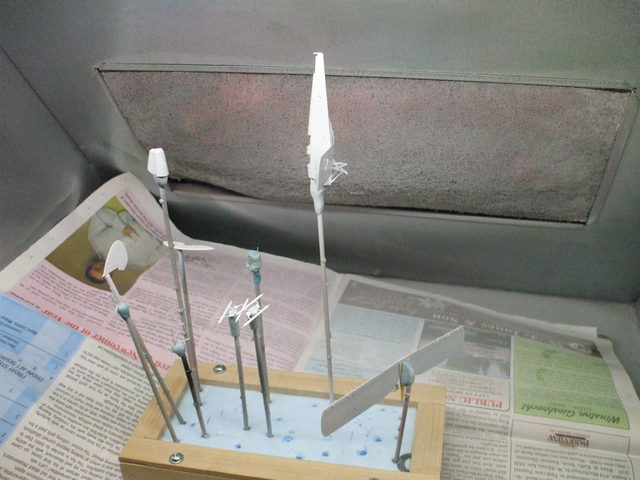
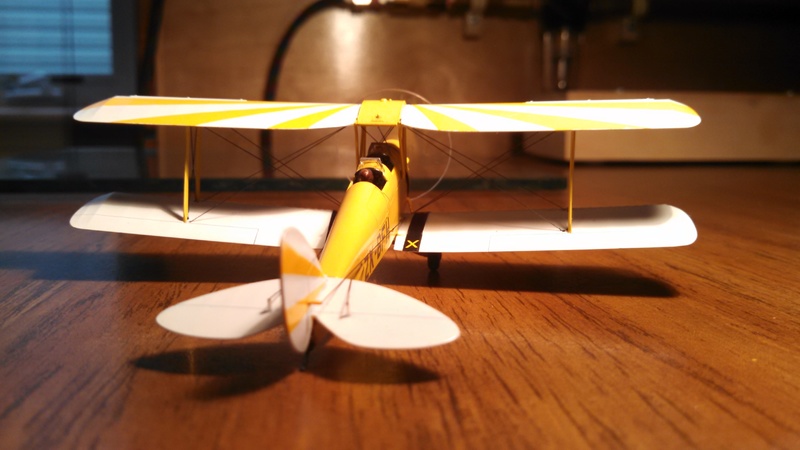
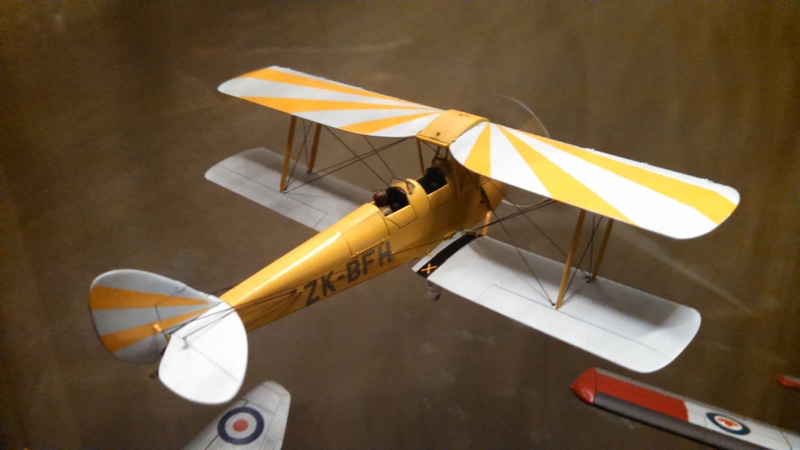
Been away from the desk working for a little bit but I'm back and have started on a new project. The 1/72 Airfix Tigermoth. Another beautiful kit from Airfix. Small fiddly thing though.
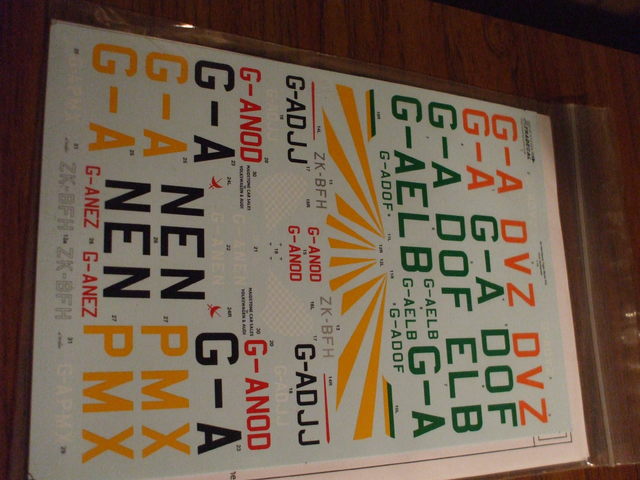
I have decided to do a different scheme than on the box. It will be a yellow and white aircraft from New Zealand. I bought the Xtradecal sheet for the markings.
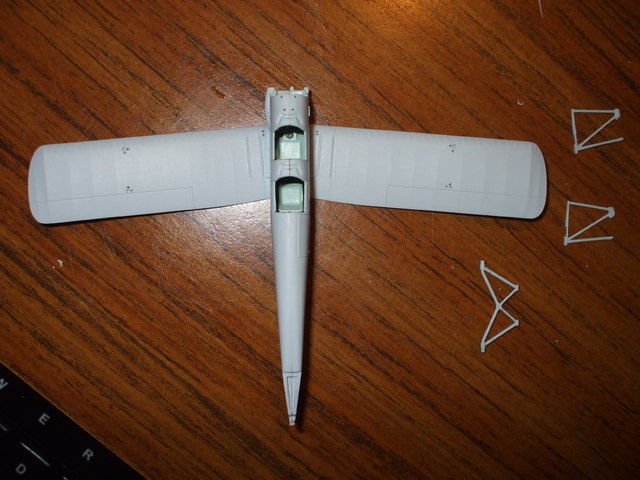
Holes drilled for the rigging. The holes are only partially drilled through the top wing like I did on the Gladiator, however unlike the Gladiator I am not going to drill all the way through the bottom wing. I want to keep the bottom as neat as possible.

A little work was required to smooth the seams on the underside for the bottom wing.
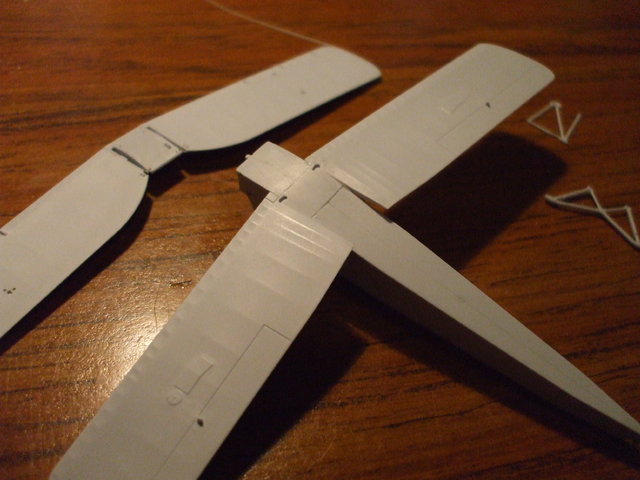
Block of plastic that was to simulate the control rod to the ailerons was replaced with plastic rod.
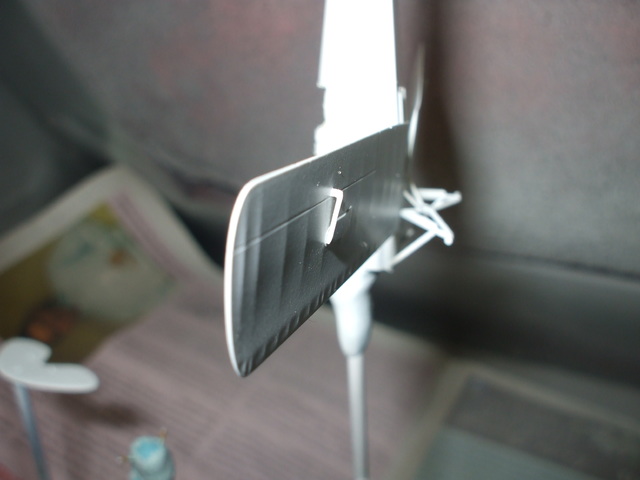
One set of bracing that was missing in the kit (45 degree behind the landing gear) was added. Landing gear was surprising easy to install and it was also strong.
Wonderful kit!. More to follow. Thanks for looking.
Cheers,
Been away from the desk working for a little bit but I'm back and have started on a new project. The 1/72 Airfix Tigermoth. Another beautiful kit from Airfix. Small fiddly thing though.
I have decided to do a different scheme than on the box. It will be a yellow and white aircraft from New Zealand. I bought the Xtradecal sheet for the markings.
Holes drilled for the rigging. The holes are only partially drilled through the top wing like I did on the Gladiator, however unlike the Gladiator I am not going to drill all the way through the bottom wing. I want to keep the bottom as neat as possible.
A little work was required to smooth the seams on the underside for the bottom wing.
Block of plastic that was to simulate the control rod to the ailerons was replaced with plastic rod.
One set of bracing that was missing in the kit (45 degree behind the landing gear) was added. Landing gear was surprising easy to install and it was also strong.
Wonderful kit!. More to follow. Thanks for looking.
Cheers,
Paul
This is it. The moment we should have trained for.
This is it. The moment we should have trained for.
Re: Paul's Attempts
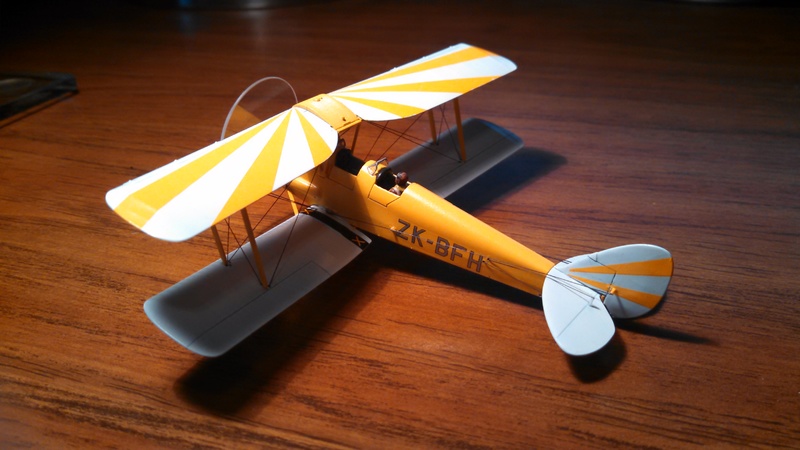
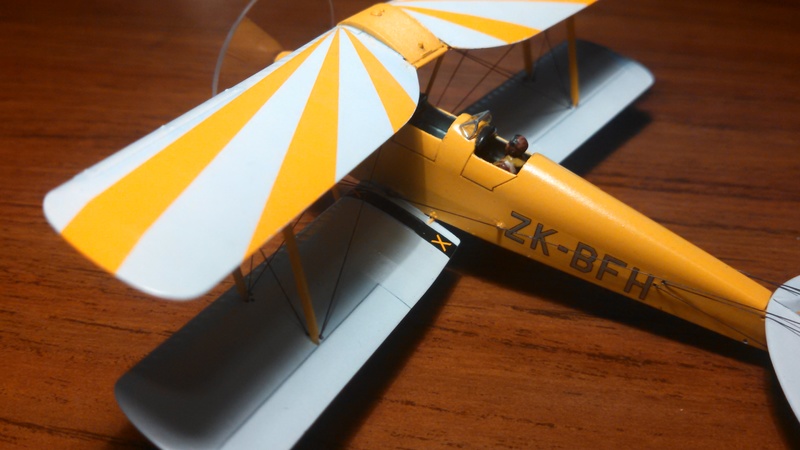
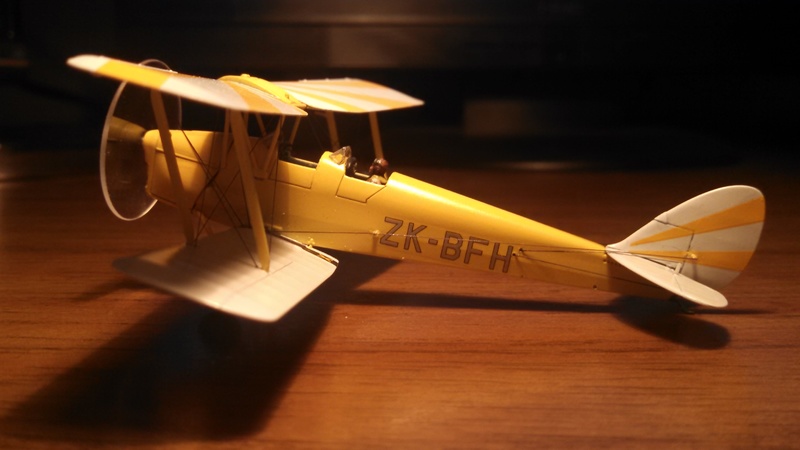
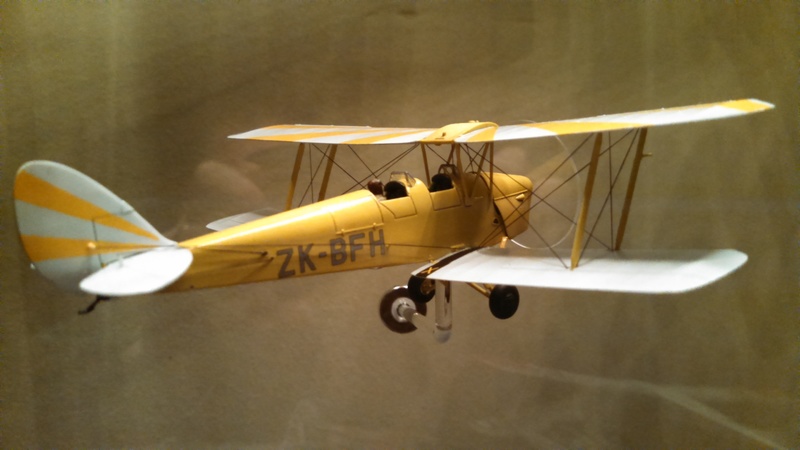
The Tigermoth is almost finished. I wanted to simulate a flying aircraft so I used a clear piece of plastic to make the propeller arc. I still have to add the spinner tip and give it a little paint. I finally tried to insert the pilot. Painting was not a great success but it's OK. He looks like he sits too low in the cockpit so I may take him out and raise him a bit. A couple stand-offs were added to the side of the fuselage so that the rudder rigging would stand proud a bit and also raise the control wire a bit so it does not interfere with the horizontal stab. I did regret one thing I did. I tried to keep the bottom wing clean and not drill right through it for the rigging. Unfortunately I could not get the rigging to stick in the bottom holes and they just kept popping out with globs of CA. I ended up drilling right through as I did before. Not sure why I couldn't get it to stick!
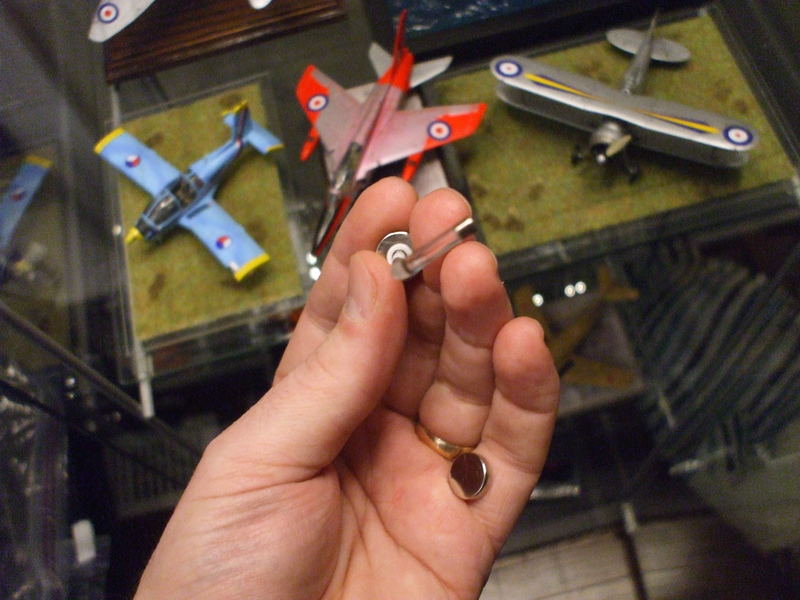
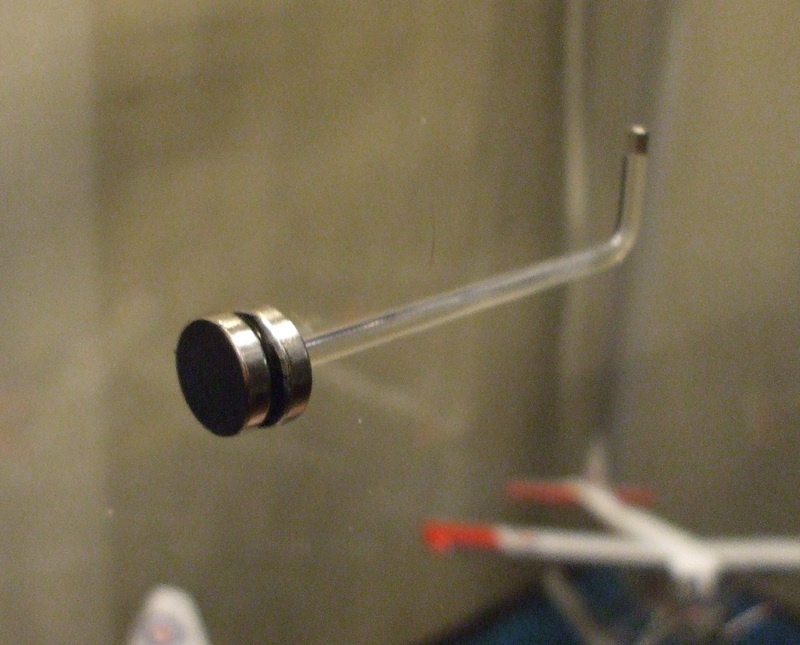
I had a dilemma, I only have the middle shelf for my models and I have run out of room. The stuff on the top shelf is not mine. I thought about it for a bit and I realized the air above the shelf was still empty so I thought I would stick the model there. the model is quite small and light so I used a couple of 1/8" magnets in the model as I did with the Gladiator. I then used a larger magnet with a hole in the middle and inserted an acrylic rod into it. A second magnet on the outside of the glass would hold it up.
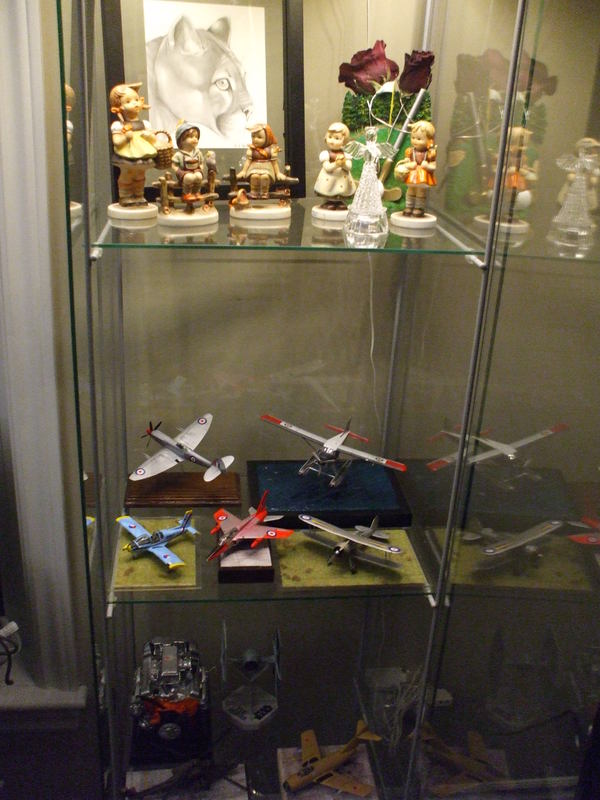
Now, presto, the unused space is now useful!

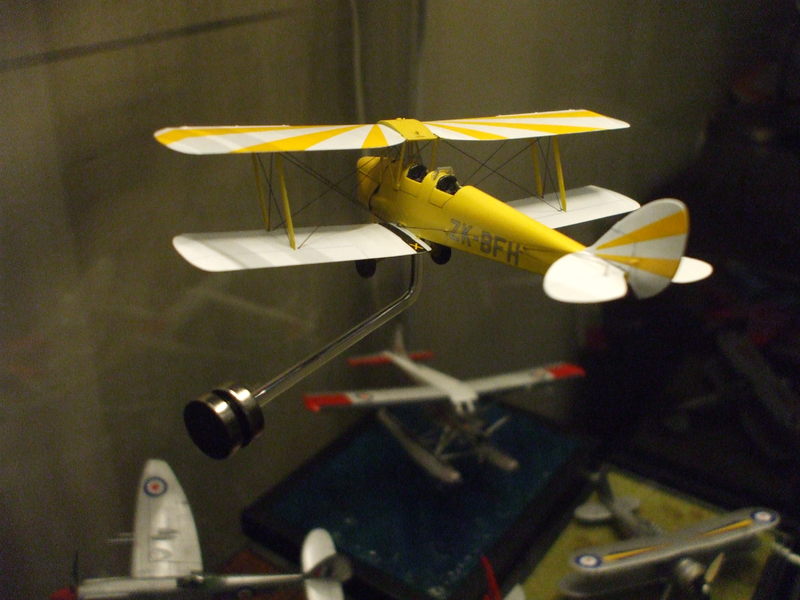
It is not permanently stuck since there is no glue and it is easily removable. From some angles it even looks like it is just hanging there.
I had a dilemma, I only have the middle shelf for my models and I have run out of room. The stuff on the top shelf is not mine. I thought about it for a bit and I realized the air above the shelf was still empty so I thought I would stick the model there. the model is quite small and light so I used a couple of 1/8" magnets in the model as I did with the Gladiator. I then used a larger magnet with a hole in the middle and inserted an acrylic rod into it. A second magnet on the outside of the glass would hold it up.
Now, presto, the unused space is now useful!
It is not permanently stuck since there is no glue and it is easily removable. From some angles it even looks like it is just hanging there.
Paul
This is it. The moment we should have trained for.
This is it. The moment we should have trained for.

Re: Paul's Attempts
Really nice Tiggie and a great display case.
Besting 60 years of mediocre building of average kits in the stand off scale
-
ShaunW
- NOT the sheep
- Posts: 26194
- Joined: November 26th, 2011, 6:11 pm
- Location: Pontefract West Yorkshire
Re: Paul's Attempts
That is a lovely Tiger Moth Paul and a neat idea for the display stand. I also really like your display cabinet and the adjustments that you have made to it. Top work all round 
Doing - Tamiya 1/35th Universal Carrier.
Work is the curse of the modelling classes!
IPMS#12300
Work is the curse of the modelling classes!
IPMS#12300
-
iggie

- Modelling Gent and Scholar
- Posts: 23438
- Joined: July 31st, 2013, 11:04 am
- Location: North Somercotes, Lincolnshire
- Contact:
Re: Paul's Attempts
Loving the Tiggie and the colourful scheme you've done it in.
Also like the mounting idea.....that could be very useful!
Also like the mounting idea.....that could be very useful!
Best wishes
Jim
If you can walk away from a landing, it's a good landing. If you use the airplane the next day, it's an outstanding landing
"Never put off till tomorrow, what you can do the day after tomorrow"
Jim
If you can walk away from a landing, it's a good landing. If you use the airplane the next day, it's an outstanding landing
"Never put off till tomorrow, what you can do the day after tomorrow"