E.E. Lightning SB 'The Lightning Boys!'
-
JohnRatzenberger

- Why is he so confused ?
- Posts: 15741
- Joined: April 5th, 2011, 3:42 pm
- Location: Living on a sandbar - Nags Head, NC.
Re: E.E. Lightning SB 'The Lightning Boys!'
That's a good point Fred, thanks.
John Ratzenberger 
It's my model and I'll do what I want with it.
It's my model and I'll do what I want with it.
-
DavidWomby

- Modelling Gent and Scholar
- Posts: 11767
- Joined: May 1st, 2011, 8:09 pm
- Location: Florida, USA
Re: E.E. Lightning SB 'The Lightning Boys!'
Made some exhaust cans from 1/4" plastic tube with little nicks out of the edge.
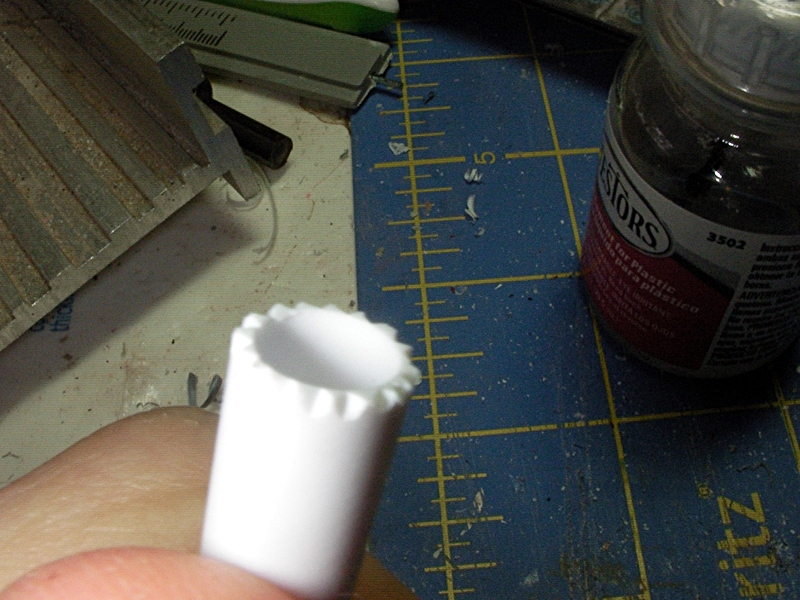
Not quite like the real thing but should suffice.
David
Not quite like the real thing but should suffice.
David
-
Stuart

- Raider of the Lost Ark Royal
- Posts: 19451
- Joined: February 25th, 2013, 4:55 pm
- Location: North Wales
- Contact:
Re: E.E. Lightning SB 'The Lightning Boys!'
Hey those are good - Nice idea.
In answer to your question - No my wings don't appear to be short shot. I'll take a picture later.
Cheers
Stuart
In answer to your question - No my wings don't appear to be short shot. I'll take a picture later.
Cheers
Stuart
Stuart Templeton I may not be good but I'm slow...
My Blog: https://stuartsscalemodels.blogspot.com/
My Blog: https://stuartsscalemodels.blogspot.com/
-
DavidWomby
- Modelling Gent and Scholar
- Posts: 11767
- Joined: May 1st, 2011, 8:09 pm
- Location: Florida, USA
Re: E.E. Lightning SB 'The Lightning Boys!'
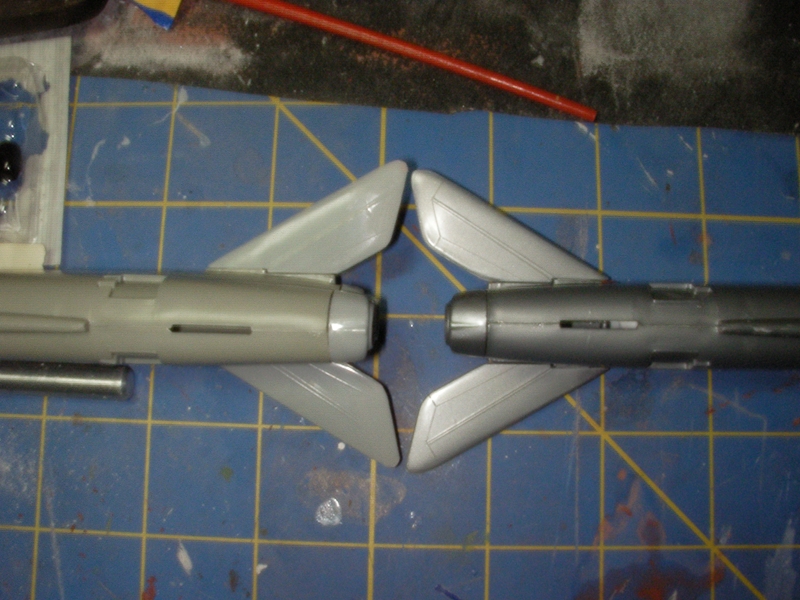
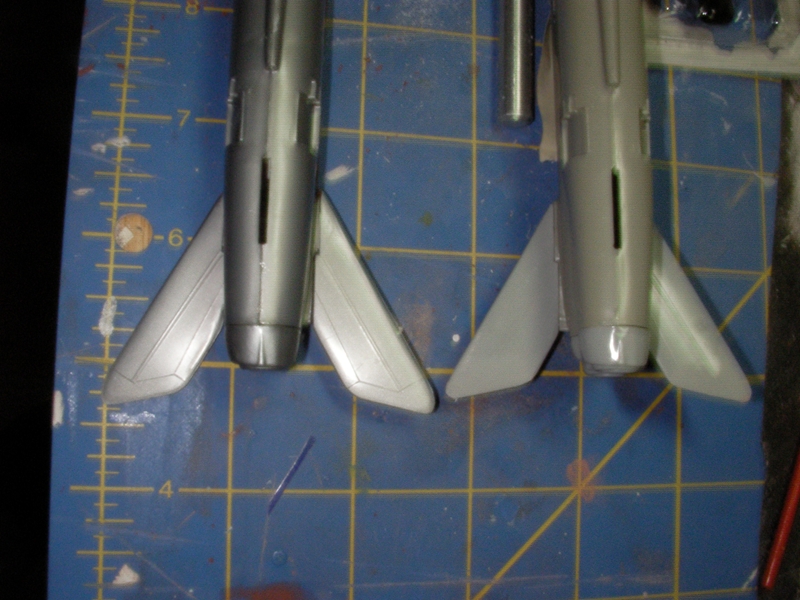
In the end, after comparisons to plans and the Mbox and Hgwa kits, I decided the Afx tailplanes didn't need moving forward - they are just too long. So I cut a couple of mm off the trailing edges of the grey ones in the pics. Subtle difference but I can see it!
David
David
-
DavidWomby
- Modelling Gent and Scholar
- Posts: 11767
- Joined: May 1st, 2011, 8:09 pm
- Location: Florida, USA
Re: E.E. Lightning SB 'The Lightning Boys!'
Stuart, watch out for the airbrakes. They are a truly horrid fit. I just did one pair - one was too far sunken in and the other stood too proud of the fuselage. If you're building it wheels down, you may want to consider making little struts and fitting the airbrakes in the open position.
David
David
-
Stuart
- Raider of the Lost Ark Royal
- Posts: 19451
- Joined: February 25th, 2013, 4:55 pm
- Location: North Wales
- Contact:
Re: E.E. Lightning SB 'The Lightning Boys!'
Thanks for the heads-up David - I was going to close then but perhaps I'll leave them open.dwomby wrote:Stuart, watch out for the airbrakes. They are a truly horrid fit. I just did one pair - one was too far sunken in and the other stood too proud of the fuselage. If you're building it wheels down, you may want to consider making little struts and fitting the airbrakes in the open position.
David
Cheers
Stuart
Stuart Templeton I may not be good but I'm slow...
My Blog: https://stuartsscalemodels.blogspot.com/
My Blog: https://stuartsscalemodels.blogspot.com/
-
DavidWomby
- Modelling Gent and Scholar
- Posts: 11767
- Joined: May 1st, 2011, 8:09 pm
- Location: Florida, USA
Re: E.E. Lightning SB 'The Lightning Boys!'
They can be closed - mine are. Just expect a lot of fettling if they fit like mine do.
-
Stuart
- Raider of the Lost Ark Royal
- Posts: 19451
- Joined: February 25th, 2013, 4:55 pm
- Location: North Wales
- Contact:
Re: E.E. Lightning SB 'The Lightning Boys!'
The F.3 is starting to look like a Lightning...
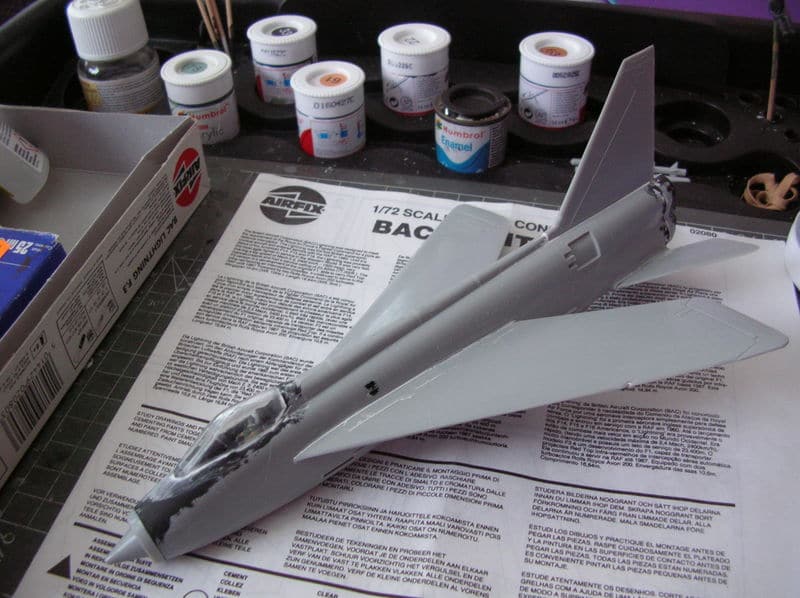
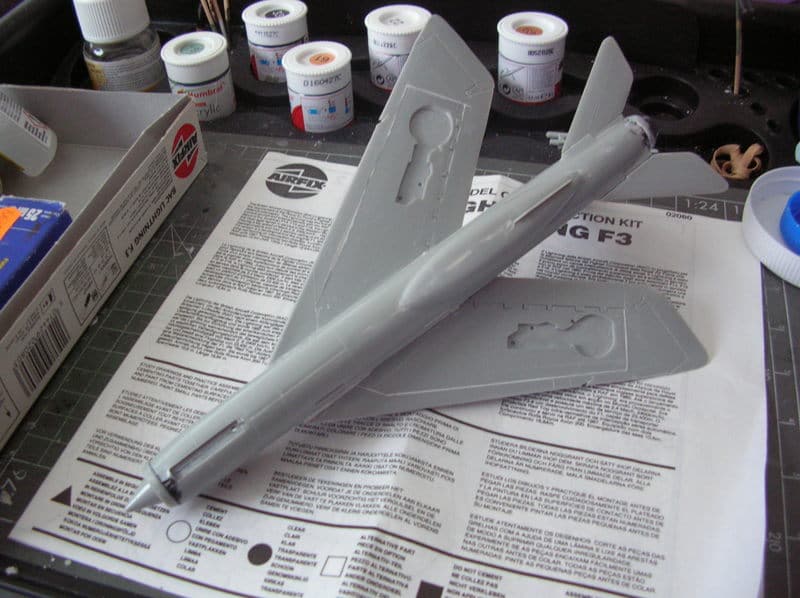
I don't know why but I've a real urge to paint this one in enamels - not something I've done for nearly a year.
Cheers
Stuart
I don't know why but I've a real urge to paint this one in enamels - not something I've done for nearly a year.
Cheers
Stuart
Stuart Templeton I may not be good but I'm slow...
My Blog: https://stuartsscalemodels.blogspot.com/
My Blog: https://stuartsscalemodels.blogspot.com/
-
fredk

- Modelling Gent and Scholar
- Posts: 6196
- Joined: May 1st, 2012, 6:25 am
- Location: Donaghadee, N'rn Ir'n
Re: E.E. Lightning SB 'The Lightning Boys!'
Thats certainly looking like an E E Lightning there
Al speling misteaks aer all mi own werk..
Its not just how good your painting is, its how good the touch-ups are too.
Its not just how good your painting is, its how good the touch-ups are too.

Re: E.E. Lightning SB 'The Lightning Boys!'
Lightning progress. I have struggled with the light grey stated in the Lightning MDF. It says just that, Light Grey. I started with Humbrol 47 but that seemed too light, almost white. I then used Humbrol 167 Barley Grey which although not strictly light grey seemed to match the picture better.


Hoping to return to modelling sometime this year!! 
Owner of Marky's Model Emporium since 2013!.
Owner of Marky's Model Emporium since 2013!.
-
lancfan

- Avro's Rivet Rhapsodizer
- Posts: 8764
- Joined: May 2nd, 2011, 3:55 pm
- Location: Nelson, Lancashire
Re: E.E. Lightning SB 'The Lightning Boys!'
Well, it's high time I reported my progress on this, my first Lightning SB build, the first steps were to cut away the fuselage parts from the styrene sheet and prepare the cockpit, the kit includes a WM ejection seat but the cockpit tub is simply made up from vac-formed flat shapes which are not at all convincing so I think I will copy the tub from the Airfix F.2a kit for this model.

Here is Airfix part A9 along with the mould I have taken from it for this model.

This is the mould with the modified resin part.

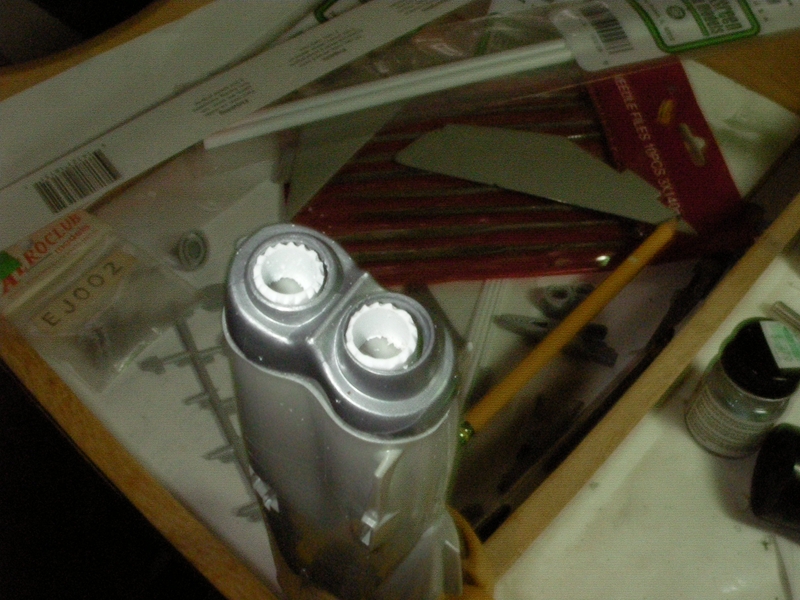
I then turned my attention to the tail pipes these were made up from thin plastic card rolled around a makeshift mandrel, here are the rolled tubes pictured with the rear fuselage and the mandrel.

The tubes were then joined together with a spacer and another Airfix part, number B21 was used to form the engine detail for the tailpipes, this was copied using a plasticene mould and was made from epoxy resin, here are the parts and mould prior to the pour.

The nose intake trunking was now cut free from the sheet and made up, this was then trimmed and due to it's fragile nature the far end was filled with epoxy to strengthen it as the base of the noseleg mounting point. This and the finished tail pipe assembly were then fitted in place to the RH fuselage half and are pictured here glued in position with the cockpit mould and resin tub shown alongside.

AT this point I put the fuselage to one side and began work on the Airfix F.1 wings, from looking at the plans the panel lines are quite different from the production lightning and engraving them would be a little trickier than simply running along the raised kit lines, also the wheel bay shape was different so this will also have to be changed. Before looking at this I milled out the wheel bays inside the wing upper surface parts, at the same time I removed the 'orrible snaptite lugs.

I then cut a new pair of wheel bays from plastic card and milled down the same area from the wing undersides parts, the new plastic card pieces were then glued to the wing panels and the wing halves were glued together. The edges of the new panels were then filled with Revell Plasto filler and when dry the wings were sanded smooth prior to be engraved. After engraving they now look like this.

David.
Here is Airfix part A9 along with the mould I have taken from it for this model.
This is the mould with the modified resin part.
I then turned my attention to the tail pipes these were made up from thin plastic card rolled around a makeshift mandrel, here are the rolled tubes pictured with the rear fuselage and the mandrel.
The tubes were then joined together with a spacer and another Airfix part, number B21 was used to form the engine detail for the tailpipes, this was copied using a plasticene mould and was made from epoxy resin, here are the parts and mould prior to the pour.
The nose intake trunking was now cut free from the sheet and made up, this was then trimmed and due to it's fragile nature the far end was filled with epoxy to strengthen it as the base of the noseleg mounting point. This and the finished tail pipe assembly were then fitted in place to the RH fuselage half and are pictured here glued in position with the cockpit mould and resin tub shown alongside.
AT this point I put the fuselage to one side and began work on the Airfix F.1 wings, from looking at the plans the panel lines are quite different from the production lightning and engraving them would be a little trickier than simply running along the raised kit lines, also the wheel bay shape was different so this will also have to be changed. Before looking at this I milled out the wheel bays inside the wing upper surface parts, at the same time I removed the 'orrible snaptite lugs.
I then cut a new pair of wheel bays from plastic card and milled down the same area from the wing undersides parts, the new plastic card pieces were then glued to the wing panels and the wing halves were glued together. The edges of the new panels were then filled with Revell Plasto filler and when dry the wings were sanded smooth prior to be engraved. After engraving they now look like this.
David.
David.
If you forget the past, you may lose the future.
If you forget the past, you may lose the future.
-
DavidWomby
- Modelling Gent and Scholar
- Posts: 11767
- Joined: May 1st, 2011, 8:09 pm
- Location: Florida, USA
Re: E.E. Lightning SB 'The Lightning Boys!'
That's impressive work, David!
David
David
-
fredk
- Modelling Gent and Scholar
- Posts: 6196
- Joined: May 1st, 2012, 6:25 am
- Location: Donaghadee, N'rn Ir'n
Re: E.E. Lightning SB 'The Lightning Boys!'
ooo, thats some good detail working
What is the blue stuff you used for making the mould?
What is the blue stuff you used for making the mould?
Al speling misteaks aer all mi own werk..
Its not just how good your painting is, its how good the touch-ups are too.
Its not just how good your painting is, its how good the touch-ups are too.
-
lancfan
- Avro's Rivet Rhapsodizer
- Posts: 8764
- Joined: May 2nd, 2011, 3:55 pm
- Location: Nelson, Lancashire
Re: E.E. Lightning SB 'The Lightning Boys!'
Cheers David- Fred, The silicone rubber I used is here- https://www.amazon.co.uk/gp/product/B00 ... UTF8&psc=1;.
just think dentist !
David.
just think dentist !
David.
David.
If you forget the past, you may lose the future.
If you forget the past, you may lose the future.
-
fredk
- Modelling Gent and Scholar
- Posts: 6196
- Joined: May 1st, 2012, 6:25 am
- Location: Donaghadee, N'rn Ir'n
Re: E.E. Lightning SB 'The Lightning Boys!'
Thanks
Al speling misteaks aer all mi own werk..
Its not just how good your painting is, its how good the touch-ups are too.
Its not just how good your painting is, its how good the touch-ups are too.