Nice progress with the resin parts and the 2 bucc's mate and awesome news on the missing canopy!
Miracles like that rarely happen these days!
Rob's Buccaneer mob *finished*
-
IronMan129
- Modelling Gent and Scholar
- Posts: 4385
- Joined: November 23rd, 2012, 4:20 pm
-
rob_van_riel
- Modelling Gent and Scholar
- Posts: 3325
- Joined: November 4th, 2012, 11:28 am
- Location: The Netherlands
- Contact:
Re: Rob's Buccaneer mob
I'd be surprised if I ever did another Buccaneer other than as part of some nostalgia project, or from a more modern tooling than the current Frog/Airfix/Matchbox trio (come to think of it, where's the new tool Airfix?), and sadly, my house is not big enough to contain an archive of everything that might come in handy again some day. Also, those moulds will decay over time, not necessarily in ways immediately obvious.fredk wrote:I'd say keep those moulds safe; they may be useful if you ever build an Airfix Buccaneer
Heritage sell the one piece intake and compressor face for £5 a pair; and they are ending production
These moulds will leave my house, at the end of the project. Whether that happens after casting a single part each, or comletely worn out from a long production run, and whether they leave in the trash or in the mail to some interested party, is all the same to me. If you, or anyone else, want to do the "hanging on to the moulds" bit, let me know, and you'll find them in the mail sometime next month. The same holds if anyone should want some castings.
-
rob_van_riel
- Modelling Gent and Scholar
- Posts: 3325
- Joined: November 4th, 2012, 11:28 am
- Location: The Netherlands
- Contact:
Re: Rob's Buccaneer mob
Miracle indeed. I wouldn't bet on myself finding a canopy that went Houdini more than a week after it's disappearance, let alone on someone not plastic model obsessed doing so. Still, the occasional miracle is a good thing, so I'm happyMaverick231 wrote:Miracles like that rarely happen these days!
-
rob_van_riel
- Modelling Gent and Scholar
- Posts: 3325
- Joined: November 4th, 2012, 11:28 am
- Location: The Netherlands
- Contact:
Re: Rob's Buccaneer mob
Sanded off the gaps between tail and fuselage of the tri-colour model, then stuck the wings on. I was unable to fettle the gap between the inner and outer wing panels away far enough for my liking. No problem on the upper surfaces, as those a white plastic, but on the lower sirfaces, this leaves a gap between two mid blue parts, and I have nothing to fill the gap that will match the colour. As this build has lost most of it's bare plastic first status, I fudged it by using Perfect Plastic Putty with some Vallejo Dark Prussian Blue mixed in. I suspect the result will be too dark, but it beats a stark white line. We'll see when I've cleaned up the seam.
The Revell kit has had a load of sanding done, and the resin parts installed. Then, there was more filler, which is now curing. I hope to get the wings on that one tomorrow as well.
The Revell kit has had a load of sanding done, and the resin parts installed. Then, there was more filler, which is now curing. I hope to get the wings on that one tomorrow as well.
-
rob_van_riel
- Modelling Gent and Scholar
- Posts: 3325
- Joined: November 4th, 2012, 11:28 am
- Location: The Netherlands
- Contact:
Re: Rob's Buccaneer mob
Coarse construction on the tri-colour is complete.
It's just had a nice hot, soapy bath to get rid of all the sanding dust, and is now drying. Stage one construction should be complete tomorrow, with a completed bare plastic Buccaneer not far behind.
Coarse construction on the Revell model is only marginally behind; it should reach the point where it gets a first shot of primer tomorrow. I really should get to work on the seats and pilots for this one.
-
rob_van_riel
- Modelling Gent and Scholar
- Posts: 3325
- Joined: November 4th, 2012, 11:28 am
- Location: The Netherlands
- Contact:
Re: Rob's Buccaneer mob
Just out of curiosity, what colours are yours?dwomby wrote:Actually, I have two Mbox Buccs but neither is moulded in the colours of your first one.
-
rob_van_riel
- Modelling Gent and Scholar
- Posts: 3325
- Joined: November 4th, 2012, 11:28 am
- Location: The Netherlands
- Contact:
Re: Rob's Buccaneer mob
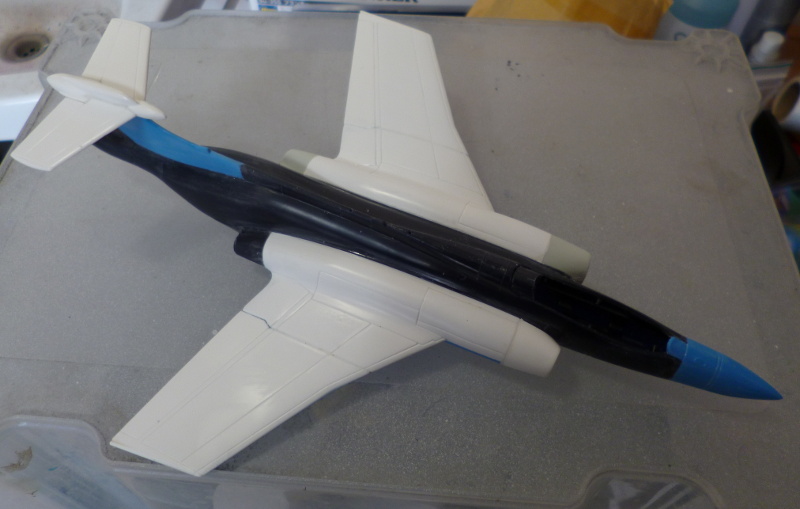
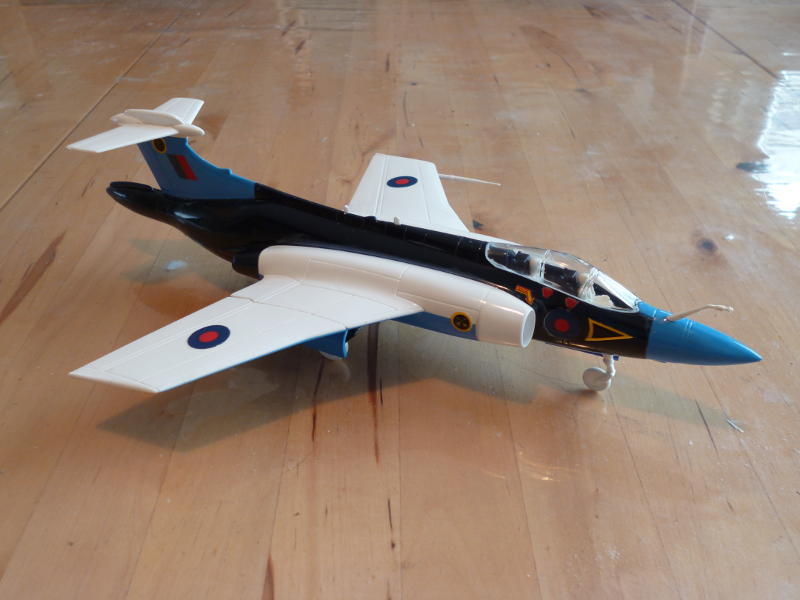
Construction of the tri-colour has been completed. I've also painted it in what is rumoured to be every girl's favourite colour: Shiny!
I should have the decals on before the end of the week, completing the first stage of this build.
I should have the decals on before the end of the week, completing the first stage of this build.
-
rob_van_riel
- Modelling Gent and Scholar
- Posts: 3325
- Joined: November 4th, 2012, 11:28 am
- Location: The Netherlands
- Contact:
Re: Rob's Buccaneer mob
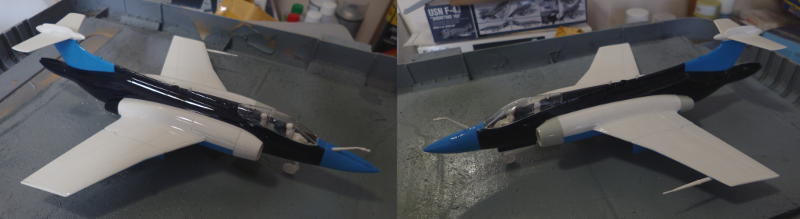
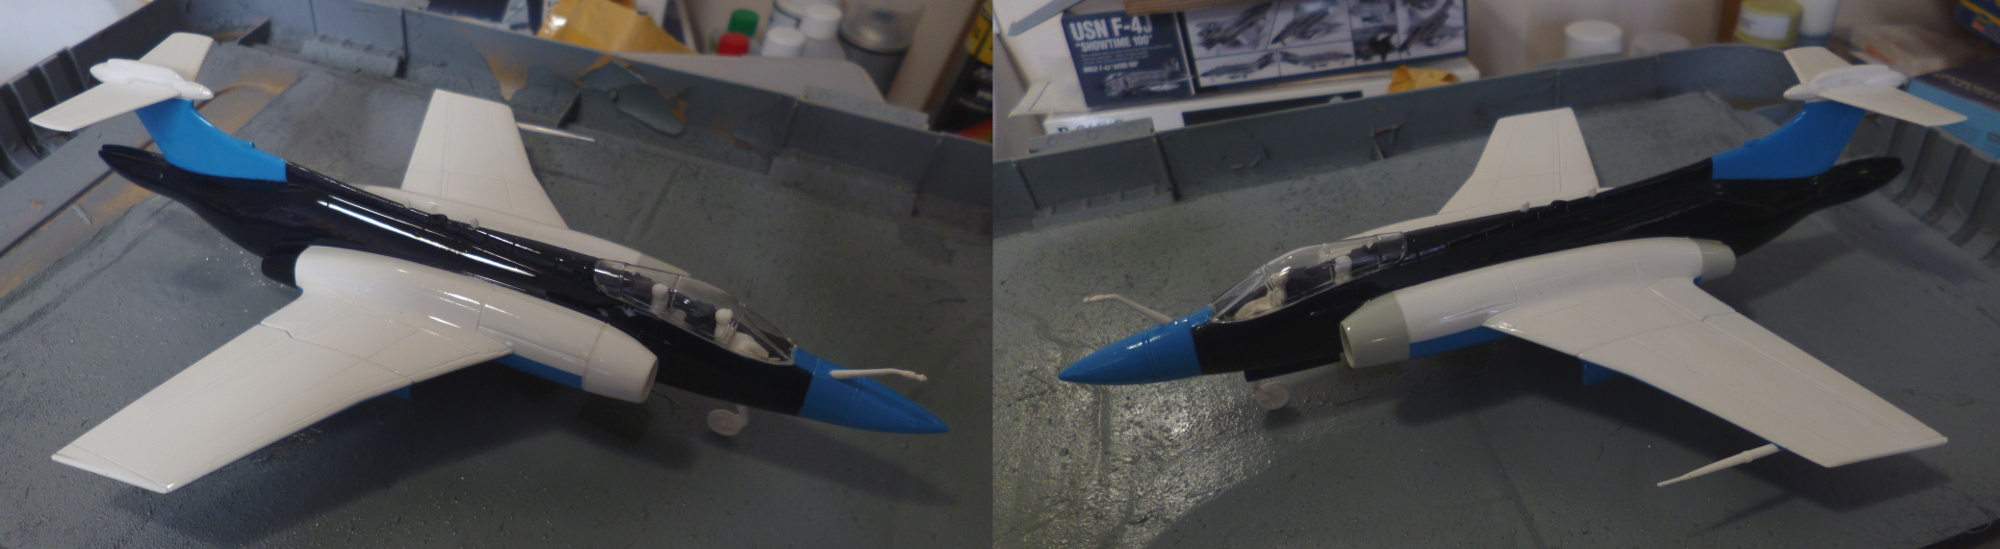
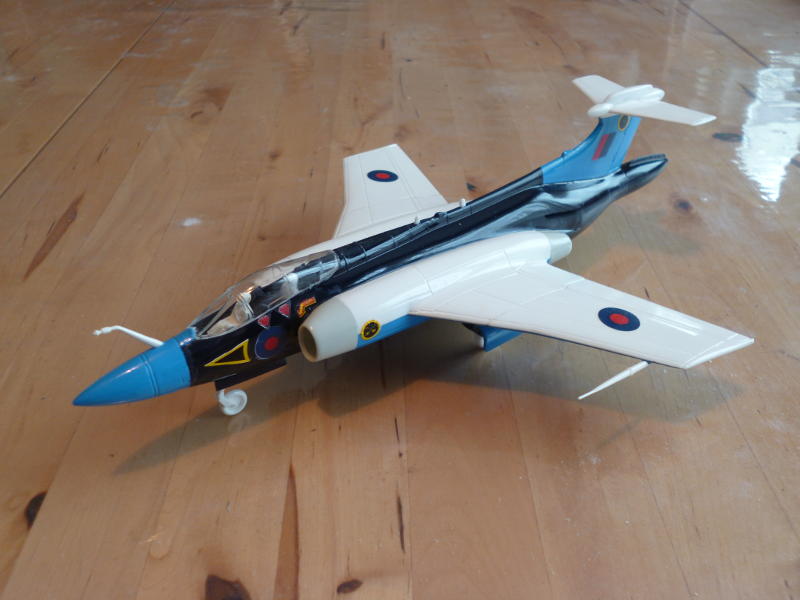
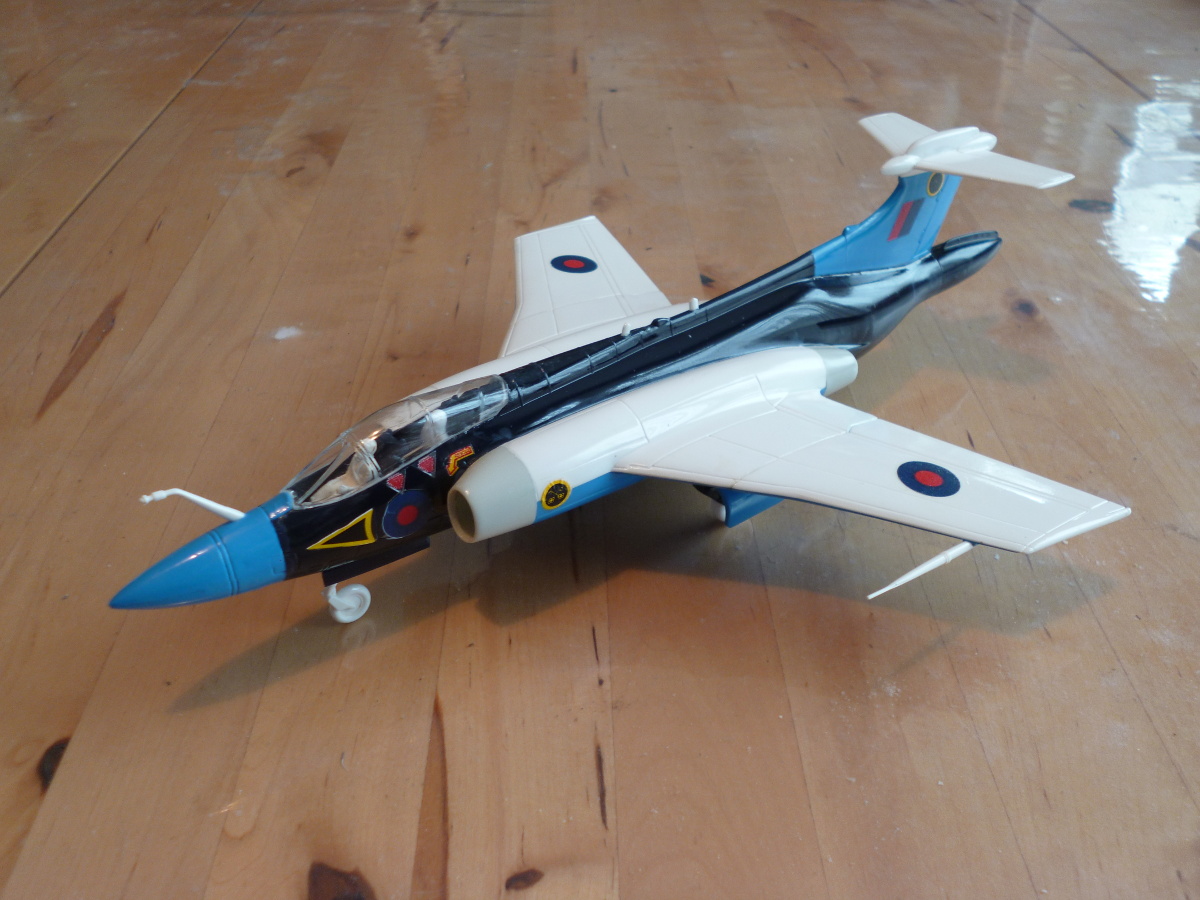
The bare plastic stage of the Matchbox boxing is complete.
(click for larger image)
(click for larger image)
The decals were late German production sheet. Let's just say they were not suitable as showcases of superior German engineering They disintegrated like mad, and instead of sticking, they curled. Good thing my paranoia saved me, and all but the test subject were covered in three layers of liquid decal, while most of the adhesion and curling problems were fixed with Humbrol Clear. The printwork was also noticably out of register; fortunately, this didn't go so far as to have the carrier film and colours in different spots (don't laugh, I've had that happen), but it was close. On the bright side, the white rims make it easier to spot the roundels against their dark blue background
  The black serial numbers that should have gone below the tail were left out; they would have been invisible anyway.
Once painted up, the model will receive older, but most likely better, original Matchbox decals.

(click for larger image)
(click for larger image)
The decals were late German production sheet. Let's just say they were not suitable as showcases of superior German engineering
Once painted up, the model will receive older, but most likely better, original Matchbox decals.
-
ShaunW
- NOT the sheep
- Posts: 26188
- Joined: November 26th, 2011, 6:11 pm
- Location: Pontefract West Yorkshire
Re: Rob's Buccaneer mob
Well done, completing a build in the naked plastic calls for neater construction than I usually manage - paint can hide a fair few flaws! I have to say though and at the risk of being called a heretic given this is a Matchbox GB, I'm not a big fan of MB's multi-coloured plastic although I do like MB kits, especially their military vehicles. I'm not a fan of any strong coloured plastic such as red, black or white and much prefer kits to be in a nice neutral grey!
Doing - Tamiya 1/35th Universal Carrier.
Work is the curse of the modelling classes!
IPMS#12300
Work is the curse of the modelling classes!
IPMS#12300
-
fredk

- Modelling Gent and Scholar
- Posts: 6196
- Joined: May 1st, 2012, 6:25 am
- Location: Donaghadee, N'rn Ir'n
Re: Rob's Buccaneer mob
That looks excellent Rob
Well done for working through all those problems
Well done for working through all those problems
Al speling misteaks aer all mi own werk..
Its not just how good your painting is, its how good the touch-ups are too.
Its not just how good your painting is, its how good the touch-ups are too.
-
rob_van_riel
- Modelling Gent and Scholar
- Posts: 3325
- Joined: November 4th, 2012, 11:28 am
- Location: The Netherlands
- Contact:
Re: Rob's Buccaneer mob
The canopy for the second Buccaneer arrived today. The good news is that it is indeed a 1/72 scale Buccaneer canopy. The bad news is that it's the Airfix part, which is several mm wider than the Matchbox one, and thus completely useless 
Where's my rubber and resin stuff...
Where's my rubber and resin stuff...
-
rob_van_riel
- Modelling Gent and Scholar
- Posts: 3325
- Joined: November 4th, 2012, 11:28 am
- Location: The Netherlands
- Contact:
Re: Rob's Buccaneer mob
The formerly bare plastic model was hit with primer yesterday, and for once, the resulting disaster was according to plan. I'd long suspected that the primer I use is simply unable to coexist with existing paintwork, but there was the possibility damage to the existing paint was part of the problem. This brand new, all over layer of varnish was, I'm certain, not yet damaged in any way, and yet, the primer totally wrecked it. I'd sort of counted on that for confirmation, and on this particular model, I could afford it, since rather a lot of sanding was certain to be needed anyway; the little extra to get rid of the expected primer mess was considered acceptable.
Wrinkled up or not, the primer did it's job in showing me where further work to the exterior of the model would be needed. Satisfyingly little, actually. The joins between the engines and the fuselage needed a bucket of filler (the almost black blue had neatly concealed the issues there), and bit of work on the tail, but other than that, the build was good to go. Filler is on and curing. I shudder to think of the mess I'll be making tomorrow sanding all that paint and filler off again
The interior of both machines, such as it is, has been painted, and work on the pilots has begun. They should be ready long before the canopies, although the first half of the mould is curing as I type this.
-
rob_van_riel
- Modelling Gent and Scholar
- Posts: 3325
- Joined: November 4th, 2012, 11:28 am
- Location: The Netherlands
- Contact:
Re: Rob's Buccaneer mob
I'd hoped to at least pour the second half of the mould this evening, but the rubber is taking too long to cure. Odds are that if I try to rush it, I'll ruin the first half of the mould instead. I'll have to be patient 
-
rob_van_riel
- Modelling Gent and Scholar
- Posts: 3325
- Joined: November 4th, 2012, 11:28 am
- Location: The Netherlands
- Contact:
Re: Rob's Buccaneer mob
The fumes from that bucked of filler on the Tornado went to my head, and I unboxed the first half of the mould. I got lucky
The second half has been poured and is curing. I should be able to start casting tomorrow.
The second half has been poured and is curing. I should be able to start casting tomorrow.
-
rob_van_riel
- Modelling Gent and Scholar
- Posts: 3325
- Joined: November 4th, 2012, 11:28 am
- Location: The Netherlands
- Contact:
Re: Rob's Buccaneer mob
Well, here, obviouslyrob_van_riel wrote:Where's my rubber and resin stuff...
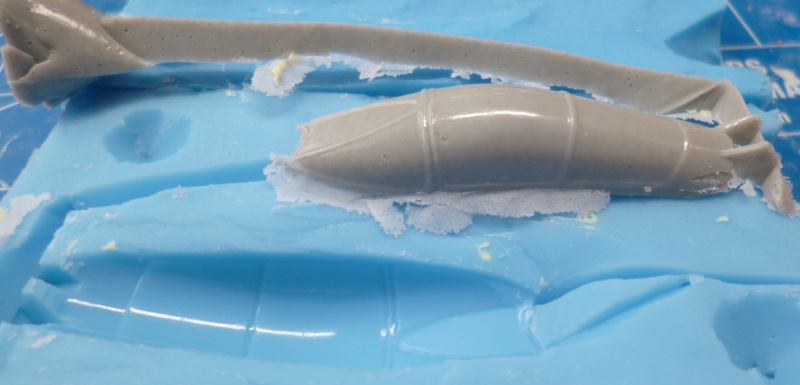
Test cast with normal grey resin for starters of course, but this at least proves the mould is good. The first shot with clear resin is now curing. Since this is the first time I've actually used that particular type of resin, the suspense is rather murderous, which is made worse by the fact that this stuff is very slow by comparison; de-mould time specified as 2-4 hours, as opposed to about 15 minutes for the plain stuff. I'm also a bit concerned about the specified time to full cure: 7 days