Ernie's Comfy Corner
-
iggie

- Modelling Gent and Scholar
- Posts: 23438
- Joined: July 31st, 2013, 11:04 am
- Location: North Somercotes, Lincolnshire
- Contact:
Re: Ernie's Comfy Corner
Excellent work on the ammo and storage crates 
Best wishes
Jim
If you can walk away from a landing, it's a good landing. If you use the airplane the next day, it's an outstanding landing
"Never put off till tomorrow, what you can do the day after tomorrow"
Jim
If you can walk away from a landing, it's a good landing. If you use the airplane the next day, it's an outstanding landing
"Never put off till tomorrow, what you can do the day after tomorrow"
-
ShaunW
- NOT the sheep
- Posts: 26188
- Joined: November 26th, 2011, 6:11 pm
- Location: Pontefract West Yorkshire
Re: Ernie's Comfy Corner
More great work on this really interesting build, Ernie.
Doing - Tamiya 1/35th Universal Carrier.
Work is the curse of the modelling classes!
IPMS#12300
Work is the curse of the modelling classes!
IPMS#12300
-
Softscience

- Staring out the window
- Posts: 7491
- Joined: April 5th, 2011, 4:34 pm
- Location: Maryland, near Washington DC
Re: Ernie's Comfy Corner
Ernie wrote:Thank you Ralph, glad you like my little collection of oddities!Softscience wrote:That's a neat little thing, and a nicely built model.
I like all the oddities you've presented in this thread. All of them expertly built!
I hope my message didn't come off as glib. I think your eclectic collection is great. It's refreshing to read through a thread that is largely dedicated to submarines, with the occasional robot, spaceship, or cannon on skis.
-
Ernie

- The Bug Has Well And Truly Bitten
- Posts: 354
- Joined: May 1st, 2011, 3:09 am
- Location: A small town in New Hampshire
Re: Ernie's Comfy Corner
Oh, no, no, no, not at all. I know I have somewhat eclectic tastes in the subjects I build and I tend to skip from one subject category to another and I appreciate when others enjoy that too.Softscience wrote:Ernie wrote:Thank you Ralph, glad you like my little collection of oddities!Softscience wrote:That's a neat little thing, and a nicely built model.
I like all the oddities you've presented in this thread. All of them expertly built!
I hope my message didn't come off as glib. I think your eclectic collection is great. It's refreshing to read through a thread that is largely dedicated to submarines, with the occasional robot, spaceship, or cannon on skis.
-
Ernie
- The Bug Has Well And Truly Bitten
- Posts: 354
- Joined: May 1st, 2011, 3:09 am
- Location: A small town in New Hampshire
Re: Ernie's Comfy Corner
I have been messing around with the white wash effect on the gun, I can live with how it turned out. The Washable white paint was not as washable as I thought it would be, however I kept working at it until I got a result that works. I lost the right ski as well. That has now been pined back into place.
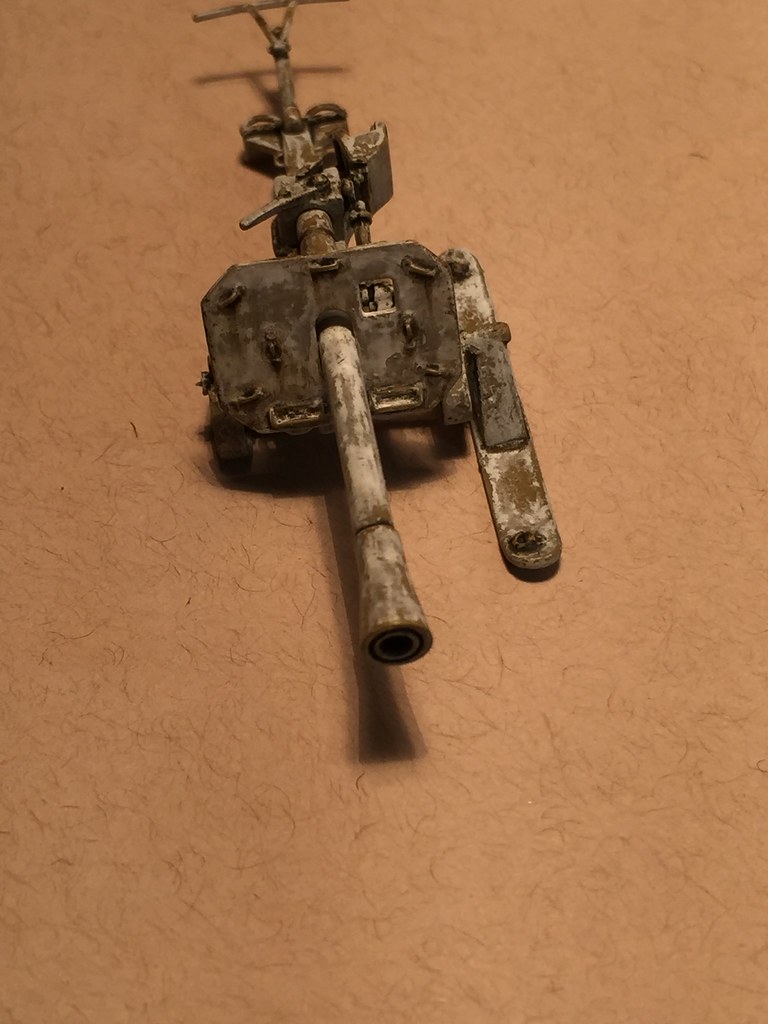
Hopefully I can get my photo set up operational tomorrow to get some photos. I will call this my last completion for 2020 even though the base for it will not be finished. Unfortunately the snow material I need to finish the base was sent a day latter than scheduled so now will not arrive until after the weekend But, hey, at least it is another one finished!
Hopefully I can get my photo set up operational tomorrow to get some photos. I will call this my last completion for 2020 even though the base for it will not be finished. Unfortunately the snow material I need to finish the base was sent a day latter than scheduled so now will not arrive until after the weekend
-
ShaunW
- NOT the sheep
- Posts: 26188
- Joined: November 26th, 2011, 6:11 pm
- Location: Pontefract West Yorkshire
Re: Ernie's Comfy Corner
That is a really great looking worn winter finish there, Ernie.
Doing - Tamiya 1/35th Universal Carrier.
Work is the curse of the modelling classes!
IPMS#12300
Work is the curse of the modelling classes!
IPMS#12300
-
Ernie
- The Bug Has Well And Truly Bitten
- Posts: 354
- Joined: May 1st, 2011, 3:09 am
- Location: A small town in New Hampshire
Re: Ernie's Comfy Corner
The Puppchen is officially finished, but I still need to finish the base for it. The AK snow paste finally arrived today so I can continue with that. I have already finished a little wood base, topped with a Milliput ground section. Now I will use the AK paste to build up the snow to set the gun and ammo crates in, and use the Deluxe Materials snow powder and ice sparkles to top that off and hopefully wind up with a convincing snow base.

I am not going to start until the coming weekend though, as I have never worked with these products before and don't want to be rushed by getting too involved before having to leave for work.
I am not going to start until the coming weekend though, as I have never worked with these products before and don't want to be rushed by getting too involved before having to leave for work.
-
PaulBradley

- Staring out the window
- Posts: 21220
- Joined: April 6th, 2011, 3:08 pm
- Location: Flagstaff, AZ
Re: Ernie's Comfy Corner
Where'd you get the Deluxe snow from?
Paul
За демократію і незалежний Україну
"For Democracy and a Free Ukraine"
За демократію і незалежний Україну
"For Democracy and a Free Ukraine"
-
Ernie
- The Bug Has Well And Truly Bitten
- Posts: 354
- Joined: May 1st, 2011, 3:09 am
- Location: A small town in New Hampshire
Re: Ernie's Comfy Corner
I found it on eBay a while back, and since no one seemed to have it in stock I took both packages they had. I hope it works, otherwise I have $50.00 of useless white powder......... Haven't had to say that since the 90's....oopss never mindPaulBradley wrote:Where'd you get the Deluxe snow from?
It came from a place called Beachcomer....seemed to be some type of retail store. I think it was in the Carolinas
-
Ernie
- The Bug Has Well And Truly Bitten
- Posts: 354
- Joined: May 1st, 2011, 3:09 am
- Location: A small town in New Hampshire
Re: Ernie's Comfy Corner
After a very busy spring and summer taking care of my mom and many out door projects I have gotten back to the bench. I have had only managed to get one model across the finish line, but have been plugging away. Mainly, during the week I stick parts together and then on the weekend I try to get some time for painting, so I can stick more parts together. Currently I have a Bandai First order TIE fighter getting close to finished.
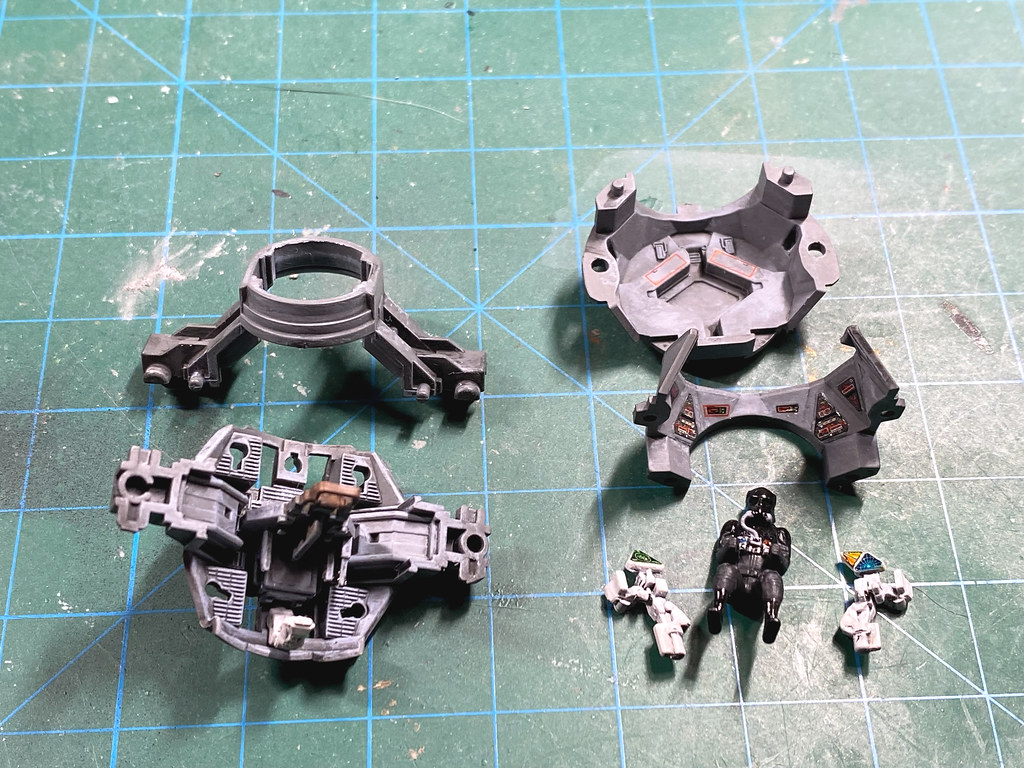
The cockpit parts painted, washed, and drybrushed.
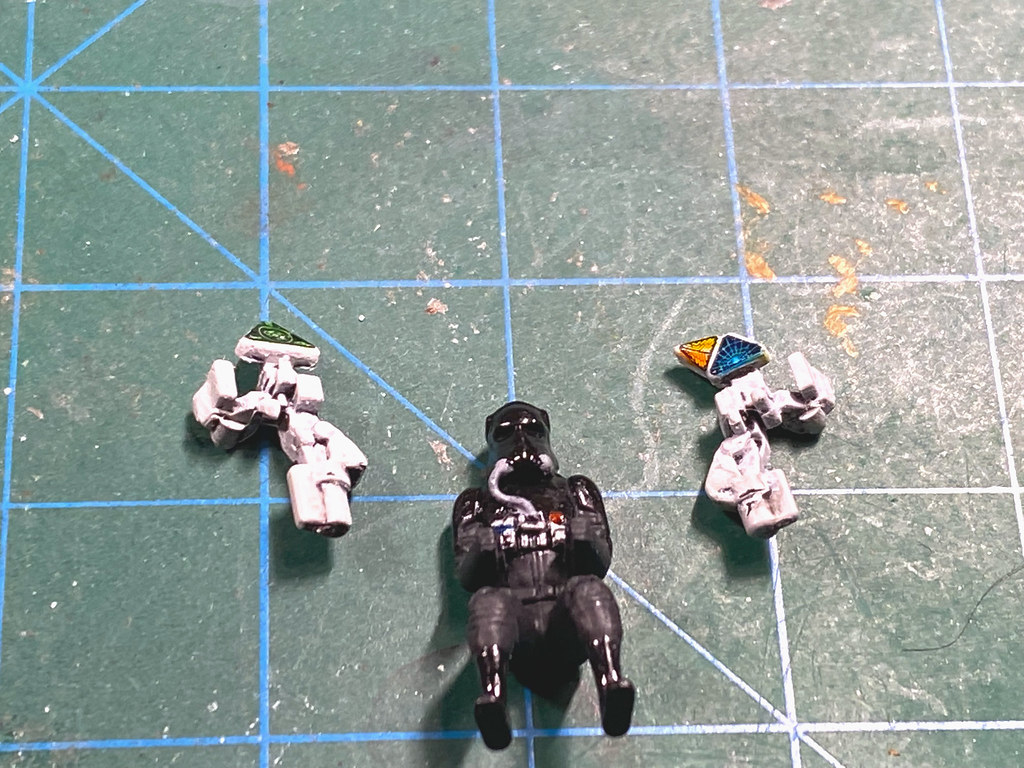
The pilot and instrument panels. The pilot was painted flat black, the armor pieces of is uniform were brushed with clear gloss, while the fabric areas were drybrushed with dark grey. The details were painted with medium grey, silver and clear red and blue. The instrument panels were painted white, washed, and drybrushed as well and the decals applied. After they set, the decals were coated with clear blue, orange, yellow or green.

The completed cockpit tub.

The completed cockpit assembly. Very little of all the decals and detail work will be visible on the finished model.
The cockpit parts painted, washed, and drybrushed.
The pilot and instrument panels. The pilot was painted flat black, the armor pieces of is uniform were brushed with clear gloss, while the fabric areas were drybrushed with dark grey. The details were painted with medium grey, silver and clear red and blue. The instrument panels were painted white, washed, and drybrushed as well and the decals applied. After they set, the decals were coated with clear blue, orange, yellow or green.
The completed cockpit tub.
The completed cockpit assembly. Very little of all the decals and detail work will be visible on the finished model.
-
Ernie
- The Bug Has Well And Truly Bitten
- Posts: 354
- Joined: May 1st, 2011, 3:09 am
- Location: A small town in New Hampshire
Re: Ernie's Comfy Corner
Well, 2022 wasn't a very good year for my model building hobby, and I managed only one completed build, and very little time or inclination, when the time was available, to do anything really meaningful hobby related. The one completion happened back in January of 2022, so it has been a year i guess since I really finished anything. There were attempts made to get going again throughout the year, but they did not bear fruit. Over the holidays I decided to just pick up and pack away everything from the past year and try to start fresh with no pressure or obligation to finish anything I had been working on. Anyway, enough blubbering about that, I needed to work on something, so I decided to start a kit I was given for Christmas.
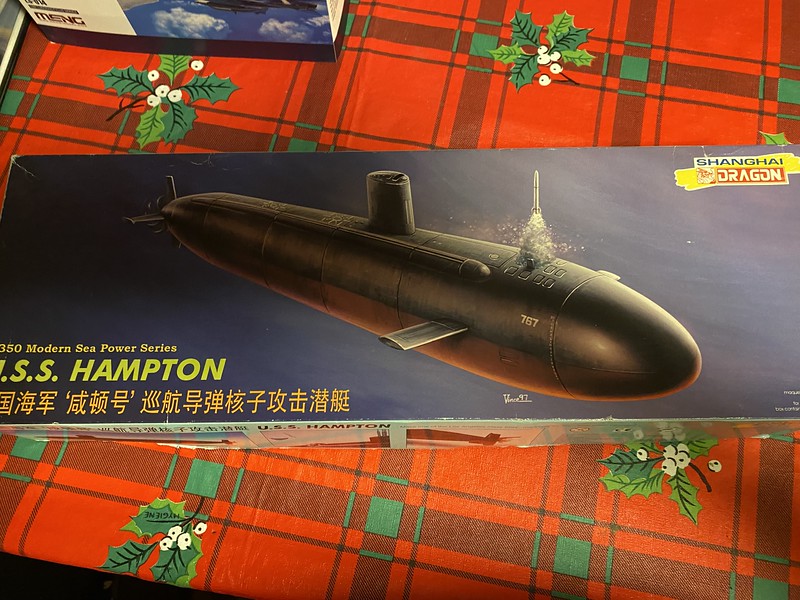
It's not a bad kit considering it was first released in 1990, with this particular version released in 1997. It will however benefit from a few tweaks here and there. Time to get started and see where this goes!
It's not a bad kit considering it was first released in 1990, with this particular version released in 1997. It will however benefit from a few tweaks here and there. Time to get started and see where this goes!
-
ShaunW
- NOT the sheep
- Posts: 26188
- Joined: November 26th, 2011, 6:11 pm
- Location: Pontefract West Yorkshire
Re: Ernie's Comfy Corner
Ditto here, Ernie, I only managed one completion myself last year. The sub is a good choice, modern boats like that have a real sinister beauty about them.
Doing - Tamiya 1/35th Universal Carrier.
Work is the curse of the modelling classes!
IPMS#12300
Work is the curse of the modelling classes!
IPMS#12300
-
Ernie
- The Bug Has Well And Truly Bitten
- Posts: 354
- Joined: May 1st, 2011, 3:09 am
- Location: A small town in New Hampshire
Re: Ernie's Comfy Corner
To start, the kit was originally molded as the USS Dallas from the movie The Hunt For Red October so the tail configuration on the stern is not accurate for the real boats. Dragon provides a new stern section, and the hull conveniently has a clearly defined location where to cut it to remove the molded stern section and graft on the correct stern.

The upper bow section of the hull is also modular as well, having two separate bow sections with and without the vertical launch tubes. Of course, the hatches for the tubes are all separate pieces that do not fit all that well. Alot of filling, sanding, and scribing would be needed to make these look good, so I opted to use the upper bow section that did not have the hatches and will add the hatches with decals later. Much easier and will probably yield a better result.
The hull fit together reasonably well considering the modular construction of the bow section and the new stern section that had to be grafted on. I gave the seams a quick rough sanding before adding putty to the seams.
One other area of the kit had to be addressed and that is the propeller. The 688i class of subs have a prop with an annular ring around its diameter. There is an Ebay seller that makes 3D prints of the correct prop, so I placed an order for that (and have followed the tracking as the package has been bounced to and fro between the regional sorting center and a couple of different post offices in the area, hopefully it will land at the correct one soonish )
)
The upper bow section of the hull is also modular as well, having two separate bow sections with and without the vertical launch tubes. Of course, the hatches for the tubes are all separate pieces that do not fit all that well. Alot of filling, sanding, and scribing would be needed to make these look good, so I opted to use the upper bow section that did not have the hatches and will add the hatches with decals later. Much easier and will probably yield a better result.
The hull fit together reasonably well considering the modular construction of the bow section and the new stern section that had to be grafted on. I gave the seams a quick rough sanding before adding putty to the seams.
One other area of the kit had to be addressed and that is the propeller. The 688i class of subs have a prop with an annular ring around its diameter. There is an Ebay seller that makes 3D prints of the correct prop, so I placed an order for that (and have followed the tracking as the package has been bounced to and fro between the regional sorting center and a couple of different post offices in the area, hopefully it will land at the correct one soonish
Re: Ernie's Comfy Corner
Nice work on the gun. I like the bold weathered look. Looking forward to see what you can do with that sub.
"We're going to need a bigger boat"
-
Ernie
- The Bug Has Well And Truly Bitten
- Posts: 354
- Joined: May 1st, 2011, 3:09 am
- Location: A small town in New Hampshire
Re: Ernie's Comfy Corner
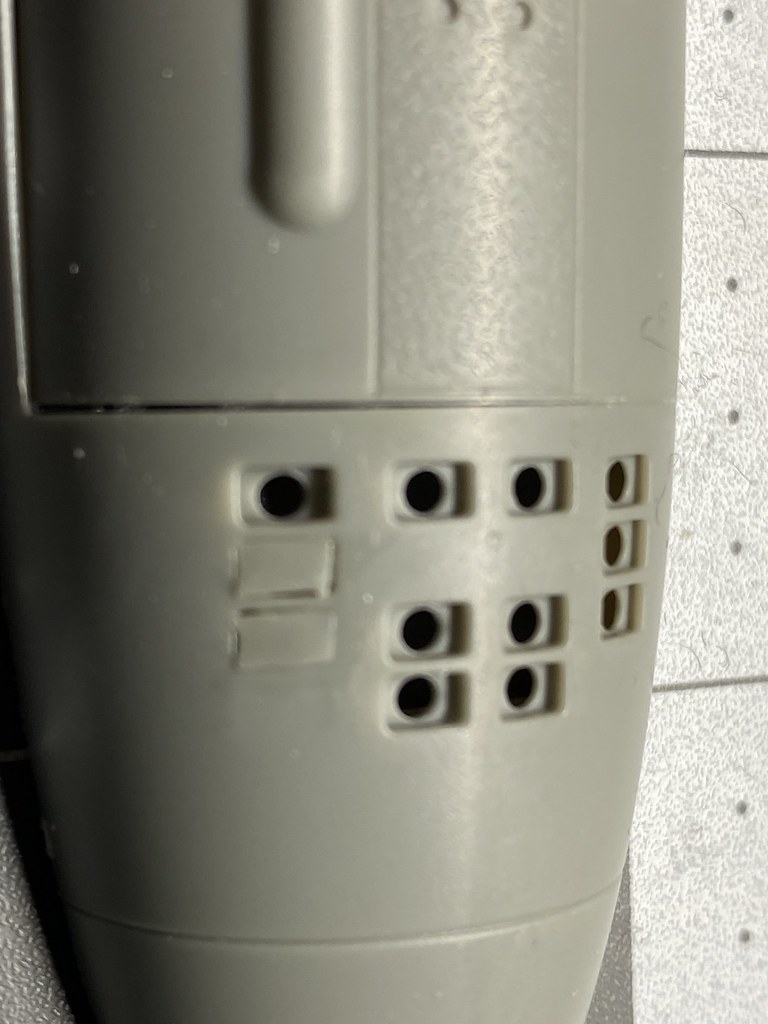
I have been making slow but steady progress on the Hampton; often I do not get significant time during the week to get to the bench, or if I do, not enough to make a lot of headway. So anyway, the upper hull of the kit is missing one hatch, the one that is there is not well represented, the deck bollards are not well rendered, and the anti-slip texturing is very pronounced for the scale of the kit.
I clipped off the bollards and made a pin mark in the center of where they were located so I can replace the detail later, then sanded off the hatch, remains of the bollards, and the anti-slip texture. I used a hollow punch to punch out some discs from sheet plastic for the hatches. These were glued in place and blended in with a couple of layers of Mr. Surfacer 1000 & 1500.
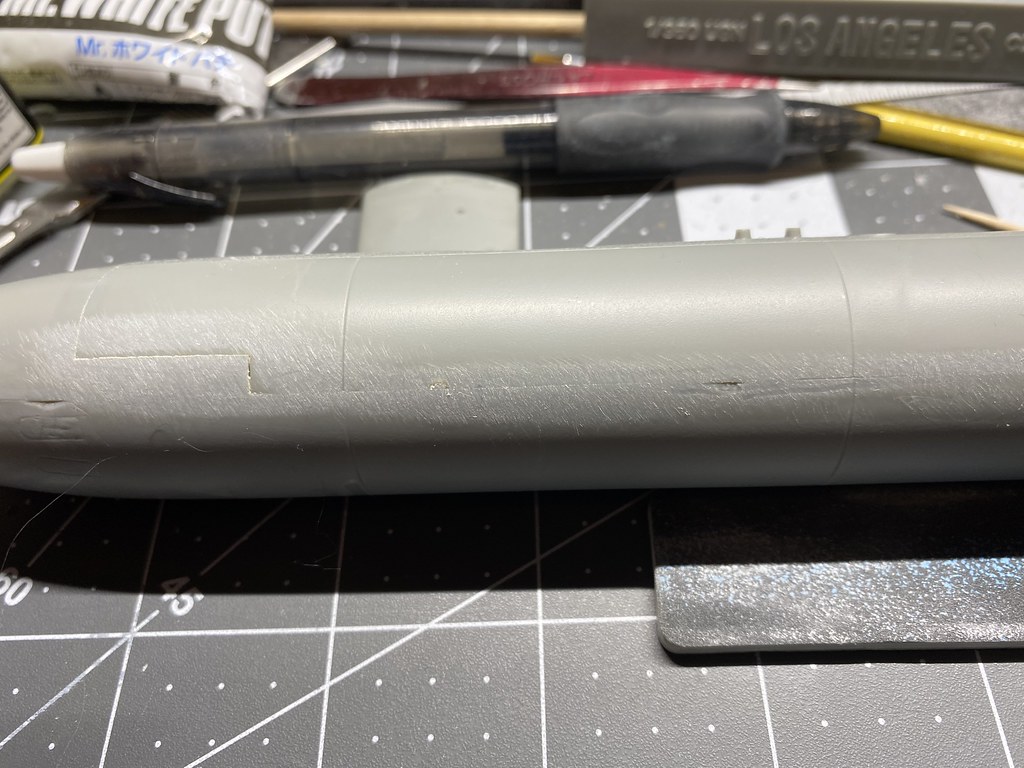
I noticed when comparing this kit to the Hobby Boss one that the lower vertical rudder was too long, so shortened it by about 3/32 inch, sanded it to blend the edges, and called it good. I also used a few discs of styrene to continue the hull taper at the stern until it matched the new propeller, that is the little white extension visible at the end of the hull.

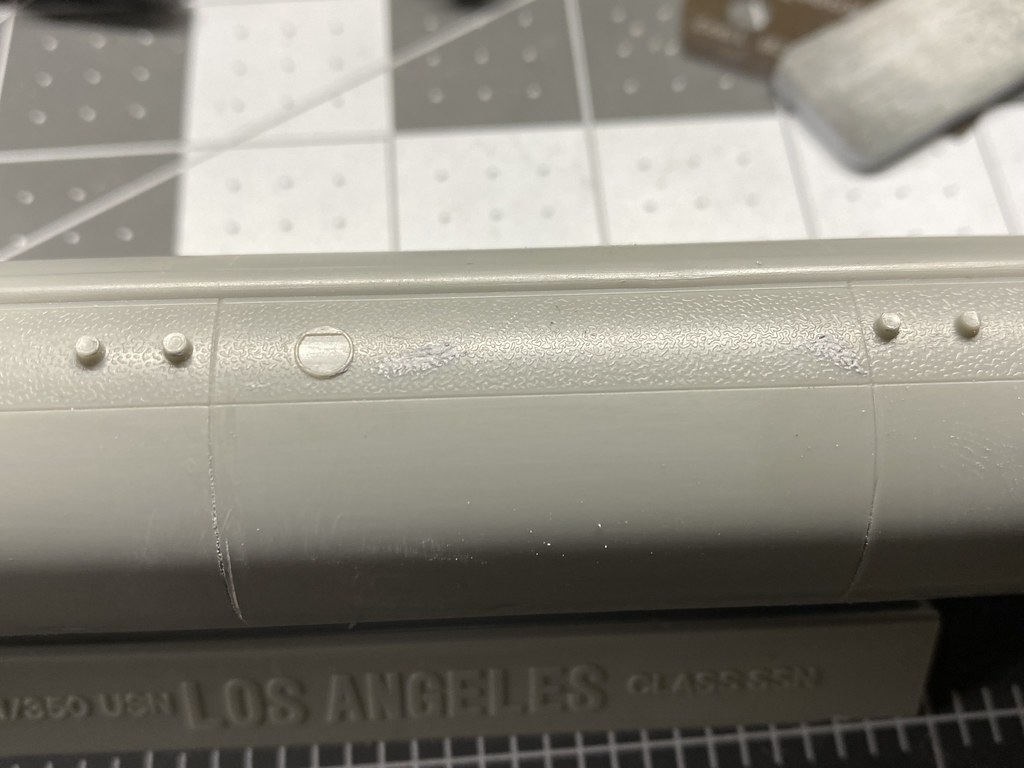
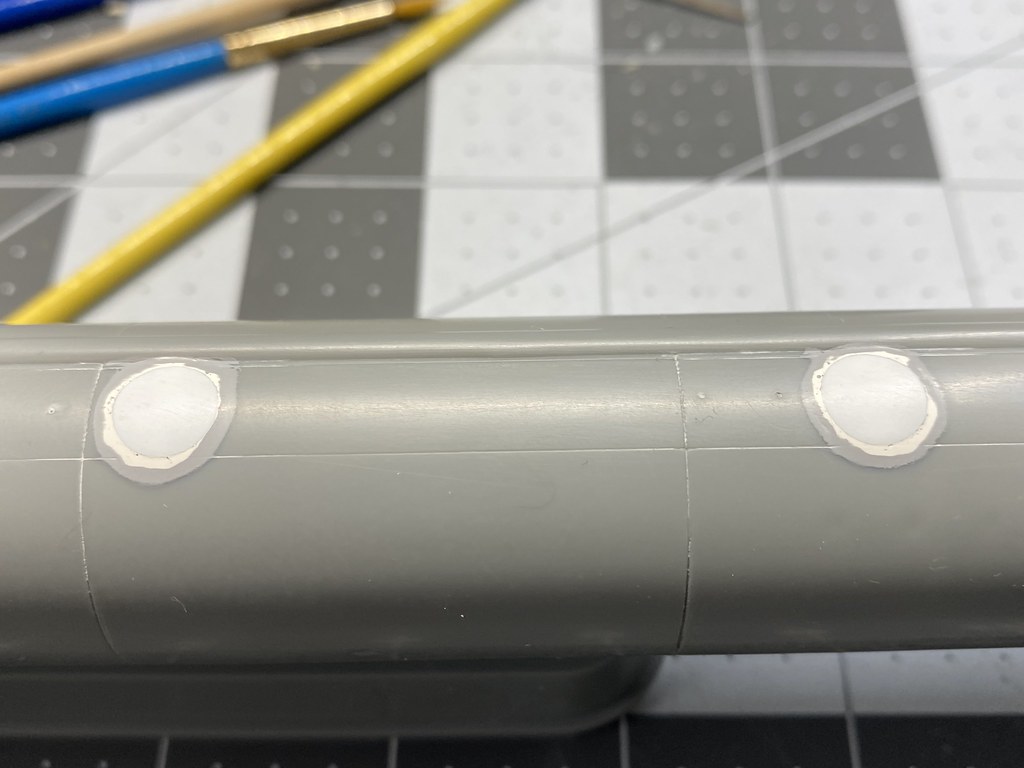
At the bow I cut out notches for the hull mounted diving planes and test fit those. They will not be attached until part way through the painting process as I am sure I will knock them off while masking the hull. The bow torpedo tube outer hatches were the wrong size and shape, so they were filled with Mr. Dissolved Putty and sanded out. My scribing skills are not at the point where trying to rescribe the doors on the curved hull would yield good results for the time spent, so I decided to use two layers of decal stripes the proper size. These should show up faintly after painting, but enough to allow me to highlight the edges to help define them. It will be good enough to trick the eye into seeing a reasonable facsimile of the outer torpedo tube doors. This is just the first layer added, the second covered the ragged edge on the one door!

And lastly, is the new 3D printed prop I ordered to fit to the sub. It is just removed from its support base and need a little cleanup and then a coat of primer.
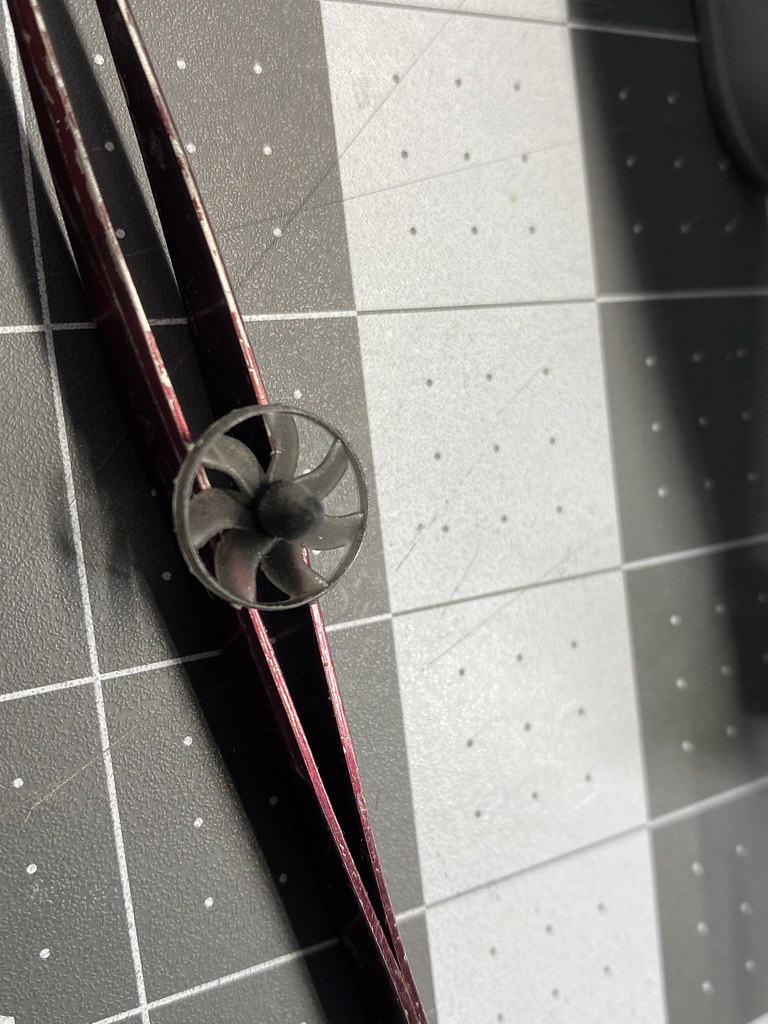
I must say, I am having a blast adding all the extra detail to this kit, so far it has been a lot of fun adding the various upgrades!
I clipped off the bollards and made a pin mark in the center of where they were located so I can replace the detail later, then sanded off the hatch, remains of the bollards, and the anti-slip texture. I used a hollow punch to punch out some discs from sheet plastic for the hatches. These were glued in place and blended in with a couple of layers of Mr. Surfacer 1000 & 1500.
I noticed when comparing this kit to the Hobby Boss one that the lower vertical rudder was too long, so shortened it by about 3/32 inch, sanded it to blend the edges, and called it good. I also used a few discs of styrene to continue the hull taper at the stern until it matched the new propeller, that is the little white extension visible at the end of the hull.
At the bow I cut out notches for the hull mounted diving planes and test fit those. They will not be attached until part way through the painting process as I am sure I will knock them off while masking the hull. The bow torpedo tube outer hatches were the wrong size and shape, so they were filled with Mr. Dissolved Putty and sanded out. My scribing skills are not at the point where trying to rescribe the doors on the curved hull would yield good results for the time spent, so I decided to use two layers of decal stripes the proper size. These should show up faintly after painting, but enough to allow me to highlight the edges to help define them. It will be good enough to trick the eye into seeing a reasonable facsimile of the outer torpedo tube doors. This is just the first layer added, the second covered the ragged edge on the one door!
And lastly, is the new 3D printed prop I ordered to fit to the sub. It is just removed from its support base and need a little cleanup and then a coat of primer.
I must say, I am having a blast adding all the extra detail to this kit, so far it has been a lot of fun adding the various upgrades!