Ernie's Comfy Corner

Show us a view of your workbench / work in progress and build reports too.
Post Reply
User avatar
Ernie
The Bug Has Well And Truly Bitten
Posts: 354
Joined: May 1st, 2011, 3:09 am
Location: A small town in New Hampshire

Re: Ernie's Comfy Corner

Post by Ernie »

After a very busy fall, I finally have a chance to get back to the bench, at least for a little bit. Between work, caring for my mother with Alzheimer's, and just plain everyday family stuff (errands, fix this or that, Dr, appointments etc.) I have had precious little time at the bench. And my airbrush compressor crapped out, and while I quickly got a replacement, it was different from the previous ones I had so when I went to set it up I realized it would require new fittings etc. so I sorta put off doing anything else with that as it was kind of far down on the list of things that i needed to spend time on, so.........things just kind of sat in limbo until I could get back to them.
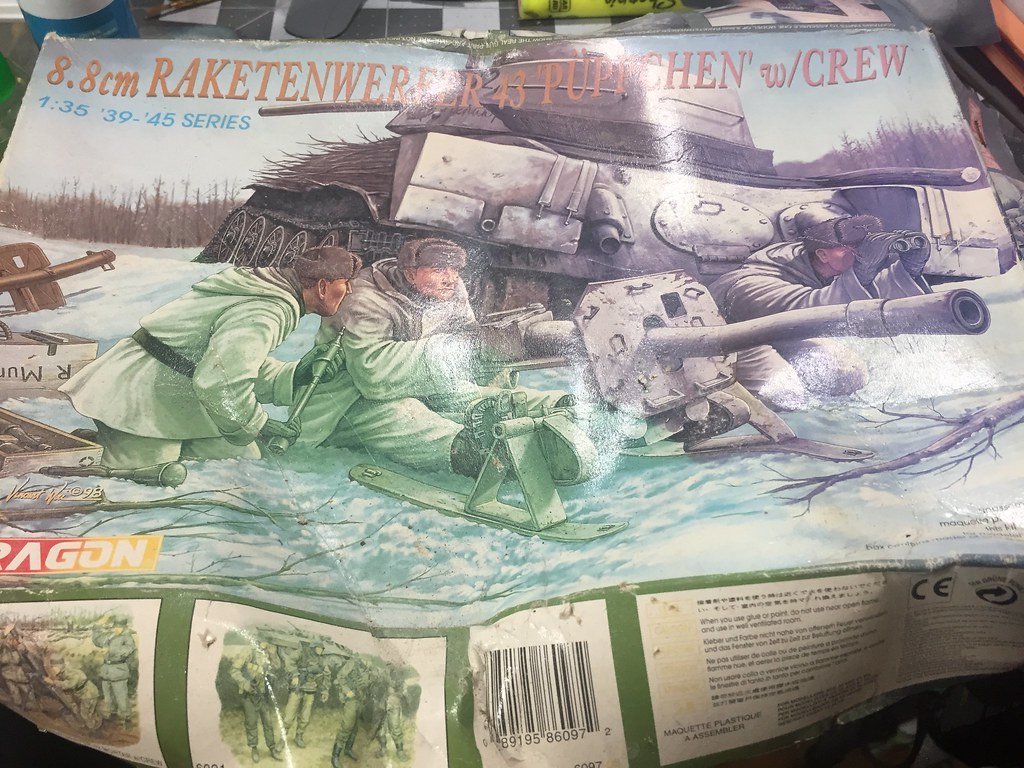
Anyway, I have a fair number of kits that are either in damaged boxes, bagged, or started, which makes said kits inconvenient to store. So I figured in between everything else I would try to finish some of those up and at least get some built and out of the way. So, I started with this old 1/35 DML Puppchen kit.

Image

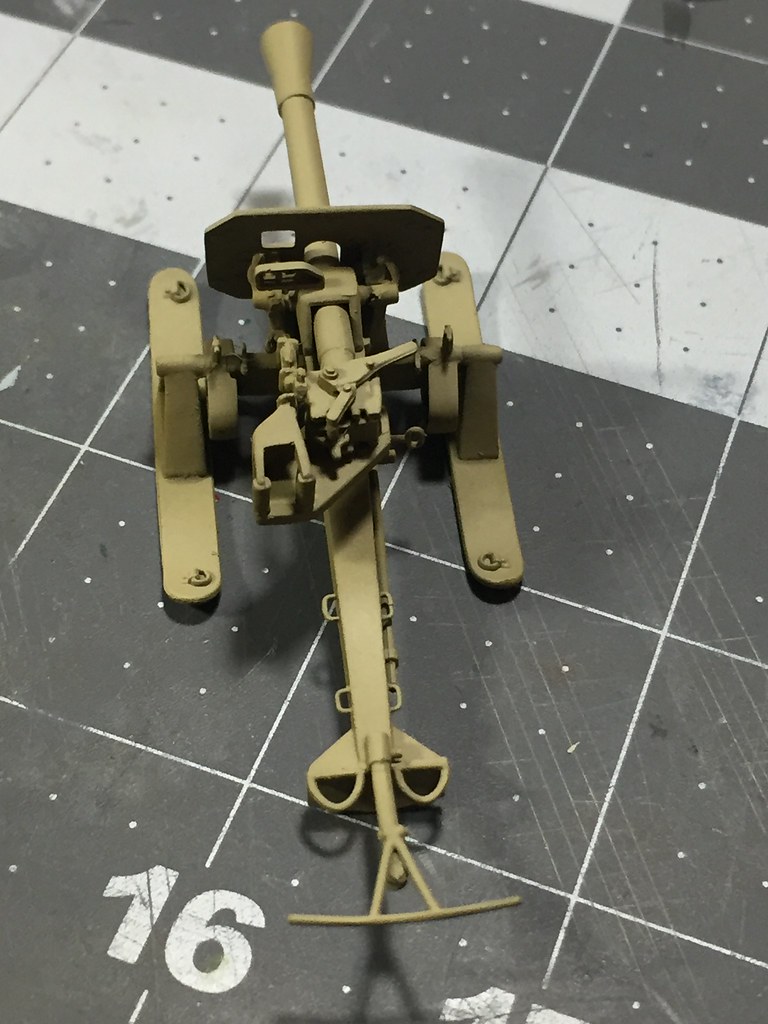
I had started it (rather hurriedly and badly) a long time ago, so figured it would be a good candidate to get finished up, and also try out a winter white wash finish as it has been along time since I have done one of those. The first thing I decided to do was to thin down the gun shield to a more scale thickness ( ever wonder why it takes me forever to finish something, and I have a stack of unfinished kits.....this might be why), so I first removed the detail from the front of the shield with a razor saw and then sanded it thinner.

Image

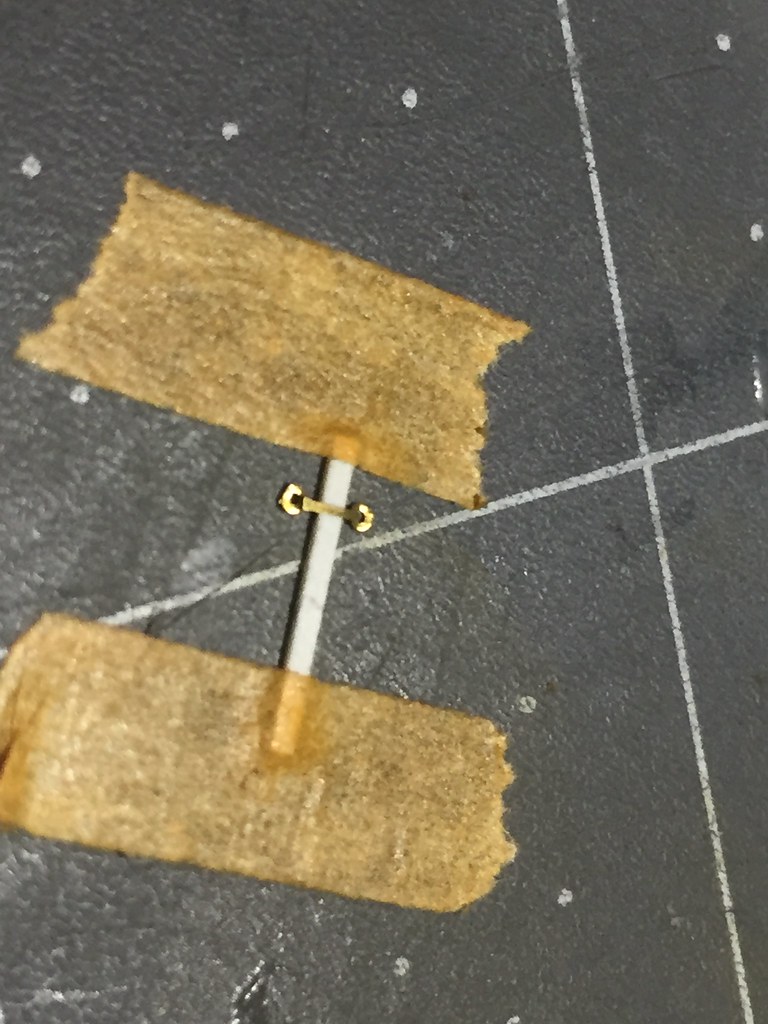
I also thought it would be a nice idea to replace the small tiedowns with some ancient etched ones from KMC, these were formed over a piece of Evergreen strip stock before being lost....er glued to the shield.

Image

Then all the detail was added back, including the rivet details with 3d rivet decals. I had some laying around and decided to try them to see how they worked. Ultimately it was a fail as they do not show up well, however they are not the correct scale for the kit so that is not surprising, but I figured I would try it out anyway.

Image

This is how it sat until I got the compressor up and running, so into the paint shop it goes.
User avatar
iggie
Modelling Gent and Scholar
Posts: 23438
Joined: July 31st, 2013, 11:04 am
Location: North Somercotes, Lincolnshire
Contact:

Re: Ernie's Comfy Corner

Post by iggie »

Good to see you back again Ernie :grin:
The gun shield additions look really good and will look even more so under some paint I suspect 8-)
Best wishes

Jim
If you can walk away from a landing, it's a good landing. If you use the airplane the next day, it's an outstanding landing
"Never put off till tomorrow, what you can do the day after tomorrow"
User avatar
Ernie
The Bug Has Well And Truly Bitten
Posts: 354
Joined: May 1st, 2011, 3:09 am
Location: A small town in New Hampshire

Re: Ernie's Comfy Corner

Post by Ernie »

Thank you, it is nice to finally have a little time to get to the work bench again! Hopefully it will be sustainable for the foreseeable future!
ShaunW
NOT the sheep
Posts: 26188
Joined: November 26th, 2011, 6:11 pm
Location: Pontefract West Yorkshire

Re: Ernie's Comfy Corner

Post by ShaunW »

It's good to see you back in action, Ernie, the Puppchen is a great subject and is coming long very nicely with some great detailing on the shield.
Doing - Tamiya 1/35th Universal Carrier.

Work is the curse of the modelling classes!
IPMS#12300
User avatar
Ernie
The Bug Has Well And Truly Bitten
Posts: 354
Joined: May 1st, 2011, 3:09 am
Location: A small town in New Hampshire

Re: Ernie's Comfy Corner

Post by Ernie »

ShaunW wrote:It's good to see you back in action, Ernie, the Puppchen is a great subject and is coming long very nicely with some great detailing on the shield.
Thank you Shaun, the Puppchen is a fun little kit, and it is allowing me to try out a few different techniques that I can build on and use on other projects.
Lone Modeller
Modelling Gent and Scholar
Posts: 5345
Joined: April 1st, 2013, 6:45 pm

Re: Ernie's Comfy Corner

Post by Lone Modeller »

Those extra details may have taken time but they certainly enhance the model. Good luck with the painting!
User avatar
Ernie
The Bug Has Well And Truly Bitten
Posts: 354
Joined: May 1st, 2011, 3:09 am
Location: A small town in New Hampshire

Re: Ernie's Comfy Corner

Post by Ernie »

Lone Modeller wrote:Those extra details may have taken time but they certainly enhance the model. Good luck with the painting!
Thank you, the shield is the single most detailed part in the whole kit, so while it took some time, I think the extra work will improve the overall "look" of the model in the end as it is such a visible part of it.

The base coat of dark yellow applied, using Tamiya XF-60 lightened bit with Deck Tan.

Image

Image

I plan on using two different methods for the white wash finish. The first is covering the model with a layer of chipping fluid and then overspray that with Tamiya flat white. After chipping and scrubbing some of that off, I will use Mig's Washable White paint to give a more faded out white finish. So the chipping fluid was applied, left to dry then the Tamiya white was sprayed.

Image
User avatar
PaulBradley
Staring out the window
Posts: 21220
Joined: April 6th, 2011, 3:08 pm
Location: Flagstaff, AZ

Re: Ernie's Comfy Corner

Post by PaulBradley »

Weird-looking little machine!
Paul

За демократію і незалежний Україну

"For Democracy and a Free Ukraine"
User avatar
Softscience
Staring out the window
Posts: 7491
Joined: April 5th, 2011, 4:34 pm
Location: Maryland, near Washington DC

Re: Ernie's Comfy Corner

Post by Softscience »

That's a neat little thing, and a nicely built model.

I like all the oddities you've presented in this thread. All of them expertly built!
User avatar
Ernie
The Bug Has Well And Truly Bitten
Posts: 354
Joined: May 1st, 2011, 3:09 am
Location: A small town in New Hampshire

Re: Ernie's Comfy Corner

Post by Ernie »

Softscience wrote:That's a neat little thing, and a nicely built model.

I like all the oddities you've presented in this thread. All of them expertly built!
Thank you Ralph, glad you like my little collection of oddities! :grin:
User avatar
Ernie
The Bug Has Well And Truly Bitten
Posts: 354
Joined: May 1st, 2011, 3:09 am
Location: A small town in New Hampshire

Re: Ernie's Comfy Corner

Post by Ernie »

I have also worked on the ammo crates that came with the kit as I intend to display them on a small base with the gun. I found a YouTube video of a very talented model railroader who had a video of painting plastic to look like wood. It seemed simple enough to do, and uses acrylic craft paint which is quite inexpensive compared to some of our specialty paints, so I decided to give it a try, The boxes were first textured with a saw blade then painted.

Image

The boxes got a coat of gloss, some hair spray and the a coat of Gunze Aqueous dark green from a 30 year old bottle :shock: Then they were stippled around the edges with a couple different shades of lighter greens to show wear and chipping. Once all that was dry the decal was applied. I was quite surprised the decals worked, as you might be able to see they suffered some moisture damage while in storage. However, it took some work to get it to settle down. I have read that Tamiya Extra Thin Cement can be used to melt down stubborn decals. Well, it is a thing, I resorted to that to finally get the decal settle down onto the ammo box perfectly! Some of the paint was scrubbed and rubbed off to expose the underlying wood grain.

Image

In all contemporary photos of the shells I looked at the shells were a very dark color, with a very slight sheen, I base coated the shells with Vallejo Grey Black. I thought it looked a too light. Looking around I spied a bottle of Wilder Products diesel exhaust stains wash. This is a very very dark greyish sooty looking wash, which I applied to the shells and it kind of gave me the look I was going for. After that dried I rubbed the shells with a dark metallic pigment, dark steel I think it was? Anyway it gave the shells a slight sheen and metallic look.

Image

Getting closer...
Lone Modeller
Modelling Gent and Scholar
Posts: 5345
Joined: April 1st, 2013, 6:45 pm

Re: Ernie's Comfy Corner

Post by Lone Modeller »

Some excellent painting there Ernie. The wood looks very realistic, as do the shells.
User avatar
skypirate
Modelling Gent and Scholar
Posts: 7303
Joined: May 1st, 2011, 6:13 am
Location: Port Macquarie, Australia

Re: Ernie's Comfy Corner

Post by skypirate »

Love the extra details! Sure makes a difference!

David
User avatar
wokka
Modelling Gent and Scholar
Posts: 4575
Joined: March 22nd, 2019, 1:20 pm
Location: Germany

Re: Ernie's Comfy Corner

Post by wokka »

The boxes look very realistic, I'm afraid my knowledge of shell colours is none existent to be able to say if the colours are accurate.
It's only pain, work through it.
User avatar
gnomemeansgnome
Modelling Gent and Scholar
Posts: 5269
Joined: July 16th, 2013, 4:03 pm
Location: No Fun City

Re: Ernie's Comfy Corner

Post by gnomemeansgnome »

Cool!
Ego no habeo consilium.

ICBM = Insatiable Collector and Builder of Models
Post Reply

Return to “Workbench Window”