Tutorial Tamiya 1:35 JSU-152

Hints here for painting, decalling, weathering and displaying your finished models.
User avatar
Canuck2016
Active Participant
Posts: 535
Joined: March 6th, 2016, 4:03 pm

Tutorial Tamiya 1:35 JSU-152

Post by Canuck2016 »

Good day all!

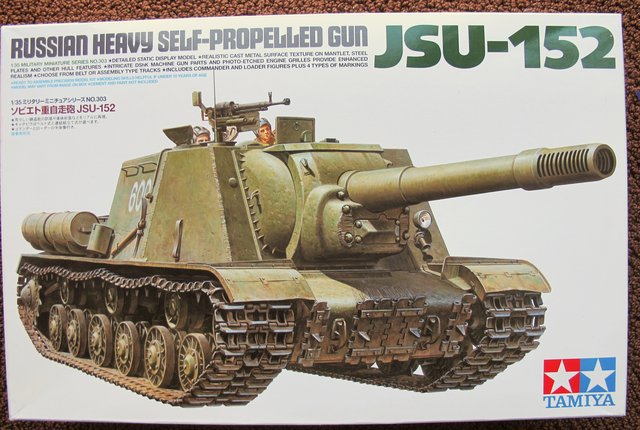
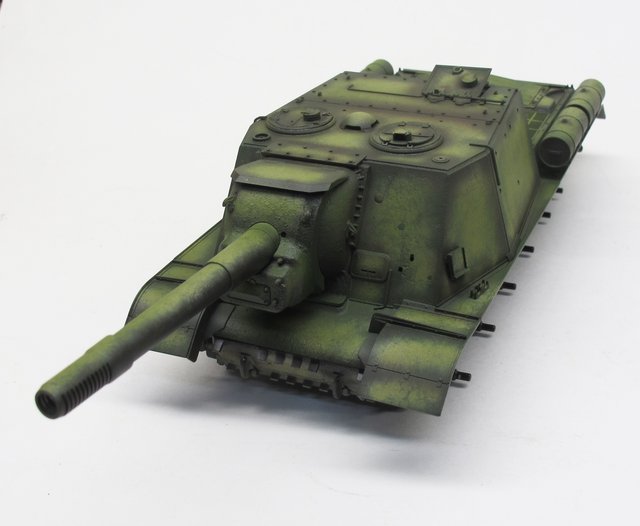
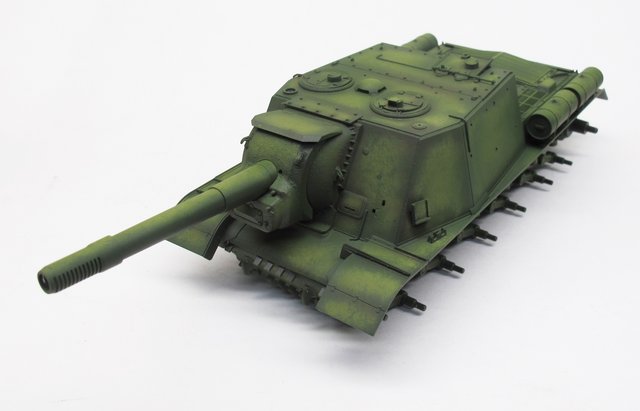
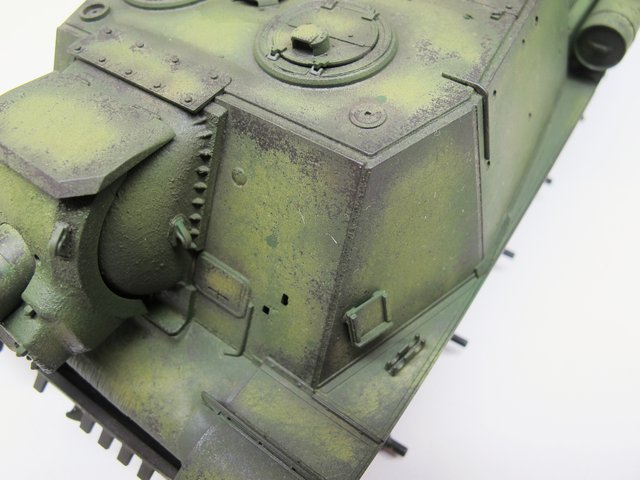
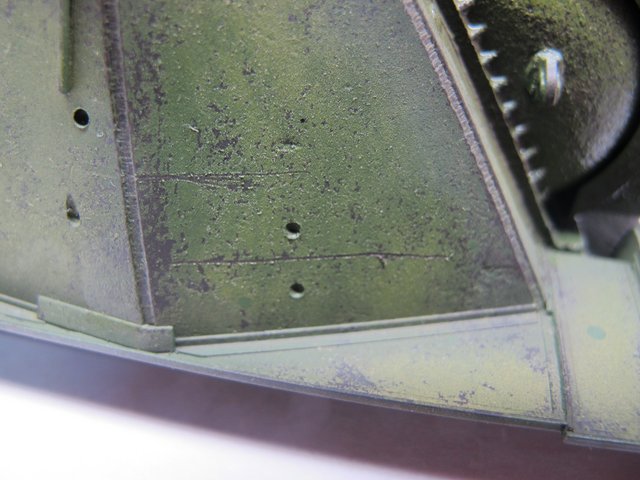
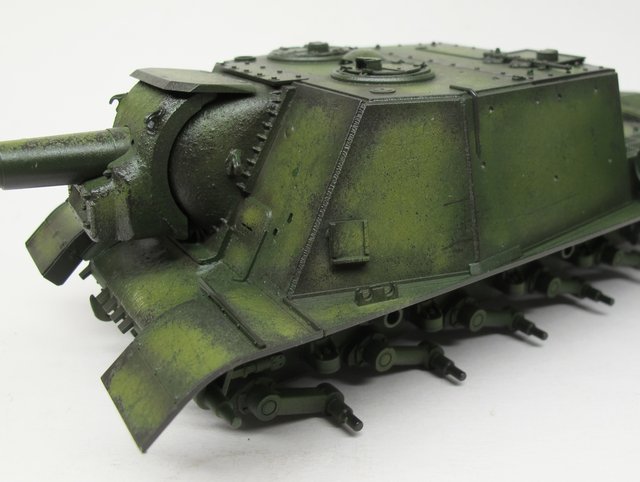
Some folk here very kindly asked if I could do a tutorial on a build with a focus on painting and weathering. So here's my attempt using Tamiya's 1:35 JSU-152 as a subject.

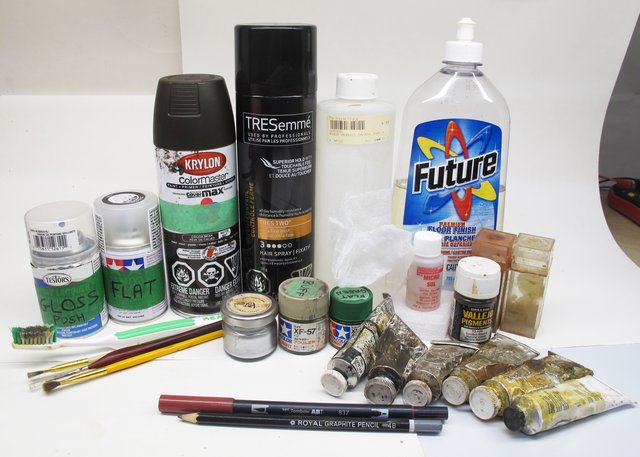
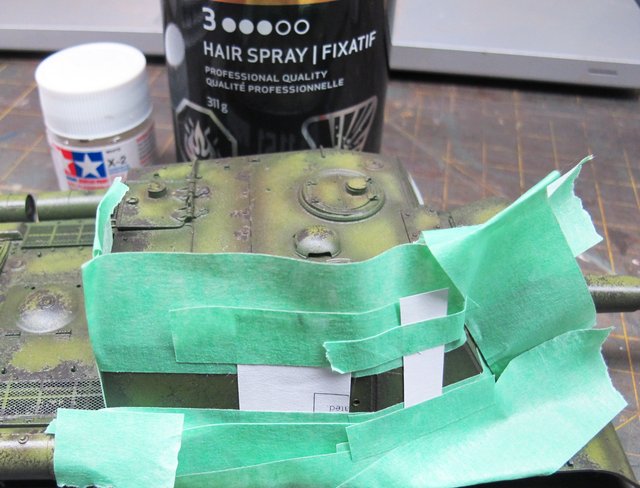
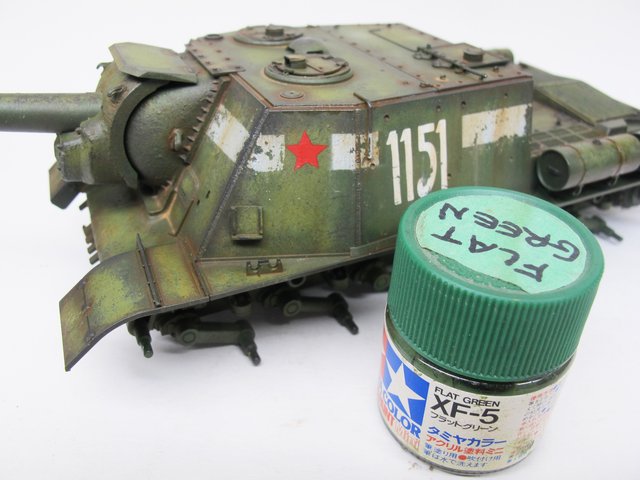
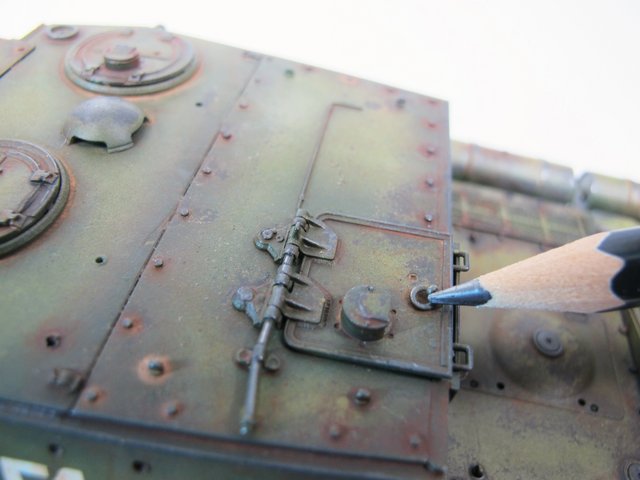
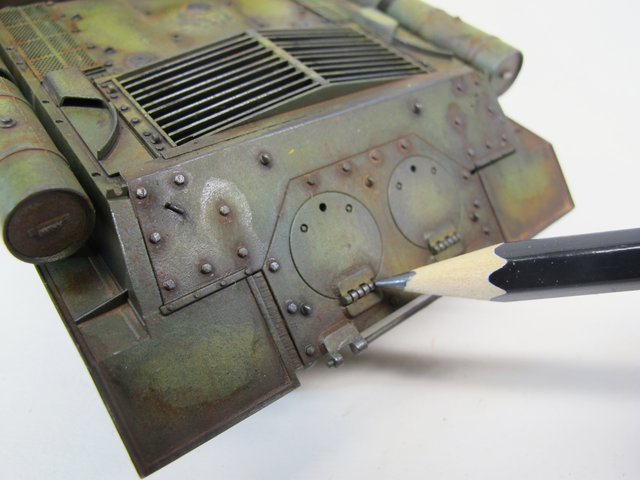
The second photo shows the materials I usually use for a "Russian Green" subject. Since there aren't a lot of specialty stores where I live, I try to keep the materials as generic and broadly available as possible! Anyway, here's what's in the photo, roughly left-to-right, and top-to-bottom: gloss coat, dull coat, Krylon spray paint ("Cocoa Bean" colour), fine hair spray, odourless paint thinner, used fabric softener sheet (the crumpled white thing in front of the thinner), Future floor polish, old toothbrush, cheap stiff-bristled paintbrush, fine-tipped paintbrush, broad soft paintbrush, Rub & Buff metallic wax (or similar), Tamiya XF-57 "Buff" (or similar), Tamiya XF-5 "Flat Green", artists oils in various shades (from beige through dirty yellow, brown, rusty red, dark brown, and black), Microsol (or similar), pigments (light sand, rust, and dark brown), rusty-brown soft-tipped marker, and a soft graphite pencil. Whew! Now down to work! :)

Image

Image
User avatar
Canuck2016
Active Participant
Posts: 535
Joined: March 6th, 2016, 4:03 pm

Re: Tutorial Tamiya 1:35 JSU-152

Post by Canuck2016 »

Here's the JSU-152 mostly built. I left off the external stowage, grab handles, headlight, wheels, etc. since they get in the way of the painting, decalling, and weathering to follow, and are in great danger of being broken or knocked off during handling. Since this is a Tamiya kit, I have nothing to say about the construction, except that it went as smoothly as can be!

The entire model is painted with the Krylon "Cocoa Bean" spray paint (very dark brown, almost black). I'm a huge fan of this, as it's cheap, it makes a good primer, it's impervious to all the painting and weathering steps to follow, its colour is a good likeness of exposed metal, and it and gives a warmer look to the base colour than a straight black primer does. Love this stuff!

The first photo just shows the model with a coat of Krylon on everything, including the photo-etch engine grilles. The second photo shows the model after a light overall mist of hair spray, explaining the glossier look!


Image
User avatar
Canuck2016
Active Participant
Posts: 535
Joined: March 6th, 2016, 4:03 pm

Re: Tutorial Tamiya 1:35 JSU-152

Post by Canuck2016 »

The next step is pre-shading with heavily-thinned Tamiya Buff airbrushed through a dryer sheet. I've used similar colours (e.g. Dark Yellow, Desert Yellow, Deck Tan) and I think they all work fine. I think the dryer sheet gives a nice, irregular distressed pattern, a bit like Danish blue cheese. This is concentrated around high spots, horizontal surfaces, and the centres of panels and hatches, while low spots and overhangs like the undersides of the fenders are left with the cocoa bean colour. It looks bad now, but it will be mostly hidden by later steps.

The combination of the dark brown primer with the beige pre-shading will give a warmer tint to the upcoming base coat of Tamiya Flat Green, making it more of an olive colour. I think this gives a nice effect, and is less stark than white pre-shading over black primer.
Image
User avatar
Canuck2016
Active Participant
Posts: 535
Joined: March 6th, 2016, 4:03 pm

Re: Tutorial Tamiya 1:35 JSU-152

Post by Canuck2016 »

Next, mist on layers of heavily-thinned Flat Green, building it up gradually as a filter. The trick is to stop when the pre-shading still looks slightly overstated, since it will become more muted with the following weathering steps. I think the green looks too thin in the first photo, and about right in the second one.

Image

Image
User avatar
Canuck2016
Active Participant
Posts: 535
Joined: March 6th, 2016, 4:03 pm

Re: Tutorial Tamiya 1:35 JSU-152

Post by Canuck2016 »

Then it's on to chipping! I use a cheap, coarse-bristled brush for this. I trimmed the bristles a bit to make them more stiff. I just dip the brush in water and chip the base layer off with a jabbing motion. I concentrate on raised edges and high-traffic areas like around crew hatches or engine hatches.

Scratches were done with a cocktail stick. I find the easiest way to do this is to hold the cocktail stick firmly a short distance above the tabletop, and slide the model past it, as if the vehicle was driving past a protruding branch or other obstacle.

I think you'll see here what I meant about the dark brown primer simulating the look of exposed metal which has tarnished.


Image

Image
User avatar
Canuck2016
Active Participant
Posts: 535
Joined: March 6th, 2016, 4:03 pm

Re: Tutorial Tamiya 1:35 JSU-152

Post by Canuck2016 »

Follow-on pics:

1. Same as before, but with gloss coat for the upcoming decals.

2. Decals applied with Microsol, then distressed with a sharp knife blade to simulate chipped paint.

3. Decals protected with dull coat, then masked in preparation to paint the battle of Berlin stripes. Once masked, sprayed with hairspray (to allow later chipping of the stripes), then lightly sprayed with Tamiya X-2 White.

4. Masking removed, and white stripes chipped with a stiff-bristled brush and water. Note the loose chips of white paint, which will need to be removed!

5. A layer of dull coat over the whole model to protect the decals from the weathering to follow!

Image

Image

Image

Image

Image
ShaunW
NOT the sheep
Posts: 26188
Joined: November 26th, 2011, 6:11 pm
Location: Pontefract West Yorkshire

Re: Tutorial Tamiya 1:35 JSU-152

Post by ShaunW »

I'm afraid I managed to miss the start of this, Canuck and what a brilliant tutorial it is. Top notch work, nicely explained and photographed.
Doing - Tamiya 1/35th Universal Carrier.

Work is the curse of the modelling classes!
IPMS#12300
User avatar
Clashcityrocker
Modelling Gent and Scholar
Posts: 10823
Joined: May 1st, 2011, 12:31 am
Location: Adelaide. South Australia

Re: Tutorial Tamiya 1:35 JSU-152

Post by Clashcityrocker »

Excellent set of pics and explanations. Will be very useful.

Nigel
User avatar
JohnRatzenberger
Why is he so confused ?
Posts: 15734
Joined: April 5th, 2011, 3:42 pm
Location: Living on a sandbar - Nags Head, NC.

Re: Tutorial Tamiya 1:35 JSU-152

Post by JohnRatzenberger »

Thank you, I've made a note of Krylon Cocoa Bean primer; I tried black once and wasn't happy.
John Ratzenberger :???:
It's my model and I'll do what I want with it.
User avatar
Canuck2016
Active Participant
Posts: 535
Joined: March 6th, 2016, 4:03 pm

Re: Tutorial Tamiya 1:35 JSU-152

Post by Canuck2016 »

Next, dab on small dots of artist's oils in a random pattern using a fine-tipped brush, then draw them down with a broad, soft brush dampened with thinner to simulate rain streaks and add some variation to the finish.
Image

Image

Image
User avatar
Canuck2016
Active Participant
Posts: 535
Joined: March 6th, 2016, 4:03 pm

Re: Tutorial Tamiya 1:35 JSU-152

Post by Canuck2016 »

Simulate small chips and blemishes by flicking on small quantities of rusty-brown artist's oil paint with an old toothbrush. Then drag the small specks down with a broad, soft brush dampened in thinner.

Add some more rust-coloured oil paint to areas where grab-handles, headlights, etc. will be attached, then drag it down in a long streak with a damp brush.

Dab small amounts of white artist's oil around the white decals and stripe, particularly where the white paint/decal has been chipped off, and again, draw it down with a soft, damp brush to simulate places where the paint was washed down by rain.

Image

Image

Image

Image
User avatar
Canuck2016
Active Participant
Posts: 535
Joined: March 6th, 2016, 4:03 pm

Re: Tutorial Tamiya 1:35 JSU-152

Post by Canuck2016 »

Next, make a thin mixture of rusty-brown artist's oil paint and thinner, and use a fine-tipped brush to apply it to areas where rain and rust might gather (e.g. weld seams, torch cuts, rivets, etc.

Rusty edges on fenders can be simulated by making a generous puddle of the above mixture on the fender, and letting it run down naturally to the edge until it pools. This looks bad at first, but when the paint dries I think it looks pretty realistic! :)

I included the last photo in this group just to show how much the primer coat and subsequent filters "knock down" the brightness and saturation of the Flat Green base coat, making it a more olive colour and (I believe) a decent approximation of "Russian Green". Barely recognizable, no? :)
Image

Image

Image
ShaunW
NOT the sheep
Posts: 26188
Joined: November 26th, 2011, 6:11 pm
Location: Pontefract West Yorkshire

Re: Tutorial Tamiya 1:35 JSU-152

Post by ShaunW »

This really is a masterclass, Canuck and one that I'm thoroughly enjoying.
Doing - Tamiya 1/35th Universal Carrier.

Work is the curse of the modelling classes!
IPMS#12300
User avatar
Canuck2016
Active Participant
Posts: 535
Joined: March 6th, 2016, 4:03 pm

Re: Tutorial Tamiya 1:35 JSU-152

Post by Canuck2016 »

ShaunW wrote:This really is a masterclass, Canuck and one that I'm thoroughly enjoying.
Thank you ShaunW! I'm enjoying it too, and I'm very glad if it's useful! :)
User avatar
Canuck2016
Active Participant
Posts: 535
Joined: March 6th, 2016, 4:03 pm

Re: Tutorial Tamiya 1:35 JSU-152

Post by Canuck2016 »

Simulate worn metal on raised edges with a soft graphite pencil. For a lighter effect, draw a series of dots with the pencil, and smudge them with a cloth. Good areas for this are weld seams, rivet heads, hatches, and hinges.

You can also use the Rub & Buff for this, but be warned that it's very shiny, and hard to remove once it's on. I think the pencil gives a more subtle gloss, and is easier to control.
Image

Image

Image

Image
Post Reply

Return to “Finishing Tips”