WIP - Small A4 1/72nd Diorama
-
general rocket

- Modelling Gent and Scholar
- Posts: 2791
- Joined: May 1st, 2011, 4:42 pm
- Location: Telford
Re: WIP - Small A4 1/72nd Diorama
Arriving with a bang, welcome to the forum, and keep it up.
I wish, that I knew what was doing!
-
TeeELL

- Modelling Gent and Scholar
- Posts: 11633
- Joined: December 28th, 2015, 4:38 pm
- Location: North Wiltshire
Re: WIP - Small A4 1/72nd Diorama
That is inspiring work G-man, you have certainly caught our interest now you have fallen off the fence and landed in a heap of praise. Welcome aboard and may your fine work continue.
Tony
The older I get the better I was!
Current build:
Airfix 1:72 Javelin FAW9
Particular modelling interests:
Cuban Airforce aircraft, 29(F) Sqn aircraft, Aircraft I’ve flown
The older I get the better I was!
Current build:
Airfix 1:72 Javelin FAW9
Particular modelling interests:
Cuban Airforce aircraft, 29(F) Sqn aircraft, Aircraft I’ve flown

Re: WIP - Small A4 1/72nd Diorama
My thanks to Stuart, James, general rocket, and Tony for their kind words,  .
.
I look forward to seeing your wargaming scenery Stuart,.
Cheers, ,
,
G
I look forward to seeing your wargaming scenery Stuart,
Cheers,
G
Re: WIP - Small A4 1/72nd Diorama
Hi all,
As promised, the next stage of the build, having roughed-out the quayside walls. I created a recess in the surface to take a length of track and started to apply pva glue over which a thin covering of DAS was smeared. In all instances I work with small pea-sized blobs of DAS, smoothing it out with a wetted finger, don't worry too much about everything being perfectly smooth, slight undulations in the surface can create a more realistic impression when dry. However, if you want it to be smoother it's a simple process to sand the surface when it has dried out:
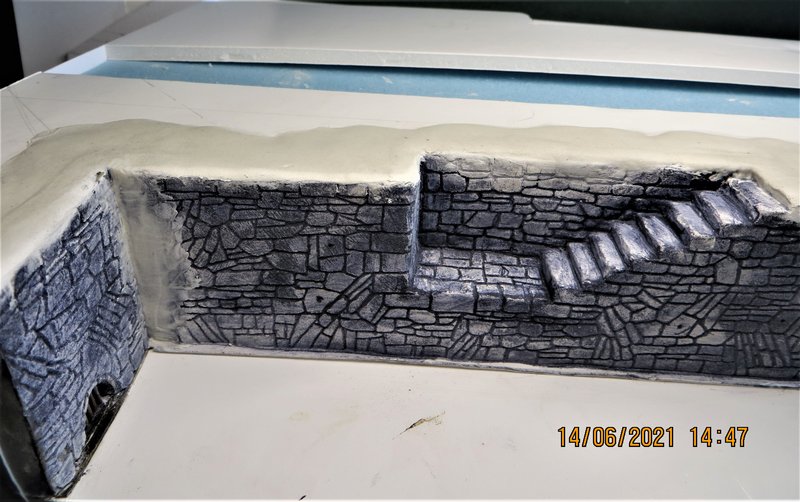
Again, as previously, once the DAS has dried it's just a matter of scribing, in this case it was the cobbled surface. You can draw on the DAS first before scribing so as to check the look prior to scribing, or else you can just jump straight on in freestyle, however, the beauty of DAS is that if you're unhappy with an element you can simply apply a fresh smear over the offending surface, let it dry, and then start again.
Personally, I tend to draw certain elements, such as the large edging stones where the wall meets the horizontal areas. I also mark out about an inch of cobbles, so that I can get a feel for the size and pattern that I have to maintain freehand, after that I simply draw a straight line very few inches to help me stay on course:
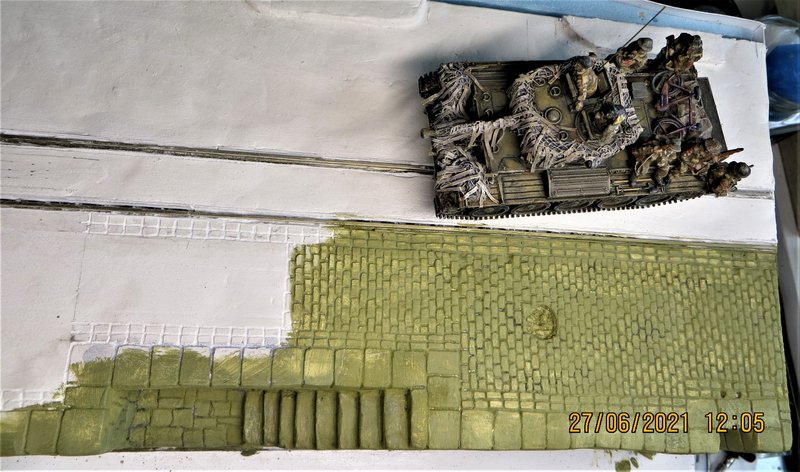
After that it's just carry-on scribing, which is a tad laborious and tedious, so occasionally I'll take a break and further enhance areas previously created, e.g. putting some texture and colour into the quay walls, or creating wooden bumper rails:
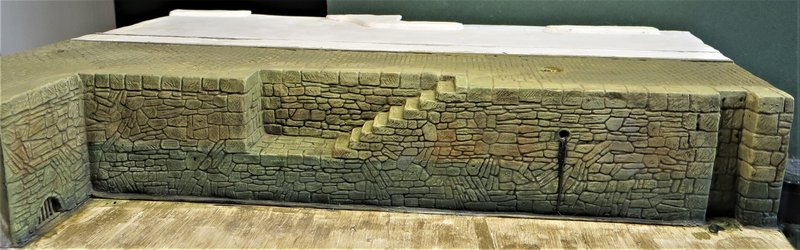

The weed along the bottom of the wall and leaking from the pipe is plumbers hemp soaked in pva glue that has had some cheap acrylic paint mixed in with it.
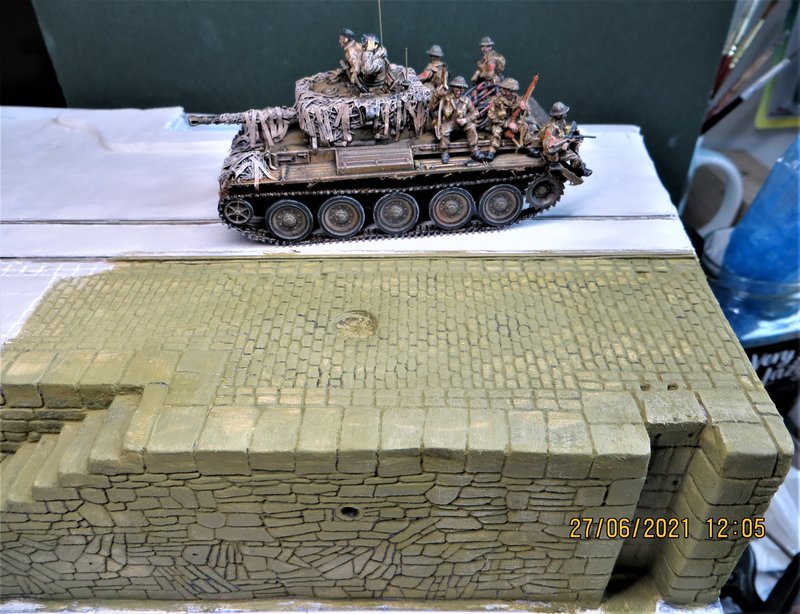
Eventually all the cobbles are scribed and given a basic colour:


It took about 9hrs in total to scribe the cobbles, I think I was beginning to lose my sanity by then, , that's presuming I had any in the first instance,
 .
.
DAS is easy to clean off hands and clothes, it is a bit messy when working it when wetted, and a lot of dust is created when scribing, so I would suggest surgical gloves if you have sensitive skin, and definitely a mask when scribing.
Th-th-that's all, folks!...for now,.
Cheers,,
G
As promised, the next stage of the build, having roughed-out the quayside walls. I created a recess in the surface to take a length of track and started to apply pva glue over which a thin covering of DAS was smeared. In all instances I work with small pea-sized blobs of DAS, smoothing it out with a wetted finger, don't worry too much about everything being perfectly smooth, slight undulations in the surface can create a more realistic impression when dry. However, if you want it to be smoother it's a simple process to sand the surface when it has dried out:
Again, as previously, once the DAS has dried it's just a matter of scribing, in this case it was the cobbled surface. You can draw on the DAS first before scribing so as to check the look prior to scribing, or else you can just jump straight on in freestyle, however, the beauty of DAS is that if you're unhappy with an element you can simply apply a fresh smear over the offending surface, let it dry, and then start again.
Personally, I tend to draw certain elements, such as the large edging stones where the wall meets the horizontal areas. I also mark out about an inch of cobbles, so that I can get a feel for the size and pattern that I have to maintain freehand, after that I simply draw a straight line very few inches to help me stay on course:
After that it's just carry-on scribing, which is a tad laborious and tedious, so occasionally I'll take a break and further enhance areas previously created, e.g. putting some texture and colour into the quay walls, or creating wooden bumper rails:
The weed along the bottom of the wall and leaking from the pipe is plumbers hemp soaked in pva glue that has had some cheap acrylic paint mixed in with it.
Eventually all the cobbles are scribed and given a basic colour:
It took about 9hrs in total to scribe the cobbles, I think I was beginning to lose my sanity by then,
DAS is easy to clean off hands and clothes, it is a bit messy when working it when wetted, and a lot of dust is created when scribing, so I would suggest surgical gloves if you have sensitive skin, and definitely a mask when scribing.
Th-th-that's all, folks!...for now,
Cheers,
G
-
ShaunW
- NOT the sheep
- Posts: 26188
- Joined: November 26th, 2011, 6:11 pm
- Location: Pontefract West Yorkshire
Re: WIP - Small A4 1/72nd Diorama
My goodness, that Normandy diorama has to be one of the best I've seen anywhere, G and those cobbles really look the part. It's amazing what can be made to fit onto something the area of an A4 sheet of paper. My gob is properly smacked 

Doing - Tamiya 1/35th Universal Carrier.
Work is the curse of the modelling classes!
IPMS#12300
Work is the curse of the modelling classes!
IPMS#12300
-
Clashcityrocker

- Modelling Gent and Scholar
- Posts: 10827
- Joined: May 1st, 2011, 12:31 am
- Location: Adelaide. South Australia
Re: WIP - Small A4 1/72nd Diorama
Just held up a sheet of A4 paper, and am seriously impressed with the amount of work and detail going into these dioramas. Please, keep showing us your processes.
Nigel
Nigel
Re: WIP - Small A4 1/72nd Diorama
Thank you to Shaun and Nigel for their supportive comments, .
Cheers,,
G
Cheers,
G
Re: WIP - Small A4 1/72nd Diorama
Hi all,
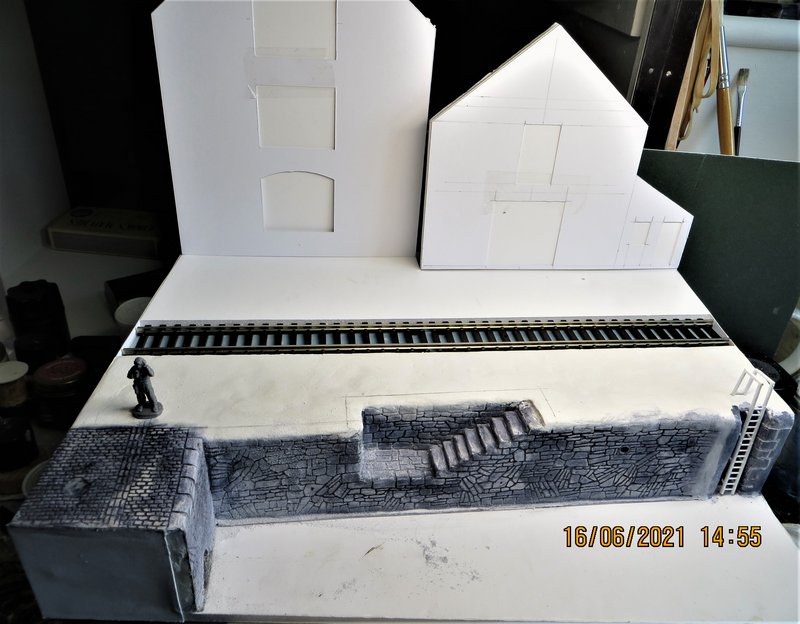
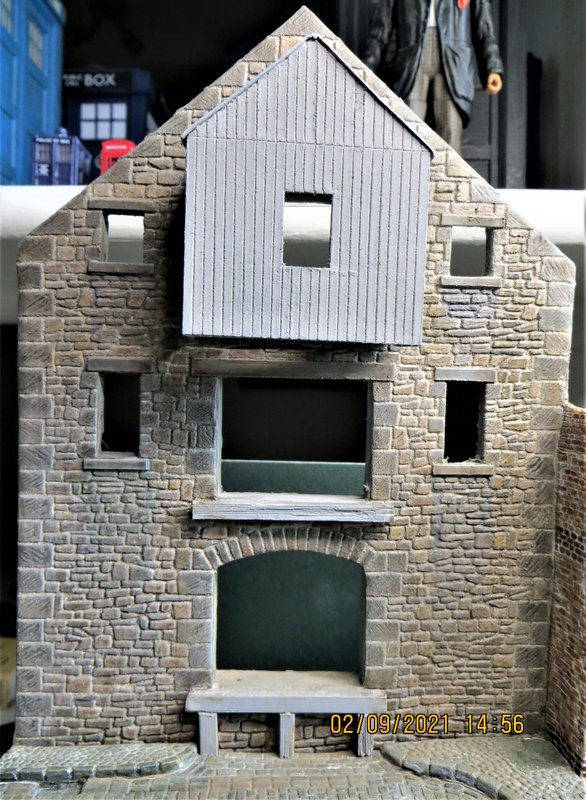
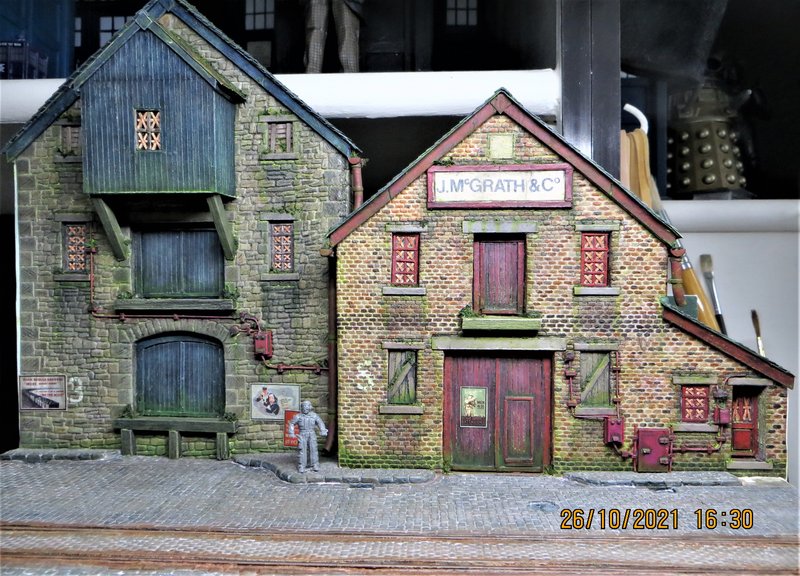
The building facades were constructed in a similar way to quayside, foamboard carcass covered in a thin layer of DAS over white glue:


One was scribed to represent stone, the other to look like brickwork, how realistic this would be in real life is questionable, but I thought the visual contrast would be interesting,:
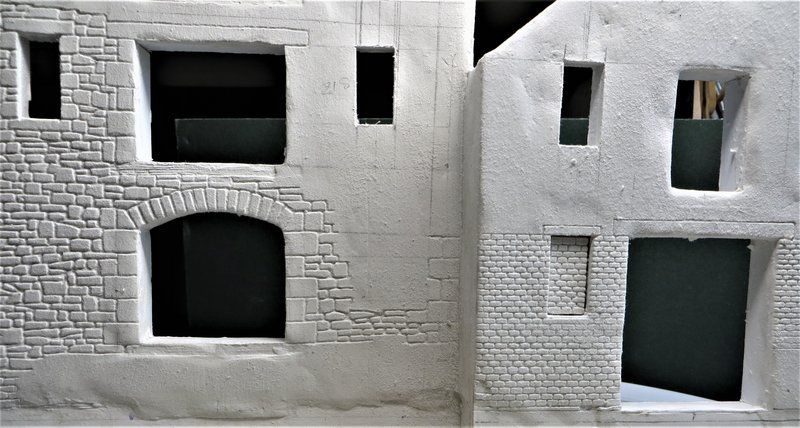
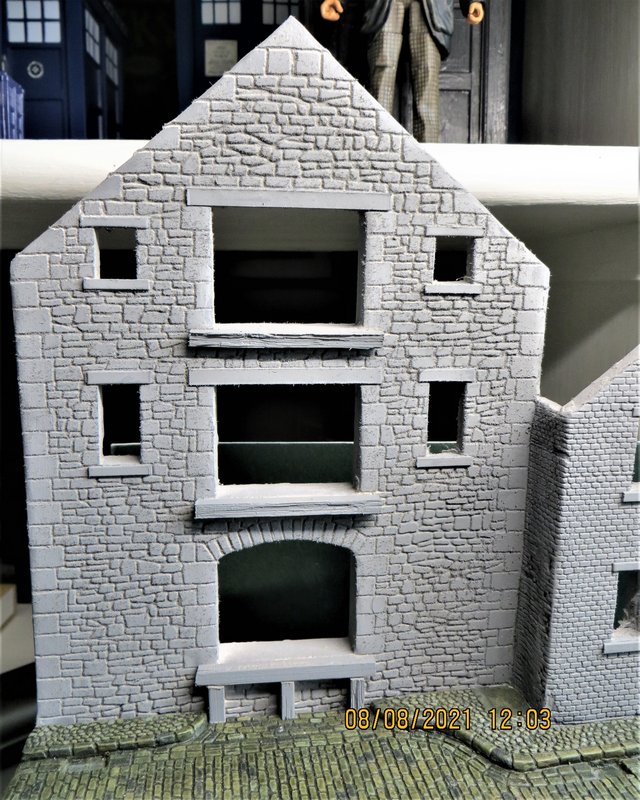

Then it was just a case of building up layers of colour:
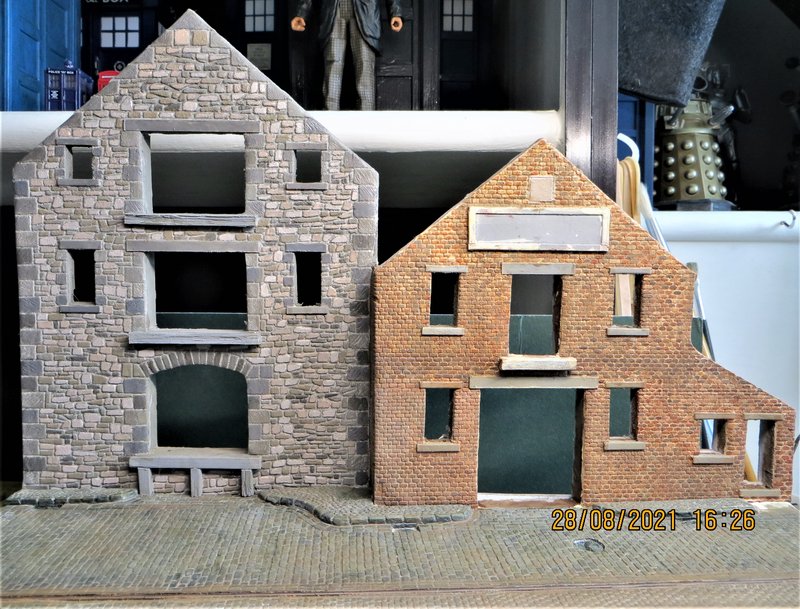
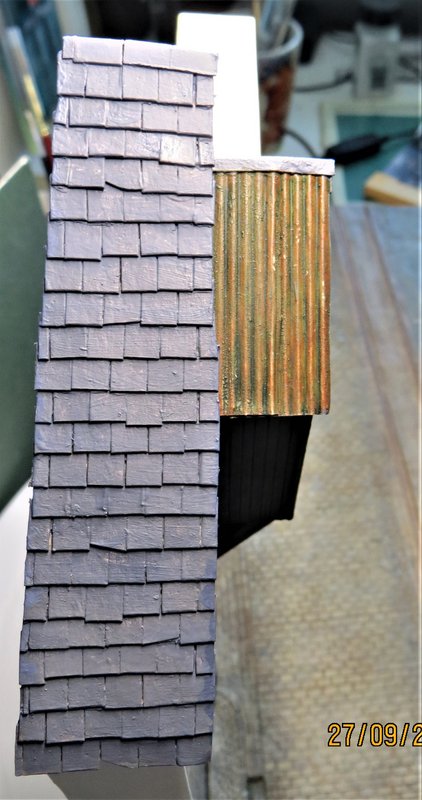
The next steps were the addition of a lucam (a winch house) from old greeting cards, the roof was made from material scavenged from a pie tray pressed between a plasticard jig I cobbled together to look like corrugated iron:

Any questions, please feel free...
Cheers for now,,
G
The building facades were constructed in a similar way to quayside, foamboard carcass covered in a thin layer of DAS over white glue:
One was scribed to represent stone, the other to look like brickwork, how realistic this would be in real life is questionable, but I thought the visual contrast would be interesting,
Then it was just a case of building up layers of colour:
The next steps were the addition of a lucam (a winch house) from old greeting cards, the roof was made from material scavenged from a pie tray pressed between a plasticard jig I cobbled together to look like corrugated iron:
Any questions, please feel free...
Cheers for now,
G

Re: WIP - Small A4 1/72nd Diorama
Those are fantastic dioramas, you have a real talent.
It's only pain, work through it.
-
TeeELL
- Modelling Gent and Scholar
- Posts: 11633
- Joined: December 28th, 2015, 4:38 pm
- Location: North Wiltshire
Re: WIP - Small A4 1/72nd Diorama
Splendid work indeed and thanks for sharing. I note we came up with very similar solutions to the creating of corrugated iron!
Tony
The older I get the better I was!
Current build:
Airfix 1:72 Javelin FAW9
Particular modelling interests:
Cuban Airforce aircraft, 29(F) Sqn aircraft, Aircraft I’ve flown
The older I get the better I was!
Current build:
Airfix 1:72 Javelin FAW9
Particular modelling interests:
Cuban Airforce aircraft, 29(F) Sqn aircraft, Aircraft I’ve flown
Re: WIP - Small A4 1/72nd Diorama
Thank you to wokka and Tony for their support, .
Interesting that you have a similar approach Tony, do you use it in this scale, or larger scales? Not sure how realistic my corrugated iron is, but at this small scale it passes muster, imho, as a representation of the product:


Thanks again, and cheers,,
G
Interesting that you have a similar approach Tony, do you use it in this scale, or larger scales? Not sure how realistic my corrugated iron is, but at this small scale it passes muster, imho, as a representation of the product:
Thanks again, and cheers,
G
Re: WIP - Small A4 1/72nd Diorama
Hi all,
The roof tiles, fascia boards, large warehouse doors, and boarded up windows were made from old greeting cards, and the glazed windows and door were strips of clear plastic packaging with card applied to look like frames:
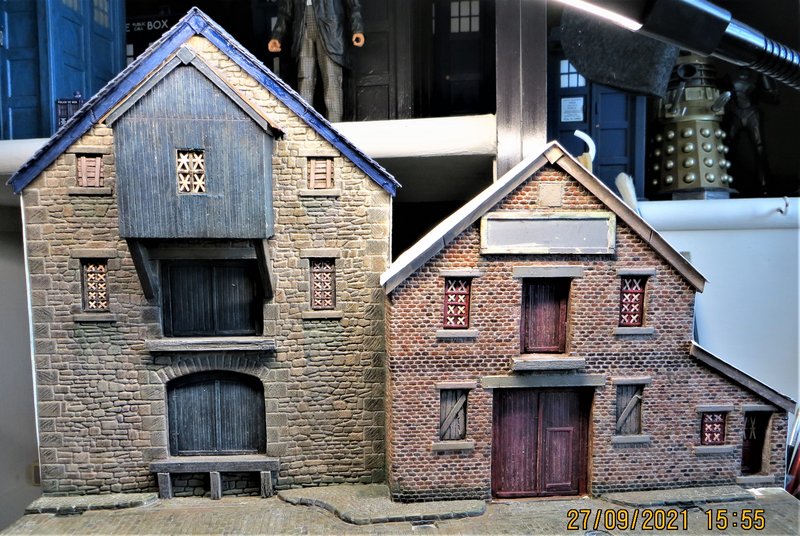
The blast tape on the 'glazing' is thin strips of an adhesive label, it's as narrow as I could get it, but unfortunately still looks overscale, .
.
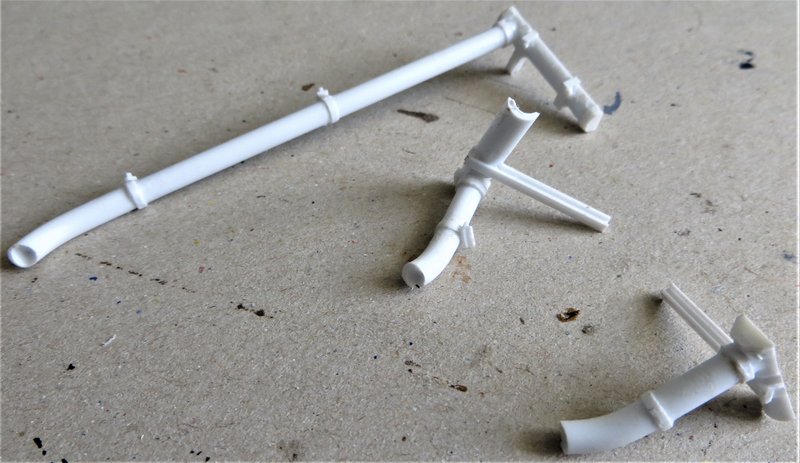
The rainwater goods, again unfortunately overscale, are cobbled together from bits of plastic extrusions. I'm a bit of a tightwad and paid the price for not shelling out money on some of the very good moulded products, the same goes for doors and windows,:

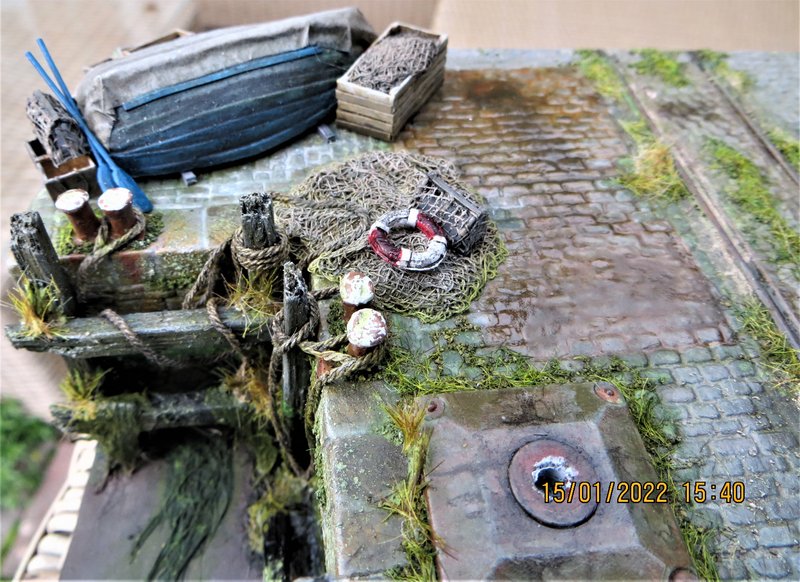
Things like the clutter to the front left of the diorama and the mooring bollards were cobbled together from bits of plastic, foam, card and paper.
The bollards are plastic rod with the end melted over and a pair glued to a piece of plastic sheet:
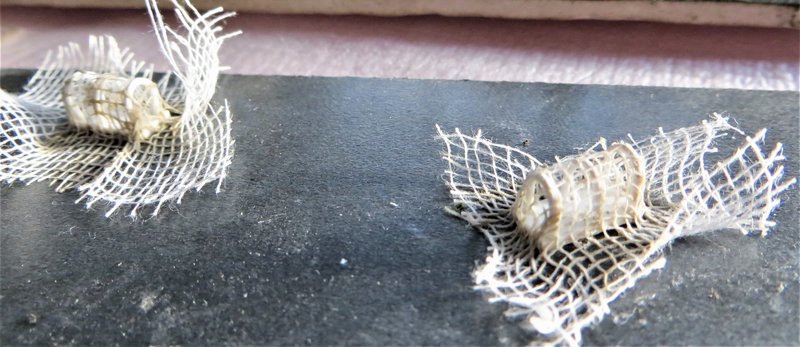
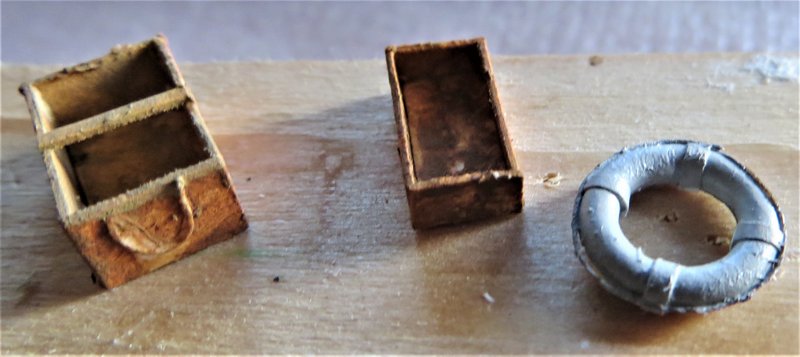
The upturned boat was a piece of foam cut roughly to shape, half of it covered in strips of paper to represent planking, the other half covered in a sheet of paper to look like tarpaulin, and the gang planks, boxes and lobster pots made from card and mesh:
And then painted up and grouped together:

And the red boxes and cabling on the building facades is just chunks of plastic strip and rod:
All for now, but please feel free to ask if you have any questions.
Cheers,,
G
The roof tiles, fascia boards, large warehouse doors, and boarded up windows were made from old greeting cards, and the glazed windows and door were strips of clear plastic packaging with card applied to look like frames:
The blast tape on the 'glazing' is thin strips of an adhesive label, it's as narrow as I could get it, but unfortunately still looks overscale,
The rainwater goods, again unfortunately overscale, are cobbled together from bits of plastic extrusions. I'm a bit of a tightwad and paid the price for not shelling out money on some of the very good moulded products, the same goes for doors and windows,
Things like the clutter to the front left of the diorama and the mooring bollards were cobbled together from bits of plastic, foam, card and paper.
The bollards are plastic rod with the end melted over and a pair glued to a piece of plastic sheet:
The upturned boat was a piece of foam cut roughly to shape, half of it covered in strips of paper to represent planking, the other half covered in a sheet of paper to look like tarpaulin, and the gang planks, boxes and lobster pots made from card and mesh:
And then painted up and grouped together:
And the red boxes and cabling on the building facades is just chunks of plastic strip and rod:
All for now, but please feel free to ask if you have any questions.
Cheers,
G
-
iggie

- Modelling Gent and Scholar
- Posts: 23438
- Joined: July 31st, 2013, 11:04 am
- Location: North Somercotes, Lincolnshire
- Contact:
Re: WIP - Small A4 1/72nd Diorama
I think you're being a little hard on yourself with regard to the guttering and downpipes especially; the whole trick with dioramas for me is creating the illusion and providing what the viewer's eyes and brain expects to see even if it is more 'smoke and mirrors' than an exact representation.
To achieve the degree of realism that you have in 1/72 is amazing!
To achieve the degree of realism that you have in 1/72 is amazing!
Best wishes
Jim
If you can walk away from a landing, it's a good landing. If you use the airplane the next day, it's an outstanding landing
"Never put off till tomorrow, what you can do the day after tomorrow"
Jim
If you can walk away from a landing, it's a good landing. If you use the airplane the next day, it's an outstanding landing
"Never put off till tomorrow, what you can do the day after tomorrow"
-
TeeELL
- Modelling Gent and Scholar
- Posts: 11633
- Joined: December 28th, 2015, 4:38 pm
- Location: North Wiltshire
Re: WIP - Small A4 1/72nd Diorama
I endorse Jim’s comment. The diorama looks incredible and the detail is such that any scaling errors are totally camouflaged by the detail.
Tony
The older I get the better I was!
Current build:
Airfix 1:72 Javelin FAW9
Particular modelling interests:
Cuban Airforce aircraft, 29(F) Sqn aircraft, Aircraft I’ve flown
The older I get the better I was!
Current build:
Airfix 1:72 Javelin FAW9
Particular modelling interests:
Cuban Airforce aircraft, 29(F) Sqn aircraft, Aircraft I’ve flown
-
TeeELL
- Modelling Gent and Scholar
- Posts: 11633
- Joined: December 28th, 2015, 4:38 pm
- Location: North Wiltshire
Re: WIP - Small A4 1/72nd Diorama
Like you, I use it in 1/72. I was creating a piece of corrugated iron as the feature for a boarded-up entrance to a derelict WW2 ‘pillbox’.G-Man69 wrote: ↑March 15th, 2022, 10:37 am Thank you to wokka and Tony for their support,
Interesting that you have a similar approach Tony, do you use it in this scale, or larger scales? Not sure how realistic my corrugated iron is, but at this small scale it passes muster, imho, as a representation of the product:
G
Tony
The older I get the better I was!
Current build:
Airfix 1:72 Javelin FAW9
Particular modelling interests:
Cuban Airforce aircraft, 29(F) Sqn aircraft, Aircraft I’ve flown
The older I get the better I was!
Current build:
Airfix 1:72 Javelin FAW9
Particular modelling interests:
Cuban Airforce aircraft, 29(F) Sqn aircraft, Aircraft I’ve flown