Aeroclub 1/72 English Electric P.1A conv

Military or civil, triplanes, biplanes or monoplanes, props, jets or helicopters...models in here.
User avatar
JamesPerrin
Looks like his avatar
Posts: 13695
Joined: April 5th, 2011, 8:09 pm
Location: W. Yorkshire
Contact:

Aeroclub 1/72 English Electric P.1A conv

Post by JamesPerrin »

So a nice straightforward build to end the year on...

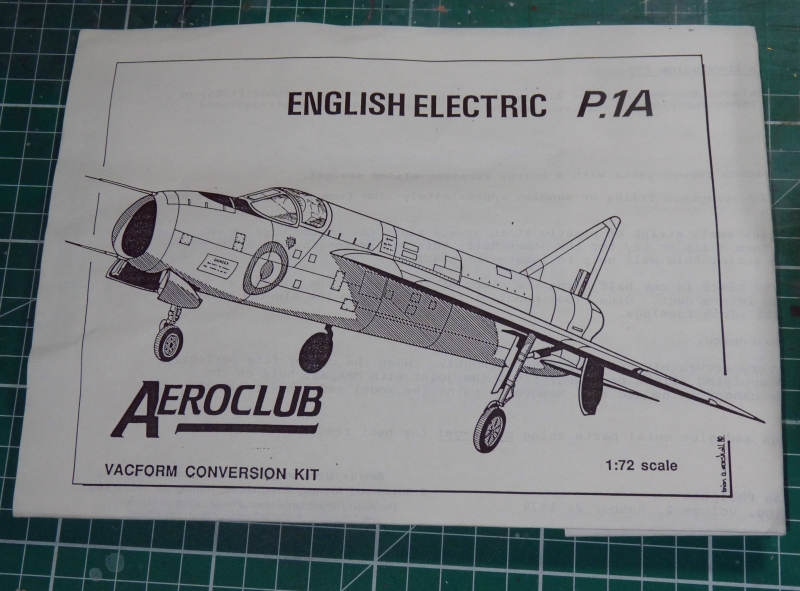
I came back from Telford with the odd urge to build the Welsh Models Short Belfast, I went through my vacform stash only to find I didn't have the kit! However I did come across this and since the Iain (ejsnotgrass) had sent me some straight edged Lightning wings a few years ago it seem appropriate to build it. Also the thread about "scary" builds put me in mind to knuckle down on a more in-depth build.

WG760 use to reside at Manchester Aerospace Museum and I was always struck by the gaping mouth of the P1A and knew I needed to build it. In the past, I've been the owner of the Merlin Models kits - my god that was rough and allegedly a rip-off of the Frog kit with all its inaccuracies and was sold to a collector.
Image

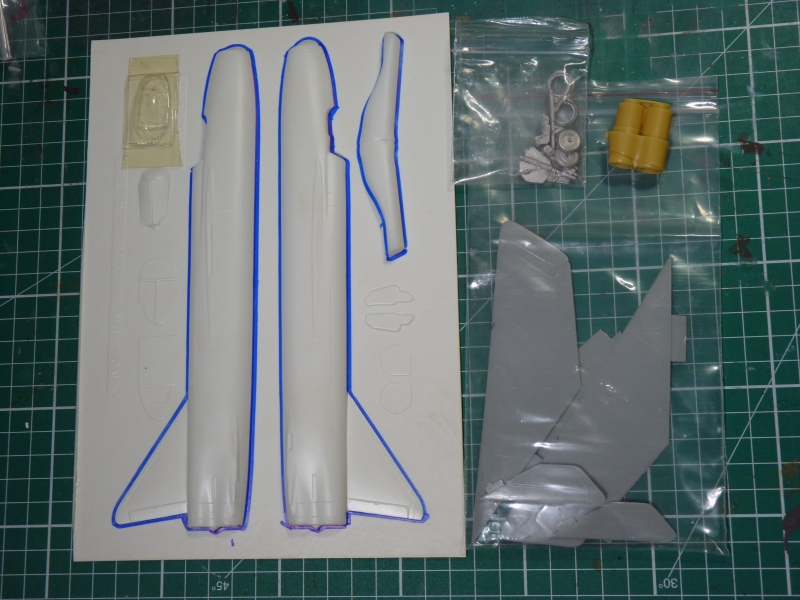
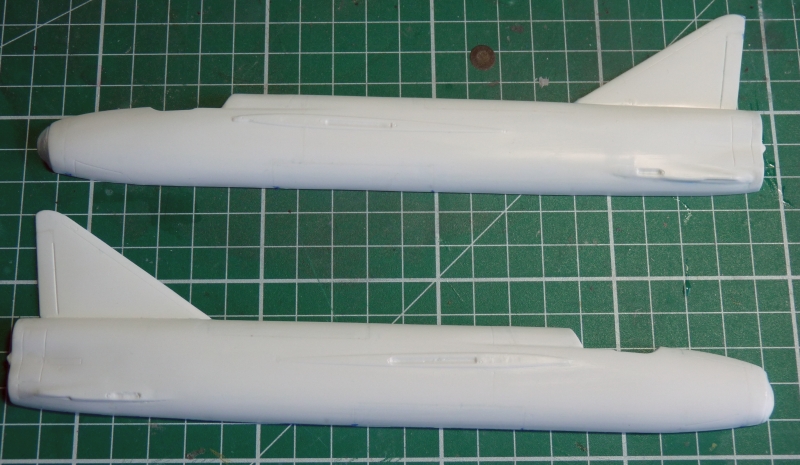
The vacform parts are pretty simple, fuselage halves, intake, bulkhead and undercarriage doors. A bag of white metal provides the seat, undercarriage and hot end. The resin exhaust is Aeroclubs fix for the Trunpeter Lightning and I threw one in the bag in case it could be of use but on examination not.
Image

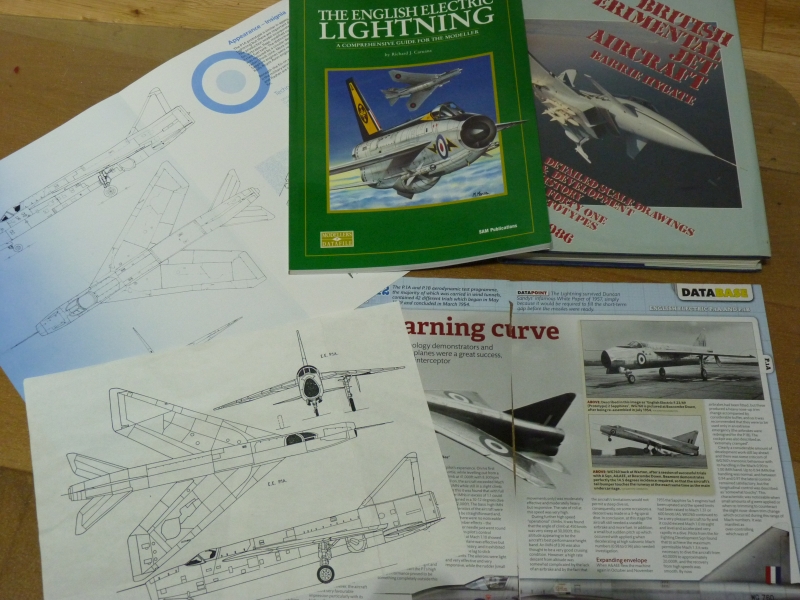
I think this kit must have predated Barrie Hygate's defacto tome on British prototypes as John Adams appears to have drawn up his own plans. In comparison, the fuselage is pretty spot on, but the tail is too tall (Barrie gives a definite height of 7'0.5") and the canopy is a little long. I checked Barrie's drawings against a good profile photo just to confirm these discrepancies. Annoyingly the book has the plans over a deep page fold but luckily they were reproduced at scale in a free profile I got from the museum.

The Modellers Datafile has a large number of cockpit photos which appear to be hard to find elsewhere and lots of 'very' close-up fuselage details. I fortunately have a lot of my own photos from trips to Manchester and Cosford.
Image
Classic British Kits SIG Leader Better to fettle than to fill
(2024 A:B 5:2) (2023 13:8:7) (2022 21:11) (2021 15:8) (2020 8:4:4)
User avatar
DavidWomby
Modelling Gent and Scholar
Posts: 11766
Joined: May 1st, 2011, 8:09 pm
Location: Florida, USA

Re: Aeroclub 1/72 English Electric P.1A conv

Post by DavidWomby »

Do you plan adjusting the slight inaccuracies, James?

David
User avatar
JamesPerrin
Looks like his avatar
Posts: 13695
Joined: April 5th, 2011, 8:09 pm
Location: W. Yorkshire
Contact:

Re: Aeroclub 1/72 English Electric P.1A conv

Post by JamesPerrin »

DavidWomby wrote: December 2nd, 2023, 10:17 pm Do you plan adjusting the slight inaccuracies, James?
The tail for sure, it’s an easy fix. Not sure what to with the canopy. It’s yellowed a bit so could do with replacing, so I’ll be making a copy at least.
Classic British Kits SIG Leader Better to fettle than to fill
(2024 A:B 5:2) (2023 13:8:7) (2022 21:11) (2021 15:8) (2020 8:4:4)
User avatar
beany
Fat git, glasses, goatie - Avoid!
Posts: 4334
Joined: April 6th, 2011, 11:05 am
Location: Chellaston, Derby

Re: Aeroclub 1/72 English Electric P.1A conv

Post by beany »

Always enjoy your more "thoughtful" builds James and admire your patience and eye for detail that I sadly lack in both ability and inclination on most of my builds. Like you I have photographed the Cosford inhabitant many times so really look forward to what you make of this.
2024 Acquired: 9 Built: 1
User avatar
B4en
Modelling Gent and Scholar
Posts: 1145
Joined: February 8th, 2014, 9:58 am
Location: South Yorkshire

Re: Aeroclub 1/72 English Electric P.1A conv

Post by B4en »

It'll be interesting to see this develop James. Anyone modelling vac-form kits deserves serious respect!
The past, present, and future walked into a bar. It was tense.
User avatar
Eric Mc
Modelling Gent and Scholar
Posts: 4813
Joined: May 3rd, 2011, 8:27 am
Location: Farnborough, Hants

Re: Aeroclub 1/72 English Electric P.1A conv

Post by Eric Mc »

I think I have that in my vac stash somewhere so it will be educational to follow the build.
ShaunW
NOT the sheep
Posts: 26188
Joined: November 26th, 2011, 6:11 pm
Location: Pontefract West Yorkshire

Re: Aeroclub 1/72 English Electric P.1A conv

Post by ShaunW »

Nice one, James, this should make for interesting viewing.
Doing - Tamiya 1/35th Universal Carrier.

Work is the curse of the modelling classes!
IPMS#12300
Billoddy
Series 3 and Beyond
Posts: 39
Joined: September 28th, 2023, 5:42 pm
Location: Lincoln

Re: Aeroclub 1/72 English Electric P.1A conv

Post by Billoddy »

Vac form, very scary! Only ever attempted one a long time ago which ended up a disaster. I shall watch with interest and hopefully pick up some tips along the way.
User avatar
JamesPerrin
Looks like his avatar
Posts: 13695
Joined: April 5th, 2011, 8:09 pm
Location: W. Yorkshire
Contact:

Re: Aeroclub 1/72 English Electric P.1A conv

Post by JamesPerrin »

First up is prepping the vacform parts. As par for the course, I marked around these with a permanent marker and then scored as close as possible. The fuselage and intakes were then snapped from the sheet. This leaves you with white plastic below the marker pen line that needs to be removed. Rather than the old-school sanding board I've taken to just scrapping the bulk of the plastic away. A lot less dust than sanding though the plastic shavings are staticly charged and love to stick to you. Having a "dust-buster" vacuum to hand is a boon. The sanding board does make an appearance at the end of the process just to square everything up instead of removing material. I left the "plugs" that fill the nose and cockpit in-place as they help provide the fuselage with rigidity while sanding etc.

I had already decided I wanted to rescribe the whole model. The moulded panel-lines are far from the best vacform ones too (it's an early Aeroclub release) so I started to fill and sand these using sprue-glue/gloop. This would ensure consistency of line when rescribing but is a lot slower than say using CA. Several passes were needed until I was happy as far as looking at the bare white plastic.

Image

After that both fuselage halves were sprayed with a solid coat of Halfords Primer, this revealed areas that needed attention but has left me with a smooth blank canvas onto which to start scribing. At this point though I did separate the tail from the fuselage and trim this down to the correct size.
Classic British Kits SIG Leader Better to fettle than to fill
(2024 A:B 5:2) (2023 13:8:7) (2022 21:11) (2021 15:8) (2020 8:4:4)
User avatar
DavidWomby
Modelling Gent and Scholar
Posts: 11766
Joined: May 1st, 2011, 8:09 pm
Location: Florida, USA

Re: Aeroclub 1/72 English Electric P.1A conv

Post by DavidWomby »

Watching.............................

David
ShaunW
NOT the sheep
Posts: 26188
Joined: November 26th, 2011, 6:11 pm
Location: Pontefract West Yorkshire

Re: Aeroclub 1/72 English Electric P.1A conv

Post by ShaunW »

Good to see this off the mark, James. I'm fair to rubbish at re-scribing so I'll be watching for hints and tips!
Doing - Tamiya 1/35th Universal Carrier.

Work is the curse of the modelling classes!
IPMS#12300
User avatar
JamesPerrin
Looks like his avatar
Posts: 13695
Joined: April 5th, 2011, 8:09 pm
Location: W. Yorkshire
Contact:

Re: Aeroclub 1/72 English Electric P.1A conv

Post by JamesPerrin »

So between bouts of filling and sanding fuselage panel lines I worked on the wings. These are from the venerable Airfix Lightning and were donated to me by our dear departed Iain (ejsnotgrass). One wing insert fitted nice and flush withing the upper wing the other was significantly thinner and needed shimming to get the same level of fit.

Image

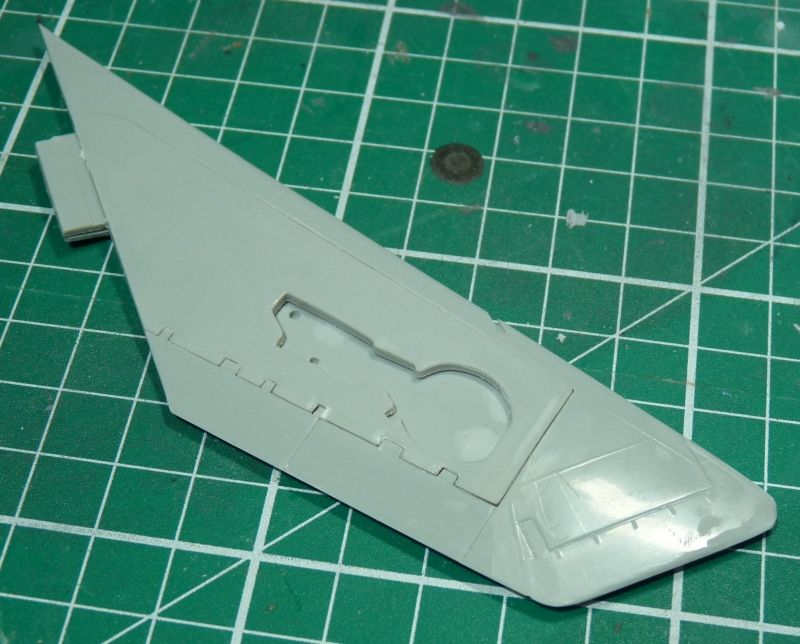
I was rather pleased with this as they only needed a bit of filler along the front edge. But before glueing them in I knew I needed to correct the hole for the undercarriage as they didn't quite match the metal wheel covers the conv supplied...

Image

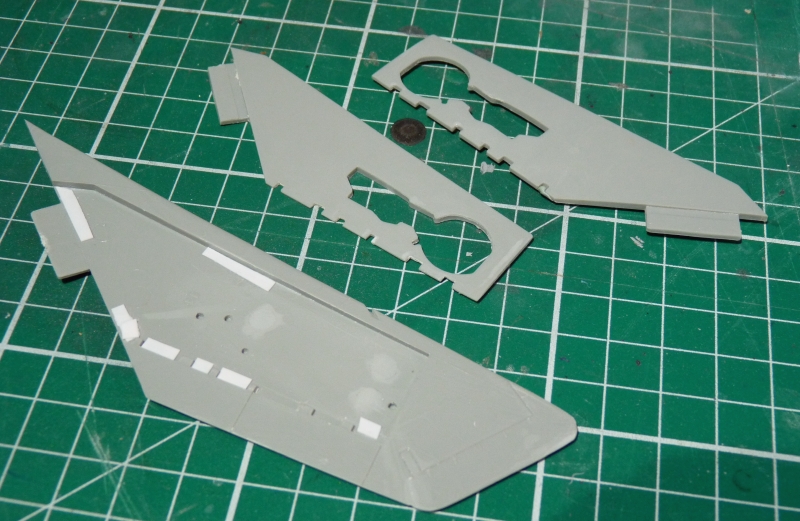
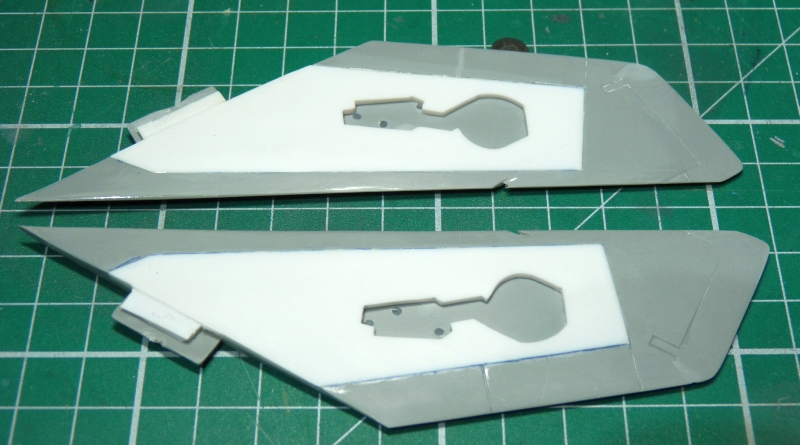
.. and it was at this point I realised that the undercarriage cutouts were hopelessly wrong and far from a minor reshaping. The whole shape is far too long, placing the wheel cutouts too near the end of the wings. After considering filling the whole undercarriage and recutting I decided on the seeming more drastic, but I think overall more straightforward approach, of replacing the wing insert with a new blank from card.

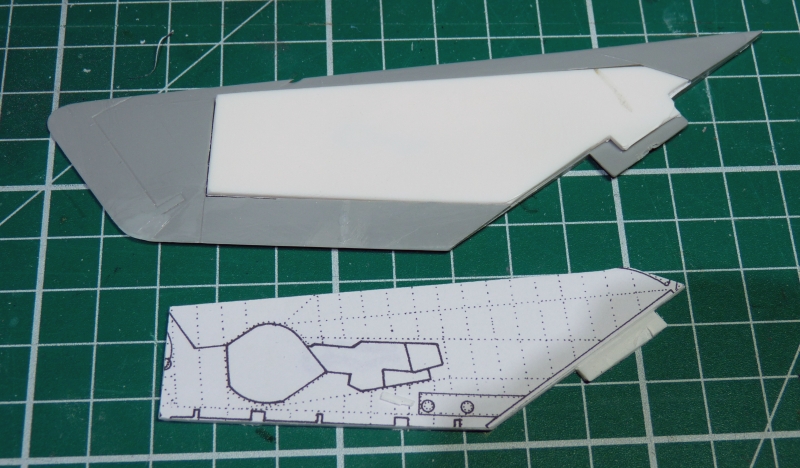
This is what I call the Mike Grant approach; sometimes to create you first need to destroy. This is something Mike did frequently in his excellent Circuits & Bumps article. Rather than wasting effort trying to preserve details when you need to do major work, just remove them, and replace them afterwards. So I also removed the control surface hinges rather than trying to cut the card to go around them. This made it quite simple to cut the blanks from 40thou card. The card was a good match in thickness at the edges but too thin in centre. I simply added a shim and bent the card over into to help form the aerofoil shape without having to do a load of shaping using a thicker piece of card.

(I inverted one insert for illustrative purposes)
Image

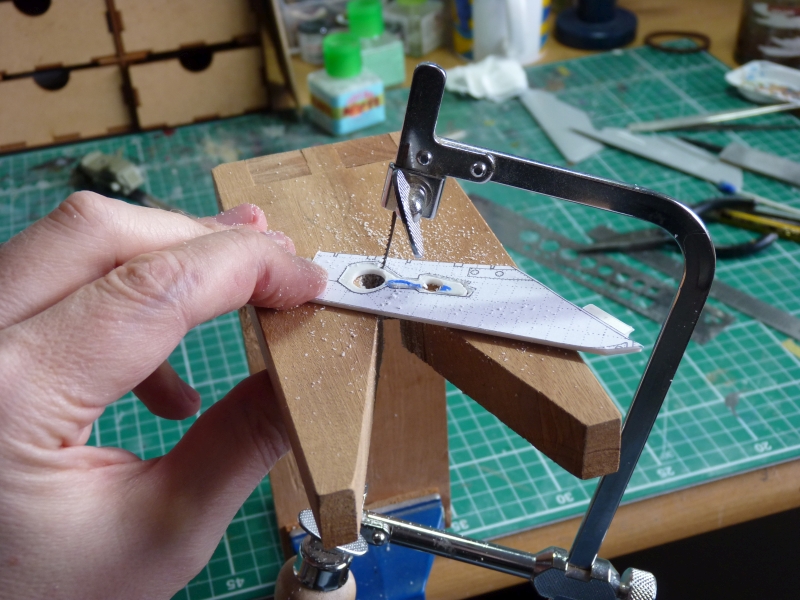
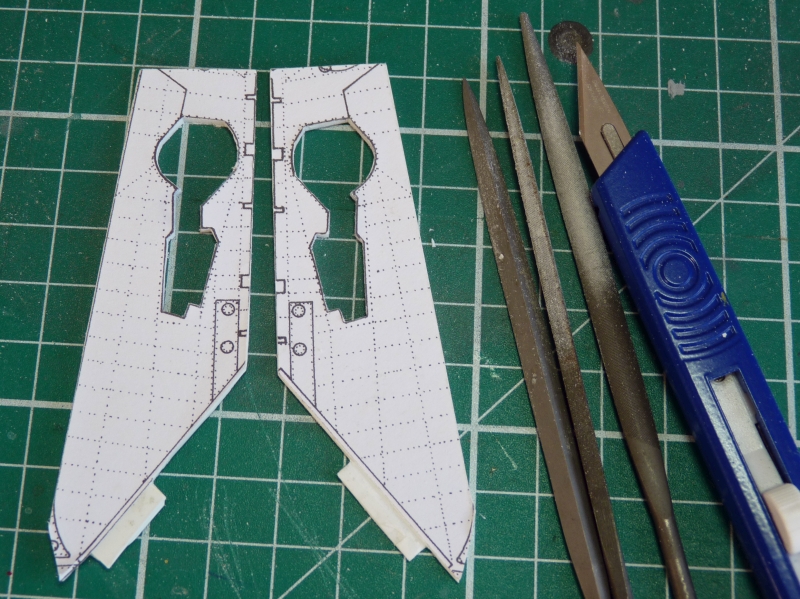
With the insert cut out a photocopy of the wing underside was stuck on. I decided to remove the bulk of undercarriage cutout with a fret saw rather then trying to cut the thick plastic.

Image

Knife and files were used to work to the line.

Image

I marked where they stood proud of the wing with a marker pen and used a large file to get the rough aerofoil shape. Once glued in place the final shaping was achieved.

Image

I've just got the hinges to form before I can set about rescribing the wings. Like the inserts, one wing was thicker than the other which was noticeable at the trailing edge and was set about with my coarse file. The tips were squared off and errant control panel lines filled.
Classic British Kits SIG Leader Better to fettle than to fill
(2024 A:B 5:2) (2023 13:8:7) (2022 21:11) (2021 15:8) (2020 8:4:4)
User avatar
DavidWomby
Modelling Gent and Scholar
Posts: 11766
Joined: May 1st, 2011, 8:09 pm
Location: Florida, USA

Re: Aeroclub 1/72 English Electric P.1A conv

Post by DavidWomby »

Very impressive improvement, James.

David
Miggers
The Bug Has Well And Truly Bitten
Posts: 206
Joined: May 1st, 2011, 12:32 am

Re: Aeroclub 1/72 English Electric P.1A conv

Post by Miggers »

Cracking James.
I gave one of the old Airfix F.1's away some years ago,wish I hadn't now TBH.
You could see him thinking "Bleedin'pilots,don't know nuffin.All glammer" He's probably right.

A/C.2 Webber,Manston,1941,First Light by Geoff Wellum.
User avatar
TeeELL
Modelling Gent and Scholar
Posts: 11633
Joined: December 28th, 2015, 4:38 pm
Location: North Wiltshire

Re: Aeroclub 1/72 English Electric P.1A conv

Post by TeeELL »

My word James, this is some modelling! Excellent work I must say and inspirational for those considering vac-form kits. Following this with interest.
Tony

The older I get the better I was!
Current build:
Airfix 1:72 Javelin FAW9
Particular modelling interests:
Cuban Airforce aircraft, 29(F) Sqn aircraft, Aircraft I’ve flown
Post Reply

Return to “Aviation Modelling”