Aeroclub 1/72 English Electric P.1A conv
-
ShaunW
- NOT the sheep
- Posts: 26188
- Joined: November 26th, 2011, 6:11 pm
- Location: Pontefract West Yorkshire
Re: Aeroclub 1/72 English Electric P.1A conv
There is some excellent modelling going on here, James with bonus points from me for re-scribing, which is my modelling nemesis!
Doing - Tamiya 1/35th Universal Carrier.
Work is the curse of the modelling classes!
IPMS#12300
Work is the curse of the modelling classes!
IPMS#12300
-
Spaceowl

- Modelling Gent and Scholar
- Posts: 1081
- Joined: July 1st, 2011, 8:41 am
- Location: Middlesbrough, Peoples' Republic of Teesside
Re: Aeroclub 1/72 English Electric P.1A conv
Great rescribing tips there, James - I've got a Heller Mirage 5 in the stash that's going to need a load of that!
Overhead a rainbow appears...in black and white.
Current Projects:
Aircraft of VMA-542, USMC
Peru-Ecuador War 1995
THK 1939-2023
Polish Air Force 1939
Current Projects:
Aircraft of VMA-542, USMC
Peru-Ecuador War 1995
THK 1939-2023
Polish Air Force 1939
-
shangos70
- Modelling Gent and Scholar
- Posts: 4422
- Joined: May 1st, 2011, 11:14 am
- Location: Doncaster, Socialist Republic of South Yorkshire.
Re: Aeroclub 1/72 English Electric P.1A conv
Dedication to the cause again James. Top work as per.
-
JamesPerrin

- Looks like his avatar
- Posts: 13695
- Joined: April 5th, 2011, 8:09 pm
- Location: W. Yorkshire
- Contact:
Re: Aeroclub 1/72 English Electric P.1A conv
Thank you all.
Before rescribing the fuselage I needed to sort out the wing and tailplane attachment points. Now the wing wasn't a big issue other than the root added dihedral rather than the required anhedral. There wasn't a lot to play with so after squaring it off with my big file I added a very thin strip of card to the top edge of the wing joint and then checked the fit out against the plans.
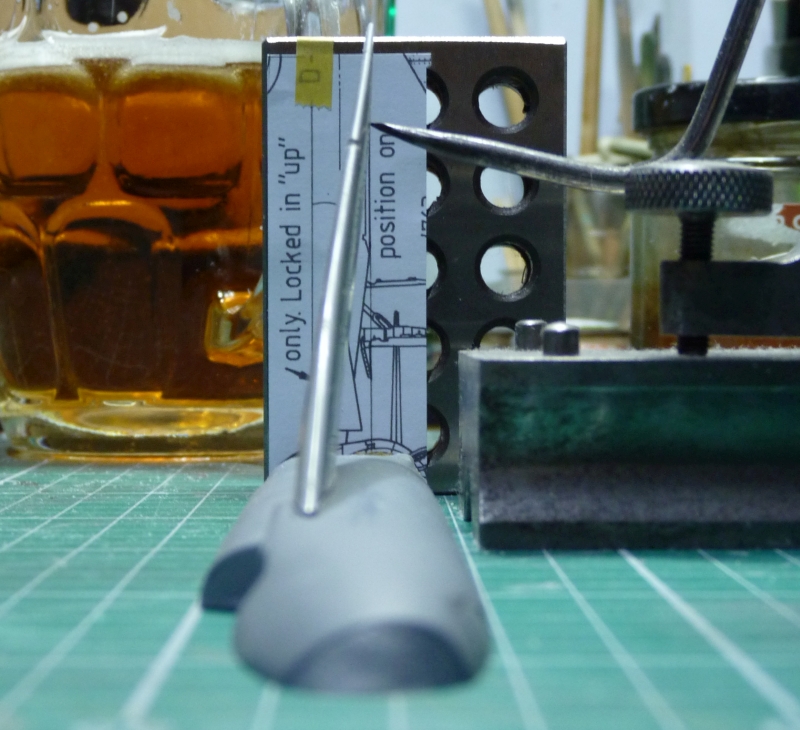
The contraption is an engineer's height scriber, it has a fine adjustment so I can tweak the position of the wing. Due the to flexibility of the fuselage halves, I may attach the wings before closing up the fuselage so I can close the joint along the top of the root.
The tailplane root's on the P1A and Lightning are quite complex wide moulded shape and the kit is mile off with a narrow raised lump. I looked at references and plans to try and determine the true shape but it was hard to get a clear idea until I went to the loft and pulled out Airfix's recent Lightning. Well I could try to make them from card but they also curve around the bottom edge of the fuselage - time for some experimentation!
I got out my thermo-forming plastic that I bought years ago - you leave in this in 80 deg C water for 5 mins and it becomes soft and malleable. This was squidged over the Airfix kit and once cooled provided me with a perfect mould.
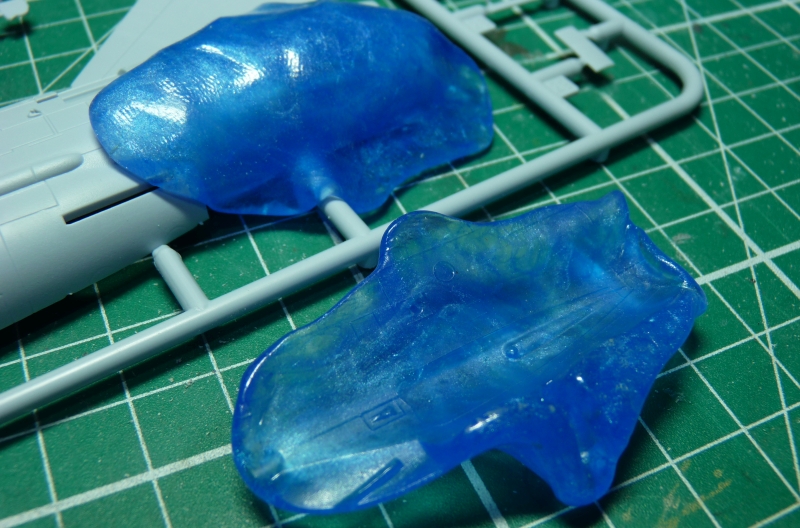
Now what to mould it in? Milliput would be too brittle for something so thin. I had some UV resin glue and had a quick go with that, it worked perfectly though the parts were too soft and rubbery to use in a kit. I could get some harder UV resin but looking at my desk I spied the plastic gloop made from Tamiya Extra thin and plastic card that I use as a filler I knew this would shrink but thought it worth a try and gave the moulds a good coat. I went back and added a few more coats every couple of days - ironically helped by the fact I got covid over Christmas and wasn't up for doing much.
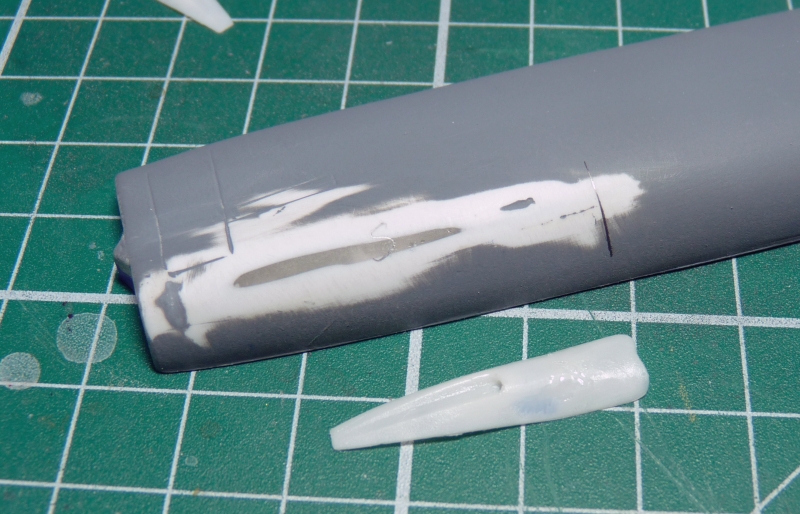
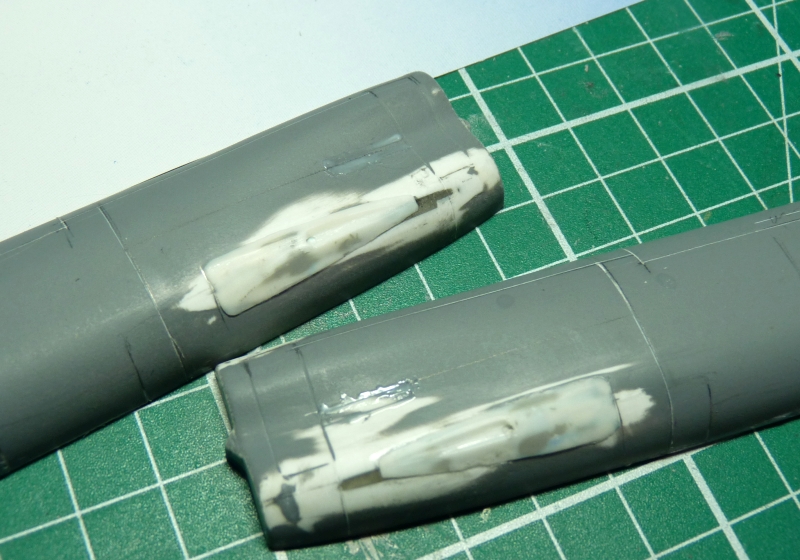
So a week later I was very pleased with what popped out of the mould. Yes, there was a bit of sinkage, but quickly sorted out with filler and as they were essentially plastic parts I could sand the insides to match the fuselage.
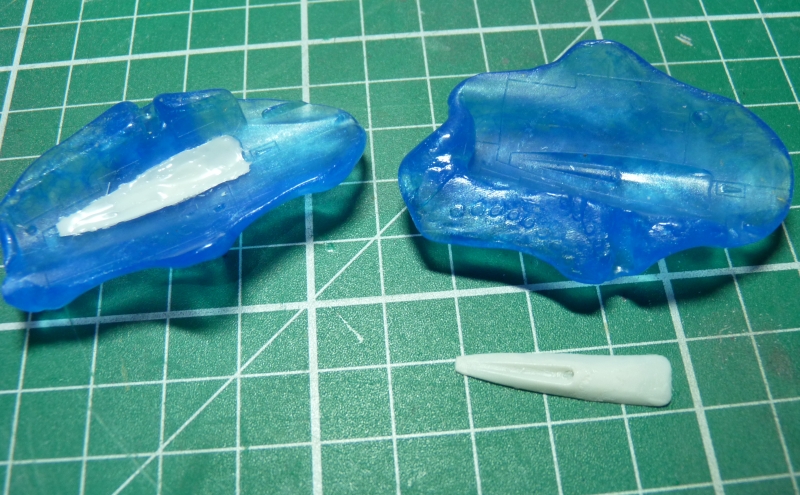
The lumps on the fuselage needed to be gone so I filled the back with CA and Acrylic nail powder - fine plastic dust. Then I sanded the lumps off and attached the new tailplane fairings.
Before rescribing the fuselage I needed to sort out the wing and tailplane attachment points. Now the wing wasn't a big issue other than the root added dihedral rather than the required anhedral. There wasn't a lot to play with so after squaring it off with my big file I added a very thin strip of card to the top edge of the wing joint and then checked the fit out against the plans.
The contraption is an engineer's height scriber, it has a fine adjustment so I can tweak the position of the wing. Due the to flexibility of the fuselage halves, I may attach the wings before closing up the fuselage so I can close the joint along the top of the root.
The tailplane root's on the P1A and Lightning are quite complex wide moulded shape and the kit is mile off with a narrow raised lump. I looked at references and plans to try and determine the true shape but it was hard to get a clear idea until I went to the loft and pulled out Airfix's recent Lightning.
I got out my thermo-forming plastic that I bought years ago - you leave in this in 80 deg C water for 5 mins and it becomes soft and malleable. This was squidged over the Airfix kit and once cooled provided me with a perfect mould.
Now what to mould it in? Milliput would be too brittle for something so thin. I had some UV resin glue and had a quick go with that, it worked perfectly though the parts were too soft and rubbery to use in a kit. I could get some harder UV resin but looking at my desk I spied the plastic gloop made from Tamiya Extra thin and plastic card that I use as a filler
So a week later I was very pleased with what popped out of the mould. Yes, there was a bit of sinkage, but quickly sorted out with filler and as they were essentially plastic parts I could sand the insides to match the fuselage.
The lumps on the fuselage needed to be gone so I filled the back with CA and Acrylic nail powder - fine plastic dust. Then I sanded the lumps off and attached the new tailplane fairings.
Classic British Kits SIG Leader Better to fettle than to fill
(2024 A:B 5:2) (2023 13:8:7) (2022 21:11) (2021 15:8) (2020 8:4:4)
(2024 A:B 5:2) (2023 13:8:7) (2022 21:11) (2021 15:8) (2020 8:4:4)
-
DavidWomby

- Modelling Gent and Scholar
- Posts: 11766
- Joined: May 1st, 2011, 8:09 pm
- Location: Florida, USA
Re: Aeroclub 1/72 English Electric P.1A conv
Great work going on here, James.
I've used that thermo-form plastic for moulds too but never thought of using sprue goop as the material to make the part from!
David
I've used that thermo-form plastic for moulds too but never thought of using sprue goop as the material to make the part from!
David
-
JohnRatzenberger

- Why is he so confused ?
- Posts: 15736
- Joined: April 5th, 2011, 3:42 pm
- Location: Living on a sandbar - Nags Head, NC.
Re: Aeroclub 1/72 English Electric P.1A conv
Always some great modelling going on, and let me not forget the design thought process.
John Ratzenberger 
It's my model and I'll do what I want with it.
It's my model and I'll do what I want with it.
-
iggie

- Modelling Gent and Scholar
- Posts: 23438
- Joined: July 31st, 2013, 11:04 am
- Location: North Somercotes, Lincolnshire
- Contact:
Re: Aeroclub 1/72 English Electric P.1A conv
Very enterprising! That's great modelling James 

Best wishes
Jim
If you can walk away from a landing, it's a good landing. If you use the airplane the next day, it's an outstanding landing
"Never put off till tomorrow, what you can do the day after tomorrow"
Jim
If you can walk away from a landing, it's a good landing. If you use the airplane the next day, it's an outstanding landing
"Never put off till tomorrow, what you can do the day after tomorrow"
-
RayS

- Modelling Gent and Scholar
- Posts: 2045
- Joined: May 25th, 2013, 8:50 am
- Location: Adelaide, South Australia
- Contact:
Re: Aeroclub 1/72 English Electric P.1A conv
Nice work with the moulding, I have some of that thermoforming plastic and was wondering what to fill it with once I made a mould.
I shall give the sprue glue a go
I shall give the sprue glue a go
Ray
-----------------------
-----------------------
-
ShaunW
- NOT the sheep
- Posts: 26188
- Joined: November 26th, 2011, 6:11 pm
- Location: Pontefract West Yorkshire
Re: Aeroclub 1/72 English Electric P.1A conv
Very innovative, James, that appears to have worked really well.
Doing - Tamiya 1/35th Universal Carrier.
Work is the curse of the modelling classes!
IPMS#12300
Work is the curse of the modelling classes!
IPMS#12300
-
Lone Modeller
- Modelling Gent and Scholar
- Posts: 5345
- Joined: April 1st, 2013, 6:45 pm
Re: Aeroclub 1/72 English Electric P.1A conv
Some super scratch building here: although the methods used are abit high tech!
I like the idea of utilising what is to hand on the desk and experimenting with new ideas. More power to your elbow!
I like the idea of utilising what is to hand on the desk and experimenting with new ideas. More power to your elbow!
-
TeeELL

- Modelling Gent and Scholar
- Posts: 11632
- Joined: December 28th, 2015, 4:38 pm
- Location: North Wiltshire
Re: Aeroclub 1/72 English Electric P.1A conv
Some rather fine skills being utilised in this build James - great stuff.
Tony
The older I get the better I was!
Current build:
Airfix 1:72 Javelin FAW9
Particular modelling interests:
Cuban Airforce aircraft, 29(F) Sqn aircraft, Aircraft I’ve flown
The older I get the better I was!
Current build:
Airfix 1:72 Javelin FAW9
Particular modelling interests:
Cuban Airforce aircraft, 29(F) Sqn aircraft, Aircraft I’ve flown
-
X12A

- Modelling Gent and Scholar
- Posts: 1327
- Joined: October 5th, 2020, 6:30 pm
- Location: The New Forest, UK
Re: Aeroclub 1/72 English Electric P.1A conv
Thats impressive James - way above my pay scale!
-
B4en

- Modelling Gent and Scholar
- Posts: 1145
- Joined: February 8th, 2014, 9:58 am
- Location: South Yorkshire
Re: Aeroclub 1/72 English Electric P.1A conv
Excellent work going on James!
That thermo-forming plastic looks sooo useful. Can you just reheat it to reuse it? Any idea where I could get some?
That thermo-forming plastic looks sooo useful. Can you just reheat it to reuse it? Any idea where I could get some?
The past, present, and future walked into a bar. It was tense.
-
beany

- Fat git, glasses, goatie - Avoid!
- Posts: 4334
- Joined: April 6th, 2011, 11:05 am
- Location: Chellaston, Derby
Re: Aeroclub 1/72 English Electric P.1A conv
Just search Thermo Plastic beads on eBay - loads to choose from - example here:
https://www.ebay.co.uk/sch/14339/i.html ... mo+plastic
2024 Acquired: 9 Built: 1