Aeroclub 1/72 English Electric P.1A conv

Military or civil, triplanes, biplanes or monoplanes, props, jets or helicopters...models in here.
User avatar
JamesPerrin
Looks like his avatar
Posts: 13695
Joined: April 5th, 2011, 8:09 pm
Location: W. Yorkshire
Contact:

Re: Aeroclub 1/72 English Electric P.1A conv

Post by JamesPerrin »

B4en wrote: January 13th, 2024, 11:55 am Excellent work going on James!
That thermo-forming plastic looks sooo useful. Can you just reheat it to reuse it? Any idea where I could get some?
Mine was a Japanese product for kids when it first came to market. You can now get bags now in bead from. Of course there is a marked up version for our hobby
https://deluxematerials.co.uk/products/smart-plastic

I suggest you shop around. As Alan has just suggested ☝️
Classic British Kits SIG Leader Better to fettle than to fill
(2024 A:B 5:2) (2023 13:8:7) (2022 21:11) (2021 15:8) (2020 8:4:4)
User avatar
DavidWomby
Modelling Gent and Scholar
Posts: 11765
Joined: May 1st, 2011, 8:09 pm
Location: Florida, USA

Re: Aeroclub 1/72 English Electric P.1A conv

Post by DavidWomby »

FWIW, to make small parts, I use small batches of this in the thermoplastic moulds

Image

I presume any similar product would do just as well.

David
User avatar
B4en
Modelling Gent and Scholar
Posts: 1145
Joined: February 8th, 2014, 9:58 am
Location: South Yorkshire

Re: Aeroclub 1/72 English Electric P.1A conv

Post by B4en »

beany wrote: January 13th, 2024, 1:56 pm Just search Thermo Plastic beads on eBay - loads to choose from - example here:
https://www.ebay.co.uk/sch/14339/i.html ... mo+plastic
JamesPerrin wrote: January 13th, 2024, 1:57 pm Mine was a Japanese product for kids when it first came to market. You can now get bags now in bead from. Of course there is a marked up version for our hobby
https://deluxematerials.co.uk/products/smart-plastic
DavidWomby wrote: January 13th, 2024, 2:01 pm FWIW, to make small parts, I use small batches of this in the thermoplastic moulds

Image

I presume any similar product would do just as well.

David
Great info! Big thanks to all of you. :beer:
The past, present, and future walked into a bar. It was tense.
User avatar
TeeELL
Modelling Gent and Scholar
Posts: 11632
Joined: December 28th, 2015, 4:38 pm
Location: North Wiltshire

Re: Aeroclub 1/72 English Electric P.1A conv

Post by TeeELL »

I’ve used Araldite and the delux molding product before now. I mix the original Araldite and warm it which causes it to become very runny so it fills the mold more easily.
Tony

The older I get the better I was!
Current build:
Airfix 1:72 Javelin FAW9
Particular modelling interests:
Cuban Airforce aircraft, 29(F) Sqn aircraft, Aircraft I’ve flown
shangos70
Modelling Gent and Scholar
Posts: 4422
Joined: May 1st, 2011, 11:14 am
Location: Doncaster, Socialist Republic of South Yorkshire.

Re: Aeroclub 1/72 English Electric P.1A conv

Post by shangos70 »

Yet more Voodoo magic at work James. Lovely stuff.
User avatar
JamesPerrin
Looks like his avatar
Posts: 13695
Joined: April 5th, 2011, 8:09 pm
Location: W. Yorkshire
Contact:

Re: Aeroclub 1/72 English Electric P.1A conv

Post by JamesPerrin »

Thanks all.

The fuselage got scribed in much the same way as the wing only a bit trickier as you are working on curved surfaces. As before I marked everything up in pencil first, taping the halves together to make sure the vertical lines matched up. I did find that a scrap of thin acetate sheet from some packaging would conform to the tight fuselage curves.

Image

Once the main lines were scribed I marked on the smaller panels and access hatches. The plans do show all the rivets however I decided to restrict myself to where they were most noticeable on small panels and the airbrakes - this was a good thing as I could seem to put them down exactly where I wanted them.

Image

I did wish I had filled all of the original kit panel lines as I found myself constantly going back and filling the ones I had left.
Classic British Kits SIG Leader Better to fettle than to fill
(2024 A:B 5:2) (2023 13:8:7) (2022 21:11) (2021 15:8) (2020 8:4:4)
User avatar
DavidWomby
Modelling Gent and Scholar
Posts: 11765
Joined: May 1st, 2011, 8:09 pm
Location: Florida, USA

Re: Aeroclub 1/72 English Electric P.1A conv

Post by DavidWomby »

Lovely work scribing. A skill I don't have!

David
ShaunW
NOT the sheep
Posts: 26188
Joined: November 26th, 2011, 6:11 pm
Location: Pontefract West Yorkshire

Re: Aeroclub 1/72 English Electric P.1A conv

Post by ShaunW »

I have a tendency to avoid scribing as well. Looking very good, James.
Doing - Tamiya 1/35th Universal Carrier.

Work is the curse of the modelling classes!
IPMS#12300
User avatar
iggie
Modelling Gent and Scholar
Posts: 23438
Joined: July 31st, 2013, 11:04 am
Location: North Somercotes, Lincolnshire
Contact:

Re: Aeroclub 1/72 English Electric P.1A conv

Post by iggie »

I admire your patience with the scribing James; not my forte at all and generally ends in disappointment 🙂
Best wishes

Jim
If you can walk away from a landing, it's a good landing. If you use the airplane the next day, it's an outstanding landing
"Never put off till tomorrow, what you can do the day after tomorrow"
User avatar
B4en
Modelling Gent and Scholar
Posts: 1145
Joined: February 8th, 2014, 9:58 am
Location: South Yorkshire

Re: Aeroclub 1/72 English Electric P.1A conv

Post by B4en »

You're certainly a master at this scribing business James. Really impressive!
The past, present, and future walked into a bar. It was tense.
User avatar
JamesPerrin
Looks like his avatar
Posts: 13695
Joined: April 5th, 2011, 8:09 pm
Location: W. Yorkshire
Contact:

Re: Aeroclub 1/72 English Electric P.1A conv

Post by JamesPerrin »

B4en wrote: January 27th, 2024, 10:32 am You're certainly a master at this scribing business James. Really impressive!
Thanks though you may be relieved to hear I’m fixing my mistakes at the moment.
Classic British Kits SIG Leader Better to fettle than to fill
(2024 A:B 5:2) (2023 13:8:7) (2022 21:11) (2021 15:8) (2020 8:4:4)
User avatar
Migrant
Happily Landed after Many Circuits and Bumps
Posts: 2428
Joined: April 5th, 2011, 8:33 pm
Location: Calgary, Canada

Re: Aeroclub 1/72 English Electric P.1A conv

Post by Migrant »

I love the innovation you bring to your projects, James. Great work on the Lightning so far.
User avatar
JamesPerrin
Looks like his avatar
Posts: 13695
Joined: April 5th, 2011, 8:09 pm
Location: W. Yorkshire
Contact:

Re: Aeroclub 1/72 English Electric P.1A conv

Post by JamesPerrin »

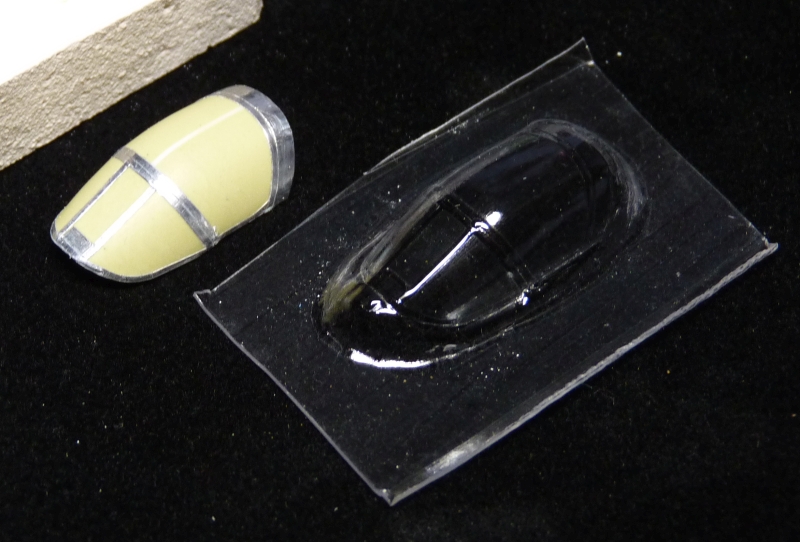
Let us turn our attention to the canopy. You will have noticed that it has yellowed and I doubt it's going to get any better. So starts an adventure in canopy moulding!

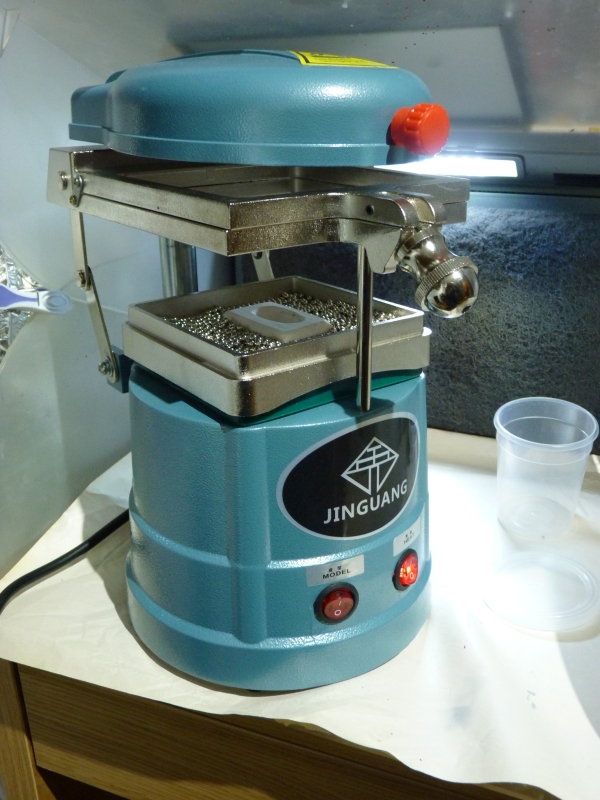
For my birthday I asked for one of those (cheapish) dental vacuform machines that can be sourced from various suppliers but are all the same machine. I've wanted one for a while but starting this kit gave me an immediate reason to acquire one. So the first thing I did was to make a plaster of Paris mould of the kit part. This was a quick proof of concept I didn't take a lot of care over it and just used some clear packaging PET that I had to hand. Anyway, the results were surprising with very good duplication of the original parts detail - though not that great in itself.

Image

I also decided to have a go with the thermo moulding plastic and some UV resin that was meant to be hard(er) than the resin glue. This worked in as much as I got a good copy, but the surface was not clear and the resin was not hard enough to be sanded/polished smooth. A two-part hard resin may have produced something that could be cleaned up but not worth the effort from this kind of mould.

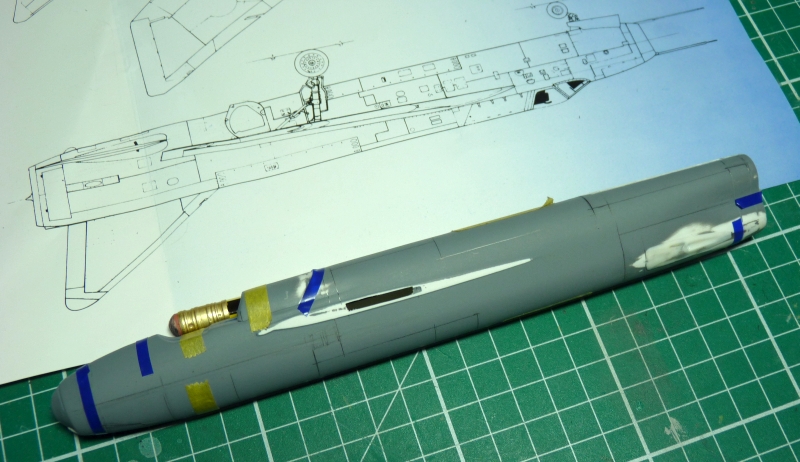
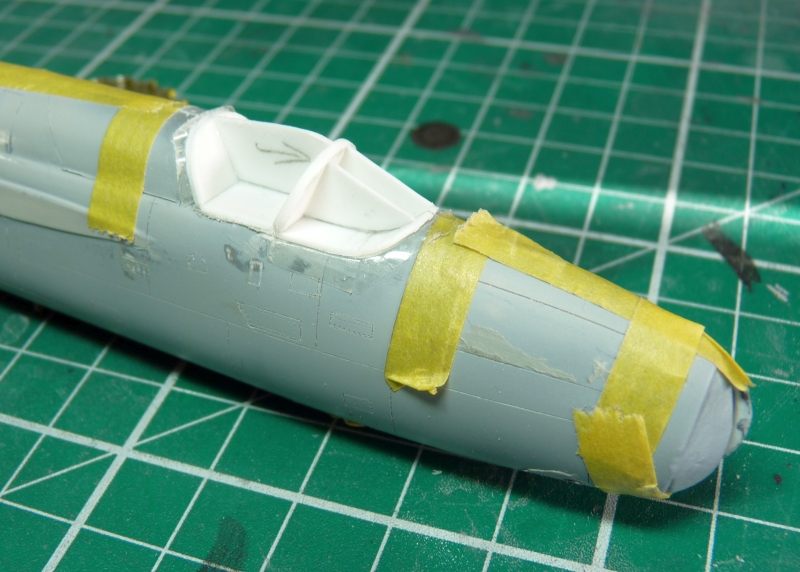
I cut out the test vacform part to see how well it fitted, it was a bit meh and it was at this point I decided to redo the canopy from scratch. I taped the fuselage halves but CA'd the cockpit opening together. This was squared and levelled off. I used some plastic strip to move the step between the canopy and windscreen further forward - and help to tie the halves together. The area had a layer of clear tape applied to help the mould to separate later. From some masking tape templates, 10thou plastic card was applied with CA. This defined the rear and bottom edges. Using the plans formers were cut and added to define the canopy and windscreen framing. An additional piece gave the canopy profile.

Image

Milliput was used to overfill gaps between the formers. Once dry I could prise it off the fuselage and remove the tape.

Image

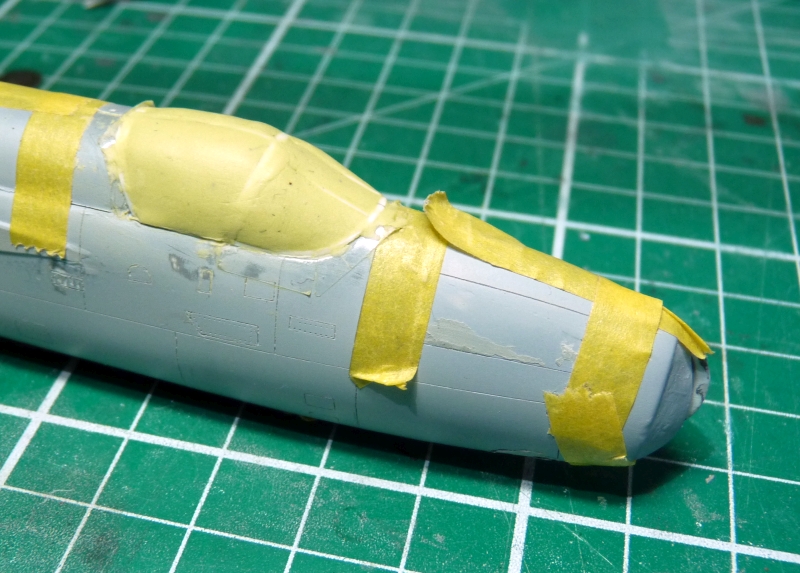
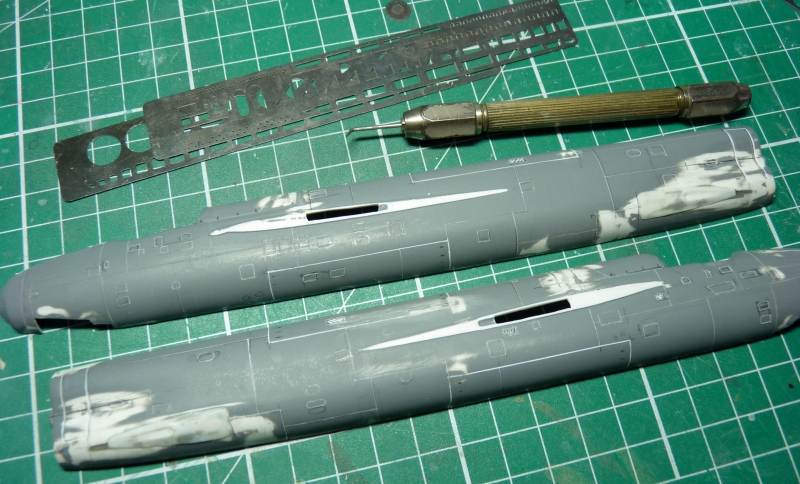
And then sanded back to the formers until they were just exposed. Tricky to make sure I didn't create any concave surfaces or undercuts.

Image

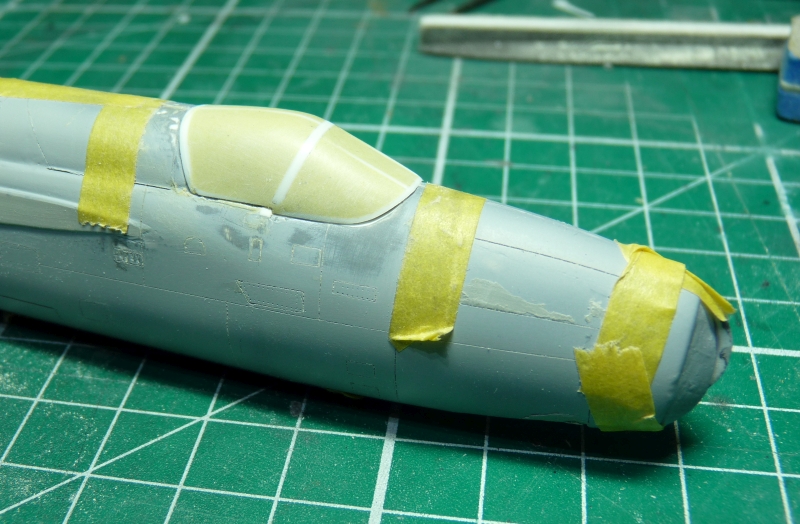
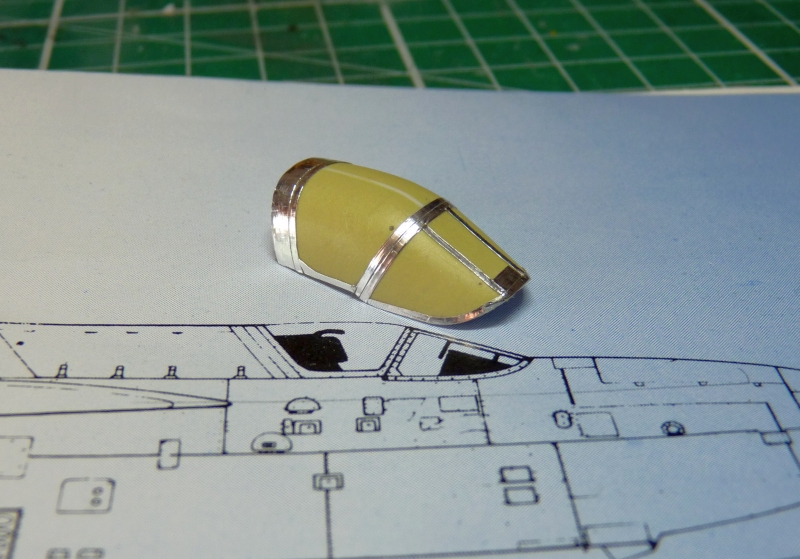
Though Tamiya tape might have sufficed I didn't think it would create sharp enough framing. Vinyl tape is too thick and stretchy. I decided to try some Aluminium tape at least I was sure it would have other uses. This worked excellently and I managed to do all the framing at my first attempt. The tape can be burnished with a cocktail stick and you can remove wrinkles when you bend it around compound curves. The canopy and windscreen frames were done separately with the vague hope that the seam between them may be picked up.

Image

The master needed to be mounted using some plasticine, this was by far the most fiddly task. A quick mould box from foam board and hot glue. I was worried the plaster of Paris might pull off the Al tape when demoulding so after reading around used some petroleum jelly thinned with white spirit as a mould release. This may have worked very well or been unnecessary as the master fell out when I came to remove it. I thought my vortex paint mixer would be a good tool for removing bubble but I still had a couple that I filled with putty after the plaster dried

Image

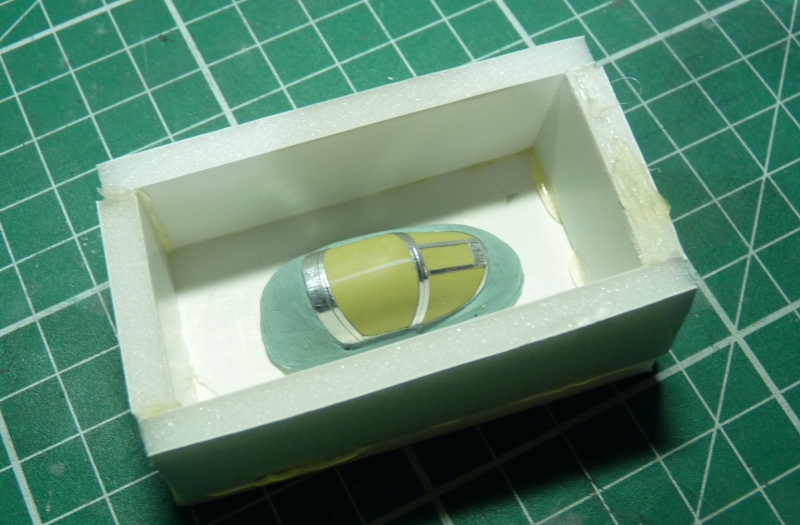
The mould was far too deep so I used a surform to remove the excess plaster. Air holes were drilled at the extremes, use an unpopular drill size as this is a great way to blunt twist bits. I tried out the ball bearing that came with the vacform machine to lessen the depth of the draft around the mould. Following some advice from TeeELL I bought some 0.5mm PETG clear plastic sheet for better results. This softens quicker and doesn't smell like PET does.

Image

In seconds I had an excellent pull. Would you believe it even the seam detail between the framing was clearly evident! However, I noticed it wasn't as clear as early tests and there was a streaky finish - good grief I think the brush strokes of the mould release had been captured! Looks like I will need to create another plaster mould for the final part but this has been a very enjoyable learning experience so far and opens up a lot of opportunities for future builds.

Image
Classic British Kits SIG Leader Better to fettle than to fill
(2024 A:B 5:2) (2023 13:8:7) (2022 21:11) (2021 15:8) (2020 8:4:4)
User avatar
Ratch
Modelling Gent and Scholar
Posts: 9946
Joined: May 1st, 2011, 9:16 am
Location: Northampton

Re: Aeroclub 1/72 English Electric P.1A conv

Post by Ratch »

That's impressive, James. I looked at a vac-former like that a while ago, but couldn't justify the expenditure, as I couldn't see myself using it that much :sad:
All models are equal. Some models are more equal than others.
Airfix Tribute Forum
User avatar
Snowbird
Getting well comfy!
Posts: 69
Joined: May 1st, 2011, 1:39 am
Location: Belleville, Ontario

Re: Aeroclub 1/72 English Electric P.1A conv

Post by Snowbird »

How about using WD40 as a mould release
Post Reply

Return to “Aviation Modelling”