B4en's Bodgery
-
Lone Modeller
- Modelling Gent and Scholar
- Posts: 5345
- Joined: April 1st, 2013, 6:45 pm
Re: B4en's Bodgery
That does look good. This will be a big improvement on the original kit.
-
B4en

- Modelling Gent and Scholar
- Posts: 1145
- Joined: February 8th, 2014, 9:58 am
- Location: South Yorkshire
Re: B4en's Bodgery
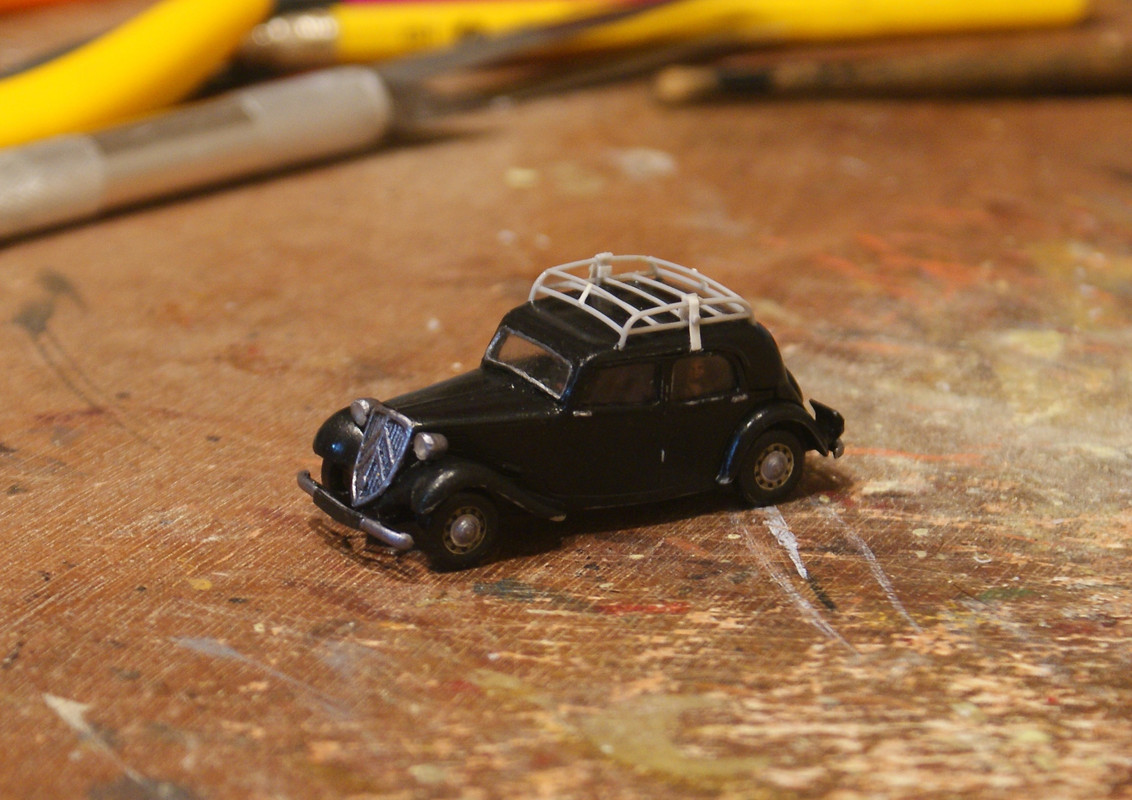
Didn't get much done yesterday due to an extended lunch with a friend. (Ribeye steak!  ) More progress today with some silver painting and the roofrack built from stretched sprue. I completely forgot to wrap the car up carefully before doing the latter - so much for keeping the paint finish neat!
  The roofrack is based on some photos I found online but I've no idea if it is really right for 1940. I used a 'polished silver' acrylic for the shiny bits - will have to build that up a little more and tidy up the windscreen framing.
The past, present, and future walked into a bar. It was tense.
-
JamesPerrin

- Looks like his avatar
- Posts: 13695
- Joined: April 5th, 2011, 8:09 pm
- Location: W. Yorkshire
- Contact:
Re: B4en's Bodgery
So the Ace kit alone wasn’t fiddly enough for you!
Top notch scratching.
Top notch scratching.
Classic British Kits SIG Leader Better to fettle than to fill
(2024 A:B 5:2) (2023 13:8:7) (2022 21:11) (2021 15:8) (2020 8:4:4)
(2024 A:B 5:2) (2023 13:8:7) (2022 21:11) (2021 15:8) (2020 8:4:4)
-
Stuart

- Raider of the Lost Ark Royal
- Posts: 19451
- Joined: February 25th, 2013, 4:55 pm
- Location: North Wales
- Contact:
Re: B4en's Bodgery
Bloody hell Ben, this just gets better and better - that roof-rack (well the whole thing actually) is awesome!
Stuart Templeton I may not be good but I'm slow...
My Blog: https://stuartsscalemodels.blogspot.com/
My Blog: https://stuartsscalemodels.blogspot.com/
-
Softscience

- Staring out the window
- Posts: 7491
- Joined: April 5th, 2011, 4:34 pm
- Location: Maryland, near Washington DC
-
Lone Modeller
- Modelling Gent and Scholar
- Posts: 5345
- Joined: April 1st, 2013, 6:45 pm
Re: B4en's Bodgery
Bet the roof rack was a fiddle - but it was worth it!
-
VickersVandal

- Modelling Gent and Scholar
- Posts: 5044
- Joined: October 4th, 2012, 3:37 am
- Location: Sydney, Australia
Re: B4en's Bodgery
That roof rack! Amazing!
Must.....build....ALL the Sopwith Camels!...
My Biggles Model display website: https://tinyurl.com/y74ydzae
My Biggles Model display website: https://tinyurl.com/y74ydzae
-
B4en
- Modelling Gent and Scholar
- Posts: 1145
- Joined: February 8th, 2014, 9:58 am
- Location: South Yorkshire
Re: B4en's Bodgery
Thanks for looking in guys. This one was beginning to feel like it would never end.
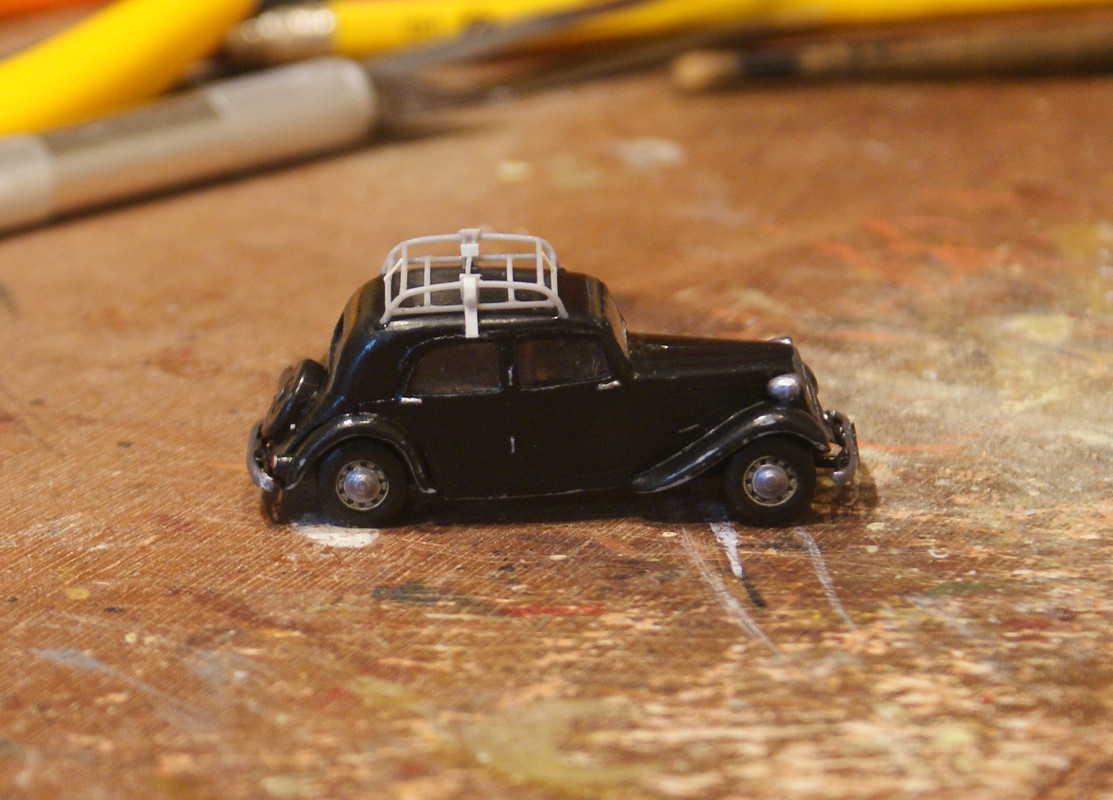
 Anyhow it's about done. I'm not happy with the windscreen really but can't face redoing it again at this stage - I'll do a little more tidying around there later probably. The Army Painter 'polished silver' settled down to a dull aluminium colour so that didn't impress me one bit - had to repaint some parts with Vallejo natural steel which at least has a bit of a shine to it. Next to do is the lamp post for the base and some more painting - the figures need brightening up a bit. Then I can load up the roofrack and do some proper finished pics.
Ah well, here is the state of the Citroen at the moment. Not terrible but not as nice as I'd have liked.
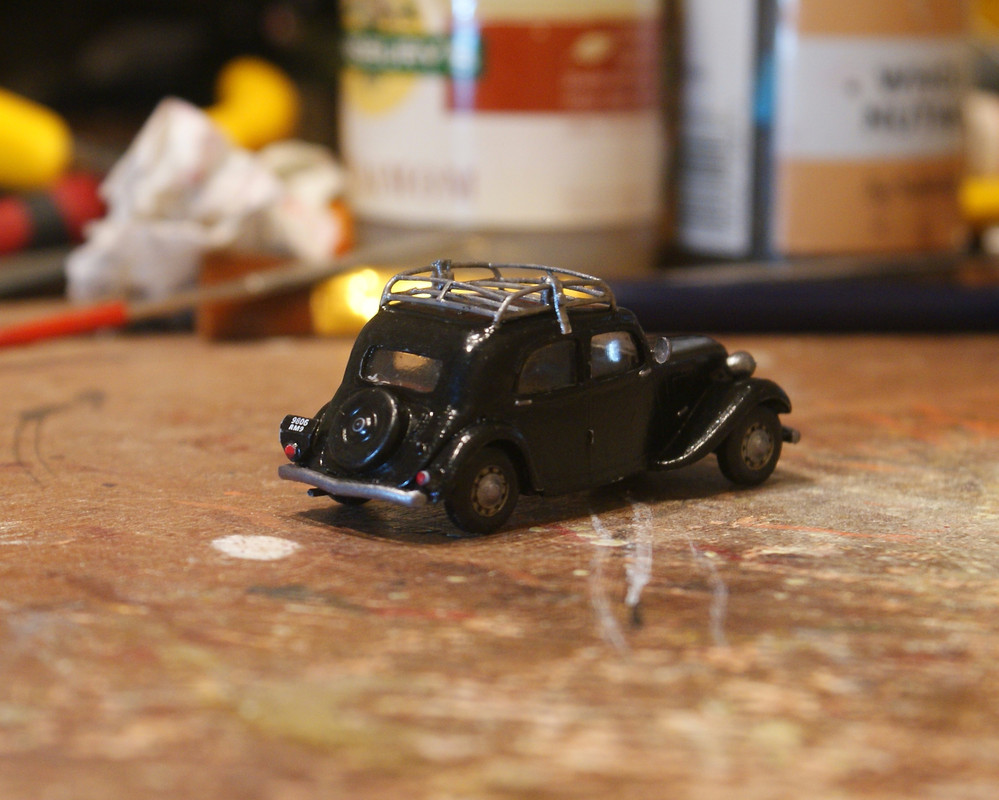
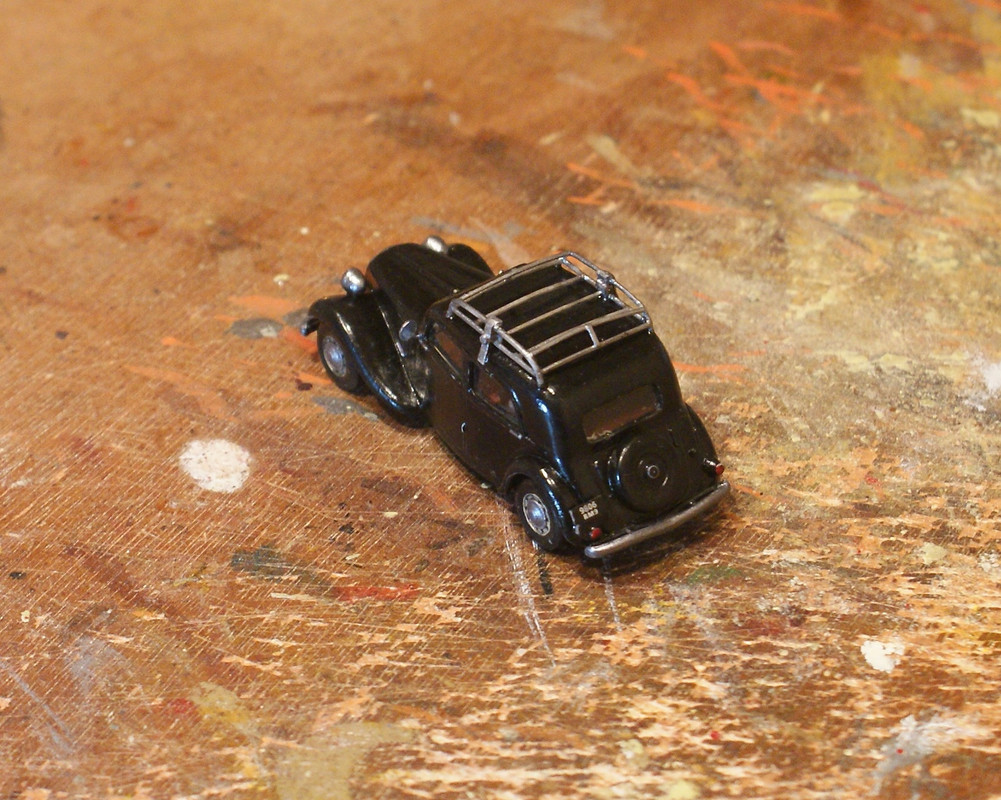

The Ace kit is just annoying, which is a shame as it's a great subject. The roofrack was indeed quite fiddly! To be honest I'm hoping the extras and the vignette will distract from the model.
Ah well, here is the state of the Citroen at the moment. Not terrible but not as nice as I'd have liked.
The past, present, and future walked into a bar. It was tense.
-
Stuart
- Raider of the Lost Ark Royal
- Posts: 19451
- Joined: February 25th, 2013, 4:55 pm
- Location: North Wales
- Contact:
Re: B4en's Bodgery
Looks pretty damn good to me Ben!
Stuart Templeton I may not be good but I'm slow...
My Blog: https://stuartsscalemodels.blogspot.com/
My Blog: https://stuartsscalemodels.blogspot.com/
-
iggie

- Modelling Gent and Scholar
- Posts: 23438
- Joined: July 31st, 2013, 11:04 am
- Location: North Somercotes, Lincolnshire
- Contact:
Re: B4en's Bodgery
Marvellous work on the Citroën Ben, it already looks better than the one I did a while back and that was a 1/35th Tamiya version!. I wouldn't have attempted a roof rack on that one, let alone at your small scale 
Best wishes
Jim
If you can walk away from a landing, it's a good landing. If you use the airplane the next day, it's an outstanding landing
"Never put off till tomorrow, what you can do the day after tomorrow"
Jim
If you can walk away from a landing, it's a good landing. If you use the airplane the next day, it's an outstanding landing
"Never put off till tomorrow, what you can do the day after tomorrow"
-
JohnRatzenberger

- Why is he so confused ?
- Posts: 15736
- Joined: April 5th, 2011, 3:42 pm
- Location: Living on a sandbar - Nags Head, NC.
Re: B4en's Bodgery
Well done on the roof rack.
John Ratzenberger 
It's my model and I'll do what I want with it.
It's my model and I'll do what I want with it.
-
KellerModeller

- The Bug Has Well And Truly Bitten
- Posts: 346
- Joined: February 19th, 2024, 1:40 pm
Re: B4en's Bodgery
The roof rack is reference class!! (as is the little Citroen!)
I like to carve old kits into something roughly aircraft/tank shaped... 

Re: B4en's Bodgery
Fantastic work Ben, and especially that roof rack! What did you use to glue it together? I find that liquid cement melts small strings of styrene. Did you use CA? Also how did you hold and align the complex geometries for gluing?
Very nice indeed.
Very nice indeed.
Paul
This is it. The moment we should have trained for.
This is it. The moment we should have trained for.
-
B4en
- Modelling Gent and Scholar
- Posts: 1145
- Joined: February 8th, 2014, 9:58 am
- Location: South Yorkshire
Re: B4en's Bodgery
Thanks for all the nice comments guys! I think I preferred the Citroen in matt black - gloss shows up all the flaws, but gloss it has to be.  (Oh, I looked up your Tamiya Citroen Iggie - fantastic!)
The roof rack was eyeballed from photos - I drilled four holes for the corners before painting, made up the side frames to fit with some careful bending, and once they were set in place added the cross pieces. Used Revell Contacta glue to fit them - it sets fairly slowly so I had some wiggle room to get them straight. Once set I added some superglue around the joints. I cheated slightly by not putting in as many cross pieces as there should be, reasoning that they were going to be covered up anyway!
Friday was actually a nice day for once, so got on with some garden stuff. Saturday tempests and hail so back to the modelling cave!
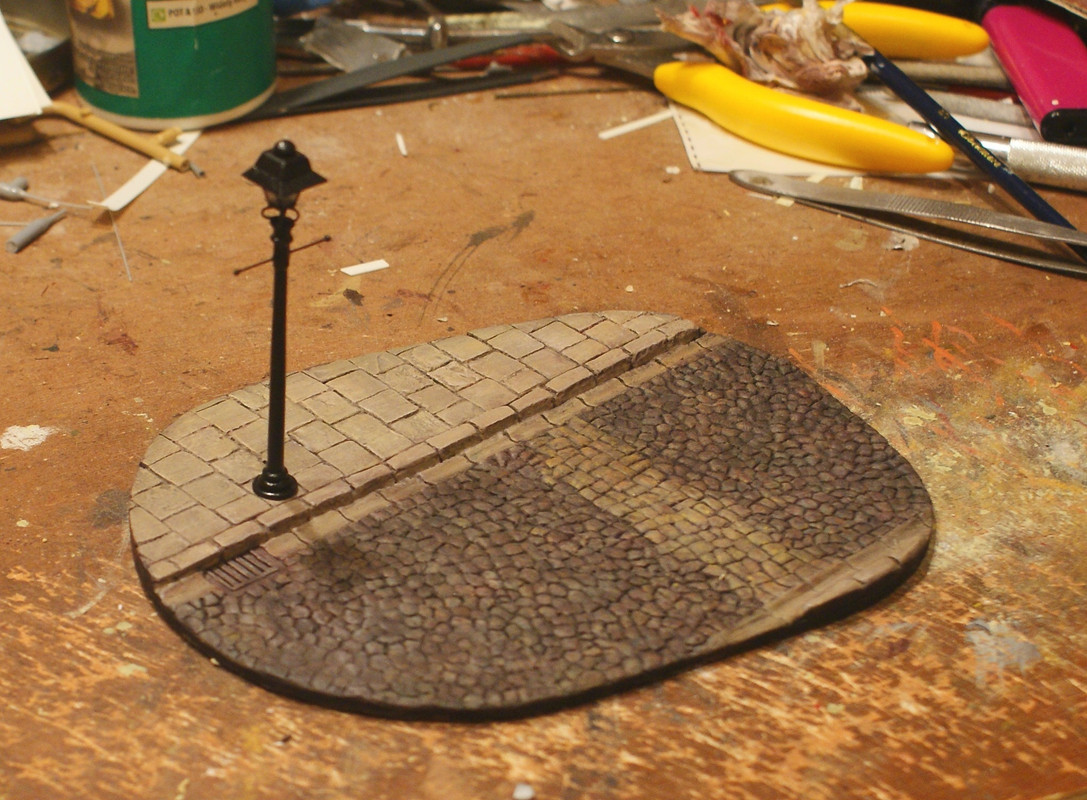
The lamp post turned out to be a suprisingly tricky bit of scratching. The 'lantern' part rests on 4 semicircular brackets so I had to be quite accurate making them (brass wire) for it to sit correctly. The pole was sprue tapered with a lot of scraping and sanding. I made several round edged disks for the pole base and top by gently heating the end of a bit of sprue then squashing it down vertically onto the worktop. (This actually makes pretty good 1:1 buttons - I may try it for tiny tyres at some point too.)
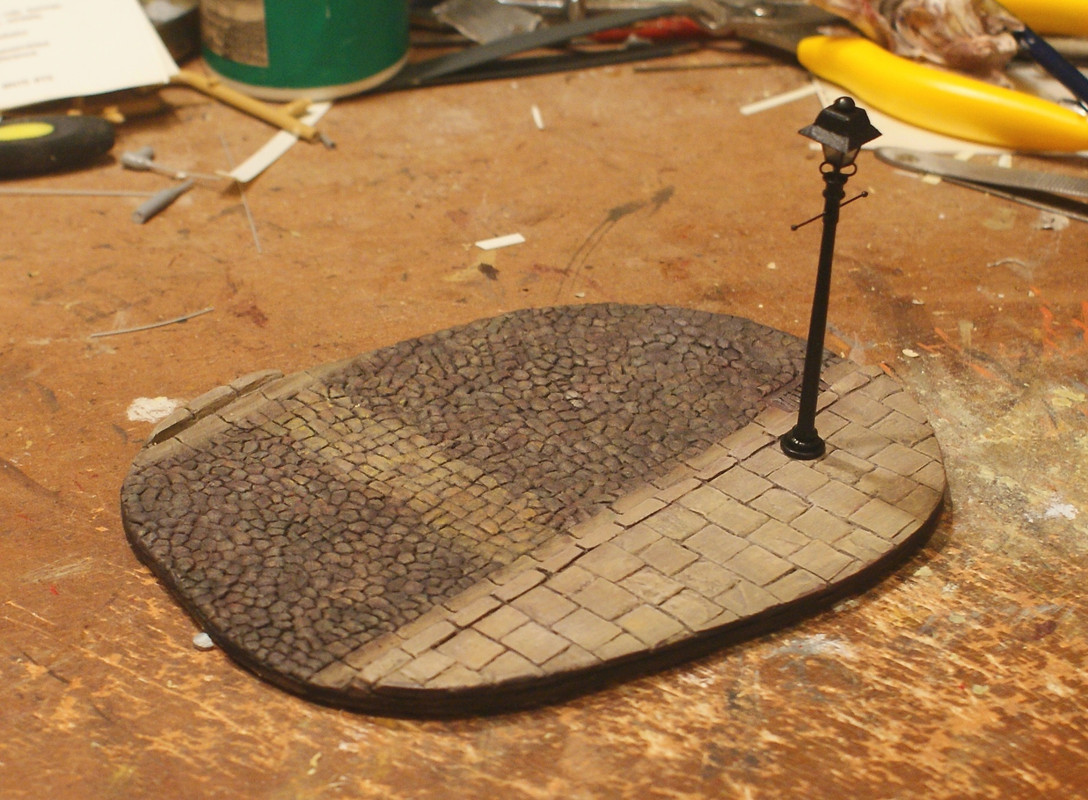
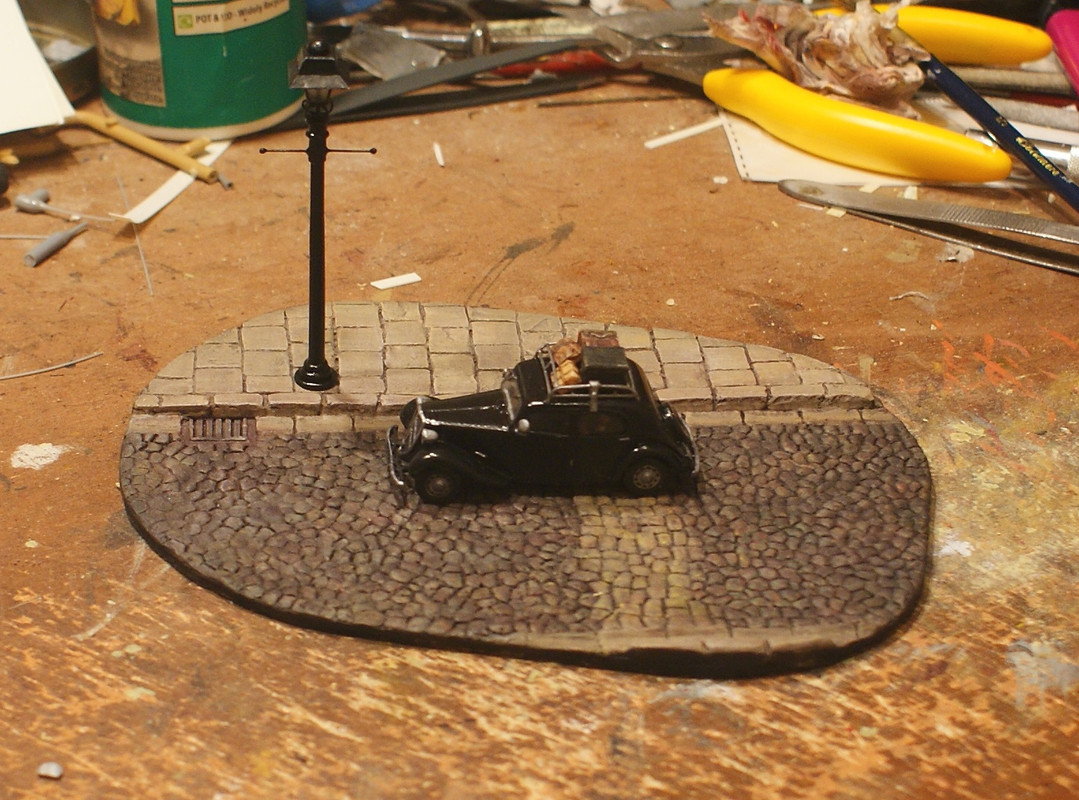
The dio base got a lot of light colour dry brushing and dark thin washes after the basic colours were dried. I stippled a variety of colours onto the cobbles as well, to give them some variation and make them a bit more visually interesting than just grey. The car got it's roof rack load, which still needs some painting finishing off, as do the figures. Progress so far...
The roof rack was eyeballed from photos - I drilled four holes for the corners before painting, made up the side frames to fit with some careful bending, and once they were set in place added the cross pieces. Used Revell Contacta glue to fit them - it sets fairly slowly so I had some wiggle room to get them straight. Once set I added some superglue around the joints. I cheated slightly by not putting in as many cross pieces as there should be, reasoning that they were going to be covered up anyway!
Friday was actually a nice day for once, so got on with some garden stuff. Saturday tempests and hail so back to the modelling cave!
The lamp post turned out to be a suprisingly tricky bit of scratching. The 'lantern' part rests on 4 semicircular brackets so I had to be quite accurate making them (brass wire) for it to sit correctly. The pole was sprue tapered with a lot of scraping and sanding. I made several round edged disks for the pole base and top by gently heating the end of a bit of sprue then squashing it down vertically onto the worktop. (This actually makes pretty good 1:1 buttons
The dio base got a lot of light colour dry brushing and dark thin washes after the basic colours were dried. I stippled a variety of colours onto the cobbles as well, to give them some variation and make them a bit more visually interesting than just grey. The car got it's roof rack load, which still needs some painting finishing off, as do the figures. Progress so far...
The past, present, and future walked into a bar. It was tense.
-
KellerModeller
- The Bug Has Well And Truly Bitten
- Posts: 346
- Joined: February 19th, 2024, 1:40 pm
Re: B4en's Bodgery
Amazing dio base!
I think this is how the Matchbox Sd.Kfz. 234 Puma base (which is already nice) would look in real life, especially the lantern
I think this is how the Matchbox Sd.Kfz. 234 Puma base (which is already nice) would look in real life, especially the lantern
I like to carve old kits into something roughly aircraft/tank shaped...