Airfix 1/72 Fw-190, tutorial and finish......
Posted: May 27th, 2011, 12:59 am
FW-190A5/U8.......Part 1........
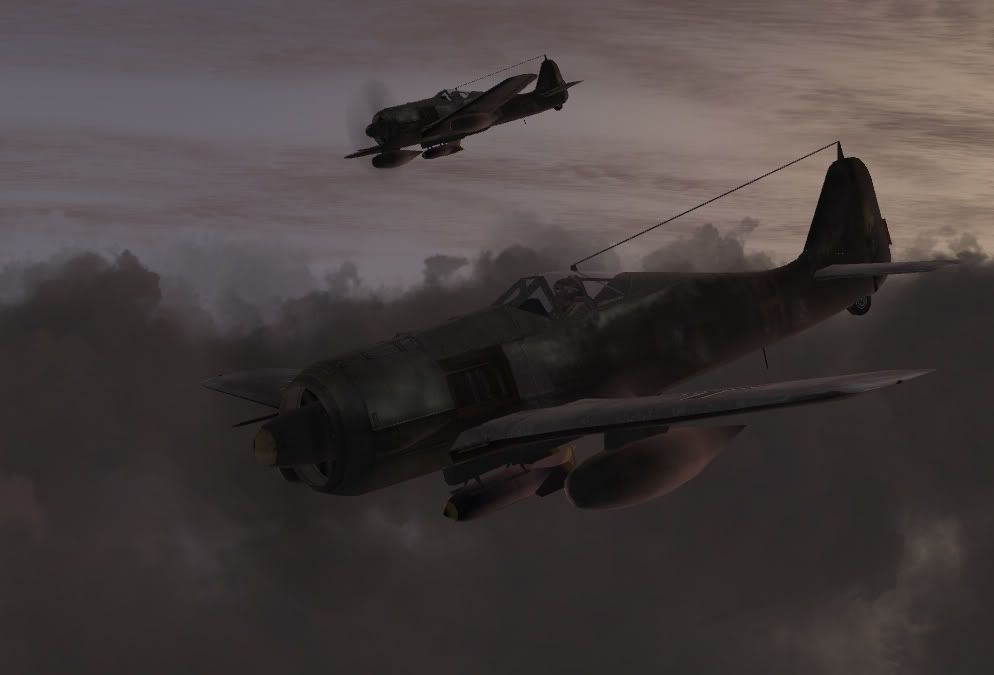
The 190 is one of my favorites and in this configuration, it's looks particularly nasty. This is an A5 with the U8 equipment for bombs and fuel tanks.
Often painted in a temporary water-based flat black finish to blend in better with the night.
These guys would go over at night, often in pairs at wave top height under radar. Swoop up when feet dry, gain proper bombing altitude, deliver their load then dive away home. Most of the time...
At least three that I know of mistakenly landed in England thinking they were home.
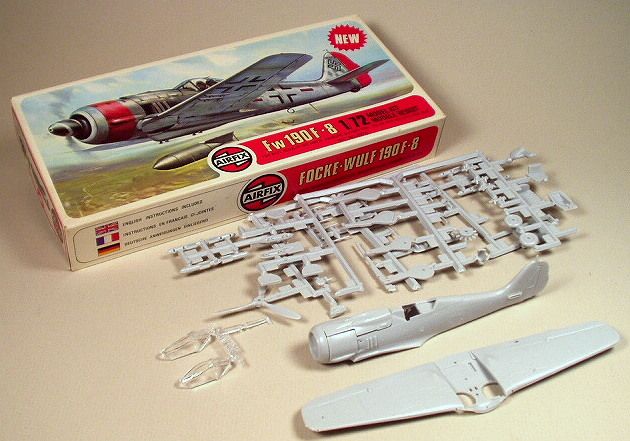
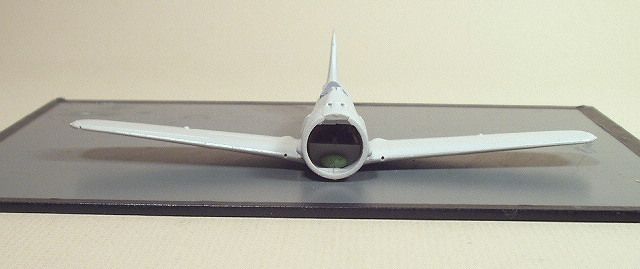
Starting with the Airfix 1/72 scale kit, #02063.
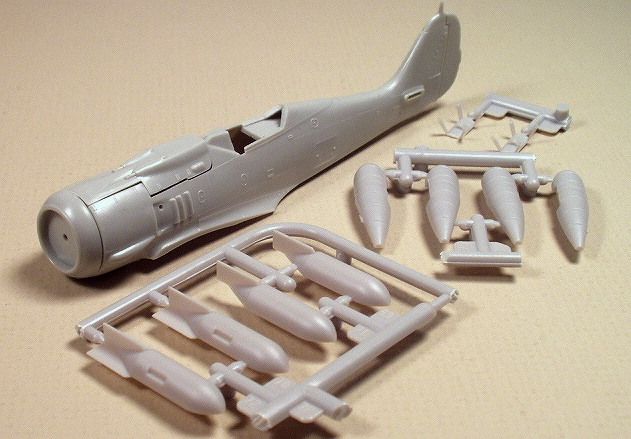
It's an F but we can backdate it to an A. I pinched bombs and tank parts from the new Airfix 110 I built...
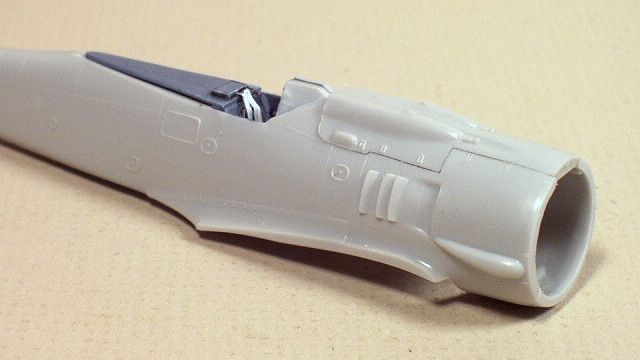
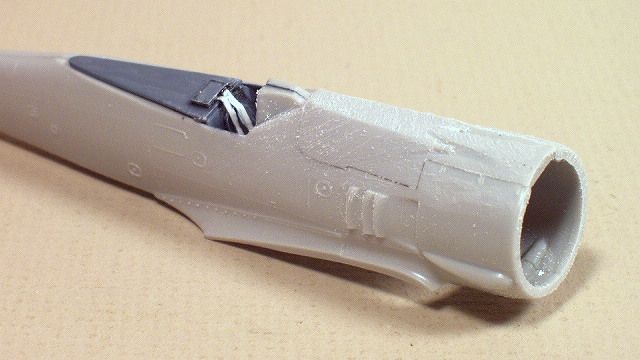
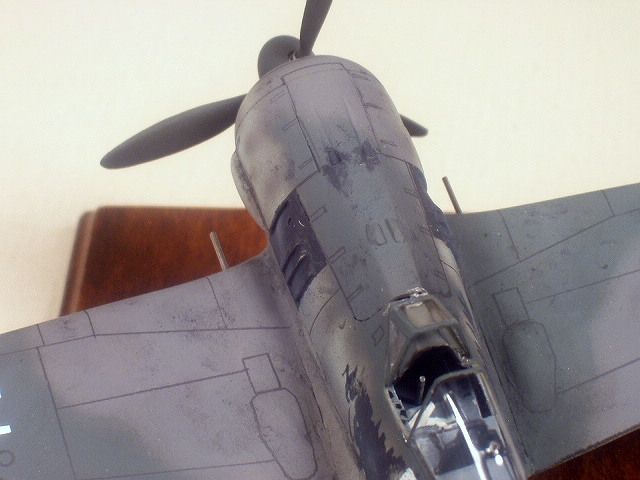
So we start in the cockpit and have not too much...
Grab some photos off the internet and some sheet styrene...
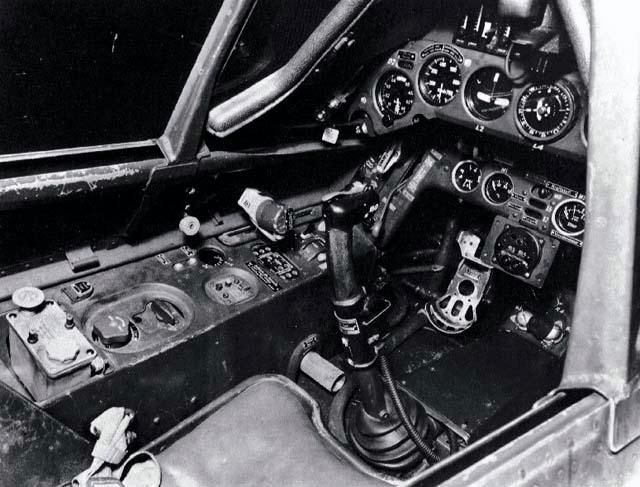
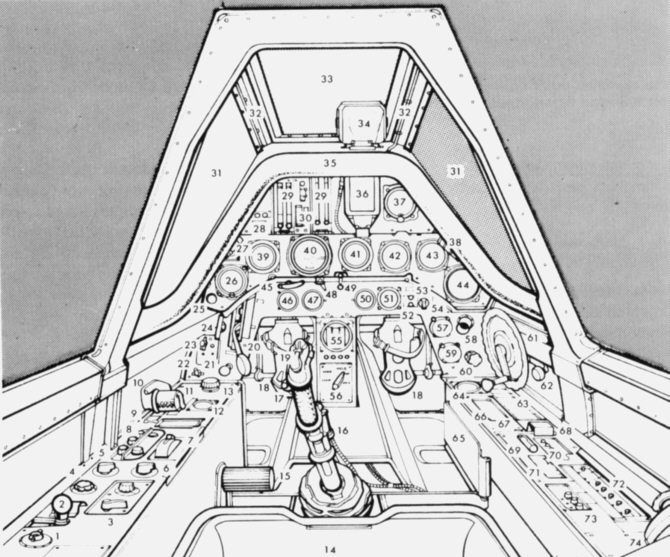
I looked at how other model manufacturers did the cockpit, no sense re-inventing the wheel. I also removed the molded on canopy. I will vac my own in one piece.
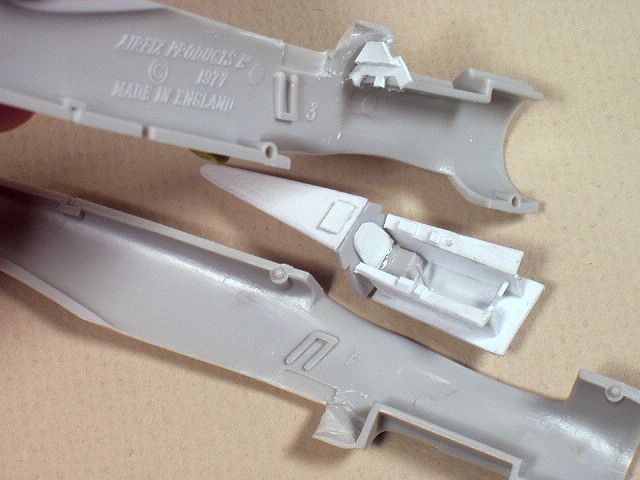
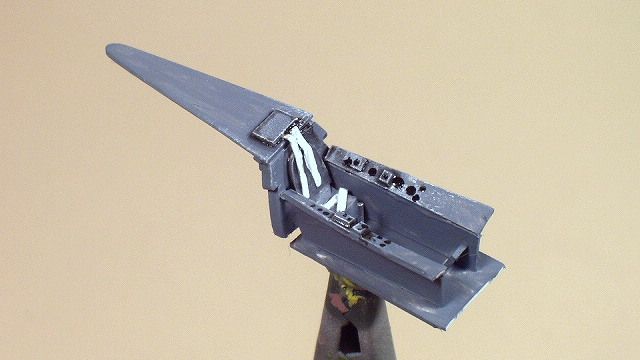
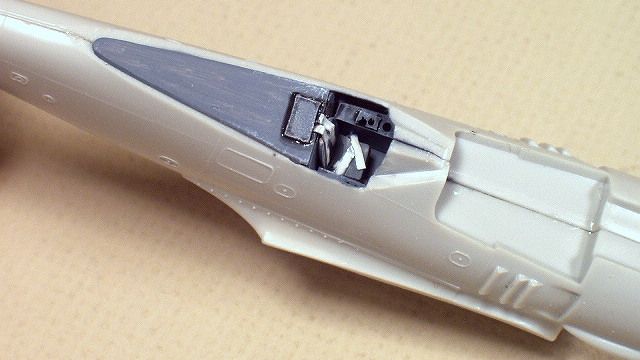
Not perfect but close enough for fun.
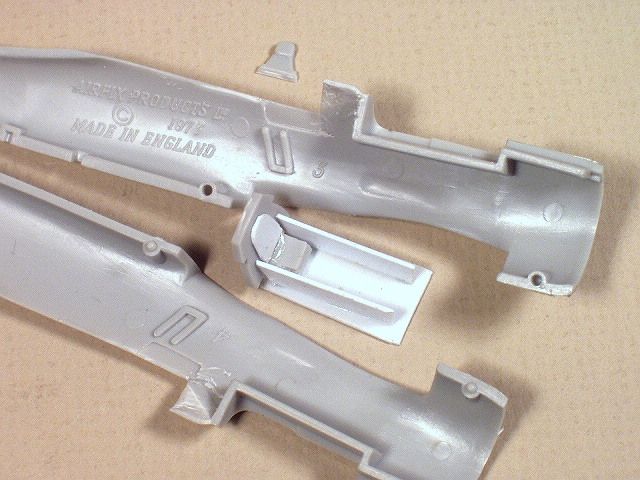
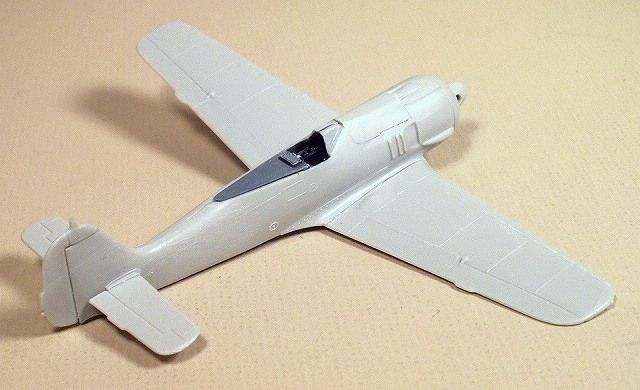
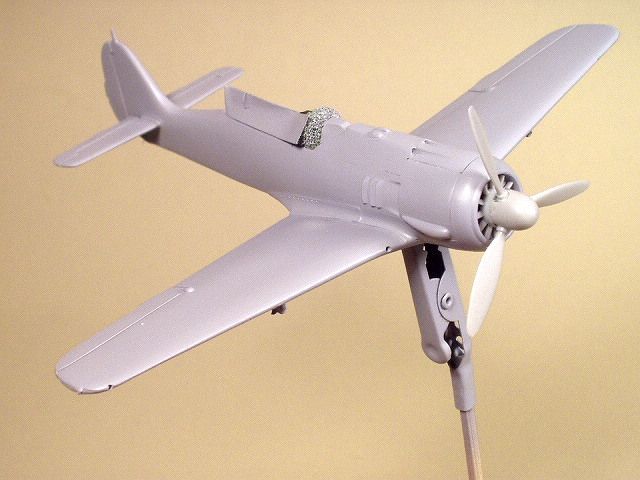
The next bit of drama would be the gun cowling. This is the most visible difference between the F and A. The A having no bulges, just smooth.
This is the kit F cowl...
And attacked with sanding sticks...
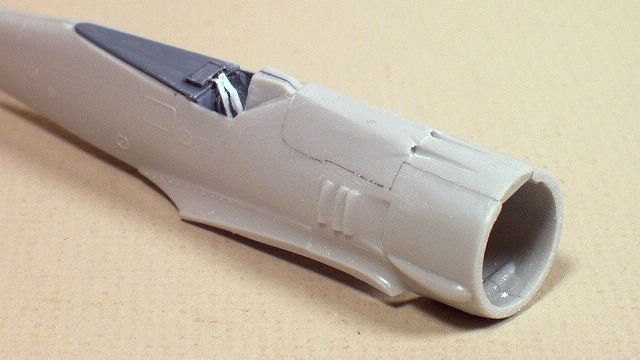
Close enough.
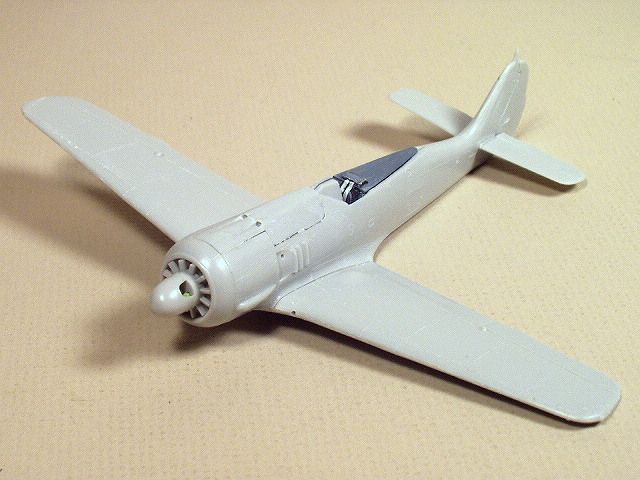
The rest went together well. I thought the dihedral was a little flat...
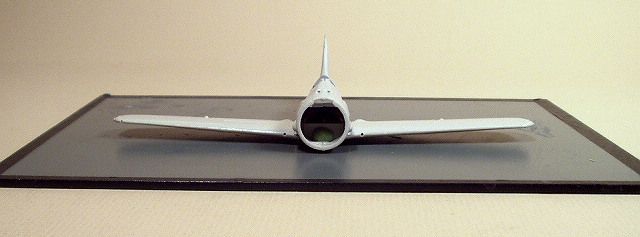
Attacked with hair dryer then glued.
Ready for sanding and primer.

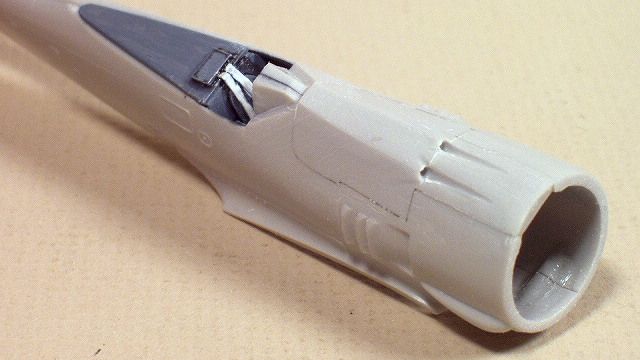
I am going to recess that cooling fan a bit more into the cowl.
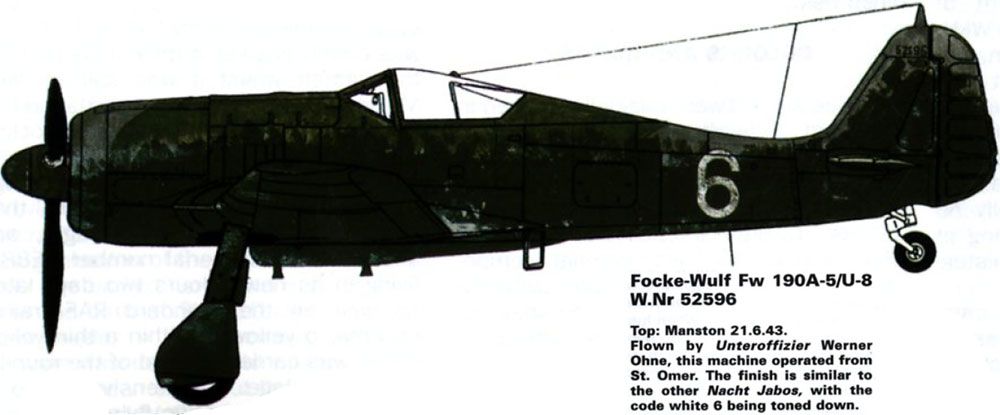
We're going for a ratty looking machine, not sure whose yet but probable "white 6"....
Thanks,
Allan
FW-190A5/U8.......Part 2........
As one sharp 190 experten here pointed out, the Airfix airframe has the little fillet in front of the wing root so it's an A5. No problem, seems the airframe I want to do, "White 6", is an A5 so all is good...
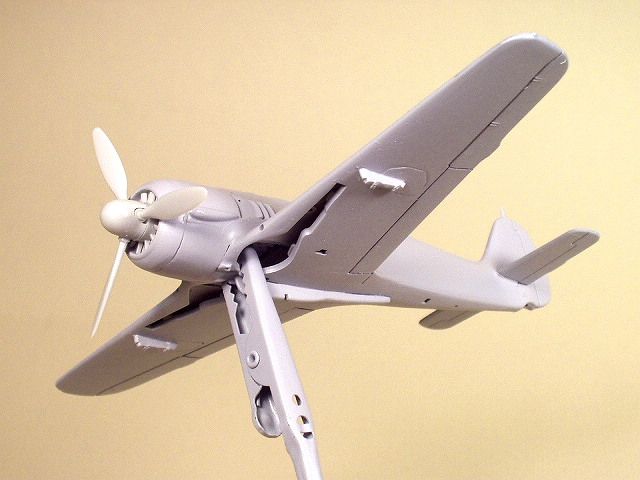
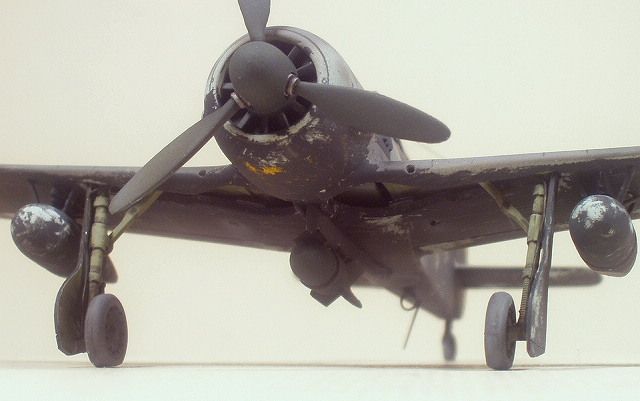
A coat of Tamiya primer over the new gun bulges on the top of the gun cowl and the bomb racks under the wings.
All the movable control surfaces got re-scribed and the back of the cooling fan/prop assembly was sanded until I liked the recess.
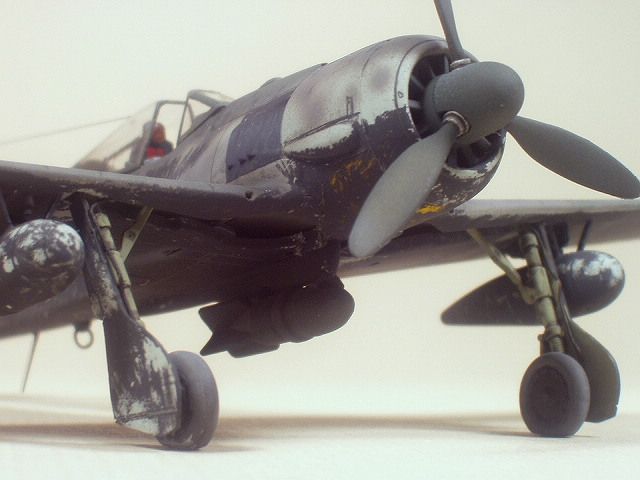
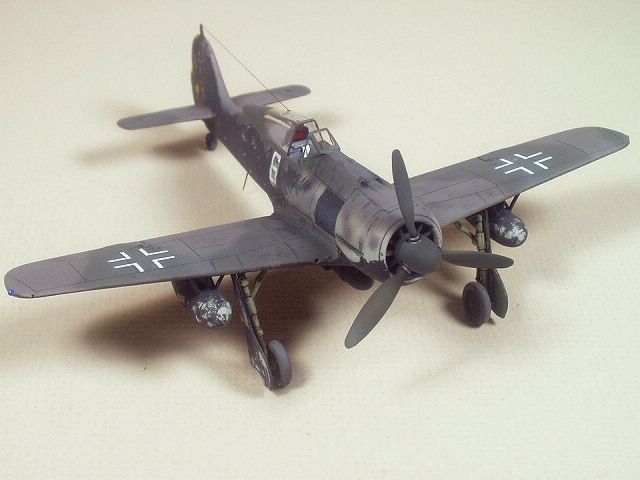
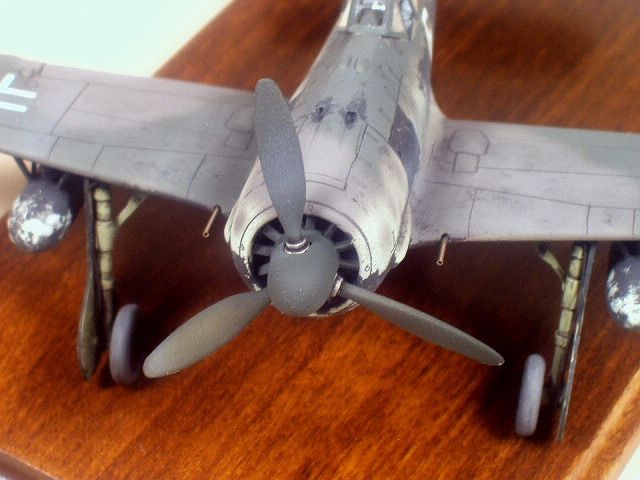
The 190 had two types of wing-tank attachment. The Junkers type with a large faring between tank and wing and the Messerschmitt type with "N" bracing.
Notice the A4 above with the Junkers type has a single panel line from the top of the wing around and down below at the wing root, the A5 below with the Messerschmitt type has two panel lines in the same position. Kurt Tank moved the entire engine assembly forward 5-1/2 inches and just filled in the gap.
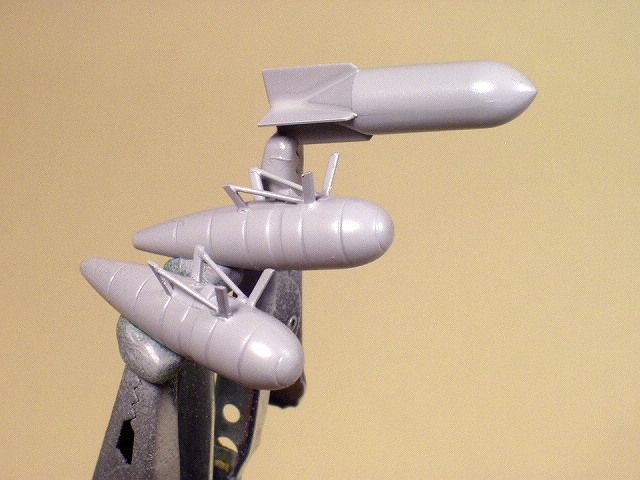
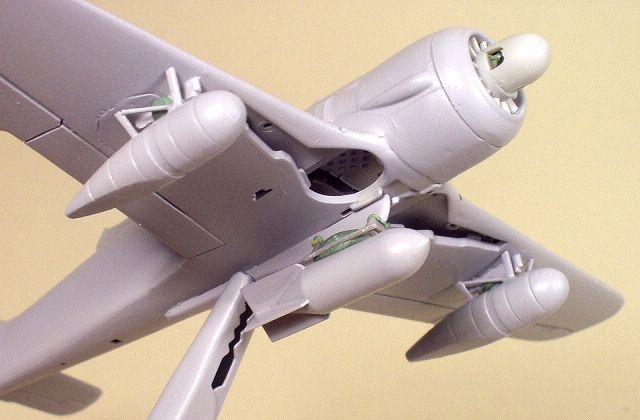
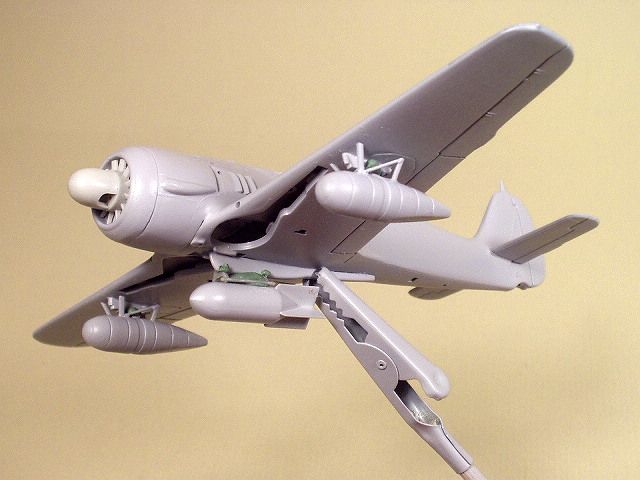
The Airfix tank got an additional stretched sprue for an "N" brace and a proper pay load was found. I think the bomb may be too large, will root around some more.
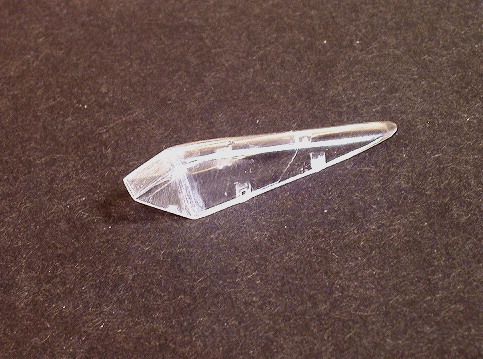
The Airfix kit canopies are discarded.
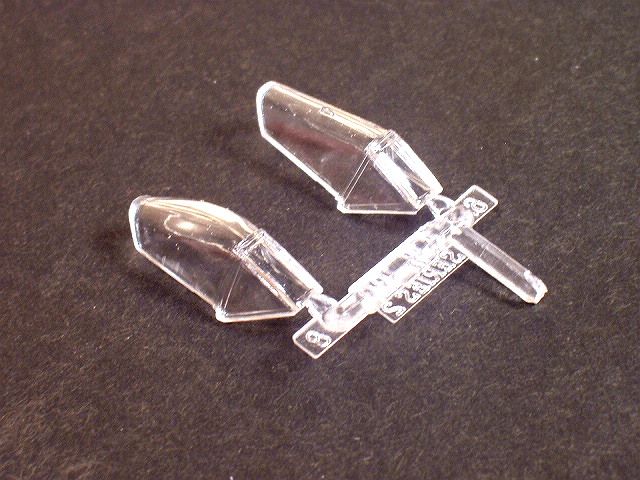
I have some "straight" and "blown" from an Academy 190D.
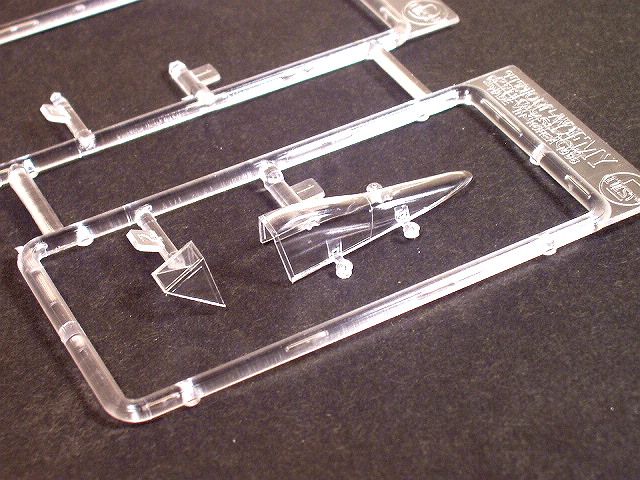
I will use this as my master and vac for my canopy.
The landing gear was pretty good right out of the box.
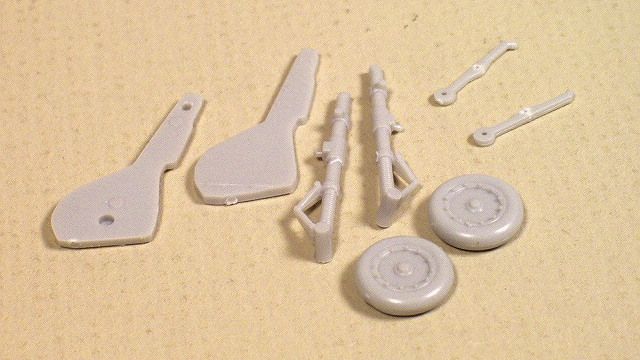
I simply traced the gear doors onto some 10thou styrene, cut scribed and sanded.
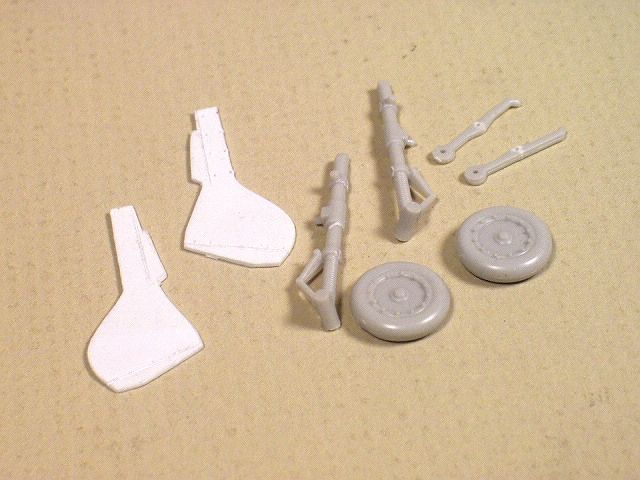
I use sticky putty to get a final fit and adjustment.
We are now ready for some RLM 74/75/76. I will try the new Mr.Hobby paints again !!!!
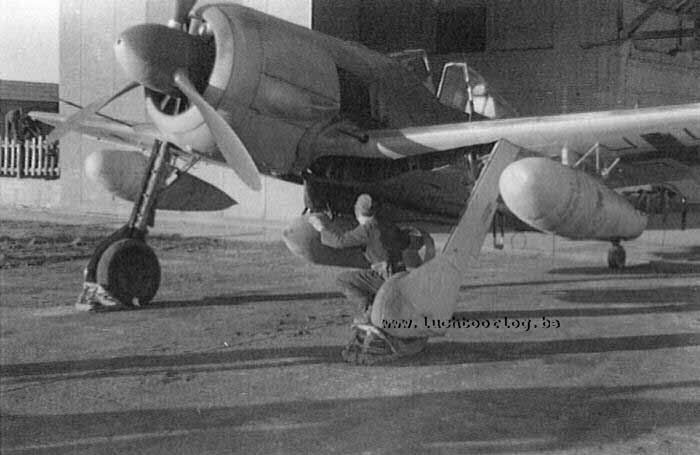
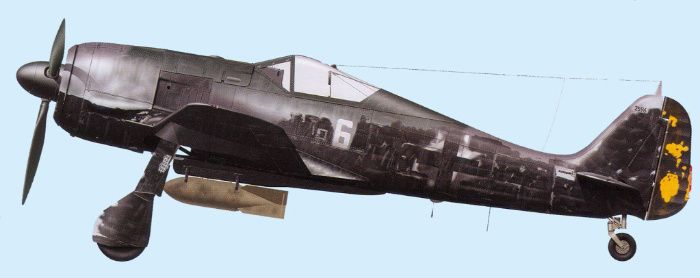
While researching the wing tanks, I came across some great photos of my aircraft "White 6" flown by Werner Ohne.
I will apply the 74/75/76 with an airbrush, then a coat of Future then the tempoary black will be applied with the good 'ol hairy stick. I can then remove some of the black and leave the under colors undamaged. That's the plan anyway, I hope the 'ell it works...
Thanks,
Allan
FW-190A5/U8.......Part 3........
My friend Dario Guliano suggested I try these "Mr Color" paints so I did. I used them the first time on my 262, now I'm trying out some other colors on the 190. So far I like them very much. I need more time learning my new Badger Velocity airbrush and how best to shoot this new paint.
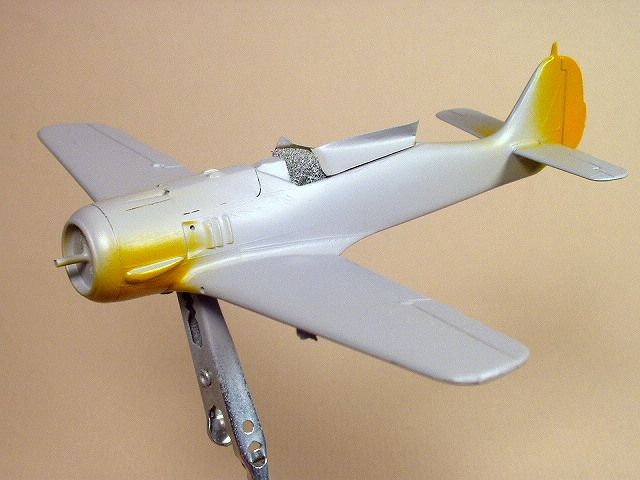
But first some good old MM yellow enamel for the RLM04. Also a good match for 04 is the MM "Blue Angels Yellow". We coated the rudder and if regulations were followed the chin would be yellow also.

Those areas masked off then shoot RLM76 on the bottom and high up the sides.
Consulting the books we follow the Luftwaffe dictum and shoot RLM75 free-hand.
And the same for RLM74.
I shot the other small parts, RLM70 on the prop parts, and now everybody is trying overnight.

A coat of future then the "temporary black" night finish applied with a small brush, hope this works.....
Thanks,
Allan
FW-190A5/U8.......Part 4........
I've never tried this but logically it sounded like it would work.
After all the camouflage colors dried, I slathered on a good, thickish coat of Future.
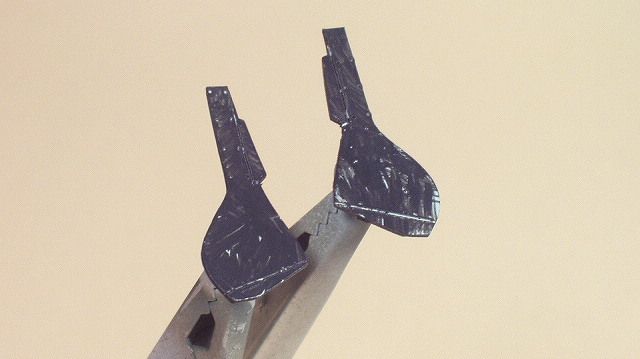
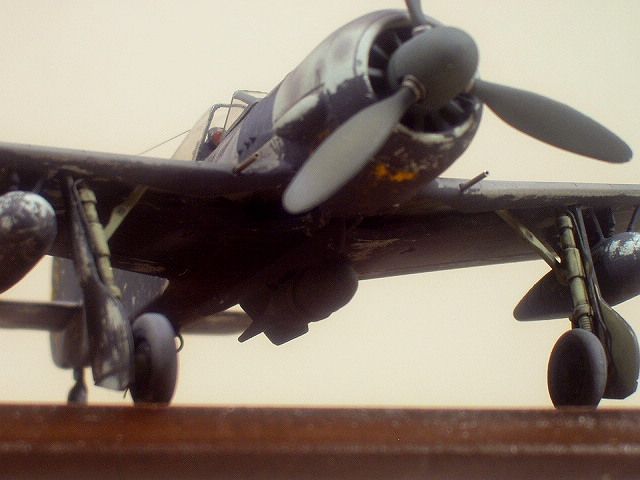
I decided to use the drop tanks as Guinea Pigs for my method of applying the temporary black finish. I painted the black on, trying to be as careful as a bored ground crew member would be and leaving brush strokes and the base color showing through.
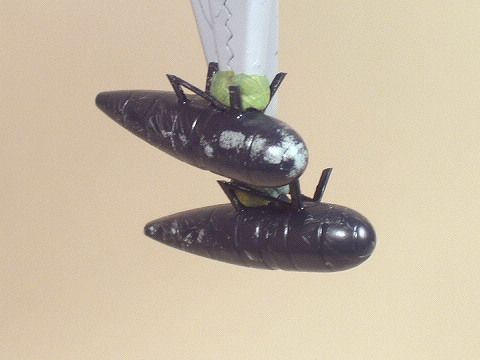
I then took a Q-tip (cotton bud) wet with mineral spirits and dabbed away the black as the rain and cloud moisture would have done. This worked well so I next tackled the landing gear covers to prove the painting concept.

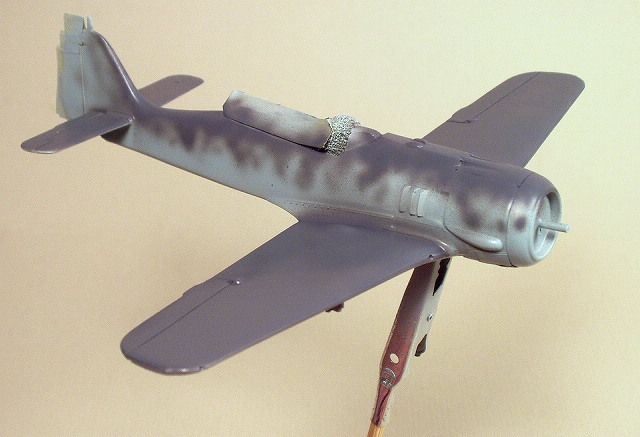
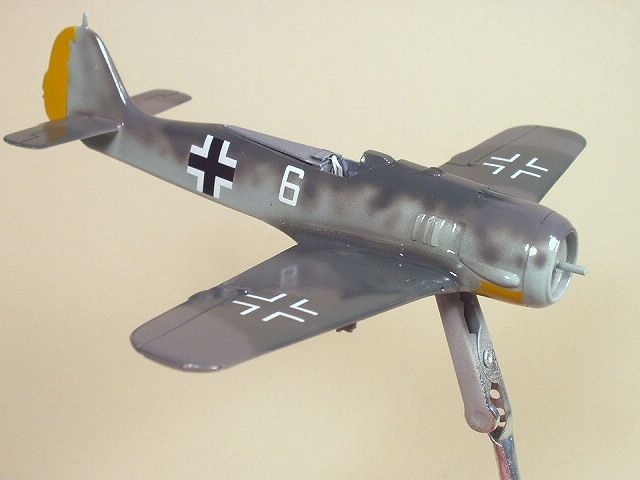
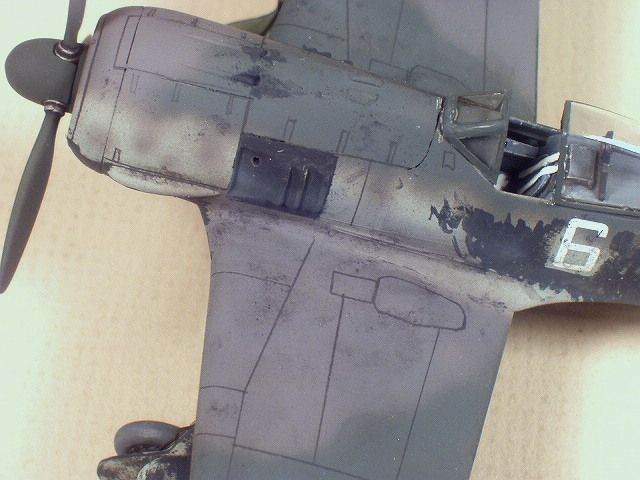
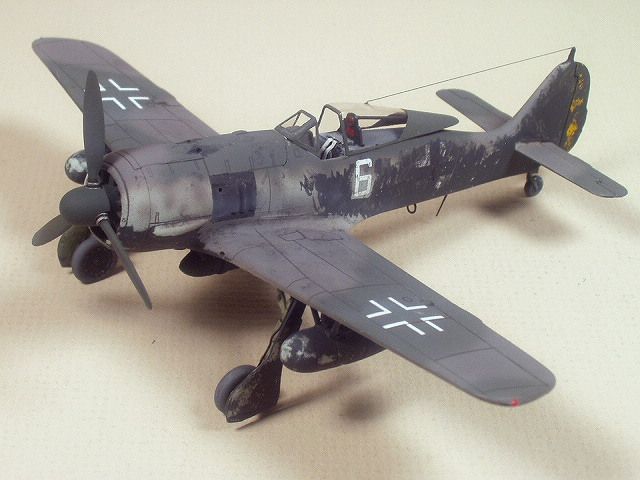
Now I'm liking this. I decaled the airframe as it would have been. The "6" is as close as I could find in the decal stash and is only slightly larger than it should be.
I then started applying the black as I did on the smaller pieces, (bored ground crew).
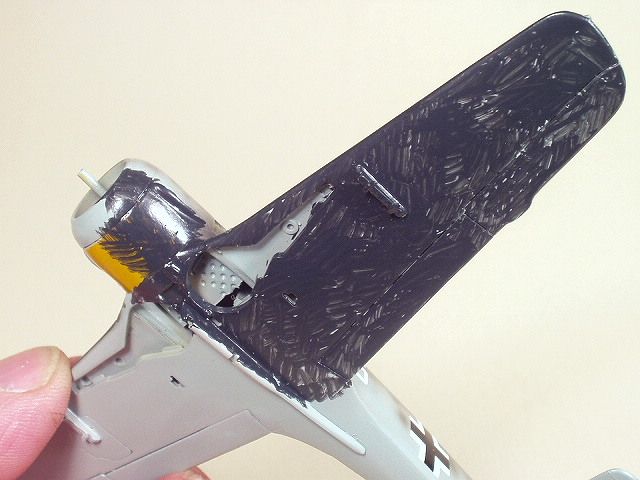
I then looked at the only photo of white 6 I have and removed the black accordingly. I tried to get that rudder as close as I could.
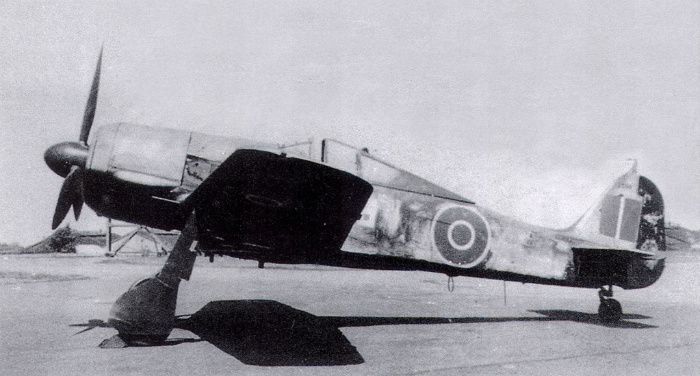
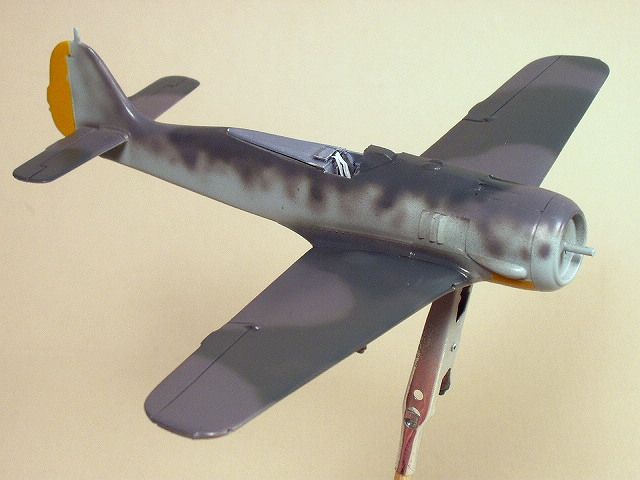
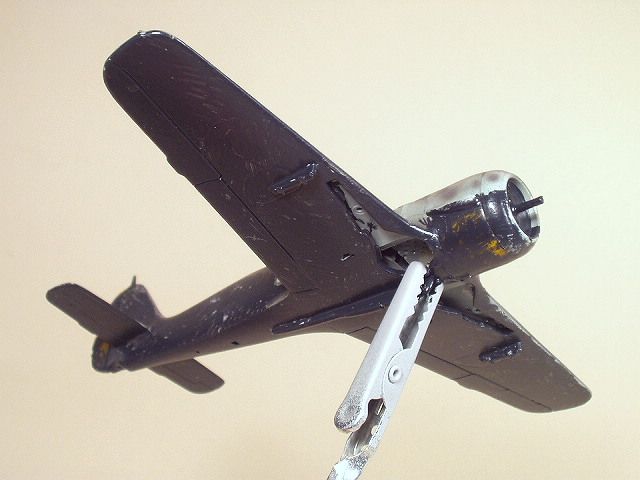
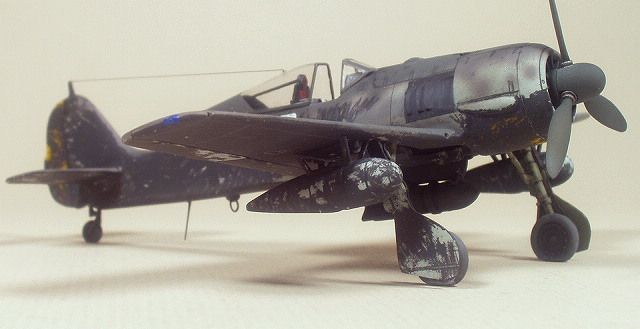
A shot after the Brits washed off some of the paint and remarked with roundels.
This was the biggest unknown in this build, glad as 'ell it worked too and I think the rest should go as usual.
Now for some grunge and weathering !!!
Thanks,
Allan
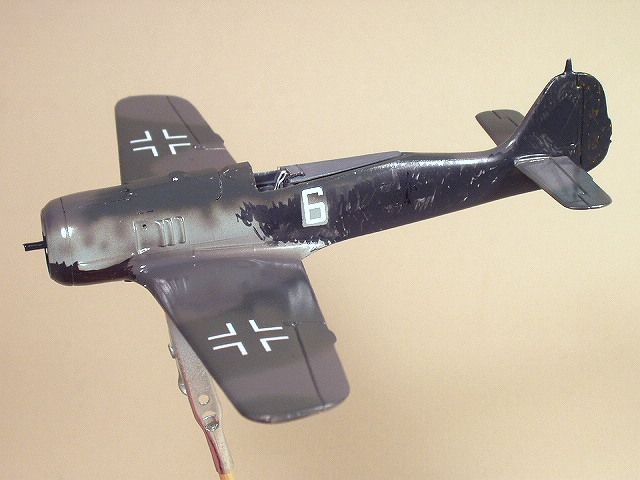
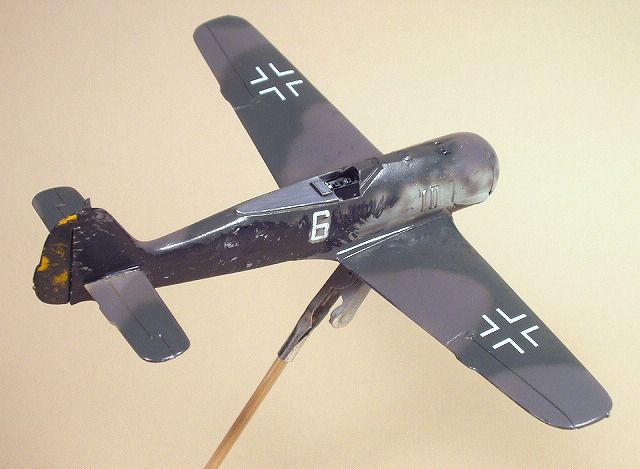
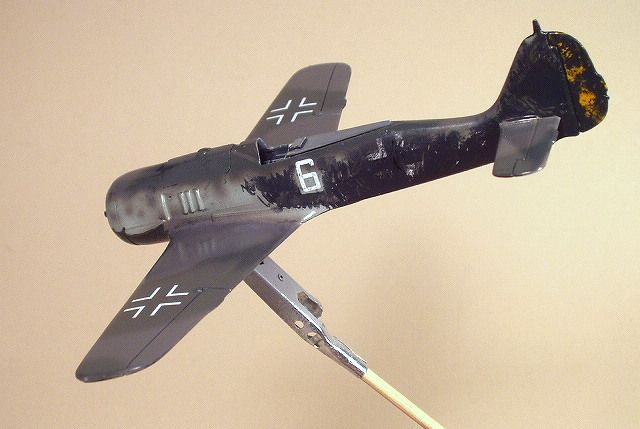
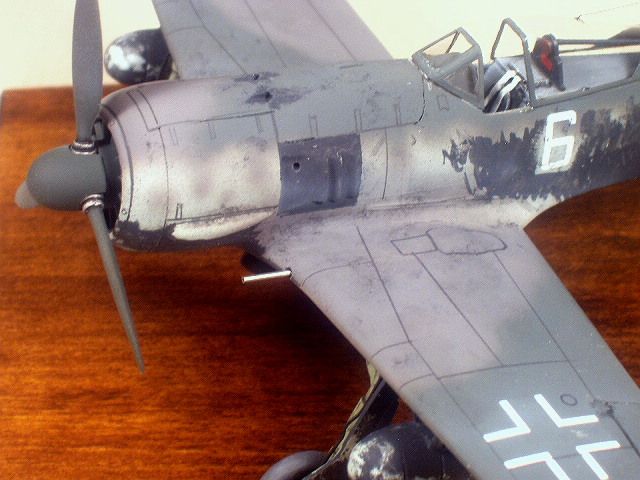
FW-190A5/U8.......Fini........
A fun little kit that I enjoyed building a 'ell of lot more than I thought I would.
Airfix kit #02063.
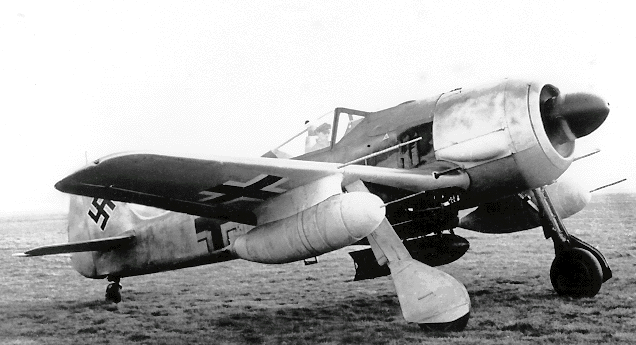
Focke-Wulf 190 A5/U8. W.Nr 52596 flown by Unteroffizier Werner Ohne operating from St. Omer. Ohne landed accidentally at the RAF airbase at Manston on the night of May 21, 1943 and was quickly taken into custody.
After capture, the airframe had some of the temporary black finished removed and british roundels added on.
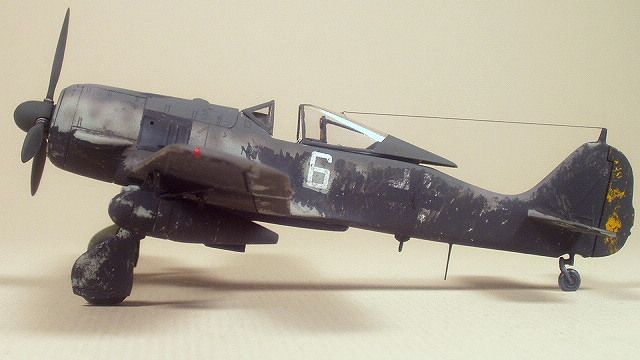
Pencil panel lines, my own vac canopy using a Academy part as a master. Scratched cockpit, foil belts, wingtanks from the Airfix 110 kit.
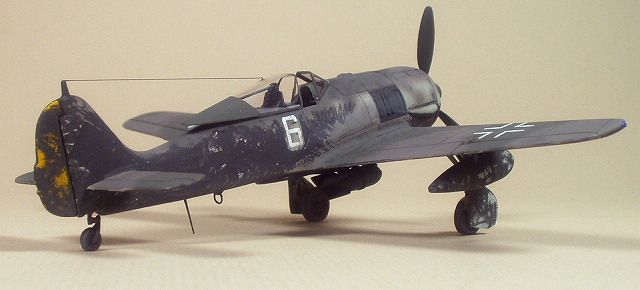
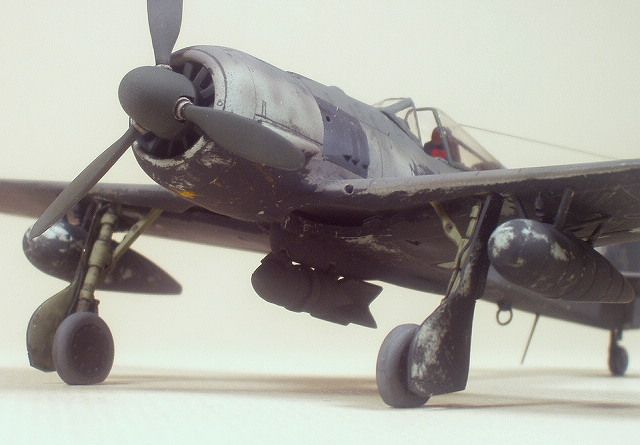
I am pleased with the way the technique for the weathered black worked out, I can now use it to do all those winter schemes both Luftwaffe and VVS.

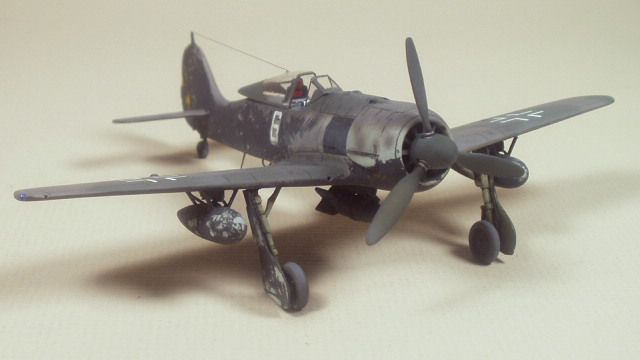
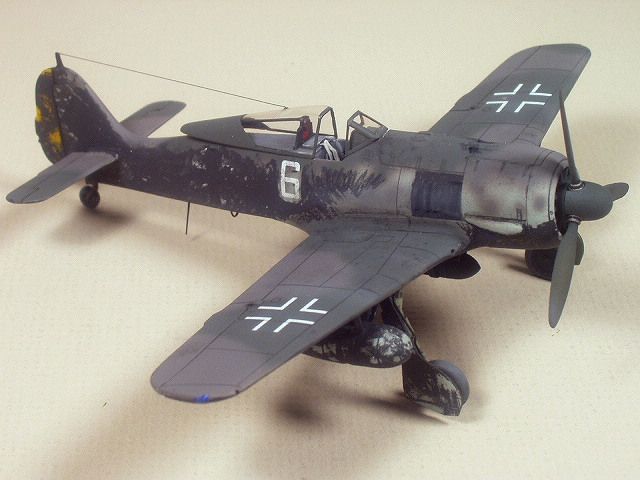
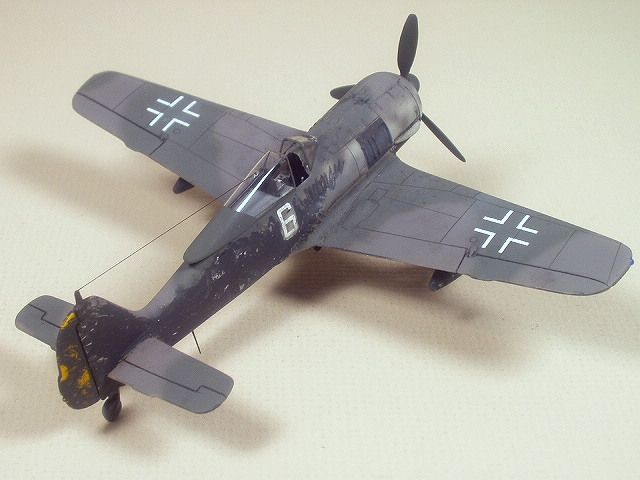
This whole project came out just about exactly as I pictured it in my mind. I was worried I would do a face-plant with the black finish but it came out better than expected.
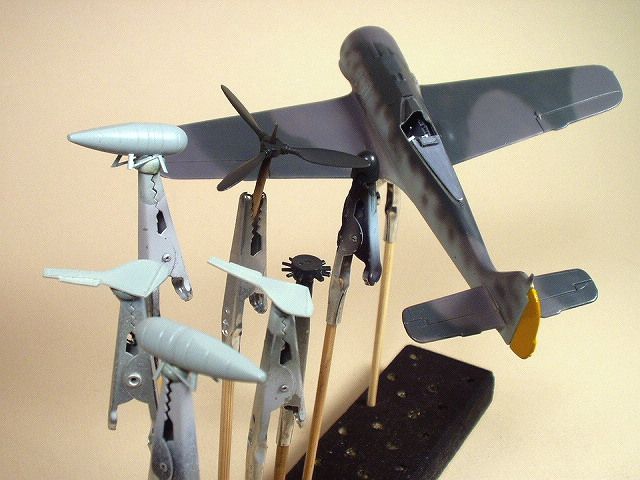
And with the previously forgotten wing cannons made form steel hypodermic needles now added...
Who has more fun than we do?.........
Nobody...... Period.
The 190 is one of my favorites and in this configuration, it's looks particularly nasty. This is an A5 with the U8 equipment for bombs and fuel tanks.
Often painted in a temporary water-based flat black finish to blend in better with the night.
These guys would go over at night, often in pairs at wave top height under radar. Swoop up when feet dry, gain proper bombing altitude, deliver their load then dive away home. Most of the time...
At least three that I know of mistakenly landed in England thinking they were home.
Starting with the Airfix 1/72 scale kit, #02063.
It's an F but we can backdate it to an A. I pinched bombs and tank parts from the new Airfix 110 I built...
So we start in the cockpit and have not too much...
Grab some photos off the internet and some sheet styrene...
I looked at how other model manufacturers did the cockpit, no sense re-inventing the wheel. I also removed the molded on canopy. I will vac my own in one piece.
Not perfect but close enough for fun.
The next bit of drama would be the gun cowling. This is the most visible difference between the F and A. The A having no bulges, just smooth.
This is the kit F cowl...
And attacked with sanding sticks...
Close enough.
The rest went together well. I thought the dihedral was a little flat...
Attacked with hair dryer then glued.
Ready for sanding and primer.
I am going to recess that cooling fan a bit more into the cowl.
We're going for a ratty looking machine, not sure whose yet but probable "white 6"....
Thanks,
Allan
FW-190A5/U8.......Part 2........
As one sharp 190 experten here pointed out, the Airfix airframe has the little fillet in front of the wing root so it's an A5. No problem, seems the airframe I want to do, "White 6", is an A5 so all is good...
A coat of Tamiya primer over the new gun bulges on the top of the gun cowl and the bomb racks under the wings.
All the movable control surfaces got re-scribed and the back of the cooling fan/prop assembly was sanded until I liked the recess.
The 190 had two types of wing-tank attachment. The Junkers type with a large faring between tank and wing and the Messerschmitt type with "N" bracing.
Notice the A4 above with the Junkers type has a single panel line from the top of the wing around and down below at the wing root, the A5 below with the Messerschmitt type has two panel lines in the same position. Kurt Tank moved the entire engine assembly forward 5-1/2 inches and just filled in the gap.
The Airfix tank got an additional stretched sprue for an "N" brace and a proper pay load was found. I think the bomb may be too large, will root around some more.
The Airfix kit canopies are discarded.
I have some "straight" and "blown" from an Academy 190D.
I will use this as my master and vac for my canopy.
The landing gear was pretty good right out of the box.
I simply traced the gear doors onto some 10thou styrene, cut scribed and sanded.
I use sticky putty to get a final fit and adjustment.
We are now ready for some RLM 74/75/76. I will try the new Mr.Hobby paints again !!!!
While researching the wing tanks, I came across some great photos of my aircraft "White 6" flown by Werner Ohne.
I will apply the 74/75/76 with an airbrush, then a coat of Future then the tempoary black will be applied with the good 'ol hairy stick. I can then remove some of the black and leave the under colors undamaged. That's the plan anyway, I hope the 'ell it works...
Thanks,
Allan
FW-190A5/U8.......Part 3........
My friend Dario Guliano suggested I try these "Mr Color" paints so I did. I used them the first time on my 262, now I'm trying out some other colors on the 190. So far I like them very much. I need more time learning my new Badger Velocity airbrush and how best to shoot this new paint.
But first some good old MM yellow enamel for the RLM04. Also a good match for 04 is the MM "Blue Angels Yellow". We coated the rudder and if regulations were followed the chin would be yellow also.
Those areas masked off then shoot RLM76 on the bottom and high up the sides.
Consulting the books we follow the Luftwaffe dictum and shoot RLM75 free-hand.
And the same for RLM74.
I shot the other small parts, RLM70 on the prop parts, and now everybody is trying overnight.
A coat of future then the "temporary black" night finish applied with a small brush, hope this works.....
Thanks,
Allan
FW-190A5/U8.......Part 4........
I've never tried this but logically it sounded like it would work.
After all the camouflage colors dried, I slathered on a good, thickish coat of Future.
I decided to use the drop tanks as Guinea Pigs for my method of applying the temporary black finish. I painted the black on, trying to be as careful as a bored ground crew member would be and leaving brush strokes and the base color showing through.
I then took a Q-tip (cotton bud) wet with mineral spirits and dabbed away the black as the rain and cloud moisture would have done. This worked well so I next tackled the landing gear covers to prove the painting concept.
Now I'm liking this. I decaled the airframe as it would have been. The "6" is as close as I could find in the decal stash and is only slightly larger than it should be.
I then started applying the black as I did on the smaller pieces, (bored ground crew).
I then looked at the only photo of white 6 I have and removed the black accordingly. I tried to get that rudder as close as I could.
A shot after the Brits washed off some of the paint and remarked with roundels.
This was the biggest unknown in this build, glad as 'ell it worked too and I think the rest should go as usual.
Now for some grunge and weathering !!!
Thanks,
Allan
FW-190A5/U8.......Fini........
A fun little kit that I enjoyed building a 'ell of lot more than I thought I would.
Airfix kit #02063.
Focke-Wulf 190 A5/U8. W.Nr 52596 flown by Unteroffizier Werner Ohne operating from St. Omer. Ohne landed accidentally at the RAF airbase at Manston on the night of May 21, 1943 and was quickly taken into custody.
After capture, the airframe had some of the temporary black finished removed and british roundels added on.
Pencil panel lines, my own vac canopy using a Academy part as a master. Scratched cockpit, foil belts, wingtanks from the Airfix 110 kit.
I am pleased with the way the technique for the weathered black worked out, I can now use it to do all those winter schemes both Luftwaffe and VVS.
This whole project came out just about exactly as I pictured it in my mind. I was worried I would do a face-plant with the black finish but it came out better than expected.
And with the previously forgotten wing cannons made form steel hypodermic needles now added...
Who has more fun than we do?.........
Nobody...... Period.