Mike W's workbench thread
-
PaulBradley

- Staring out the window
- Posts: 21222
- Joined: April 6th, 2011, 3:08 pm
- Location: Flagstaff, AZ
Re: Mike W's workbench thread
Nice work on the Gutless.  You call it a beast - why so? Bad kit or badass kit?
Paul
За демократію і незалежний Україну
"For Democracy and a Free Ukraine"
За демократію і незалежний Україну
"For Democracy and a Free Ukraine"

Re: Mike W's workbench thread
I really like the way the Cutlass is coming alive!
Very good job!
Henry
Very good job!
Henry
-
Mikeew
- Active Participant
- Posts: 637
- Joined: May 1st, 2011, 9:36 am
- Location: Bexhill on-sea,East Sussex. UK
Re: Mike W's workbench thread
thanks chaps.
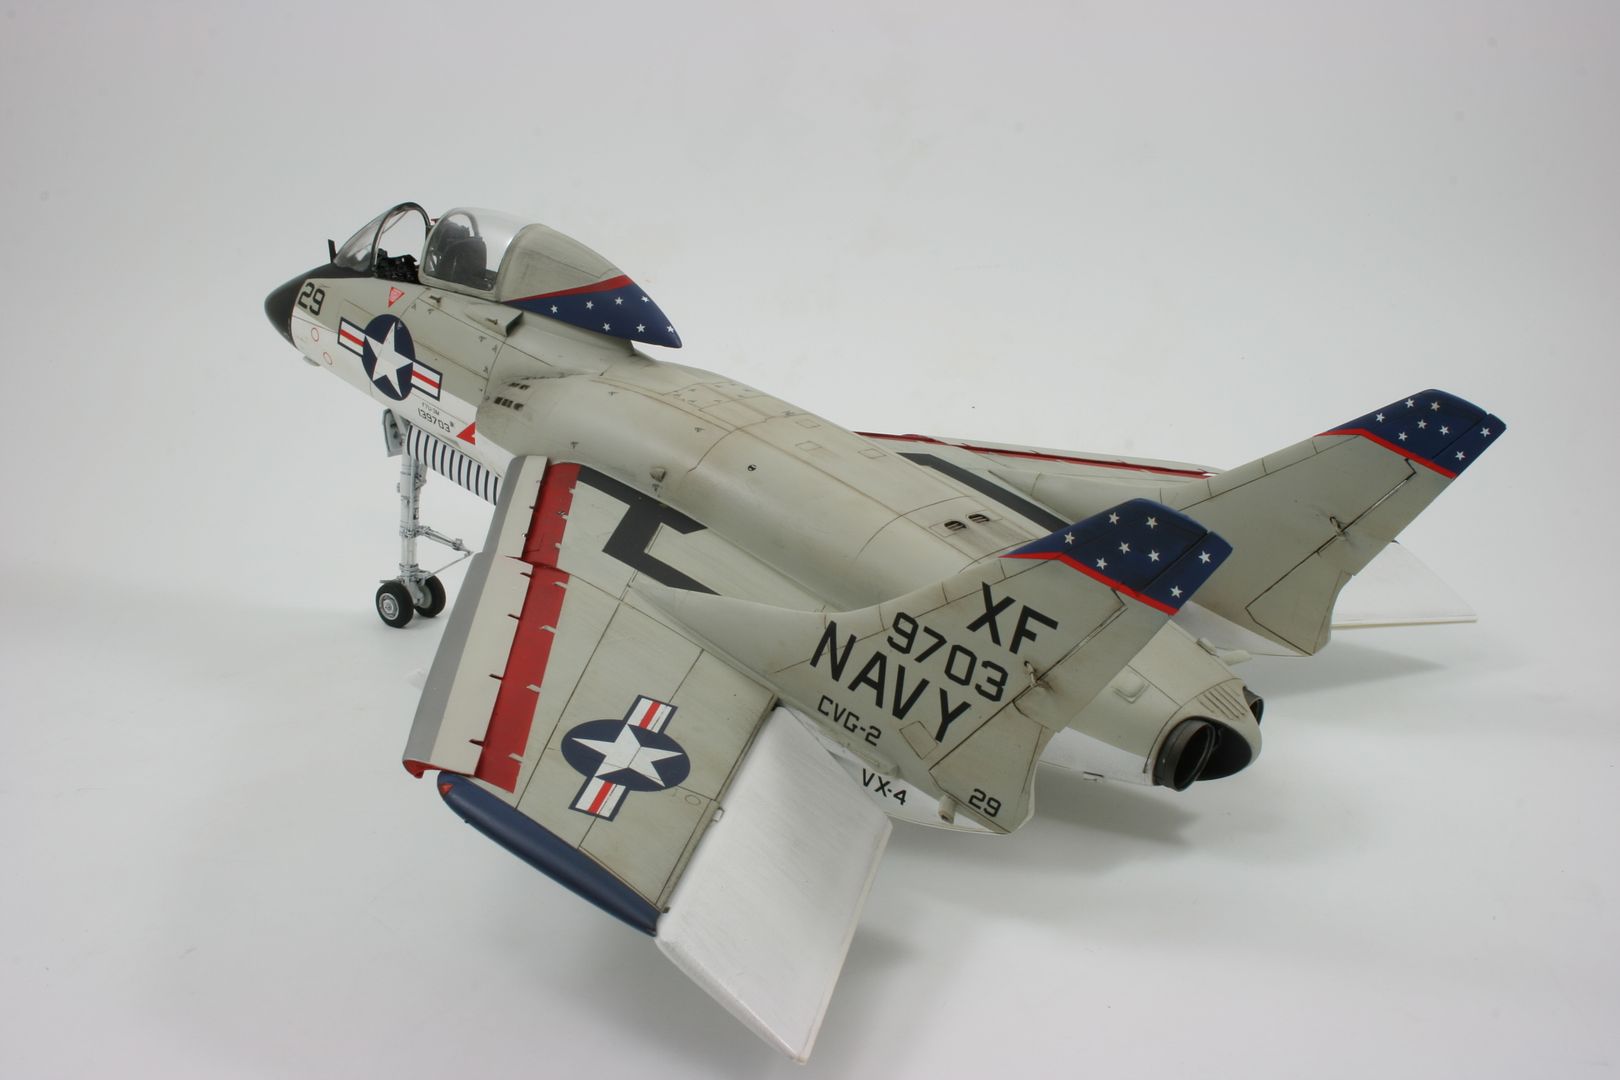
Here it is finished but without the Sparrow missiles as they need reshaping with hot water treatment as they are somewhat warped.
This will feature in an upcoming issue of Scale Aircraft Modelling as a full build feature article.
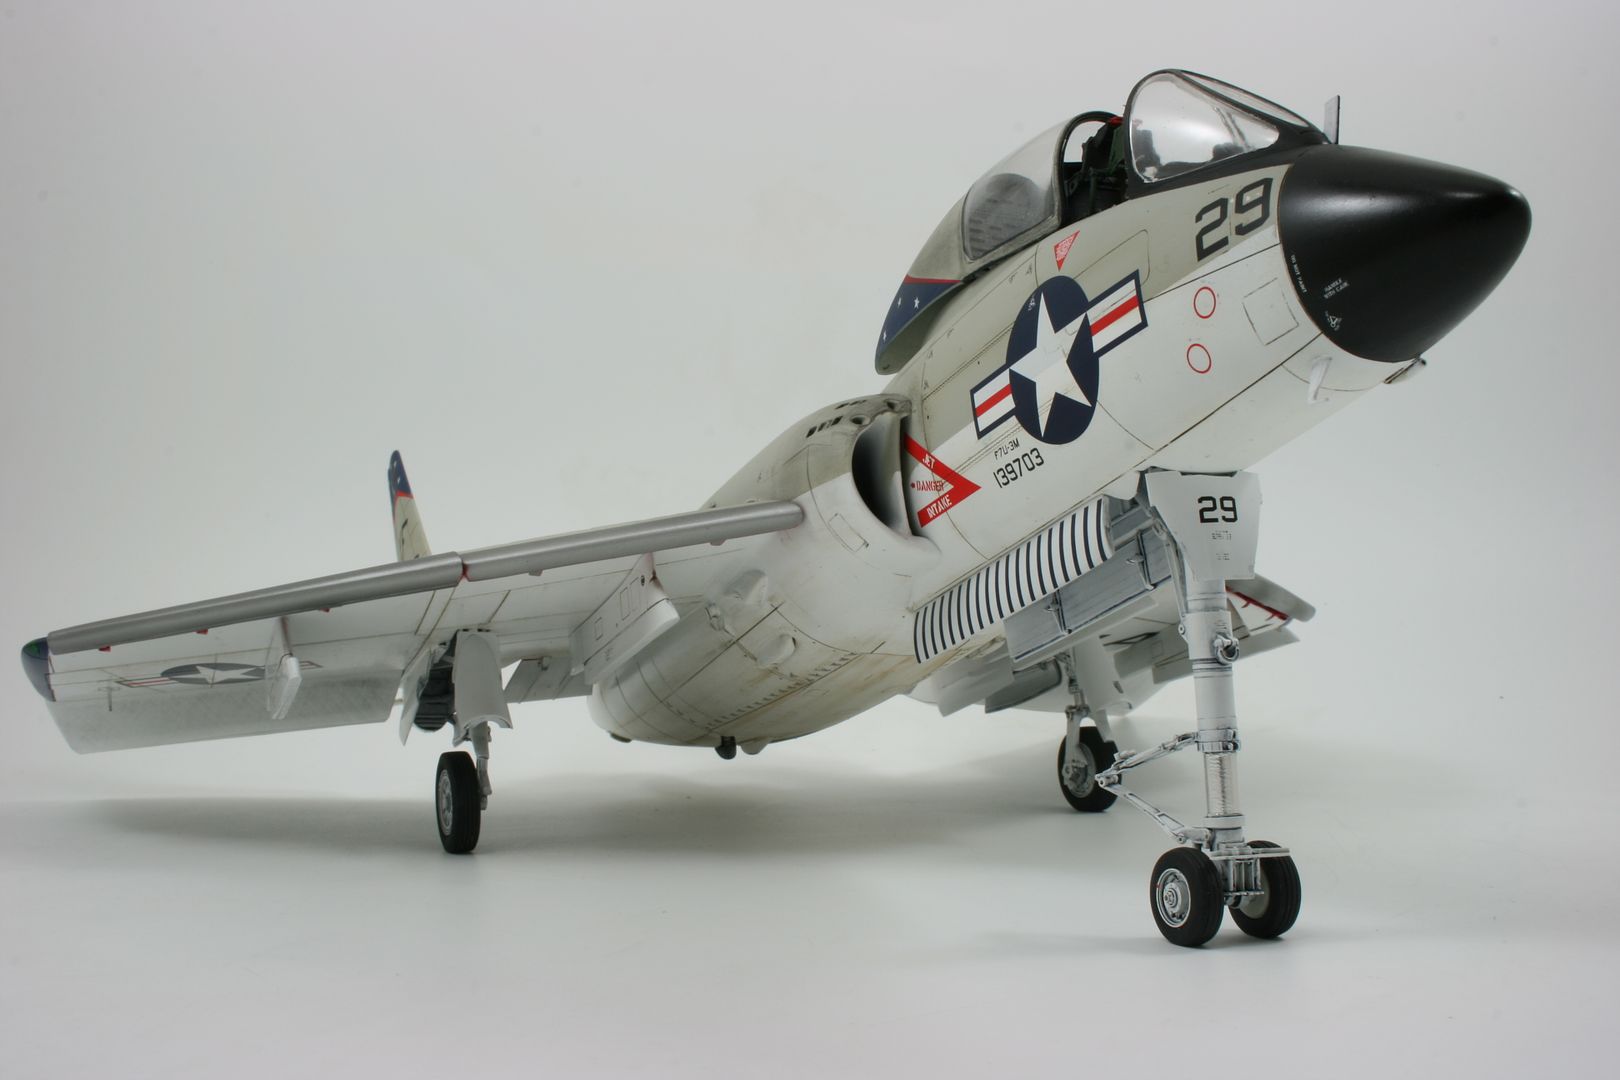
Paul it's a beast as in it's so big and heavy! lol yeah, it is pretty badass too!PaulBradley wrote:Nice work on the Gutless.
Here it is finished but without the Sparrow missiles as they need reshaping with hot water treatment as they are somewhat warped.
This will feature in an upcoming issue of Scale Aircraft Modelling as a full build feature article.


-
Mikeew
- Active Participant
- Posts: 637
- Joined: May 1st, 2011, 9:36 am
- Location: Bexhill on-sea,East Sussex. UK
Re: Mike W's workbench thread
You know how sometimes a story or news article can inspire you to get modelling a certain subject? It fires your creative juices and gets you excited about the subject all over again?
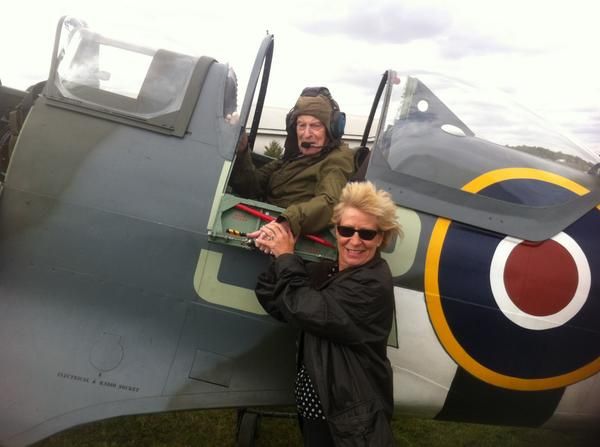
That is just what happened to me recently, whilst leafing through the local newspaper I happened upon a story about a local WW2 veteran Spitfire pilot who had taken to the skies again in a two seat Spitfire from Duxford. At 90 yrs old that is no mean feat so I did a little digging to find out more information on his Spitfire squadron and markings etc.
The story is on the local papers website here: Spitfire flight
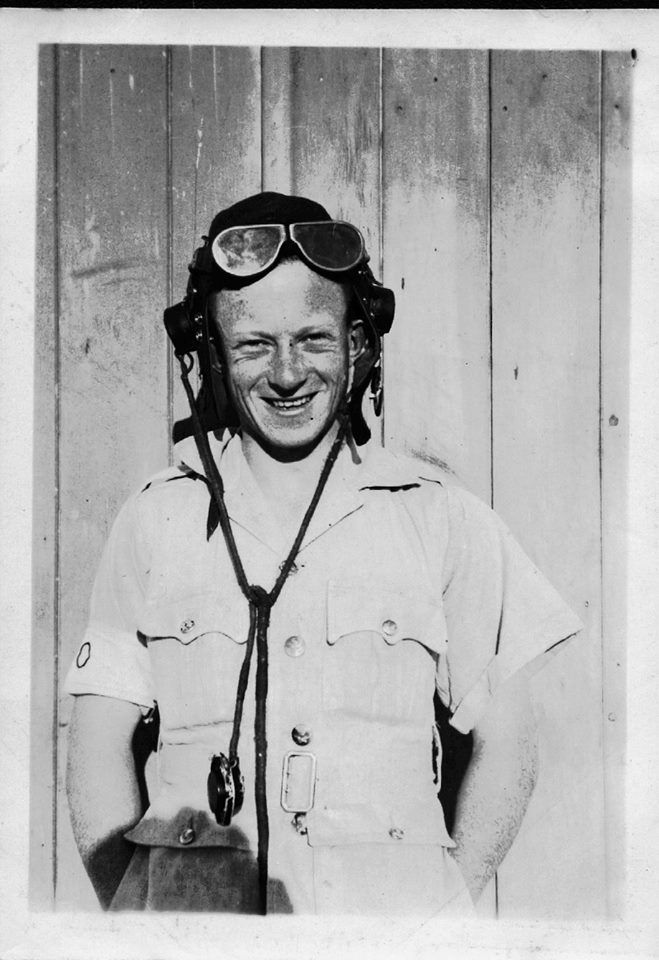
His name is Flt Sgt Brian Bird and he is on Facebook! I messaged him on there and have yet to hear back from him. I am going to build a model of his Spitfire as a surprise gift for him. Talking to the staff at the Royal British Legion care home where he now lives, he is always happy to talk about his experiences and is, rightly so, fiercely proud of his service. He is also it transpires the oldest living veteran to have flown both the Hurricane and Spitfire during WW2 as well as the P-51 Mustang.
So far I have found out that he flew the Spitfire Mk.IX in Italy 1943-44 serving in 185sqn and his aircraft carried the fuselage codes RE*D. I have been trying to find out his aircraft serial number but to no avail, if anyone here knows how or where I can find this out please let me know.
I also am under the assumption that it would have been n the Mediterranean or Desert scheme of Middle Stone and Dark Earth camouflage over Azure Blue undersides, again, if anyone can confirm this for me please say.
This is the best photo I can find of his aircraft:

and this is him during the war:
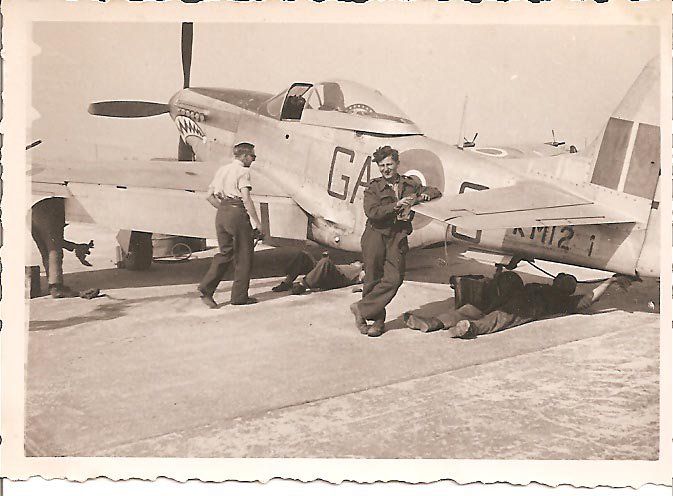
with his Mustang:
This is Brian during his recent Spitfire trip:
The painting and markings I can deal with later, for now I can get cracking on building.
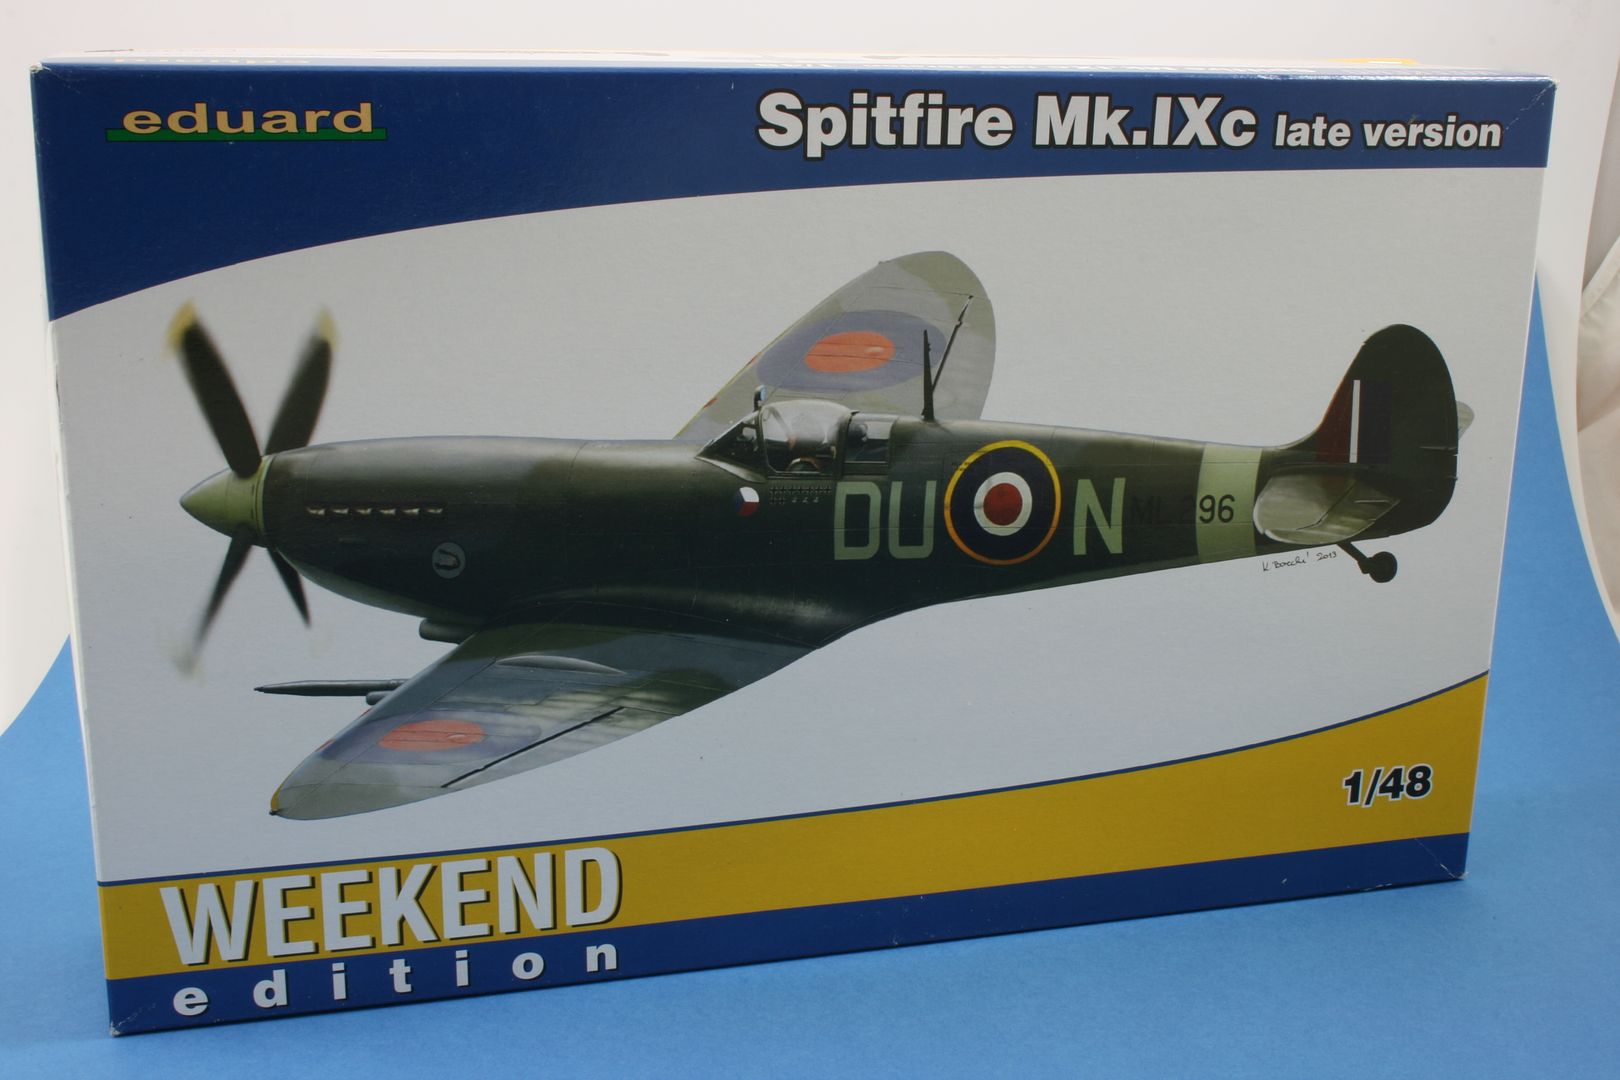
Choosing the Eduard kit was a no brainer being the best available kit of a Mk.IX Spitfire in 1/48 and a breeze to build. I got the Weekend edition for a great price off the ebay so will just need to add some seat belts, otherwise the build will be out-of-the-box.
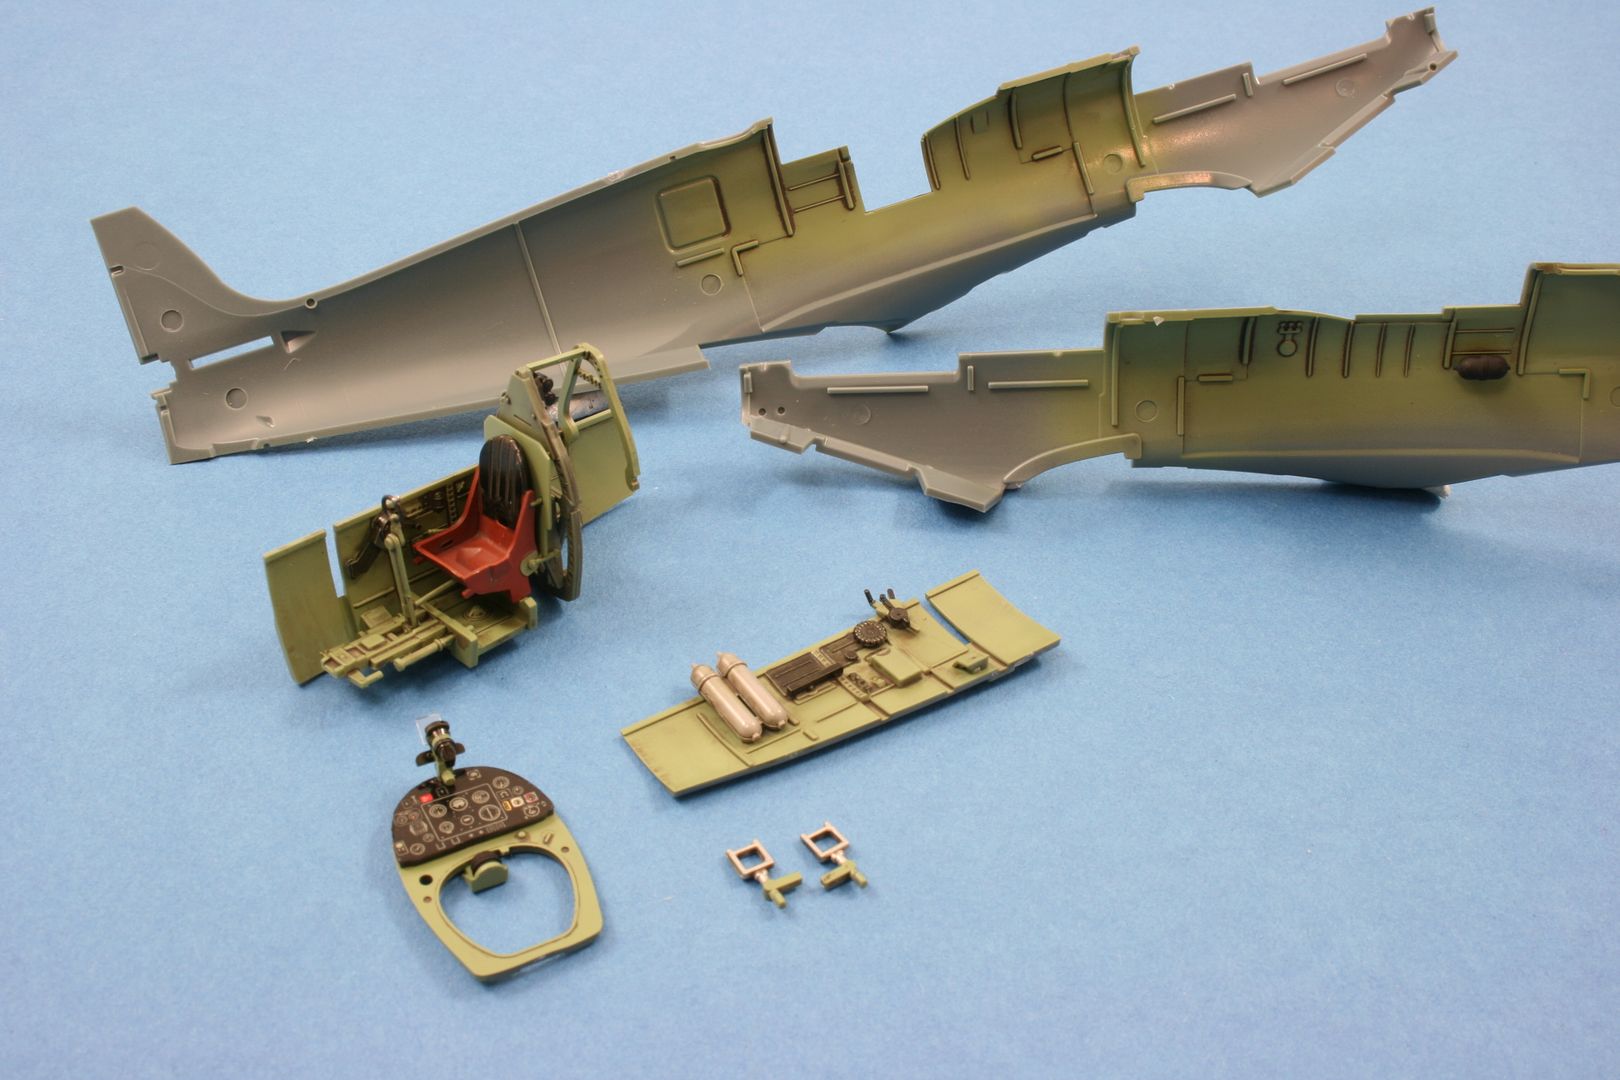
The cockpit is simplicity itself. There seems a lot to it when you look at the instructions, however it just fits together perfectly and needs nothing more than assembling and painting. I mixed my own interior grey-green , added a wash and picked out the various details in their respective colours. The Instrument panel decal was chosen over the moulded version , more so I could see how it looks than anything else. It passes muster so will go in as is.
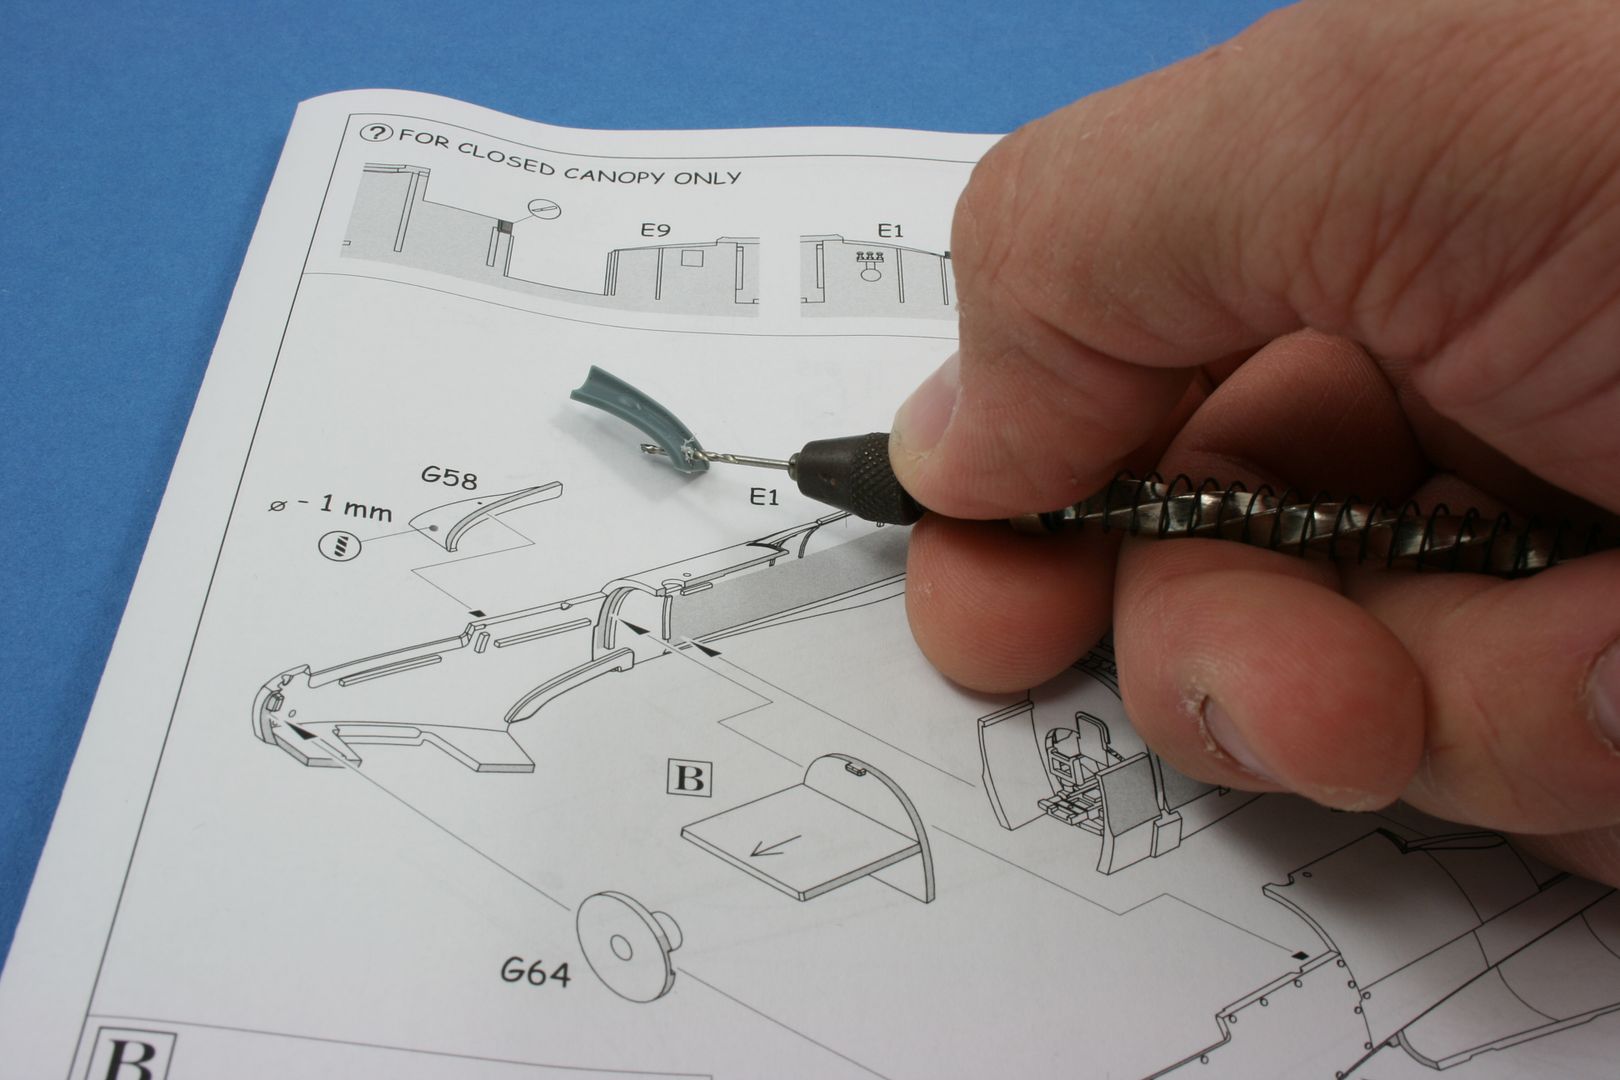
Following the instructions whilst the cockpit section dried off, the gun-camera port needed drilling out using a 1mm drill bit.
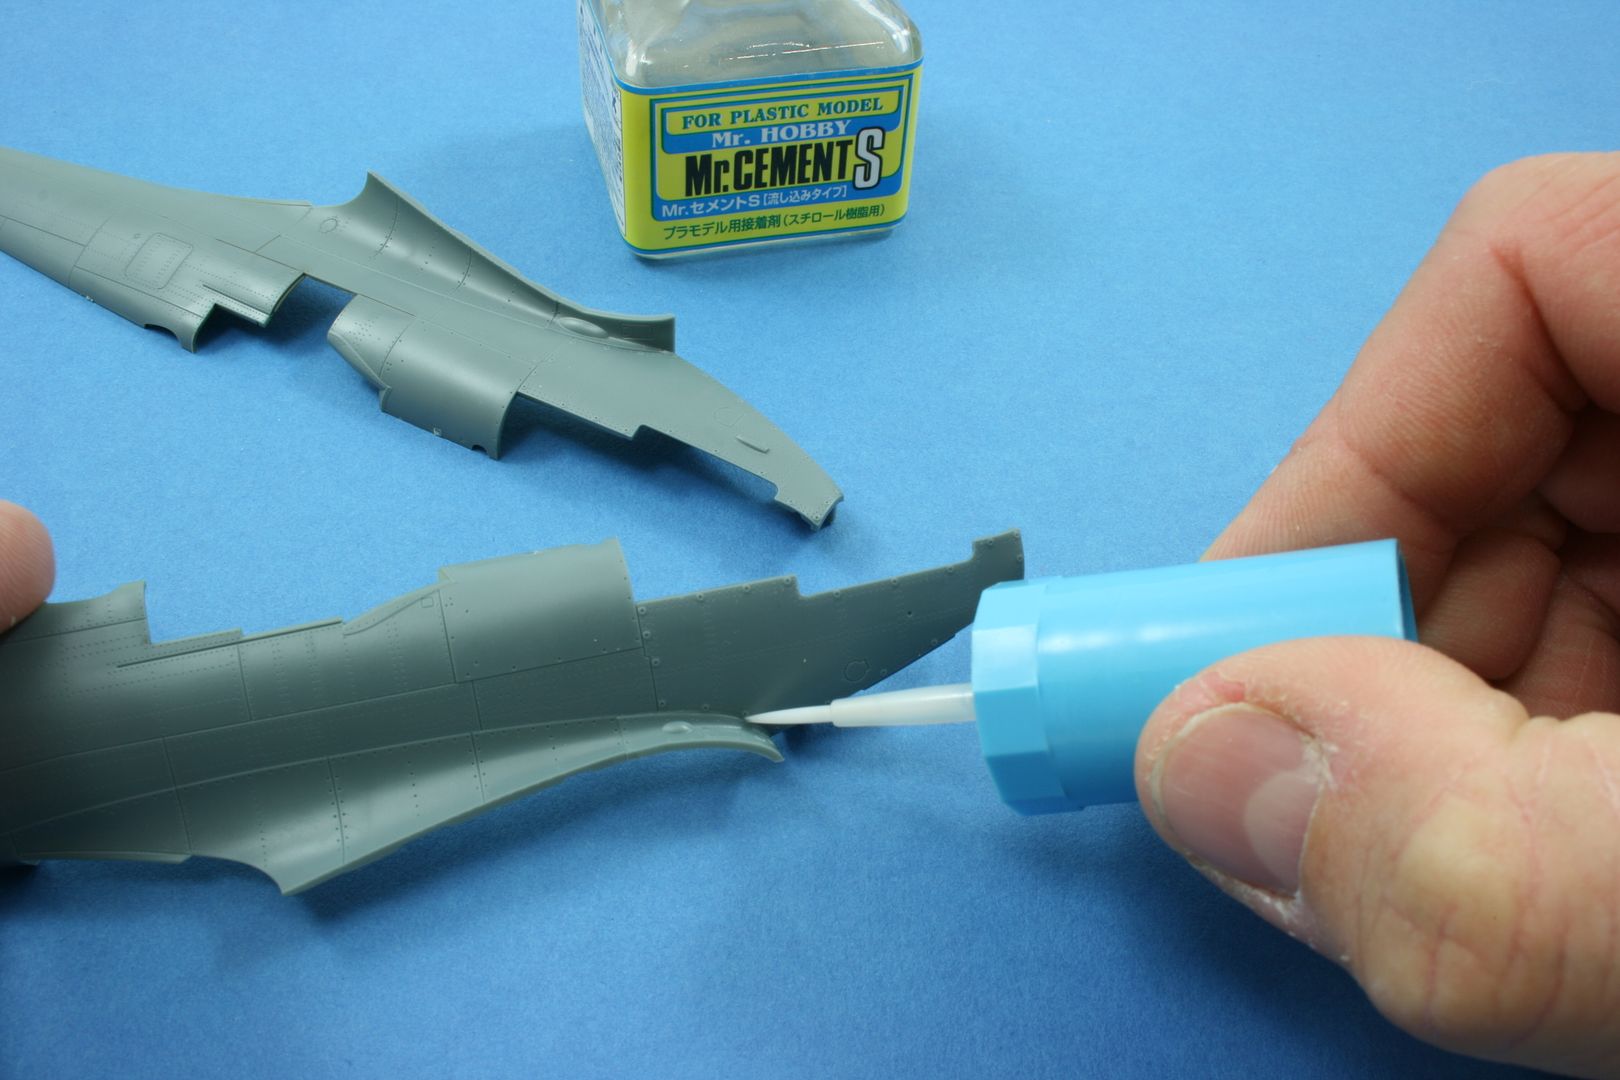
Then the wing root sections have to be fixed in place. This could have been so tricky but thanks to Eduards engineering of the kit they are a fantastic fit needing nothing more than careful alignment and some Mr.CementS.
That is just what happened to me recently, whilst leafing through the local newspaper I happened upon a story about a local WW2 veteran Spitfire pilot who had taken to the skies again in a two seat Spitfire from Duxford. At 90 yrs old that is no mean feat so I did a little digging to find out more information on his Spitfire squadron and markings etc.
The story is on the local papers website here: Spitfire flight
His name is Flt Sgt Brian Bird and he is on Facebook! I messaged him on there and have yet to hear back from him. I am going to build a model of his Spitfire as a surprise gift for him. Talking to the staff at the Royal British Legion care home where he now lives, he is always happy to talk about his experiences and is, rightly so, fiercely proud of his service. He is also it transpires the oldest living veteran to have flown both the Hurricane and Spitfire during WW2 as well as the P-51 Mustang.
So far I have found out that he flew the Spitfire Mk.IX in Italy 1943-44 serving in 185sqn and his aircraft carried the fuselage codes RE*D. I have been trying to find out his aircraft serial number but to no avail, if anyone here knows how or where I can find this out please let me know.
I also am under the assumption that it would have been n the Mediterranean or Desert scheme of Middle Stone and Dark Earth camouflage over Azure Blue undersides, again, if anyone can confirm this for me please say.
This is the best photo I can find of his aircraft:

and this is him during the war:

with his Mustang:

This is Brian during his recent Spitfire trip:

The painting and markings I can deal with later, for now I can get cracking on building.
Choosing the Eduard kit was a no brainer being the best available kit of a Mk.IX Spitfire in 1/48 and a breeze to build. I got the Weekend edition for a great price off the ebay so will just need to add some seat belts, otherwise the build will be out-of-the-box.

The cockpit is simplicity itself. There seems a lot to it when you look at the instructions, however it just fits together perfectly and needs nothing more than assembling and painting. I mixed my own interior grey-green , added a wash and picked out the various details in their respective colours. The Instrument panel decal was chosen over the moulded version , more so I could see how it looks than anything else. It passes muster so will go in as is.

Following the instructions whilst the cockpit section dried off, the gun-camera port needed drilling out using a 1mm drill bit.

Then the wing root sections have to be fixed in place. This could have been so tricky but thanks to Eduards engineering of the kit they are a fantastic fit needing nothing more than careful alignment and some Mr.CementS.


Re: Mike W's workbench thread
I've never built an Eduard.... anything... so will be keeping an eye on this one.
Daren
Half-assed Spitfire builder!
Half-assed Spitfire builder!
-
Mikeew
- Active Participant
- Posts: 637
- Joined: May 1st, 2011, 9:36 am
- Location: Bexhill on-sea,East Sussex. UK
Re: Mike W's workbench thread
Right, Spitfire on hiatus until I get some more info.
Started the Hobbyboss Bearcat in 1/48 to be ready for Telford.
Going to be throwing some aftermarket gear at this too...
A little background info courtesy of Modellingmadness.com (to save me the hassle of rewriting it)
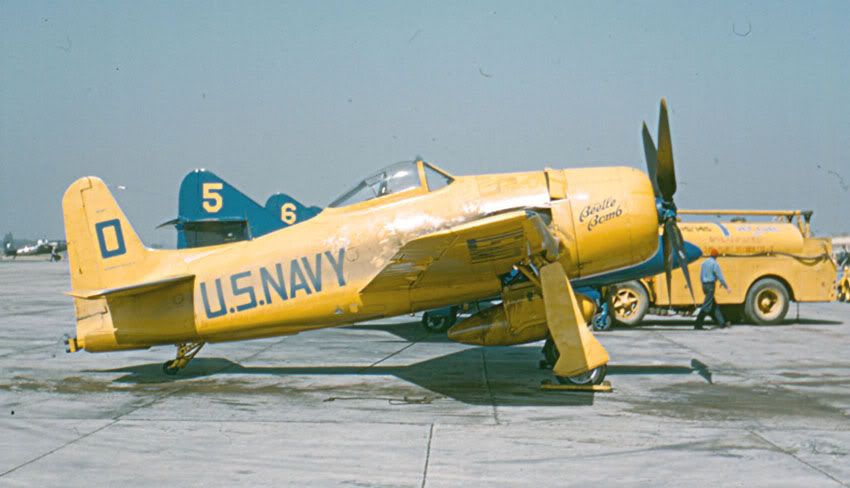
"In the Blue Angels first years of air show demonstrations, a North American SNJ was painted overall orange-yellow and given the name "Beetle Bomb". "Beetle Bomb" was a target with a big "0" painted on it and was supposed to designate an enemy aircraft. The aircraft was equipped with smoke grenades under the belly, which would be tripped after a simulated firing pass from one of the regular Blue Angels. The airplane would start smoking and flopping around before hanging up in a steep bank, at which time the second man in the SNJ's rear seat would toss out a dummy with a parachute.
The SNJ was replaced in late January of 1949 with an all orange-yellow F8F-1 "Bearcat". A centerline pod was rigged to the F8F to hold the parachute-rigged dummy, smoke canisters were fitted to the tailhook well, and the show continued with the same routine. After the Blue Angels transitioned to F9F "Panther" jet in mid-1949, the parachute dummy pod and smoke canisters were removed and "Beetle Bomb" was used for advanced aerobatics before the main show. It performed this task until Lt. Bob Longworth tragically crashed attempting a roll on takeoff at a training show in Pensacola on April 24, 1950. This ended the Blue Angels use of "Beetle Bomb".
The model represents F8F-1, bureau number 95187, which served as "Beetle Bomb".
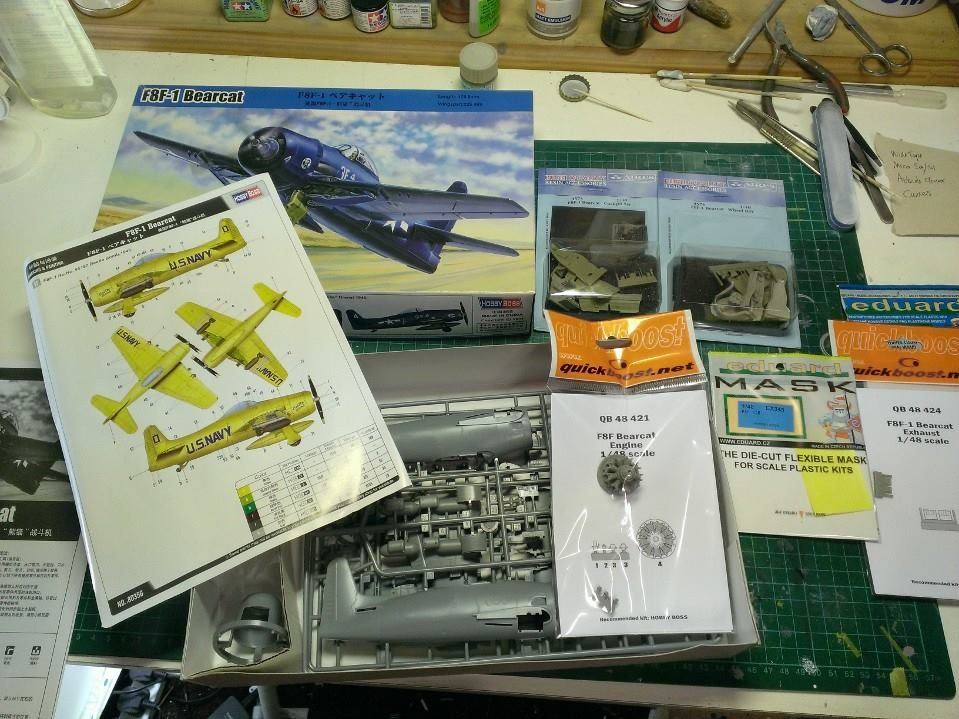
I have the Hobbyboss F8F-1 kit in 1:48 with the relevant decals included in it.
I also have a resin cockpit, engine, exhausts and wheel bays along with a set of Eduard masks.
So it should be fully loaded! B)
This is what she looks like.
This is what I have to work with...
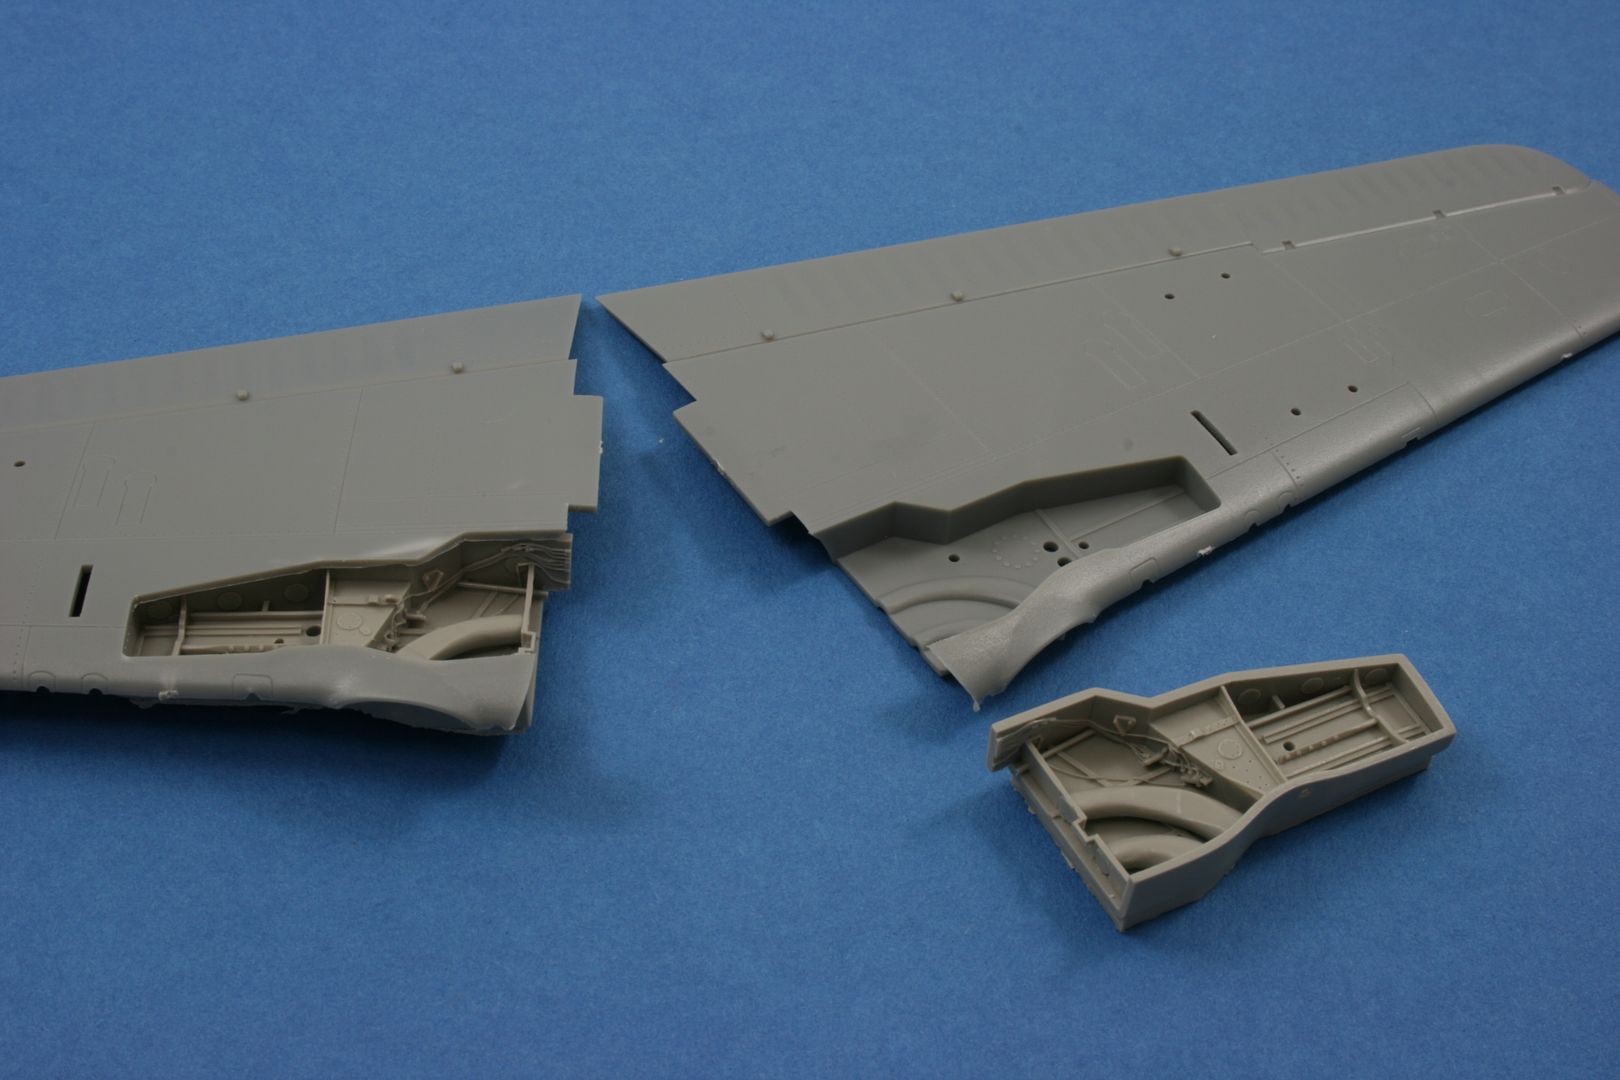
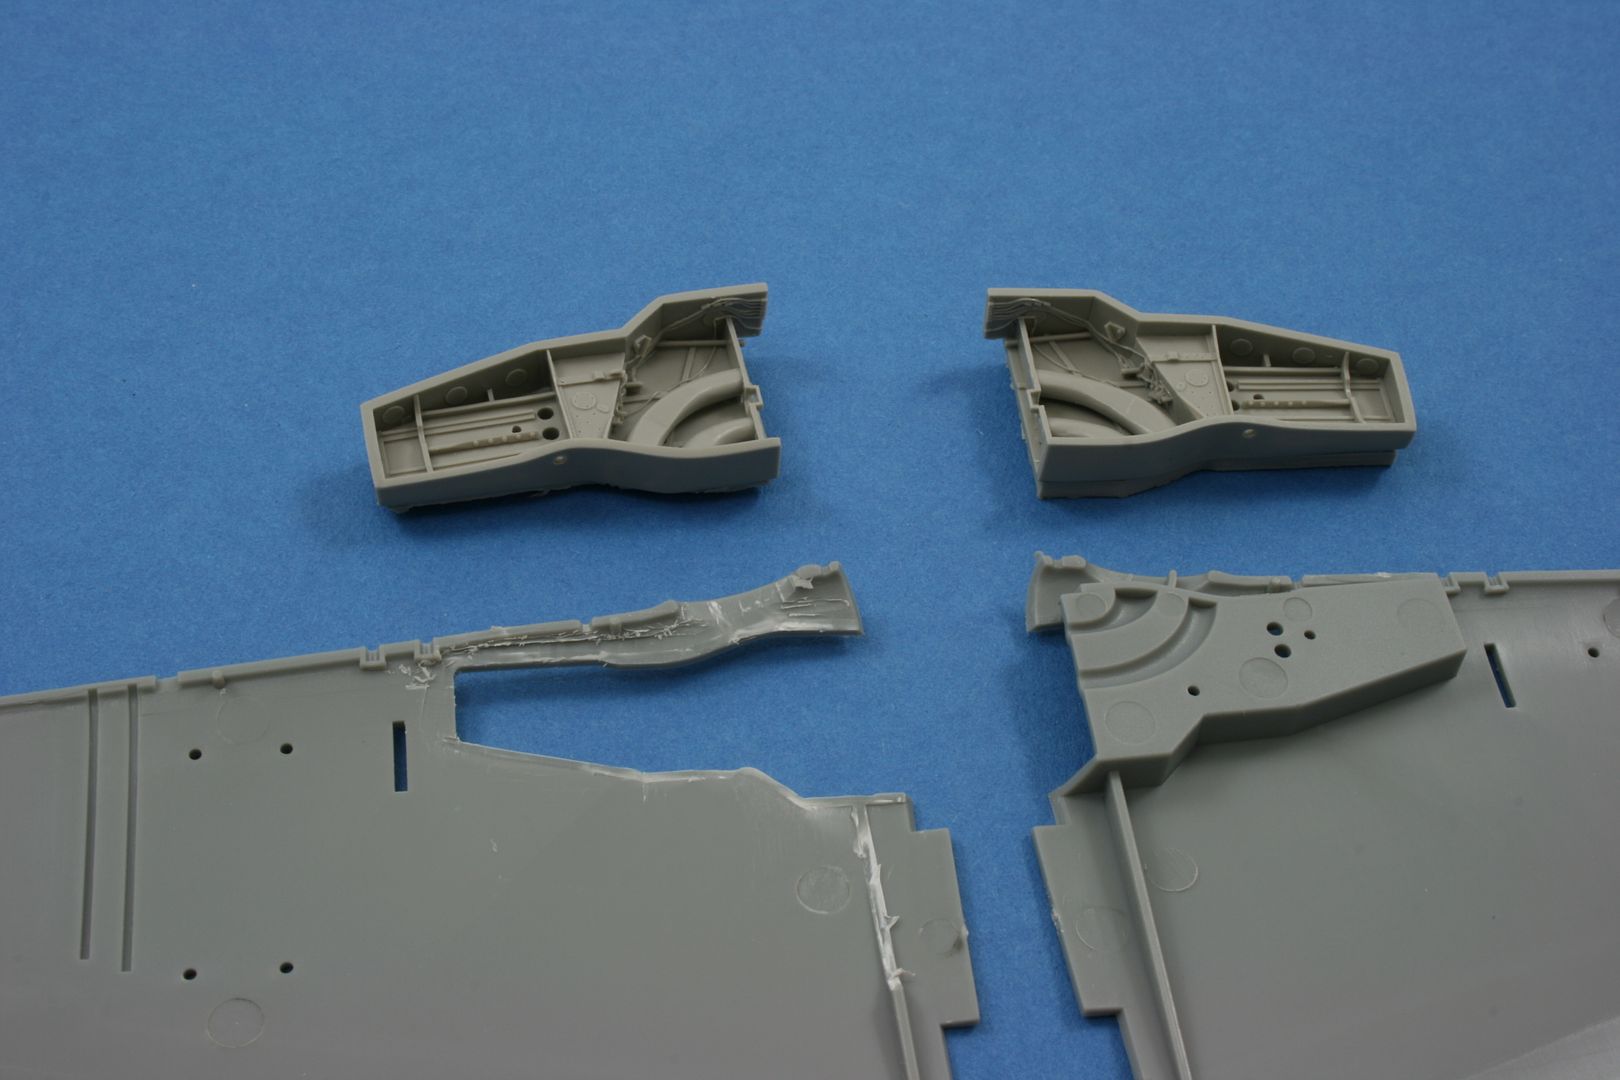
Wasn't sure where to start on this with all that aftermarket so I bit the bullet and started hacking away to fit to resin wheel bay set. This set consists of the main gear bays themselves and two firewall sections. You can see the difference the wheel bays will make in comparison and you can also see the amount of carving up the kit parts need in order to incorporate them. Its an easy-ish job but never the less a little daunting when you start hacking into a perfectly good kit wing!
The mould stub will need sanding back significantly so as not to foul the inside of the top of the wing.
the two firewall sections are drop in replacements for the kit parts. Which is handy!.
Started the Hobbyboss Bearcat in 1/48 to be ready for Telford.
Going to be throwing some aftermarket gear at this too...
A little background info courtesy of Modellingmadness.com (to save me the hassle of rewriting it)
"In the Blue Angels first years of air show demonstrations, a North American SNJ was painted overall orange-yellow and given the name "Beetle Bomb". "Beetle Bomb" was a target with a big "0" painted on it and was supposed to designate an enemy aircraft. The aircraft was equipped with smoke grenades under the belly, which would be tripped after a simulated firing pass from one of the regular Blue Angels. The airplane would start smoking and flopping around before hanging up in a steep bank, at which time the second man in the SNJ's rear seat would toss out a dummy with a parachute.
The SNJ was replaced in late January of 1949 with an all orange-yellow F8F-1 "Bearcat". A centerline pod was rigged to the F8F to hold the parachute-rigged dummy, smoke canisters were fitted to the tailhook well, and the show continued with the same routine. After the Blue Angels transitioned to F9F "Panther" jet in mid-1949, the parachute dummy pod and smoke canisters were removed and "Beetle Bomb" was used for advanced aerobatics before the main show. It performed this task until Lt. Bob Longworth tragically crashed attempting a roll on takeoff at a training show in Pensacola on April 24, 1950. This ended the Blue Angels use of "Beetle Bomb".
The model represents F8F-1, bureau number 95187, which served as "Beetle Bomb".
I have the Hobbyboss F8F-1 kit in 1:48 with the relevant decals included in it.
I also have a resin cockpit, engine, exhausts and wheel bays along with a set of Eduard masks.
So it should be fully loaded! B)
This is what she looks like.

This is what I have to work with...

Wasn't sure where to start on this with all that aftermarket so I bit the bullet and started hacking away to fit to resin wheel bay set. This set consists of the main gear bays themselves and two firewall sections. You can see the difference the wheel bays will make in comparison and you can also see the amount of carving up the kit parts need in order to incorporate them. Its an easy-ish job but never the less a little daunting when you start hacking into a perfectly good kit wing!
The mould stub will need sanding back significantly so as not to foul the inside of the top of the wing.
the two firewall sections are drop in replacements for the kit parts. Which is handy!.


-
PaulBradley
- Staring out the window
- Posts: 21222
- Joined: April 6th, 2011, 3:08 pm
- Location: Flagstaff, AZ
Re: Mike W's workbench thread
Some interesting projects there, Mike.
Regarding the Spitfire, I checked Combat Codes by Vic Flintham and Andrew Thomas - I'm sure you are familiar with the title. Anyways, they list the squadron codes for 185 as ZM, GL, F and GL. The code RE is only listed for 229 Sqn's Blenheims and Hurricanes from 1939 to 1941 (and in Britain, not in ME or Italy), and the Central Fighter Establishment on their Tempests from 1945 to 1949. I had though that perhaps it was a personal code (RED) as some Wing Commanders did that, but it is undoubtably a squadron code as both machines in that photo wear it. It is not an RAAF, RNZAF, USAAF or SAAF squadron code either.
I also checked the old Squadron Codes by Michael Bowyer and John Rawlings - same info.
A bit of a mystery!
Incidentally, the GA- coded Mustang is 112 Sqn.
Paul
За демократію і незалежний Україну
"For Democracy and a Free Ukraine"
За демократію і незалежний Україну
"For Democracy and a Free Ukraine"
Re: Mike W's workbench thread
Your Spit photo is fascinating. I can't find a source that associates the codes RE with 185 Sqn. Rawlings, "Fighter Squadrons of the RAF and their Aircraft" says 185's codes were GL and RE would have been 229 Sqn, but only when they were flying Blenheims in 1939-40. That would suggest that Spits never wore RE codes and yet, there they are.
As for the color scheme, the Mk. VIII/IX Spits in Italy often had reverted to Ocean Grey/Dark Green/Medium Sea Grey and the presence of the Sky rear fuselage band suggests strongly to me that that is what the Spits in your pic were wearing. I don't believe I've ever seen the band on a Dark Earth/Stone/Azure plane.
EDIT - posted simultaneously with Paul, I see we agree though.
August
A good model is any model you can walk away from.
-
PaulBradley
- Staring out the window
- Posts: 21222
- Joined: April 6th, 2011, 3:08 pm
- Location: Flagstaff, AZ
Re: Mike W's workbench thread
Jinx! 
What do you make of that painted-out patch (black?) on the top of the fin, August? Base for a squadron badge, perhaps?
What do you make of that painted-out patch (black?) on the top of the fin, August? Base for a squadron badge, perhaps?
Paul
За демократію і незалежний Україну
"For Democracy and a Free Ukraine"
За демократію і незалежний Україну
"For Democracy and a Free Ukraine"
Re: Mike W's workbench thread
Yes Paul, either a base or one that's been painted out.
August
August
A good model is any model you can walk away from.
Re: Mike W's workbench thread
It's a wartime shot - could have been removed by a censor?
Daren
Half-assed Spitfire builder!
Half-assed Spitfire builder!
-
Mikeew
- Active Participant
- Posts: 637
- Joined: May 1st, 2011, 9:36 am
- Location: Bexhill on-sea,East Sussex. UK
Re: Mike W's workbench thread
Very interesting chaps.
The blacked out tail circle is probably a wartime censor and conceals, I believe, a squadron badge which features the maltese cross.
Very curious though as to what the squadron codes are or are not as the case may be. Could they have been censored also during the wartime?
The blacked out tail circle is probably a wartime censor and conceals, I believe, a squadron badge which features the maltese cross.
Very curious though as to what the squadron codes are or are not as the case may be. Could they have been censored also during the wartime?
Re: Mike W's workbench thread
You could do a lot worse than to go over to the Key Publishing forums and post those Spitfire shots on there. I'd be VERY surprised if you didn't get an answer there!
Daren
Half-assed Spitfire builder!
Half-assed Spitfire builder!
Re: Mike W's workbench thread
I considered the censorship possibility, but the black patches appear to me to be painted on the plane rather than on the photo. Hard to be sure. It also occurred to me that the RE might be false codes for misdirection, certainly such things happened but one doesn't hear of it as a common British practice at that stage of the war. Possible though.
A good model is any model you can walk away from.
-
Mikeew
- Active Participant
- Posts: 637
- Joined: May 1st, 2011, 9:36 am
- Location: Bexhill on-sea,East Sussex. UK
Re: Mike W's workbench thread
Thanks guys, I will investigate further re:the Spitfire.
Meanwhile....the Bearcat continues....
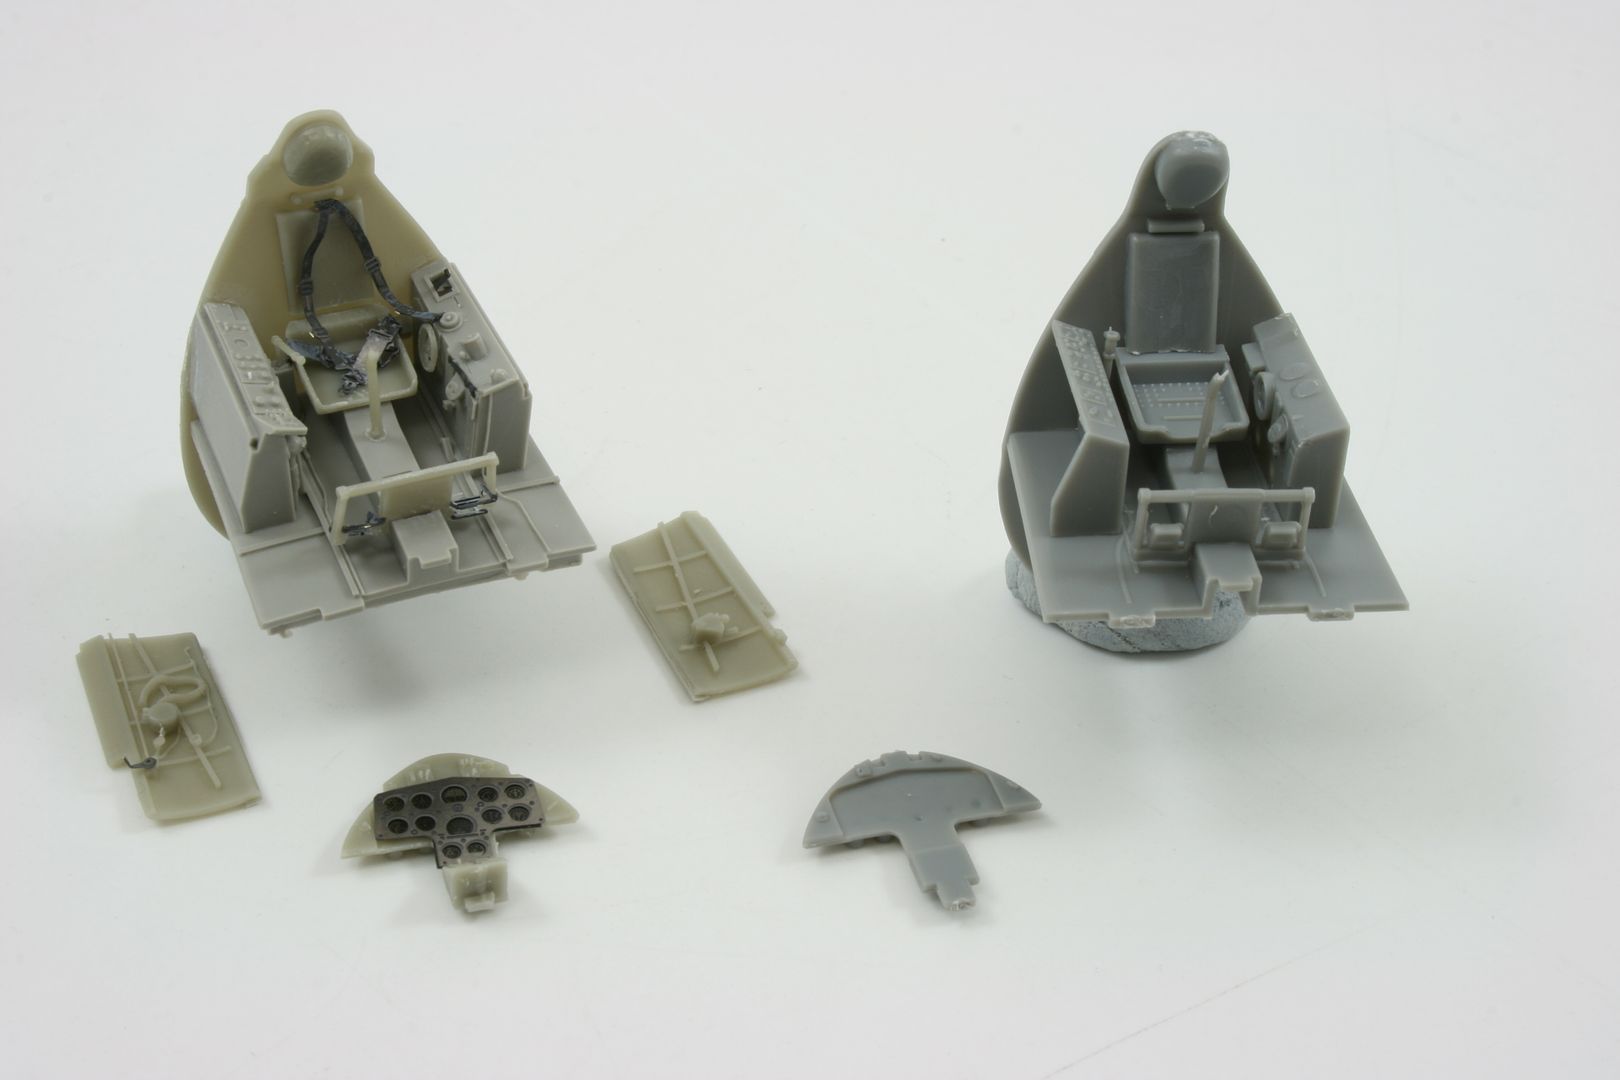
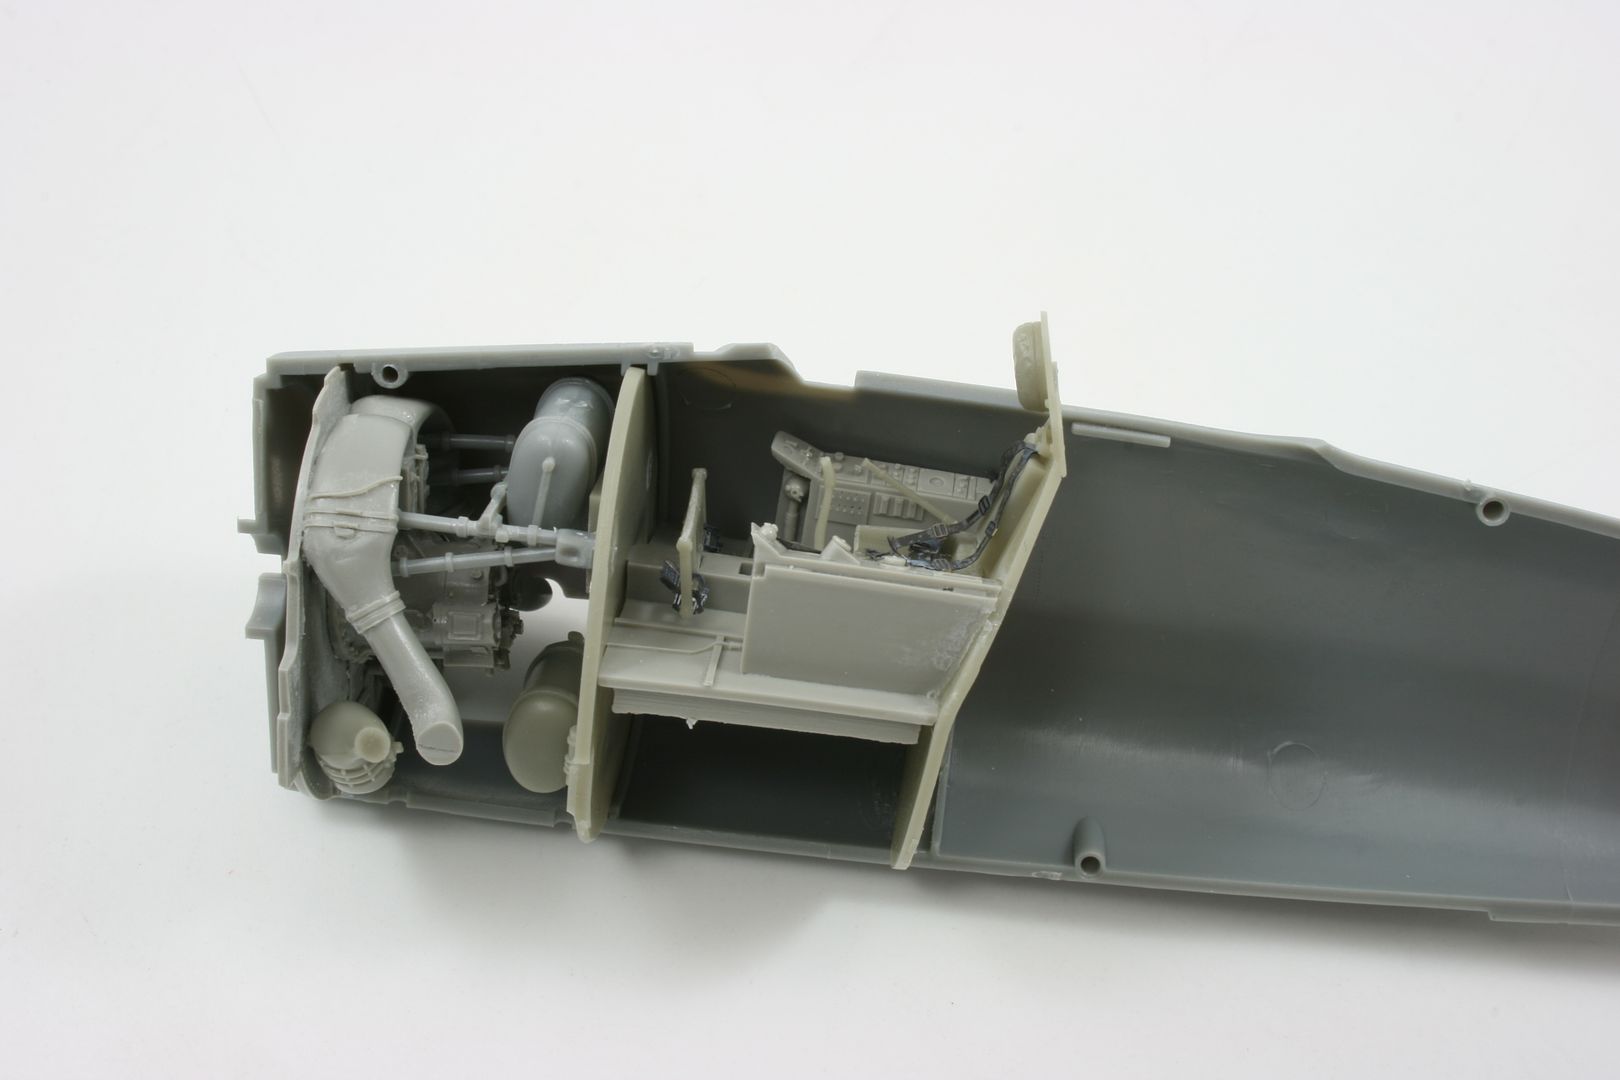
Whilst I was in he mood for working with resin I got the cockpit sorted and the cockpit floor fixes handily into the firewall section which in turn needed a couple of the kit parts adding to it.
I whacked the kit cockpit together for comparison, of which there is none.
The firewalls and the engine moulding blocks were removed with a lot of wet sanding, I also sanded off the tops of the wheels bays so they will fit without fouling the inside of the top of the wings.
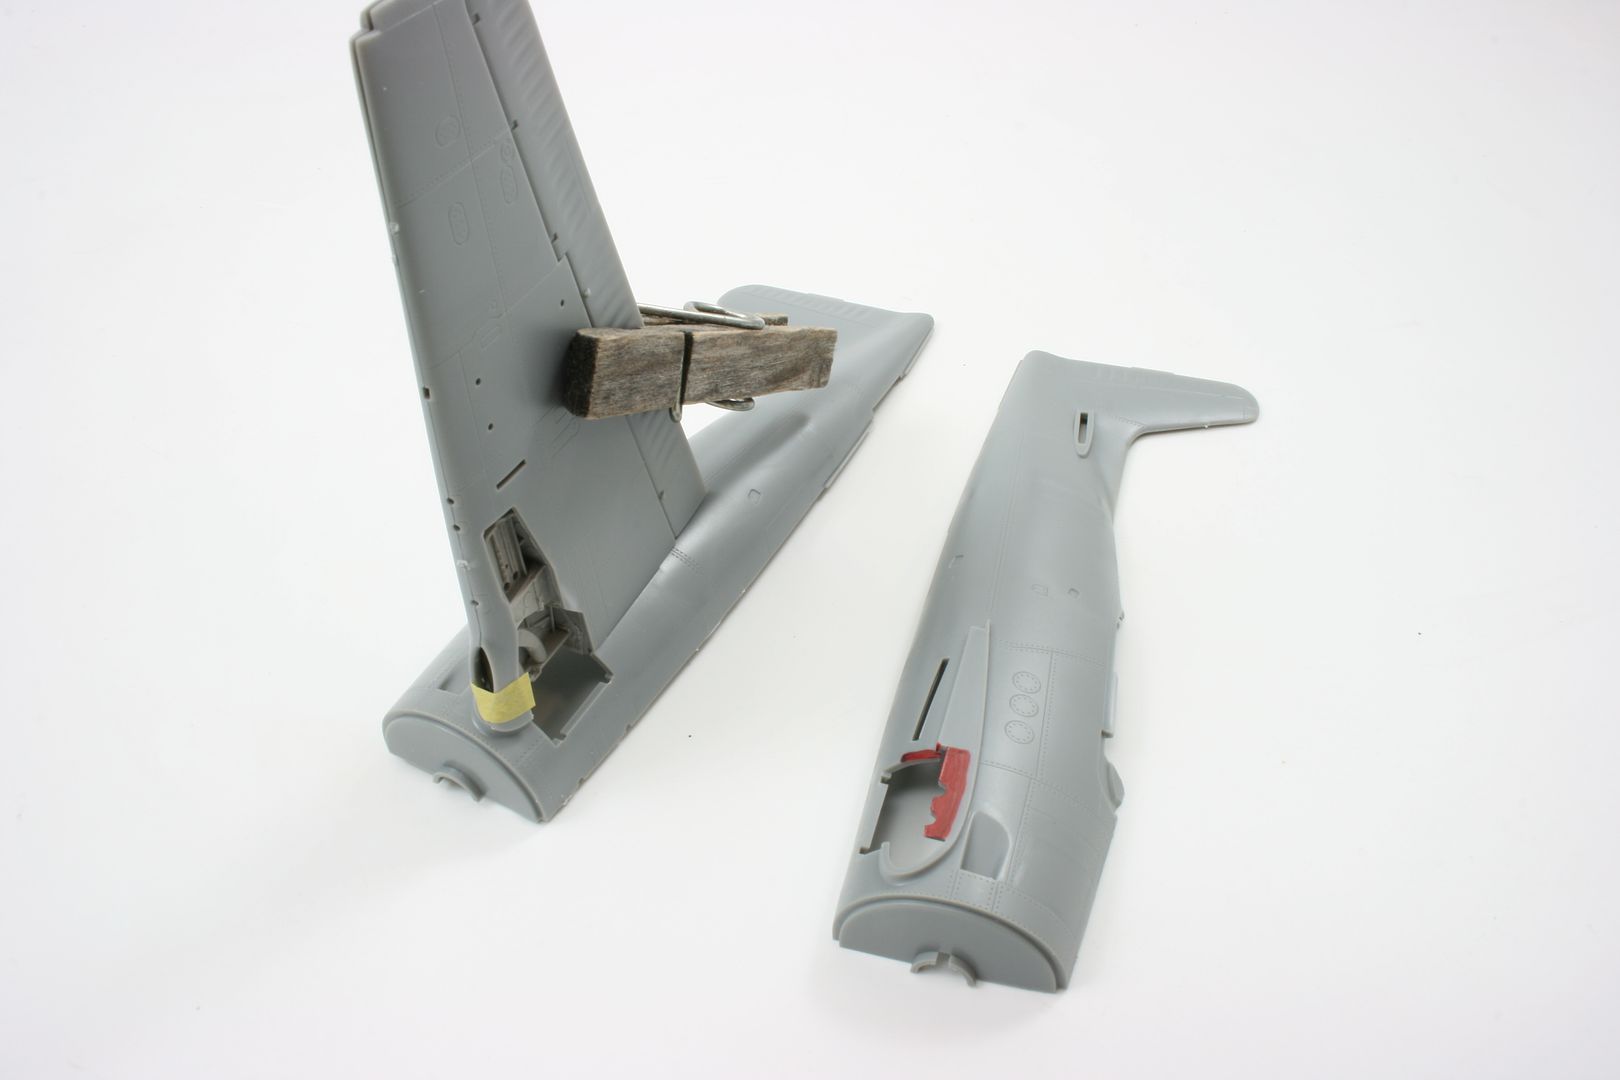
The wings and wheel bays necessitate some minor surgery on the fuselage wing joins, I marked in red what needed removing so you can see where and how much needed trimming off.
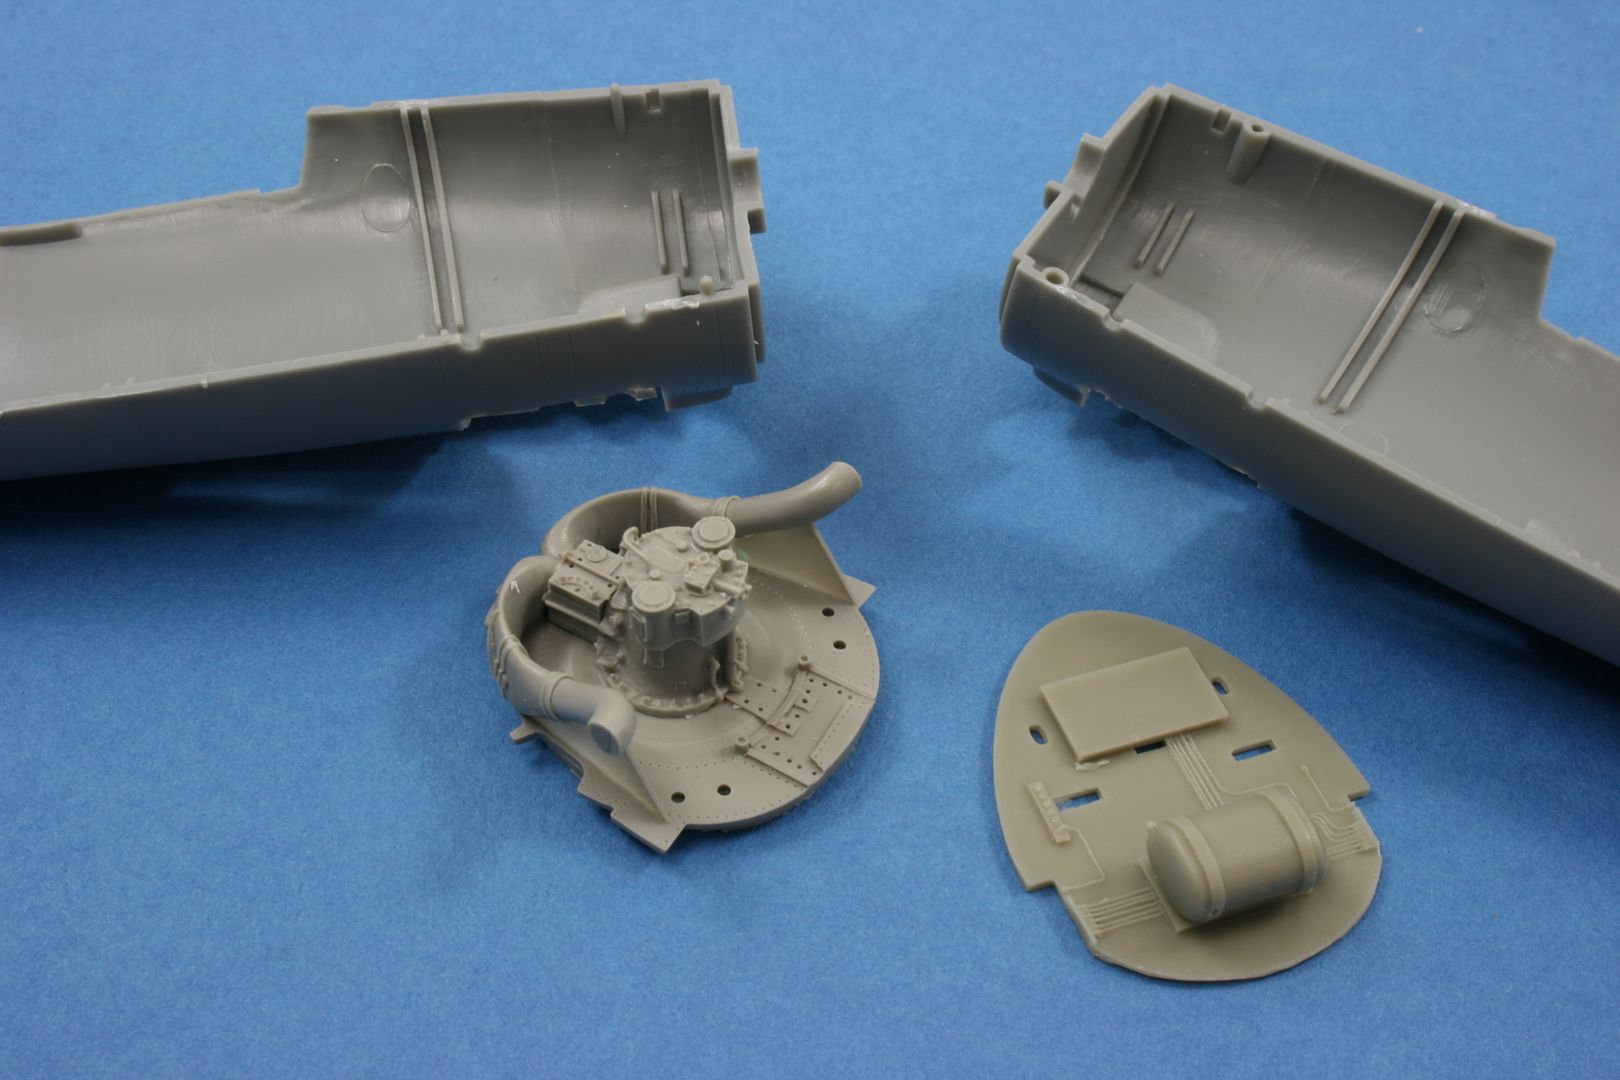
For comparison I also assembled the bare bones of the kit engine, again there is no comparison to the Quickboost resin item, all it needs is some igniton wires adding and its good to go.

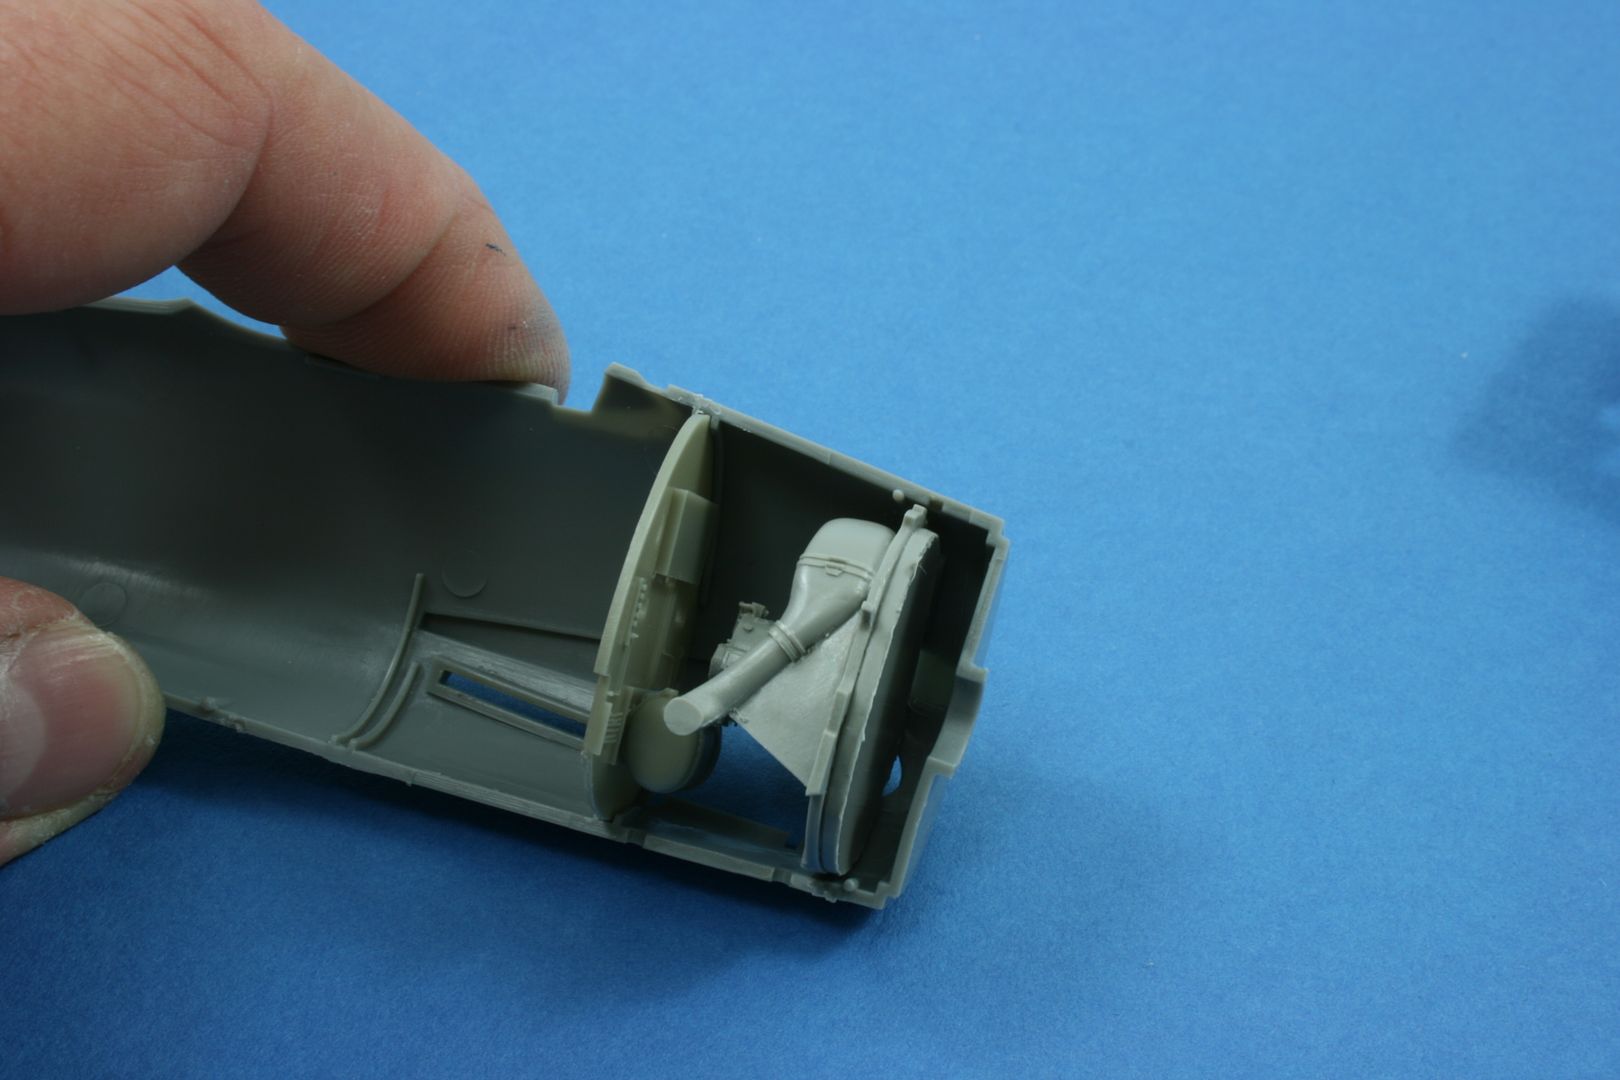
A dry run shows how everything fits really nicely inside the fuselage.
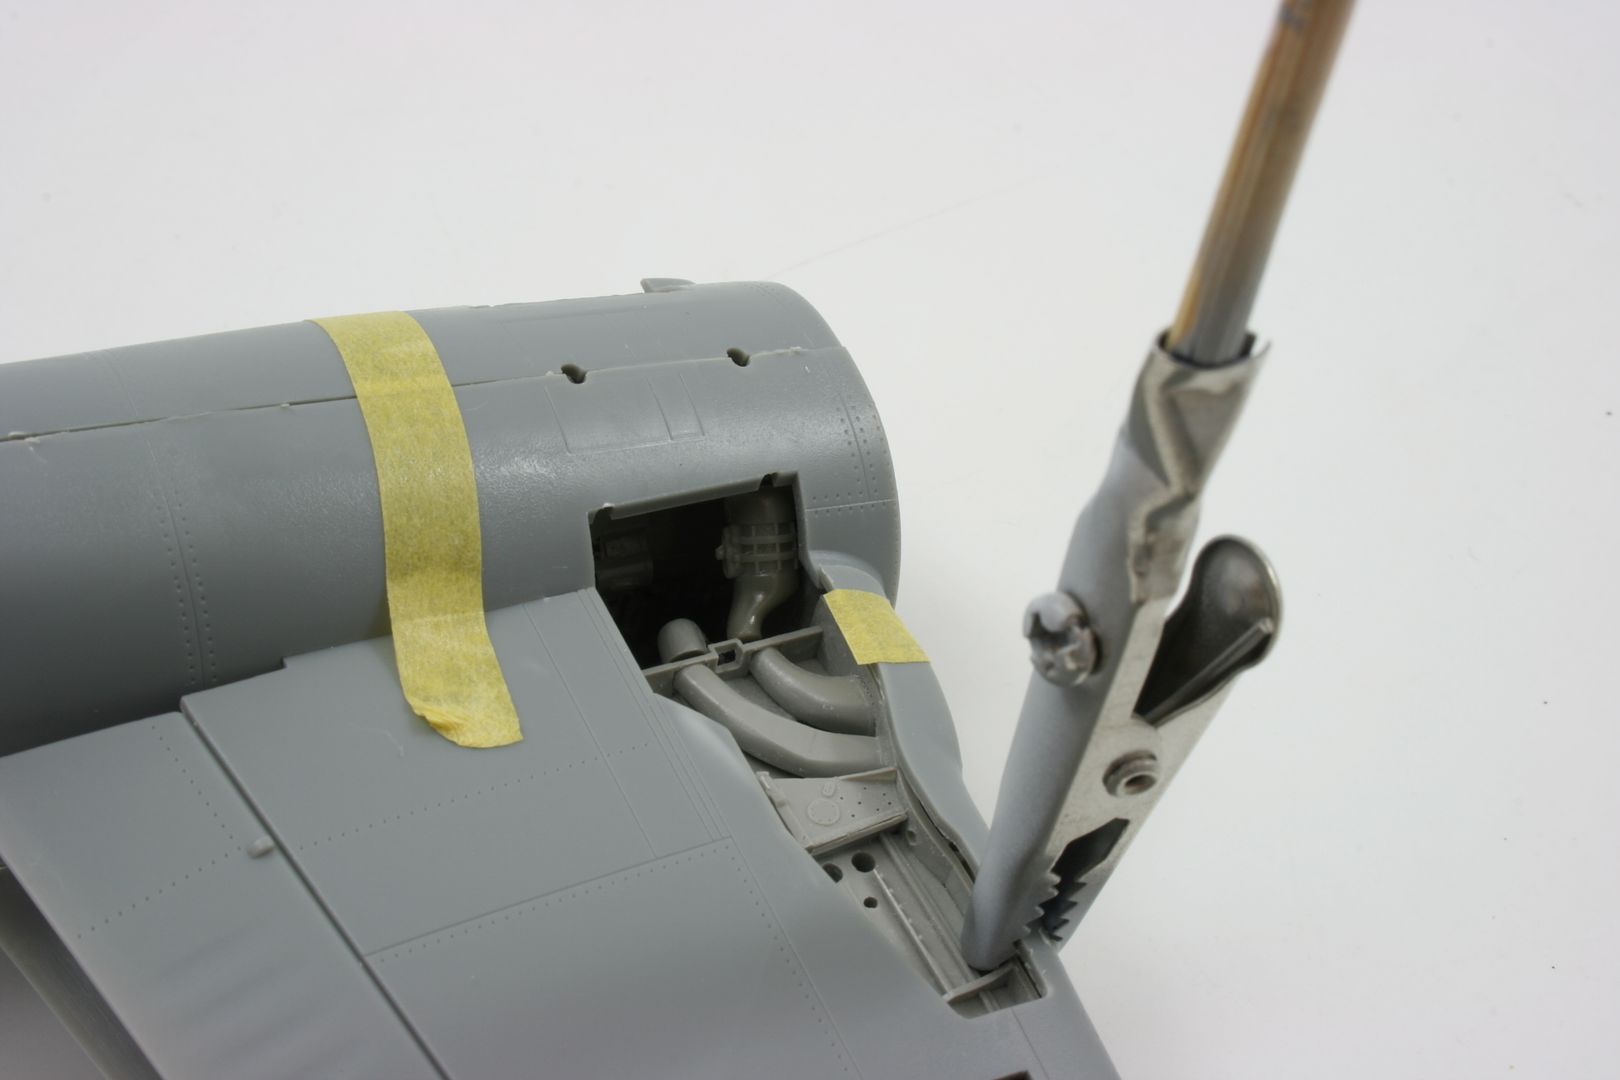
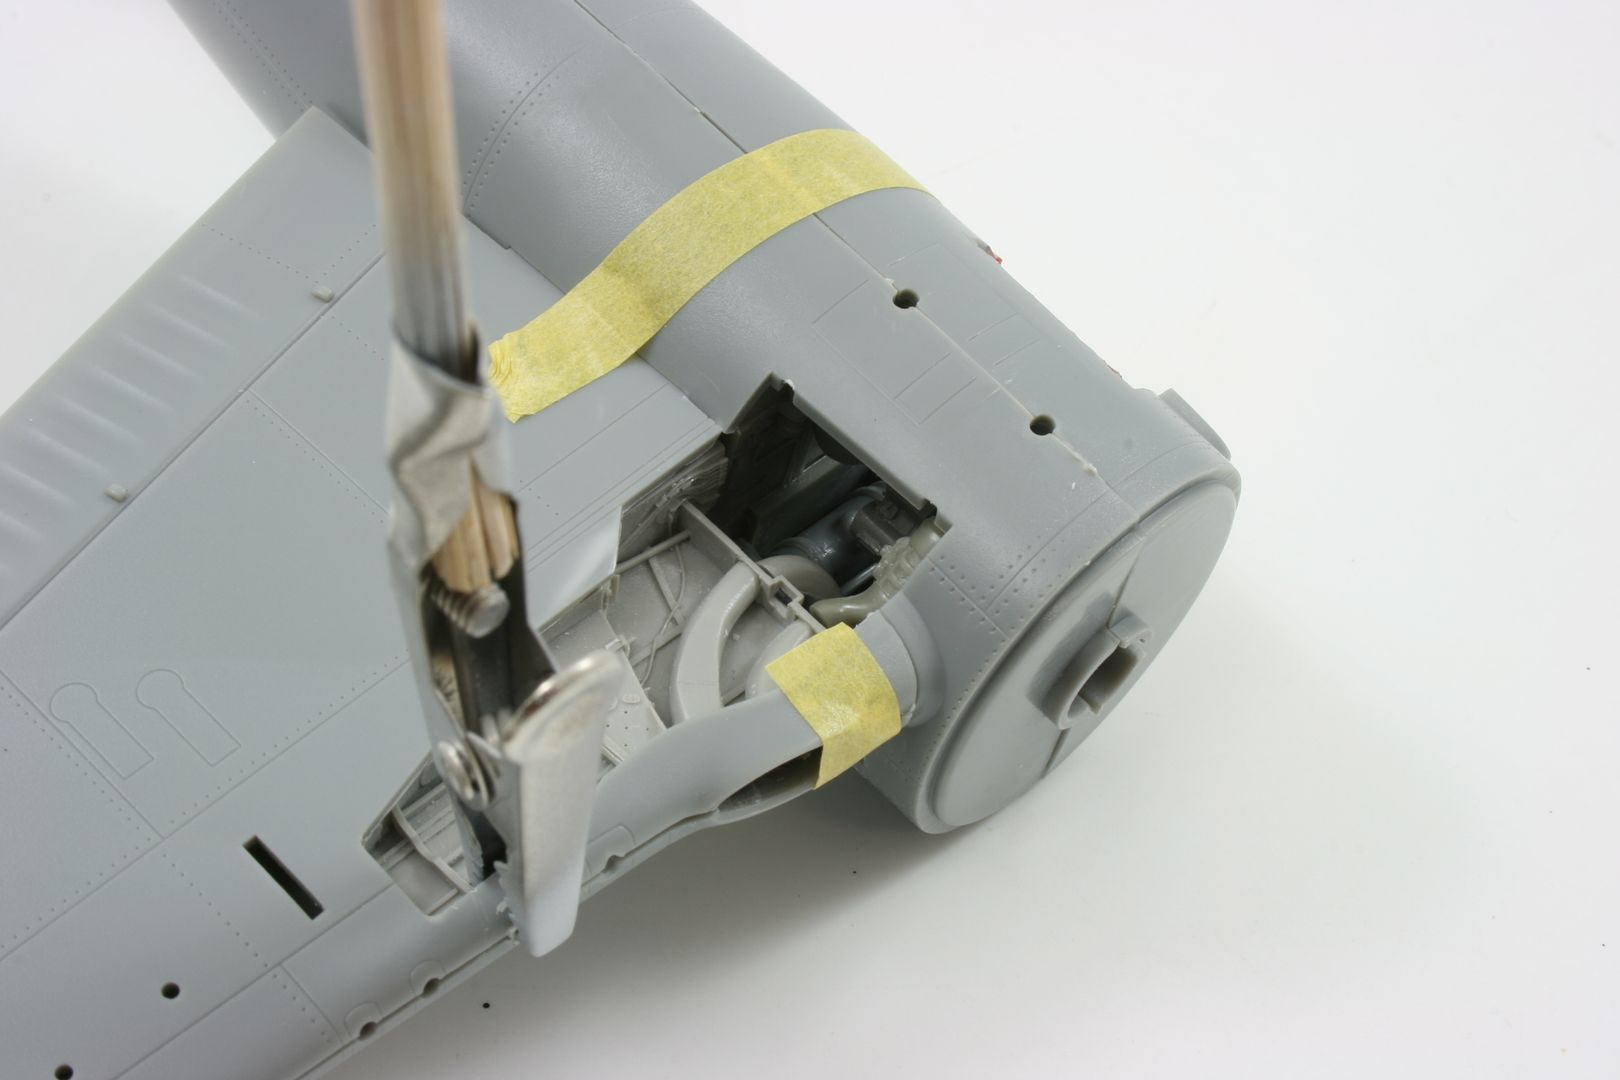
Cobbled together to see how the wheel bay fits(loosely here) and to see what can be seen inside, which when painted should be quite a lot.
I may open a couple of panels and also open the cowling cooling flaps.
Meanwhile....the Bearcat continues....
Whilst I was in he mood for working with resin I got the cockpit sorted and the cockpit floor fixes handily into the firewall section which in turn needed a couple of the kit parts adding to it.
I whacked the kit cockpit together for comparison, of which there is none.

The firewalls and the engine moulding blocks were removed with a lot of wet sanding, I also sanded off the tops of the wheels bays so they will fit without fouling the inside of the top of the wings.
The wings and wheel bays necessitate some minor surgery on the fuselage wing joins, I marked in red what needed removing so you can see where and how much needed trimming off.

For comparison I also assembled the bare bones of the kit engine, again there is no comparison to the Quickboost resin item, all it needs is some igniton wires adding and its good to go.

A dry run shows how everything fits really nicely inside the fuselage.

Cobbled together to see how the wheel bay fits(loosely here) and to see what can be seen inside, which when painted should be quite a lot.
I may open a couple of panels and also open the cowling cooling flaps.

